
Check for Dust and Debris
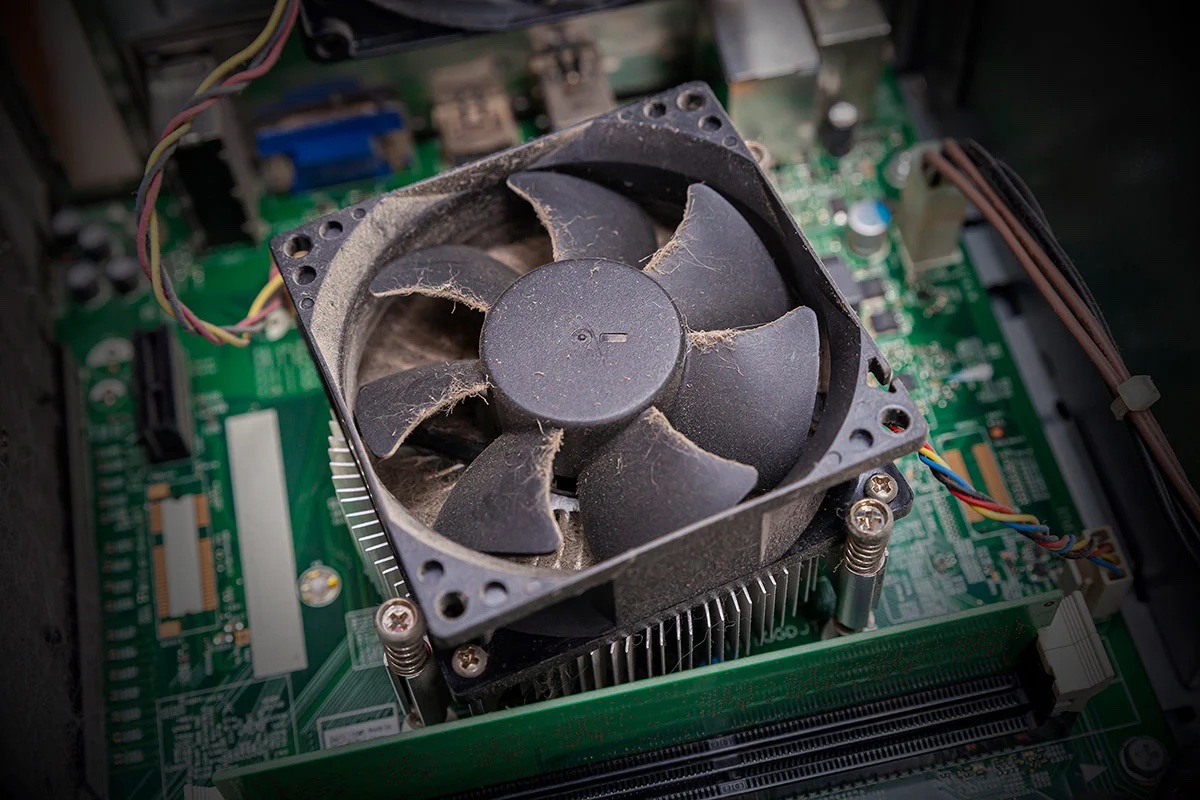
If your computer fan is making loud or unusual noises, the first thing you should do is check for any dust or debris that may have accumulated on the fan blades. Over time, dust and dirt can accumulate on the blades, causing them to become unbalanced and noisy. Follow these steps to check and clean your computer fan:
- Turn off your computer and unplug it from the power source.
- Open the computer case or access panel to expose the internal components.
- Locate the fan, which is usually located near the back of the computer and may be marked with labels such as “CPU fan” or “system fan”.
- Visually inspect the fan for any visible dust or debris. You may need to use a flashlight to get a clear view.
- If you see any dust or debris, use a soft brush or compressed air to carefully remove it from the fan blades. Be gentle to avoid damaging the fan.
- After cleaning the fan blades, close the computer case or access panel.
- Plug in your computer and turn it on to see if the fan noise has been reduced or eliminated.
Checking for dust and debris is a simple yet effective way to address a loud or noisy computer fan. By regularly cleaning the fan, you can ensure that it continues to work efficiently and quietly. Remember to perform this maintenance task every few months or as needed to prevent dust buildup and maintain optimal performance.
Clean the Fan Blades
If your computer fan is still making noise after checking for dust and debris, the next step is to clean the fan blades. Over time, dust and dirt can accumulate on the blades, causing them to spin less smoothly and produce noise. Follow these steps to clean your computer fan blades:
- Turn off your computer and unplug it from the power source.
- Open the computer case or access panel to expose the internal components.
- Locate the fan, which is usually located near the back of the computer and may be marked with labels such as “CPU fan” or “system fan”.
- Once you’ve located the fan, inspect the blades for any visible dirt or grime.
- Dampen a lint-free cloth or cotton swab with a small amount of isopropyl alcohol.
- Gently wipe the fan blades with the damp cloth or cotton swab, removing any dirt or grime.
- Be careful not to apply too much pressure or get any liquid inside the fan housing.
- Allow the fan blades to air dry completely before closing the computer case or access panel.
- Once the fan blades are dry, plug in your computer and turn it on to see if the fan noise has been reduced.
Cleaning the fan blades can help restore smooth operation and reduce noise. It’s important to use isopropyl alcohol or another gentle cleaning solution to avoid damaging the blades. Regular cleaning of the fan blades can prevent excessive noise and extend the lifespan of your computer fan.
Use Compressed Air to Remove Dust
If your computer fan continues to make noise even after cleaning the blades, there may still be dust trapped in the fan assembly or other hard-to-reach areas. In such cases, using compressed air can be an effective solution. Follow these steps to remove dust using compressed air:
- Turn off your computer and unplug it from the power source.
- Open the computer case or access panel to expose the internal components.
- Locate the fan, which is usually located near the back of the computer and may be marked with labels such as “CPU fan” or “system fan”.
- Hold the can of compressed air upright and at a distance, ensuring not to tilt it as this may release liquid.
- With short bursts, spray the compressed air into the fan assembly and other areas where dust may have accumulated.
- Avoid spraying the compressed air too close to the fan blades as it may cause them to spin uncontrollably.
- Continue spraying the compressed air until all visible dust has been removed.
- Allow any residual moisture from the compressed air to evaporate before closing the computer case or access panel.
- Once the case is closed, plug in your computer and turn it on to check if the fan noise has decreased.
Using compressed air can effectively dislodge and remove stubborn dust particles from your computer fan and other areas. It is important to handle the compressed air can carefully and follow the instructions for safe usage. Regularly using compressed air can help maintain proper airflow and prevent excessive noise caused by dust buildup within your computer.
Lubricate the Fan
If your computer fan is still making noise even after cleaning and removing dust, it may be due to lack of proper lubrication. Over time, the lubricant that helps the fan blades spin smoothly can dry out, leading to increased friction and noise. Follow these steps to lubricate your computer fan:
- Turn off your computer and unplug it from the power source.
- Open the computer case or access panel to expose the internal components.
- Locate the fan that needs lubrication, which can typically be identified by labels such as “CPU fan” or “system fan”.
- If possible, remove the fan from its mounting to have better access for lubrication.
- Identify the fan’s bearing, which is the center part that allows the fan blades to rotate.
- Apply a small amount of lubricating oil to the fan’s bearing. Consult the fan’s manufacturer documentation for the specific type of oil to use.
- Rotate the fan manually a few times to help distribute the lubricant evenly.
- Reinstall the fan, ensuring it is securely fastened, and close the computer case or access panel.
- Plug in your computer and turn it on to see if the fan noise has been reduced. If not, you may need to repeat the lubrication process or explore other solutions.
Lubricating the fan can help restore smooth rotation and reduce noise caused by friction. It’s important to use the appropriate type of lubricating oil and only apply a small amount to prevent excess buildup. Regular maintenance and lubrication can prolong the life of your computer fan and keep it running quietly.
Replace the Fan
If all previous steps have been unsuccessful in resolving the noise issue with your computer fan, it may be time to consider replacing the fan. Over time, fans can wear out or become damaged, leading to excessive noise. Follow these steps to replace your computer fan:
- Turn off your computer and unplug it from the power source.
- Open the computer case or access panel to expose the internal components.
- Locate the fan that needs to be replaced, which is typically labeled as “CPU fan” or “system fan”.
- Disconnect the fan’s power connector from the motherboard or fan controller, depending on the setup.
- Remove any screws or clips securing the fan to the case or heatsink.
- Gently lift the fan out of its mounting and set it aside.
- Obtain a compatible replacement fan for your computer model. Consider factors such as size, airflow, and noise level.
- Align the new fan with the mounting holes and ensure it is positioned correctly.
- Screw or clip the new fan into place, making sure it is secure.
- Reconnect the power connector to the motherboard or fan controller.
- Close the computer case or access panel.
- Plug in your computer and turn it on to check if the noise issue has been resolved.
Replacing the fan can be a straightforward solution for persistent noise problems. Make sure to choose a replacement fan that matches the specifications of your computer to ensure compatibility. If you’re unsure about the process, consult a professional or refer to your computer’s documentation for specific instructions. Replacing a worn-out or damaged fan can significantly reduce noise and improve the overall performance of your computer.
Fix Loose or Damaged Parts
If your computer fan is making noise, one possible cause could be loose or damaged parts within the fan assembly. Over time, vibrations and wear can loosen screws or connectors, resulting in noise. Follow these steps to fix loose or damaged parts:
- Turn off your computer and unplug it from the power source.
- Open the computer case or access panel to expose the internal components.
- Locate the fan that is causing the noise.
- Inspect the fan assembly for loose screws, connectors, or other damaged parts.
- Tighten any loose screws or connectors using a small screwdriver or pliers, depending on the type of fastener.
- If any parts are damaged beyond repair, such as a cracked fan blade, consider replacing them with compatible replacements.
- Ensure all components are properly aligned and securely fastened.
- Close the computer case or access panel.
- Plug in your computer and turn it on to see if the fan noise has been eliminated or reduced.
Fixing loose or damaged parts can effectively resolve noise issues with your computer fan. It’s important to conduct a thorough inspection to identify any problem areas. Tightening loose screws or connectors and replacing damaged parts can restore proper functionality and reduce noise. Regular maintenance and periodic checks for loose or damaged parts can help prevent future noise issues and ensure optimal performance of your computer fan.
Adjust Fan Speed Settings
If your computer fan is generating excessive noise, adjusting the fan speed settings can be a potential solution. Most computers allow users to modify the fan speed settings through the BIOS or specialized software. Follow these steps to adjust the fan speed settings:
- Boot your computer and access the BIOS settings by pressing the designated key during startup (often the Del, F2, or F10 key).
- Navigate to the “Hardware Monitor” or “Fan Control” section in the BIOS.
- Adjust the fan speed settings based on your preferences and the available options in the BIOS.
- Save the changes and exit the BIOS.
- If your computer does not have fan control options in the BIOS, you can use specialized software such as SpeedFan or HWMonitor to adjust the fan speed.
- Download and install the software compatible with your computer’s operating system.
- Open the software and locate the fan speed settings.
- Adjust the fan speed settings to a lower or more preferable level.
- Save the changes and exit the software.
- Observe if the fan noise has been reduced after adjusting the fan speed settings.
Adjusting the fan speed settings can help customize the cooling performance and noise levels of your computer. It allows you to strike a balance between efficient cooling and quiet operation. However, it’s crucial to ensure that the fan speed is not set too low, as it may result in inadequate cooling and potential overheating. Experiment with different fan speed settings to find the optimal balance for your specific needs.
Update or Reinstall Device Drivers
Another potential cause of noisy computer fans is outdated or faulty device drivers. Device drivers are software programs that allow the operating system to communicate with hardware components, including the fan. Updating or reinstalling the device drivers can resolve compatibility issues and improve fan performance. Follow these steps to update or reinstall device drivers:
- Open the Start menu and search for “Device Manager”.
- Click on the “Device Manager” result to open the Device Manager window.
- In the Device Manager, locate the section for “System Devices” or “Hardware” and expand it.
- Look for the fan-related devices, such as “System Fan” or “CPU Fan”.
- Right-click on the fan device and select “Update driver” or “Uninstall device”.
- If you choose to update the driver, follow the on-screen instructions to search for and install the latest driver software. If you choose to uninstall the device, confirm the action and then restart your computer.
- After the driver update or reinstallation is completed, check if the fan noise issue has been resolved.
Updating or reinstalling device drivers can ensure that the fan operates optimally with the latest software enhancements and bug fixes. It can address compatibility issues that may be causing increased fan noise. If the problem persists after updating or reinstalling the drivers, consider visiting the manufacturer’s website to download and install specific drivers for your computer model.
Check for Software Issues
In some cases, software-related issues can contribute to excessive fan noise. Malfunctioning programs or processes running in the background can overload the CPU, causing the fan to work harder and generate more noise. To address software-related fan noise, follow these steps:
- Open the Task Manager by right-clicking on the taskbar and selecting “Task Manager” or by pressing Ctrl + Shift + Esc on your keyboard.
- Click on the “Processes” or “Details” tab (depending on your version of Windows).
- Look for any programs or processes that are using a significant amount of CPU power.
- If there are any resource-intensive programs, consider closing them to reduce the CPU load and potentially decrease fan noise.
- Additionally, you can try temporarily disabling unnecessary startup programs to reduce system load.
- To do this, open the Task Manager and go to the “Startup” tab.
- Disable any programs that you don’t need to start automatically with your computer.
- Restart your computer and check if the fan noise issue is resolved.
Checking for software issues can help identify and address problematic programs or processes that are contributing to fan noise. By reducing the CPU load and optimizing the software running on your computer, you can alleviate the strain on the fan and potentially reduce noise levels. Additionally, regularly updating your software, including the operating system and applications, can also improve performance and minimize fan noise caused by software-related issues.
Monitor Temperature and Cooling Needs
Monitoring the temperature and cooling needs of your computer is essential for maintaining optimal performance and minimizing fan noise. Excess heat can cause the fan to work harder and produce more noise. Here are some steps to help you monitor temperature and address cooling needs:
- Install a temperature monitoring software such as HWMonitor, Core Temp, or SpeedFan.
- Run the monitoring software and observe the temperatures of different components, including the CPU and GPU.
- Make sure the recorded temperatures are within safe operating ranges. If they are consistently exceeding safe thresholds, you may need to take steps to improve cooling.
- Check that all fans in your computer are functioning properly. Ensure that they are spinning freely and not making any unusual noises.
- Consider adding additional fans or upgrading your CPU cooler if necessary. Proper airflow is crucial for keeping temperatures under control.
- Clean any air vents or radiator fins that may be obstructed by dust or debris. This will help to improve airflow and cooling efficiency.
- Ensure that your computer is placed on a flat, stable surface that allows for proper ventilation and airflow.
- Consider using a laptop cooling pad or an external fan to enhance cooling if you have a laptop.
- Regularly perform maintenance tasks such as cleaning dust from the internal components and reapplying thermal paste on the CPU.
- Monitor the temperatures regularly and make adjustments as needed to maintain appropriate cooling.
Monitoring the temperature of your computer and addressing cooling needs can help prevent overheating and minimize fan noise. By maintaining optimal cooling, you can ensure that the fans operate efficiently and quietly. However, if the temperature remains consistently high even after taking these steps, it may be worth consulting with a professional to rule out any underlying hardware issues.