
Clear Out Unnecessary Apps and Files
If you find your iPad’s storage running low, the first step is to clear out unnecessary apps and files. Over time, you may accumulate a collection of apps that you no longer use or need. By removing these unused apps, you can free up valuable storage space on your device. Similarly, sorting through your files and deleting any unnecessary documents, photos, or videos can help declutter your iPad’s storage.
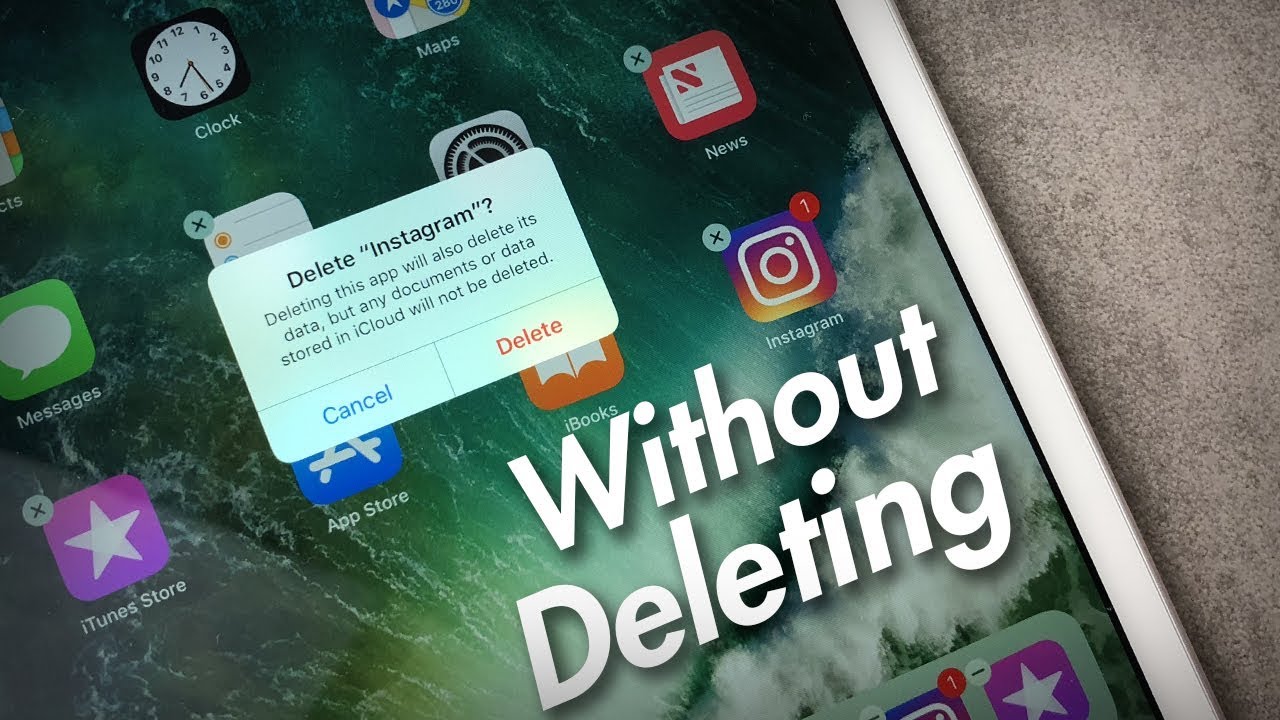
Start by assessing your app usage. Go through your iPad’s home screen and app library, identifying apps that you rarely open or no longer find useful. Simply press and hold an app icon until it begins to wiggle, then tap the “X” in the corner to delete it. Keep in mind that deleting apps will also remove any associated data, so make sure to back up any important information before removing an app.
Alongside apps, consider purging your device of unwanted files. Open the Files app on your iPad and navigate to the folders where you store your documents, photos, and videos. Review each file and delete any that are no longer needed. Remember to check your “Recently Deleted” folder as well, as files stored there can still take up space on your device until they are permanently deleted.
It’s worth noting that certain apps, such as social media platforms and messaging apps, can accumulate a significant amount of cache and data over time. You can clear this excess data within the app’s settings to free up space. For example, in the Facebook app, go to the Settings & Privacy menu, then select Storage and Clear Cache. This will remove any temporary files stored by the app without affecting your personal data.
By regularly clearing out unnecessary apps and files, you can ensure that your iPad’s storage remains optimized for the apps and files that you truly need, freeing up space for new content and improving overall device performance.
Utilize Cloud Storage Options
When it comes to expanding your iPad’s storage, one of the most convenient options is to utilize cloud storage services. Cloud storage allows you to store your files, documents, photos, and videos on remote servers, freeing up space on your iPad while giving you the ability to access your files from any device with an internet connection.
Major cloud storage providers such as iCloud, Google Drive, Dropbox, and OneDrive offer dedicated apps for iOS devices, making it seamless to upload and manage your files. These apps provide a certain amount of free storage, with the option to purchase additional storage space if needed.
To get started, sign up for a cloud storage account and download the corresponding app on your iPad. Once installed, you can easily upload files to the cloud by selecting them within the app and choosing the upload option. This way, you can store your files safely in the cloud and access them whenever you need them without taking up precious space on your device.
The benefits of utilizing cloud storage extend beyond just freeing up space. Most cloud storage providers offer features such as file syncing, which ensures that the files on your iPad and other devices remain up to date. Additionally, cloud storage services often provide sharing options, allowing you to easily share files and collaborate with others.
It’s important to keep in mind that while cloud storage provides a convenient way to expand your storage capacity, it does require an internet connection to access your files. Therefore, ensure that you have a reliable internet connection or consider downloading files locally to your iPad for offline access when necessary.
With the availability of cloud storage services, you no longer have to worry about running out of space on your iPad. By utilizing cloud storage options, you can securely store your files in the cloud and free up valuable space on your device for other tasks.
Use External Storage Devices
If your iPad’s built-in storage space is insufficient, you can expand its capacity by using external storage devices. External storage devices, such as USB flash drives or external hard drives, provide a practical solution for storing and accessing files directly from your iPad.
To connect an external storage device to your iPad, you will need a compatible adapter or dongle. Apple offers Lightning to USB adapters or USB-C adapters, depending on the iPad model. Once connected, your iPad should detect the external device, allowing you to access and transfer files between your device and the external storage.
It’s important to note that not all external storage devices will be compatible with your iPad. Ensure that you choose a device with proper compatibility and consider the storage capacity you require. USB flash drives are typically more portable and suitable for quick file transfers, while external hard drives offer larger storage capacities for storing extensive multimedia libraries.
When using an external storage device, it’s advisable to organize your files in a way that makes them easily accessible. Create folders and subfolders to categorize your files, making it simple to locate specific documents, photos, or videos when needed.
Some apps also allow you to directly save files to external storage, expanding their functionality. For example, photo editing apps may provide an option to save edited images directly to external storage, saving space on your iPad’s internal memory.
While using external storage devices can provide additional space for your iPad, it’s essential to take precautions to ensure the security of your files. Consider encrypting sensitive data on your external storage device or using secure cloud storage for confidential files.
Using external storage devices offers a practical solution for expanding your iPad’s storage capacity. By leveraging the versatility of USB flash drives or external hard drives, you can easily store and access your files on the go, without worrying about limited internal storage space on your device.
Invest in an iPad with Larger Storage Capacity
If you find yourself consistently running out of storage space on your iPad, it may be worth considering investing in an iPad with a larger storage capacity. When purchasing a new iPad, you have the option to select a model with varying storage options, typically ranging from 64GB to 1TB or more.
Choosing an iPad with a larger storage capacity ensures that you have ample space to store your files, apps, photos, videos, and other content without constantly worrying about running out of storage. This is especially beneficial for individuals who use their iPads for resource-intensive tasks or have extensive media libraries.
When deciding on the storage capacity for your iPad, it’s important to assess your usage and storage needs. Consider the types of files you frequently work with and the amount of space they require. If you frequently capture high-resolution photos or record videos in 4K, you may need more storage compared to someone who primarily uses their iPad for web browsing and productivity apps.
It’s also worth noting that the storage capacity of an iPad is not expandable, so it’s crucial to choose the appropriate capacity from the beginning. While cloud storage and external devices can provide additional storage options, having a larger internal storage capacity eliminates the need for external solutions and provides a more seamless user experience.
When investing in an iPad with a larger storage capacity, it’s essential to consider the associated cost. As the storage capacity increases, so does the price of the iPad. Therefore, it’s important to evaluate your budget and weigh the benefits of having more storage space against the additional cost.
By opting for an iPad with a larger storage capacity, you can enjoy the convenience and peace of mind that comes with having ample space to store all your files and media directly on your device. This eliminates the need for external solutions and allows you to fully utilize your iPad’s capabilities without worrying about storage limitations.
Optimize Your iPad’s Storage Settings
To make the most out of your iPad’s available storage space, it’s important to optimize its storage settings. These settings can help you manage and maximize your storage capacity by automatically removing unnecessary files and optimizing app usage.
One of the first steps in optimizing your iPad’s storage settings is to enable the “Offload Unused Apps” feature. This feature allows your iPad to automatically remove apps that you haven’t used in a while, while keeping the app data intact. You can enable this feature by going to “Settings,” selecting “General,” tapping on “iPad Storage,” and toggling on “Offload Unused Apps.” This way, your device can free up space by removing apps that you rarely use.
Another valuable storage setting to consider is the automatic removal of old messages and attachments. Messages can quickly accumulate a significant amount of storage space, especially if they include photos, videos, or other multimedia files. To enable automatic message deletion, go to “Settings,” then “Messages,” and under the “Message History” section, select “Keep Messages” and choose the option that suits your needs, such as “30 Days” or “1 Year.” This way, older messages and attachments will be automatically deleted, freeing up storage space on your iPad.
Furthermore, you can optimize the storage used by your photos and videos by enabling the “Optimize Storage” feature in the Photos app. This feature allows your iPad to store lower-resolution versions of your photos and videos on the device while keeping the original, high-resolution versions in iCloud. To enable this feature, open the “Settings” app, tap on “Photos,” and toggle on “Optimize iPad Storage.” This way, your iPad can save space by storing optimized versions of your media files without compromising viewing quality.
In addition to these built-in storage settings, it’s also a good practice to regularly check the storage usage on your iPad. By going to “Settings,” selecting “General,” and tapping on “iPad Storage,” you can see a detailed breakdown of how your iPad’s storage is being used. This information can help you identify apps, files, or media that are taking up a significant amount of space, allowing you to take appropriate actions, such as deleting or moving them to external storage or cloud services.
By optimizing your iPad’s storage settings, you can proactively manage and maximize your available storage space. Enabling features like “Offload Unused Apps,” automatic message deletion, and optimizing media storage allows you to maintain optimal storage capacity, ensuring that you have enough space for the content you truly need while eliminating unnecessary files.
Delete and Reinstall Resource-Intensive Apps
If you’re experiencing limited storage space on your iPad, it’s a good idea to identify and evaluate the resource-intensive apps that may be contributing to the issue. Resource-intensive apps are those that consume a significant amount of storage, such as video-editing apps, games, or apps with large media libraries. Deleting and reinstalling these apps can help reclaim storage space and improve the overall performance of your iPad.
Start by reviewing the apps on your device and identifying those that take up a substantial amount of storage. You can do this by going to “Settings,” selecting “General,” and tapping on “iPad Storage.” This will provide you with a breakdown of the space occupied by each app. Look for apps that have a high storage usage.
Once you have identified the resource-intensive apps, consider whether you truly need them or if there are alternatives available. Assess how frequently you use the app and if it adds value to your iPad experience. If you seldom use the app or find that it’s no longer necessary, you can delete it.
To delete an app, press and hold its icon on the home screen until it starts to wiggle, then tap the “x” icon that appears in the corner of the app’s icon. Confirm the deletion when prompted. This will remove the app from your device, freeing up the storage space it occupied. Keep in mind that deleting an app will also remove any associated data, so be sure to back up any important information before proceeding with the deletion.
After deleting the resource-intensive app, you can consider reinstalling it if you find it necessary. However, before doing so, evaluate whether there are any updates available for the app that may have addressed storage optimization. App developers often release updates that improve the app’s performance and reduce its storage footprint, so it’s a good idea to update the app before reinstalling.
To reinstall the app, simply go to the App Store and search for the app you want to reinstall. Tap the “Download” or “Get” button to initiate the reinstallation process. This will download the app and install it on your device, ensuring that you have the latest version available.
By deleting and reinstalling resource-intensive apps, you can reclaim valuable storage space on your iPad and optimize its performance. It’s important to regularly assess the apps on your device and remove those that are no longer needed or excessively consume storage. This will help maintain an efficient and organized iPad experience.
Enable Automatic Offloading of Unused Apps
If you frequently find yourself running out of storage space on your iPad, enabling the automatic offloading of unused apps can be a helpful solution. This feature allows your device to automatically remove unused apps while preserving their data, freeing up storage space without permanently deleting the app.
To enable automatic app offloading, go to the “Settings” app on your iPad and select “General.” From there, tap on “iPad Storage” and toggle on the “Offload Unused Apps” option. When this feature is turned on, your device will monitor the apps you use and automatically offload those that you haven’t used in a while to create more space.
Offloaded apps appear on your device’s home screen with a small cloud icon next to their name. The app’s icon will have a dimmed appearance, indicating that it has been offloaded. When you tap on an offloaded app, it will be reinstalled from the App Store and its data will be restored, allowing you to use it as before. This means that you can still access the app and its data whenever you need it, without taking up unnecessary storage space in the meantime.
Automatic app offloading is a practical feature for managing your storage since it eliminates the need to manually delete and reinstall unused apps. By offloading apps that you haven’t used for a while, you can free up space on your iPad while keeping your favorite and frequently used apps readily accessible.
If you find that some apps are frequently offloaded, it may be a good idea to reassess whether you actually need those apps on your device. Consider whether there are alternative apps or services that can fulfill the same purpose but require less storage space. Removing unnecessary apps entirely can help optimize your iPad’s storage capacity and improve its overall performance.
Remember that while automatic app offloading is convenient, it does require an internet connection to reinstall offloaded apps when you want to use them. So, make sure you have a reliable Wi-Fi or cellular connection available when you want to access an offloaded app.
Enabling automatic offloading of unused apps is a great way to efficiently manage your iPad’s storage space. By keeping your device clutter-free and ensuring that you have enough storage for the apps you use regularly, you can maintain a smooth and enjoyable user experience on your iPad.
Utilize Streaming and Online Services for Media
When it comes to managing your iPad’s storage, one effective strategy is to utilize streaming and online services for media consumption instead of storing large files locally. This approach allows you to enjoy a wide range of media content, such as music, movies, TV shows, and podcasts, without using up valuable storage space on your device.
Streaming services for music, such as Spotify, Apple Music, and Pandora, offer an extensive library of songs that you can access on-demand. Instead of downloading music files to your iPad, you can simply stream them whenever you want to listen. This method not only saves storage space but also provides the added benefit of discovering new music and enjoying curated playlists and personalized recommendations.
Similarly, video streaming services like Netflix, Hulu, Amazon Prime Video, and Disney+ offer an extensive collection of movies and TV shows that you can stream directly on your iPad. Instead of storing large video files, you can enjoy your favorite shows and movies in high-quality streaming, saving considerable storage space on your device.
In addition to music and video streaming, online podcast platforms like Apple Podcasts, Spotify, and Stitcher allow you to subscribe to your favorite podcasts and stream episodes on your iPad. This eliminates the need to download individual episodes and store them locally.
Furthermore, cloud-based photo services such as iCloud Photos, Google Photos, and Dropbox offer convenient options for storing and accessing your photo library. You can upload your photos to these services, freeing up space on your iPad while still being able to view and organize your photos through their respective apps.
By utilizing streaming and online services for media, you can significantly reduce the amount of storage space your media files occupy on your iPad. This not only gives you more room for other content but also allows you to access a vast selection of media without worrying about managing large files.
Keep in mind that streaming media requires an internet connection. Ensure that you have a reliable Wi-Fi or cellular data connection when using streaming services to ensure uninterrupted playback. Additionally, consider your data plan limitations if using cellular data for streaming.
Overall, embracing streaming and online services for media consumption offers a convenient and storage-friendly way to enjoy music, movies, TV shows, podcasts, and photos on your iPad. By relying on these services, you can optimize your iPad’s storage capacity and enhance your multimedia experience.
Transfer Files to a Computer or External Drive
If you’re running out of storage space on your iPad, one effective method to free up space is to transfer files to a computer or an external drive. This allows you to store and manage your files on a separate device while still having the option to access them when needed.
To transfer files to a computer, you can connect your iPad to the computer using a USB cable. Once connected, the computer should recognize your iPad as an external device. Based on your computer’s operating system, you can then access your iPad’s files through a file explorer window (such as Finder on macOS or File Explorer on Windows) and simply copy and paste or drag and drop the files from your iPad to the computer’s storage.
If you prefer to transfer files to an external drive, you will need a compatible external drive (such as a USB flash drive or external hard drive) and a suitable adapter or dongle for your iPad. Connect the external drive to your iPad using the adapter or dongle, and your iPad should detect the drive as an external storage device. You can then access the files on your iPad and transfer them directly to the external drive.
When transferring files to a computer or external drive, it’s essential to organize your files in a way that makes them easily manageable later on. Create folders and subfolders to categorize different types of files, making it simple to locate specific documents, photos, or videos when needed.
Once the files are transferred to a computer or external drive, you can delete them from your iPad to free up storage space. However, it’s important to ensure that you have properly backed up your files and that they have been successfully transferred to the desired location before deleting them from your iPad.
Transferring files to a computer or an external drive offers several benefits. Not only does it help you regain valuable storage space on your iPad, but it also provides an additional layer of backup and data security. Moreover, it allows you to access your files from different devices, making it easier to work with them across various platforms.
Remember, when transferring files to a computer or external drive, consider the compatibility and storage capacity of the destination device. Regularly transfer files from your iPad to ensure you have enough space for new content and keep your device running smoothly.
Clean Up Your Photos and Videos Library
If your iPad’s storage is being consumed primarily by a large collection of photos and videos, cleaning up your media library can help free up a significant amount of space. By removing duplicates, deleting unwanted files, and optimizing storage settings, you can reclaim valuable storage space while still preserving your precious memories.
Start by reviewing your photo and video library and identifying duplicate files. Duplicate photos and videos can accumulate over time, especially if you frequently take multiple shots or use different camera apps. Sorting through your library and deleting duplicates will not only save space but also make your media library more organized and easier to navigate.
To identify and delete duplicate files, there are several apps and software options available. Some popular ones include Duplicate Photos Fixer Pro, Gemini Photos, and Google Photos, which have built-in duplicate removal features. These tools analyze your photos and videos, identify duplicates based on visual similarities or file metadata, and allow you to remove them with a few simple clicks.
In addition to removing duplicates, consider deleting photos and videos that are no longer necessary or have low sentimental value. Review your media library and ask yourself if each file is worth keeping. Delete blurry or low-quality photos, screenshots, and any other files that may be taking up space without adding value to your collection.
If you’re reluctant to delete files permanently, you can also explore cloud-based photo storage options. Services like iCloud Photos, Google Photos, or Amazon Photos offer free or affordable storage plans that allow you to back up and access your media library across multiple devices. By leveraging these services, you can offload your media files to the cloud, freeing up storage space on your iPad while still having the ability to view and download the files when needed.
Finally, consider optimizing the storage settings for your media files. iOS offers an option called “Optimize iPad Storage” in the Photos settings, which automatically replaces full-resolution versions of your media with optimized versions, saving storage space on your device. When you view a photo or video, the original quality is retrieved from the cloud or your iCloud Photo Library. This feature ensures that you have access to your media while minimizing the storage impact on your iPad.
By cleaning up your photos and videos library, you can effectively manage and optimize your iPad’s storage capacity. Removing duplicates, deleting unwanted files, and utilizing cloud storage options help declutter your device and ensure that you have ample space for new photos and videos while preserving your treasured memories.
Use Compression Apps for Files and Documents
If you’re struggling with limited storage space on your iPad, using compression apps for files and documents can help reduce their size, allowing you to free up valuable storage space without losing access to important files.
Compression apps, such as WinZip, 7-Zip, or iZip, are designed to compress files and documents into smaller, more compact formats. These apps use algorithms to remove redundant data and optimize the file size, resulting in significant storage savings.
To compress files and documents on your iPad, you can start by installing a compression app from the App Store. Once installed, open the app and select the files or documents you want to compress. The app will then compress them into a compressed file, typically with a .zip or .rar extension.
Compressed files take up less space on your iPad, making them ideal for storing large folders or documents that are not regularly accessed. When you need to use the compressed file, you can simply open the compression app and extract the contents back to their original format.
In addition to compressing files and documents, compression apps can also encrypt the compressed files, providing an extra layer of security for sensitive or confidential information. You can set a password or use encryption methods to protect the contents of the compressed file.
It’s important to note that while compression apps can significantly reduce the size of files and documents, the level of compression achieved may vary depending on the file type. Some files, such as image or video files that are already compressed in specific formats, may not result in much additional space savings. However, document files, such as PDFs, Word documents, or PowerPoint presentations, can often be compressed effectively.
When using compression apps, it’s a good practice to organize your files and documents in a way that makes them easily manageable. Create folders and subfolders to categorize different types of files, allowing for efficient compression and extraction processes.
Remember to keep a copy of the original files before compressing them, especially for files that are regularly accessed or edited. While compression is a helpful way to save space, it’s essential to have a backup of your important files in their original format.
By utilizing compression apps for files and documents, you can significantly reduce the storage space occupied by your iPad without sacrificing access to important files. Compressing and organizing your files effectively can help optimize your device’s storage capacity and enhance overall performance.
Manage App Data and Cache
Managing app data and cache is an essential aspect of optimizing your iPad’s storage capacity. As you use various apps on your device, they accumulate data and cache files, which can take up a significant amount of storage space over time. By regularly managing app data and cache, you can free up storage space and improve the performance of your iPad.
Start by identifying the apps that consume a substantial amount of storage space. You can do this by going to “Settings,” selecting “General,” and tapping on “iPad Storage.” This will provide you with a breakdown of how much space each app is occupying on your device. Pay attention to apps that have a high storage usage.
Clearing app cache is a simple and effective way to reclaim storage space. App cache consists of temporary files that are stored by apps to improve performance and load times. However, these files can accumulate and take up a significant amount of space unnecessarily.
To clear app cache, go to “Settings,” select the specific app you want to manage, and look for the option to clear cache within the app’s settings. Some apps may not have a built-in cache-clearing option, in which case you can fully delete and reinstall the app, effectively clearing its cache in the process.
In addition to clearing app cache, you can also manage app data to save storage space. App data includes files and documents that are generated or downloaded by the app. For example, some apps store offline maps, documents, or user-generated content. It’s worth reviewing the app data individually and removing any unnecessary or outdated files that are taking up space.
To manage app data, go to “Settings,” select the specific app, and look for options related to managing its data. Some apps provide built-in options to delete specific files or clear downloaded content. Removing unnecessary app data not only frees up storage space but also helps keep your app library organized and manageable.
It’s important to note that clearing app cache and managing app data can have some drawbacks. Clearing cache files may cause apps to reload certain data the next time you use them, resulting in slightly longer load times. Similarly, deleting app data may remove specific settings or personalization data associated with the app. Be mindful of the potential consequences and ensure that you have a backup or can easily restore any important app data if needed.
By regularly managing app data and cache, you can keep your iPad’s storage space optimized and improve overall performance. Taking the time to review and clear unnecessary cache and data files ensures that your device remains clutter-free and ready to support your favorite apps and activities.