
Best PDF Editing Apps for iPhone (or iPad)
When it comes to editing PDFs on your iPhone or iPad, there are several reliable apps available in the App Store. These apps provide a range of features and functionalities to help you easily edit, annotate, and manage your PDF documents. Whether you need to make minor text edits, add annotations, or merge multiple PDFs, these apps have got you covered. Here are some of the best PDF editing apps for iPhone (or iPad):
- Adobe Acrobat Reader: Adobe Acrobat Reader is a versatile app that not only allows you to view and annotate PDFs but also offers powerful editing features. You can easily edit text, add images, merge PDFs, fill out forms, and even sign documents digitally.
- PDF Expert: PDF Expert is a popular PDF editing app known for its user-friendly interface and robust editing capabilities. You can edit text, add or remove pages, highlight text, annotate, and sign documents effortlessly. It also offers seamless integration with various cloud storage services.
- PDFelement: PDFelement is a comprehensive PDF editor that provides a wide range of editing tools. You can edit text, add images or watermarks, annotate, and even convert PDFs to other formats. It also has advanced features like OCR (Optical Character Recognition) for scanned PDFs.
- GoodReader: GoodReader is a feature-rich PDF app that enables you to edit text, add annotations, and create highlights. It has excellent file management capabilities, allowing you to manage multiple PDFs effortlessly. It supports various cloud storage services for easy file synchronization.
- PDFpen: PDFpen is a powerful PDF editor that offers comprehensive editing capabilities. You can easily edit text, add images, create annotations, and fill out forms. It also supports OCR, making it easy to extract text from scanned PDFs.
These are just a few of the top PDF editing apps available for iPhone (or iPad). Each app offers a unique set of features, so it’s important to choose the one that best fits your specific editing needs. Whichever app you choose, you can rest assured that editing PDFs on your iPhone (or iPad) is now easier than ever before.
How to Edit Text in a PDF on iPhone (or iPad)
If you need to make changes to the text in a PDF document on your iPhone or iPad, there are several efficient methods you can use. Here’s how to edit text in a PDF on your iPhone or iPad:
- Open the PDF editing app of your choice on your device.
- Select the PDF file you want to edit from your device’s storage or cloud storage services like iCloud or Dropbox.
- Once the PDF is open, locate the text you want to edit.
- Tap on the text to bring up the editing options. On some apps, you may need to select the “Edit” or “Text Edit” tool.
- Edit the text by deleting, adding, or modifying the existing content.
- If needed, you can also change the font style, size, color, and alignment of the text.
- Save your changes by tapping the “Done” or “Save” button on the app.
Note that not all PDF editing apps offer the same level of text editing capabilities. Some apps may only allow you to edit basic text content, while others offer advanced features like changing the text layout or formatting. Choose an app that suits your specific editing requirements.
It’s worth mentioning that editing text in a PDF on a mobile device may not provide the same level of precision and flexibility as on a computer. For more complex text editing tasks, it’s recommended to use a desktop PDF editing software.
With the ability to edit text in PDF documents, you can easily make corrections, update information, or add additional content on the go, directly from your iPhone or iPad.
How to Add Text to a PDF on iPhone (or iPad)
If you need to add text to a PDF document on your iPhone or iPad, there are a few simple methods you can use. Here’s how to add text to a PDF on your Apple device:
- Launch your preferred PDF editing app on your iPhone or iPad.
- Select the PDF file you want to add text to, either from your device’s storage or from a cloud storage service like iCloud or Dropbox.
- Open the PDF document within the app.
- Look for the “+” or “Add” button within the app’s interface and tap on it. This will initiate the text insertion mode.
- Position the cursor where you want to add text in the PDF.
- Tap on the text insertion area and start typing the desired text.
- Customize the added text by selecting different fonts, sizes, colors, or styles, if available.
- Once you have finished adding the text, save the changes by tapping the “Done” or “Save” button.
It’s important to note that the ability to add text to a PDF may vary depending on the app you are using. Some apps may offer more advanced text customization options, such as adjusting the opacity or rotating the text, while others may provide basic functionality for adding plain text.
Additionally, some PDF editing apps may even provide the option to add text boxes or callouts, allowing for more organized and visually appealing annotations within the PDF.
By following these steps, you can easily add text to a PDF document on your iPhone or iPad. Whether you need to insert additional information, comments, or clarifications, these methods provide a convenient way to make necessary modifications on the go.
How to Highlight Text in a PDF on iPhone (or iPad)
Highlighting text in a PDF can be a useful way to emphasize important information or make notes for future reference. If you want to highlight text in a PDF document on your iPhone or iPad, here’s how you can do it:
- Open the PDF editing app of your choice on your iPhone or iPad.
- Choose the PDF file you want to work with, either from your device’s storage or a cloud storage service like iCloud or Dropbox.
- Once the PDF is open, locate the text you want to highlight.
- Select the highlighting tool within the app. It is often represented by a marker icon or a highlighting pen icon.
- Drag your finger over the text you wish to highlight. The selected text will be covered by a translucent color.
- If available, choose the color of your preference from the app’s color palette.
- Apply the highlight by releasing your finger.
- You can adjust the size or opacity of the highlight, if supported by the app, to further customize the appearance.
- Save your changes by tapping the “Done” or “Save” button in the app.
It’s worth noting that some PDF editing apps may offer additional options for highlighting text, such as underline or strikethrough. These features can be useful for differentiating between different types of annotations or marking text for corrections.
By following these steps, you can easily highlight text in a PDF document on your iPhone or iPad. Whether you are reviewing documents, studying, or collaborating with others, the ability to highlight text provides a convenient way to draw attention to key information.
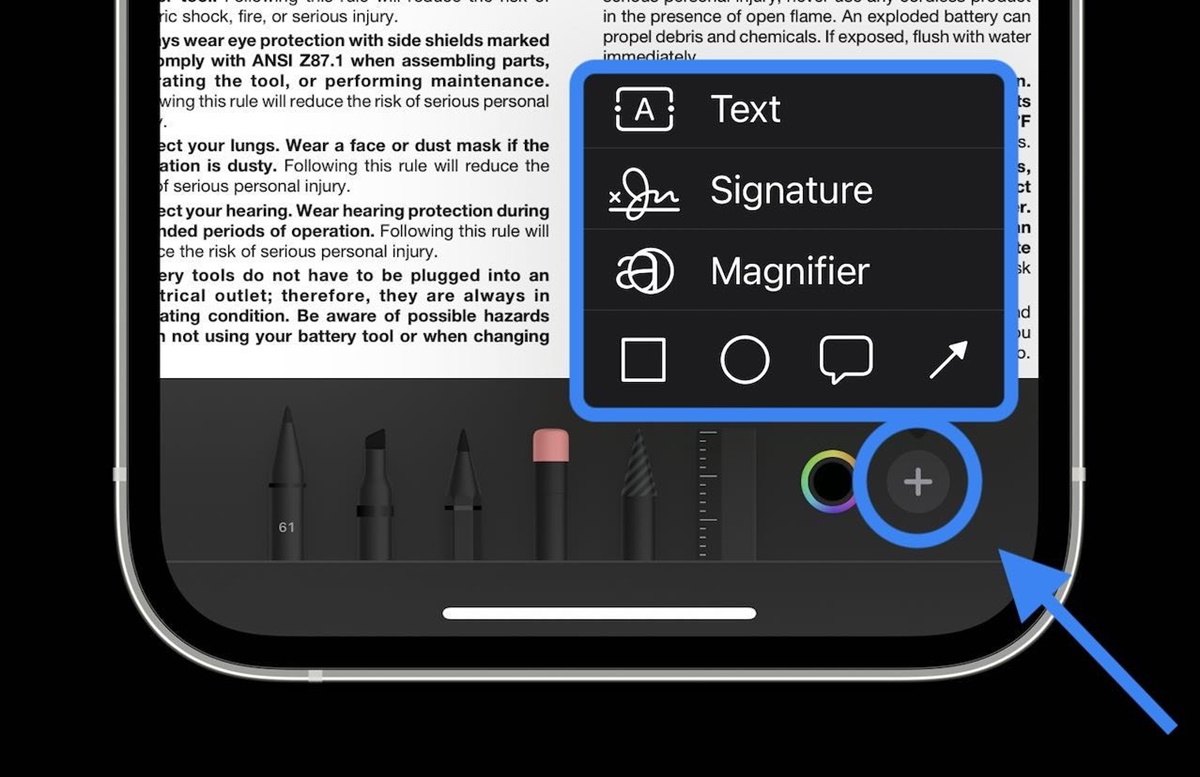
How to Annotate PDFs on iPhone (or iPad)
Annotating PDFs on your iPhone or iPad allows you to add comments, markups, and other types of annotations to make notes, provide feedback, or collaborate on documents. If you want to annotate PDFs on your Apple device, here’s how you can do it:
- Launch your preferred PDF editing app on your iPhone or iPad.
- Select the PDF file you want to annotate from your device storage or a cloud storage service like iCloud or Dropbox.
- Open the PDF document within the app.
- Look for the annotation tools within the app’s interface. These tools are typically represented by icons like a pen, pencil, or speech bubble.
- Choose the type of annotation you want to make. Common annotation options include highlighting, underlining, strikethrough, adding text comments, drawing shapes, and inserting freehand drawings.
- Select the text or area of the PDF where you want to place the annotation.
- Apply the annotation by using your finger or a stylus. Depending on the chosen annotation tool, you may need to adjust settings like color, thickness, or opacity.
- Repeat the process to add any additional annotations to the PDF.
- Save your annotated PDF by tapping the “Done” or “Save” button in the app.
Different PDF editing apps offer varying levels of annotation features. Some may provide an extensive range of tools and customization options, while others may offer more basic functionality. Choose an app that suits your specific annotation needs and preferences.
With the ability to annotate PDFs on your iPhone or iPad, you can easily provide feedback, highlight important sections, or collaborate with others directly on the document.
How to Add Images to a PDF on iPhone (or iPad)
If you want to enhance your PDF documents by adding images on your iPhone or iPad, you can easily do so using a PDF editing app. Follow these steps to add images to a PDF:
- Launch your preferred PDF editing app on your iPhone or iPad.
- Select the PDF file you want to add images to from your device’s storage or a cloud storage service like iCloud or Dropbox.
- Open the PDF document within the app.
- Look for the image insertion tool within the app’s interface. It is typically represented by an icon like a picture frame or a camera.
- Tap on the designated area or page where you want to insert the image.
- Select the source of the image. You can choose to either take a photo using your device’s camera or select an existing image from your photo library.
- If necessary, adjust the size, position, or rotation of the image within the designated area.
- Confirm the insertion of the image by tapping the “Done” or “Save” button in the app.
- Save your changes by saving the modified PDF document.
Be aware that the abilities and features of PDF editing apps may differ. Some apps may offer more advanced options to resize or crop the inserted image, while others may provide basic functionality without much customization.
By following these steps, you can easily add images to your PDF documents on your iPhone or iPad, enhancing the visual elements and making your PDFs more engaging and informative.
How to Add a Signature to a PDF on iPhone (or iPad)
If you need to sign a PDF document on your iPhone or iPad, you can easily do so with the help of a PDF editing app. Adding your signature electronically saves time and effort, eliminating the need to print, sign, and scan documents. Here’s how you can add a signature to a PDF on your Apple device:
- Open the PDF editing app of your choice on your iPhone or iPad.
- Select the PDF file that requires your signature from your device’s storage or a cloud storage service like iCloud or Dropbox.
- Within the app, navigate to the page where your signature needs to be placed.
- Look for the signature tool within the app’s interface. It is typically represented by an icon like a pen or a signature symbol.
- Choose how you want to create your signature. The app may offer options like drawing your signature with your finger, using a stylus pen, or importing a pre-saved signature image.
- Follow the on-screen prompts to create or import your signature.
- Position the signature within the designated area on the PDF page.
- Tap the “Done” or “Save” button to confirm and save the signature.
- Save the modified PDF document with the added signature.
Keep in mind that different PDF editing apps have varying signature creation options and functionality. Some apps may allow you to store multiple signatures for different purposes or provide additional features such as signing with a digital certificate.
By following these steps, you can easily add your signature to a PDF document on your iPhone or iPad, simplifying the signing process and making it more convenient for both personal and professional use.
How to Fill Out PDF Forms on iPhone (or iPad)
Filling out PDF forms on your iPhone or iPad can be a quick and efficient way to complete paperwork and submit important documents. If you need to fill out a PDF form on your Apple device, here’s a step-by-step guide to help you:
- Open your preferred PDF editing app on your iPhone or iPad.
- Select the PDF form you want to fill out from your device’s storage or a cloud storage service like iCloud or Dropbox.
- Open the PDF form within the app.
- Locate the fields or sections that require input. These fields are typically labeled, such as “Full Name,” “Email Address,” or “Date of Birth.”
- Tap on the first field to activate it. The app will provide a text box or other input method to enter the relevant information.
- Enter your information in the designated field. Use the on-screen keyboard to input text, and if available, choose from pre-defined options for dropdown menus or checkboxes.
- Move to the next field by tapping on it or using the app’s navigation tools.
- Repeat the process until you have filled in all the required fields on the form.
- Review your entries to ensure accuracy and completeness.
- Save the filled-out form by tapping the “Done” or “Save” button in the app.
- Save the modified PDF document, with the filled-out form, on your device or in your cloud storage.
It’s worth noting that the features and options for filling out PDF forms may vary depending on the app you are using. Some apps may offer additional tools like form validation or the ability to add digital signatures to further enhance the form-filling process.
By following these steps, you can easily fill out PDF forms on your iPhone or iPad, eliminating the need for printing, manual writing, and scanning. This method not only saves time but also allows for more efficient document completion and submission.
How to Merge PDFs on iPhone (or iPad)
If you have multiple PDF files that you need to combine into a single document on your iPhone or iPad, you can easily merge them using a PDF editing app. Here’s a step-by-step guide on how to merge PDFs on your Apple device:
- Launch your preferred PDF editing app on your iPhone or iPad.
- Select the PDF files you want to merge from your device’s storage or a cloud storage service like iCloud or Dropbox.
- Open the first PDF file within the app.
- Look for the “Merge” or “Combine” option within the app’s interface. This may be represented by an icon with two or more files overlapping.
- Choose the option to add additional PDF files.
- Select the remaining PDF files you want to merge into the current document.
- Arrange the PDF files in the desired order. You can usually drag and drop the files to reorder them.
- Preview the merged PDF file to ensure that all pages and content are in the correct sequence.
- Save the merged PDF file by tapping the “Done” or “Save” button in the app.
- Choose a location to save the merged PDF, either on your device or in your preferred cloud storage.
It’s important to note that the merging feature may vary between different PDF editing apps. Some apps may offer additional options to customize the merged PDF, such as adding page numbers or inserting blank pages between documents.
Merging PDFs on your iPhone or iPad allows you to consolidate information from multiple sources into a single document, making it easier to manage and share. Whether you need to combine reports, presentations, or invoices, this process simplifies document organization and enhances productivity.
How to Split PDFs on iPhone (or iPad)
If you have a large PDF document that you want to divide into smaller sections on your iPhone or iPad, you can easily split it using a PDF editing app. Splitting PDFs allows you to extract specific pages or sections for separate use. Here’s a step-by-step guide on how to split PDFs on your Apple device:
- Launch your preferred PDF editing app on your iPhone or iPad.
- Select the PDF file you want to split from your device’s storage or a cloud storage service like iCloud or Dropbox.
- Open the PDF document within the app.
- Look for the “Split” or “Extract” option within the app’s interface. This may be represented by an icon with scissors or a document with divided segments.
- Choose the specific range or pages you want to extract from the original PDF. You can usually input the page numbers or select them visually on a thumbnail view.
- Verify the selected pages before proceeding to ensure you have chosen the correct sections.
- Confirm the split operation by tapping the “Split” or “Extract” button in the app.
- Save the split PDF files. The app may prompt you to choose a location on your device or select a cloud storage service to save the extracted pages.
- Repeat the process if you need to split the PDF into additional sections.
It’s worth noting that the splitting feature may vary between different PDF editing apps. Some apps may offer options to split by specific page numbers, split into equal-sized parts, or split at predefined bookmarks within the document.
Splitting PDFs on your iPhone or iPad provides flexibility in managing and using specific sections of a larger document. Whether you need to extract particular chapters, separate invoices, or share specific pages, this process allows for better organization and streamlined document handling.
How to Convert PDFs to Other Formats on iPhone (or iPad)
If you need to convert a PDF document to a different file format on your iPhone or iPad, you can easily do so with the help of a PDF conversion app. Converting PDFs to other formats allows for easier editing, sharing, and compatibility with various applications. Here’s a step-by-step guide on how to convert PDFs to other formats on your Apple device:
- Open your preferred PDF conversion app on your iPhone or iPad.
- Select the PDF file you want to convert from your device’s storage or a cloud storage service like iCloud or Dropbox.
- Within the app, locate the conversion option or tool.
- Choose the desired file format to which you want to convert the PDF. Common formats include Microsoft Word (DOCX), Microsoft Excel (XLSX), JPEG, PNG, or plain text (TXT).
- Start the conversion process by tapping on the conversion button or command.
- Wait for the app to convert the PDF to the specified file format. The duration may vary depending on the file size and complexity of the PDF.
- Once the conversion is complete, the converted file will be available in the app or presented as an option to save or share.
- Choose the appropriate action to save or share the converted file. You can save it directly to your device, upload it to cloud storage, or share it via email or other communication apps.
It’s important to note that the available file formats for conversion may depend on the app you are using. Some apps may offer a wide range of formats to choose from, while others may have limitations or specialized options for specific use cases.
With the ability to convert PDFs to other formats on your iPhone or iPad, you can easily repurpose PDF content, extract text or images, or collaborate with others using different document editing tools.
How to Share Edited PDFs on iPhone (or iPad)
Once you have finished editing a PDF document on your iPhone or iPad, you may want to share it with others. Sharing edited PDFs can be done seamlessly using various methods available on your Apple device. Here’s a step-by-step guide on how to share edited PDFs:
- Open the PDF editing app you used to edit the document on your iPhone or iPad.
- Locate the edited PDF file within the app. It should be saved in your device’s storage or a cloud storage service.
- Tap on the file to open it in the app.
- Look for the sharing or export option within the app’s interface. This usually appears as an icon depicting an arrow pointing upwards or as a menu option.
- Select the sharing method that suits your needs. Common sharing options include sending the PDF file via email, messaging apps, social media platforms, or uploading it to cloud storage services.
- Choose the desired sharing platform or app from the available options on your device.
- Enter the recipient’s email address, contact information, or select them from your device’s contact list or app directory.
- Include a brief description or message if necessary, and specify any additional sharing preferences or settings.
- Tap the “Send” or “Share” button to initiate the sharing process.
- Wait for the file to be uploaded or attached, depending on the chosen method and app used for sharing.
- Verify that the file has been successfully sent or shared by checking notifications or confirmation messages, depending on the app or platform used.
It’s important to note that the available sharing options may vary depending on the app or platforms installed on your iPhone or iPad. Additionally, larger PDF files may require a longer upload or transfer time, so it’s advisable to be patient during the sharing process.
By following these steps, you can easily share your edited PDFs with colleagues, clients, or anyone else who needs access to the updated document, making collaboration and communication more efficient.
Tips and Tricks for Editing PDFs on iPhone (or iPad)
Editing PDFs on your iPhone or iPad can be a powerful tool for productivity and collaboration. To make the most out of your PDF editing experience on Apple devices, here are some useful tips and tricks to keep in mind:
- Use a PDF editing app: Choose a reputable and feature-rich PDF editing app from the App Store to ensure a smooth and efficient editing process.
- Master the annotation tools: Become familiar with the various annotation options available, such as highlighting, underlining, and adding text comments. These tools can help you efficiently mark-up and provide feedback on PDF documents.
- Utilize the search function: Many PDF editing apps offer a search function that allows you to quickly locate specific keywords or phrases within a document. This can save valuable time when working with large PDF files.
- Take advantage of cloud storage integration: Sync your PDF documents with popular cloud storage services like iCloud or Dropbox. This ensures that your edited files are accessible across multiple devices and can be easily shared with others.
- Explore advanced editing features: Experiment with advanced features like merging PDFs, splitting documents, or converting PDFs to other formats. These capabilities open up new possibilities for managing and manipulating your PDF files.
- Use templates for consistency: If you often work with similar types of PDFs, consider creating templates for faster and more consistent editing. This can streamline your workflow and save time in repetitive tasks.
- Backup your files: Regularly backup your edited PDF files to prevent data loss. You can save them to your device’s local storage, a cloud storage service, or transfer them to your computer for safekeeping.
- Stay organized: Establish a logical system for naming and categorizing your edited PDF files. This will make it easier to find and retrieve specific documents in the future.
- Keep your app updated: Install updates for your PDF editing app regularly to ensure you have access to the latest features, improvements, and bug fixes.
- Explore online resources: Check out online tutorials, forums, or support sections provided by the app developer or other trusted sources. These resources can help you discover additional tips and tricks specific to your PDF editing app.
By applying these tips and tricks, you can enhance your efficiency and productivity when editing PDFs on your iPhone or iPad. With practice and familiarity, you’ll become a proficient PDF editor, capable of easily making necessary changes, annotations, and conversions.