
Enabling the Find Feature on iPhone
Searching for specific content within a lengthy document or webpage can be a tedious task, especially on a small screen. However, with the help of the Find feature on your iPhone, you can quickly locate keywords or phrases to save time and effort. Here’s how you can enable and use the Find feature on your iPhone.
To begin, open the Safari app on your iPhone and navigate to the webpage or document where you want to perform the search. Next, tap on the Share button located at the bottom center of the screen. This will open a menu with multiple options.
Scroll through the options and look for the “Find on Page” option. It is represented by the magnifying glass icon. Tap on it, and a search bar will appear at the top of the screen. This indicates that the Find feature is now enabled, and you can start searching for specific keywords within the page or document.
Now that the Find feature is enabled, you can enter the keyword or phrase you want to search for in the search bar. As you type, the iPhone will automatically highlight the matching instances on the page, making it easier for you to identify the relevant content.
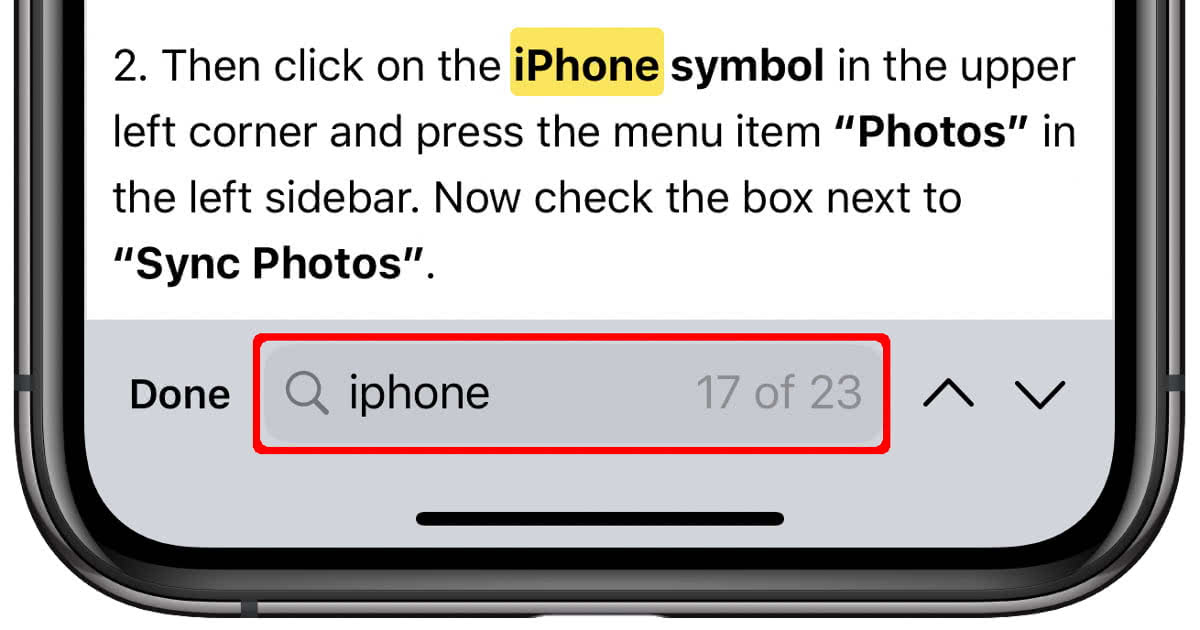
If there are multiple occurrences of the searched keyword or phrase, you can navigate through them using the “Previous” and “Next” buttons. These buttons allow you to jump to the previous or next occurrence, respectively, giving you more control and flexibility in navigating the search results.
Once you have found the desired information, you can simply tap outside the search bar to exit the Find feature. The highlighted instances will disappear, and you can continue reading or exploring the webpage or document as usual.
Using the Find feature on your iPhone not only saves you time, but it also enables you to efficiently locate specific information within lengthy content. Whether you’re searching for a specific term in an article, an address in a document, or a key point in a research paper, the Find feature provides a convenient way to quickly access the information you need.
Eliminate the hassle of scrolling through pages and documents manually by utilizing the Find feature on your iPhone. With a few simple taps, you can easily locate and access the information you’re looking for, enhancing your browsing and reading experience.
Navigating to the Search Bar
In order to use the Find feature on your iPhone, you first need to navigate to the search bar. The search bar is where you can enter the keywords or phrases you want to search for within a webpage or document. Here’s how you can easily locate and access the search bar on your iPhone.
To begin, open the Safari app on your iPhone and navigate to the webpage or document you want to search within. Once you’re on the desired page, you’ll need to locate the search bar. The location of the search bar can vary depending on the specific webpage or document you’re viewing. However, it is commonly found near the top of the screen.
If you’re viewing a webpage, the search bar is typically located at the top of the Safari browser, right below the address bar. It is usually a rectangular-shaped field with a “google.com” placeholder text or a magnifying glass icon. Tap on the search bar to activate it and start entering your search terms.
On the other hand, if you’re viewing a document, such as a PDF or Word file, the search bar may be located within the document viewer itself. Look for a search icon or a search field within the toolbar or menu options of the document viewer. Tap on the search icon or field to access the search bar.
Once you have located and opened the search bar, you can proceed to enter the keywords or phrases you want to search for. As you type, the iPhone will automatically begin searching for matching instances within the webpage or document, providing real-time results.
Being able to navigate to the search bar quickly and efficiently allows you to perform searches with ease. Whether you’re searching for specific information within a webpage or document, the search bar serves as the gateway to accessing the Find feature on your iPhone.
Take advantage of the search bar’s convenience and accessibility to streamline your searching process. By easily locating and accessing the search bar, you can make full use of the Find feature on your iPhone and efficiently find the information you need.
Understanding the Use of Control F on iPhone
Control F, also known as “Find” or “Search,” is a powerful tool that allows you to quickly locate specific words or phrases within a webpage or document. While Control F is commonly associated with desktop computers, you can also utilize this feature on your iPhone. Understanding how to use Control F on your iPhone can greatly enhance your browsing and research experience. Here’s what you need to know.
Control F on an iPhone functions similarly to its desktop counterpart, but with a slight variation in the user interface. Instead of using a physical keyboard, you’ll be using the virtual keyboard on your iPhone’s screen. To access the Control F feature on your iPhone, you’ll need to enable the Find feature, as mentioned in the previous section.
Once the Find feature is enabled, you can enter the keywords or phrases you want to search for in the search bar. As you type, your iPhone will automatically highlight the matching instances on the page, making it easier for you to identify and navigate to the relevant content.
By utilizing Control F on your iPhone, you can quickly and efficiently find specific information within lengthy documents or webpages. This can be particularly helpful when conducting research, studying, or even when reading articles or blog posts.
For example, imagine you’re reading a long article and want to find a specific term or topic mentioned. Rather than scrolling through the entire article, you can simply use Control F to search for the desired keyword. The Find feature will efficiently locate and highlight the instances of that keyword, allowing you to navigate directly to the relevant information.
Control F on your iPhone provides you with greater control over the content you’re viewing. By allowing you to search for specific terms, it saves you time and eliminates the need for manual searching or scrolling through lengthy documents.
Whether you’re searching for a specific term in an article, an address in a document, or a key point in a research paper, Control F on your iPhone offers a convenient and efficient way to access the information you need.
By understanding the use of Control F on your iPhone, you can unlock its full potential and maximize your browsing and research capabilities. Explore this feature to streamline your search process and enhance your productivity on your iPhone.
Entering Keywords for Searching
Once you have enabled the Find feature on your iPhone and located the search bar, it’s time to enter the keywords or phrases you want to search for. By effectively entering keywords for searching, you can narrow down the results and find the specific information you’re looking for within a webpage or document. Here’s how you can enter keywords for searching on your iPhone.
To begin, tap on the search bar located at the top of the screen. This will activate the virtual keyboard on your iPhone, allowing you to enter text. Using the keyboard, start typing the keywords or phrases that are relevant to your search.
As you type, your iPhone will automatically update the search results in real-time, highlighting the matching instances on the page or document. This immediate feedback helps you to refine your search and see which parts of the content contain the keywords you entered.
When entering keywords, it’s important to be as specific as possible to get accurate search results. Consider using unique or specific terms that are more likely to appear within the content you’re searching. For instance, if you’re looking for information on iPhone photography, enter keywords like “iPhone photography tips” or “iPhone camera settings” rather than generic terms like “photography” or “camera.”
You can also enter multiple keywords or phrases to narrow down your search even further. To do this, separate the keywords or phrases with a space. Your iPhone will then search for instances where all the specified keywords or phrases appear together, providing more specific and targeted results.
Additionally, keep in mind that the search is case-insensitive, which means that it does not differentiate between uppercase and lowercase letters. So whether you enter your keywords in uppercase or lowercase, your iPhone will still find the matching instances within the content.
By effectively entering keywords for searching, you can enhance the accuracy and efficiency of the Find feature on your iPhone. Take advantage of this capability to quickly find the specific information you need and make the most out of your browsing and research sessions.
Filtering Search Results
When using the Find feature on your iPhone, you may encounter situations where there are numerous instances of the searched keyword or phrase on the page or document. In such cases, filtering the search results can help you narrow down the information and find what you’re specifically looking for. Here’s how you can filter search results on your iPhone.
After entering the keywords or phrases in the search bar, your iPhone will automatically highlight the matching instances on the page or document. To filter the search results and focus on specific occurrences, you can utilize the “Previous” and “Next” buttons located near the search bar.
The “Next” button allows you to jump to the next occurrence of the keyword or phrase within the content. Tap on the “Next” button, and your iPhone will highlight the next matching instance. This feature is particularly useful when there are multiple instances of the keyword, allowing you to scroll through the results systematically.
Conversely, the “Previous” button enables you to go back to the previous occurrence of the keyword or phrase. By tapping on the “Previous” button, your iPhone will highlight the previous matching instance, allowing you to review the search results in reverse order.
Using the “Next” and “Previous” buttons, you can quickly navigate through the search results, filtering the instances and finding the specific information you’re seeking. This feature provides you with greater control over your search process, allowing for efficient exploration of the content.
Furthermore, you can utilize other filtering techniques to refine your search results. For example, you can combine the use of the “Next” and “Previous” buttons with scrolling through the page or document, examining the context of the highlighted instances to determine their relevance to your search.
By filtering the search results, you can focus on the most relevant occurrences of the keyword or phrase, saving time and effort in locating the specific information you need. This feature empowers you to efficiently navigate through content-rich webpages or lengthy documents, making your browsing and research sessions more productive.
Take advantage of the filtering options provided by the Find feature on your iPhone to streamline your search process. By utilizing the “Next” and “Previous” buttons and implementing additional filtering techniques, you can effectively narrow down the search results and locate the desired information with ease.
Using Next and Previous Buttons for Navigation
When utilizing the Find feature on your iPhone, the Next and Previous buttons play a crucial role in navigating through the search results. These buttons allow you to move between the instances of the searched keyword or phrase, making it easier for you to find the specific information you’re looking for. Here’s how you can effectively use the Next and Previous buttons for navigation on your iPhone.
After entering the keywords or phrases in the search bar, your iPhone will automatically highlight the matching instances on the page or document. To start navigating through the search results, tap on the “Next” button located near the search bar.
By tapping on the “Next” button, your iPhone will highlight the next occurrence of the keyword or phrase within the content. This allows you to move forward and examine the next instance, helping you to progress through the search results in a systematic manner.
If you want to go back and review a previous occurrence, you can tap on the “Previous” button. This will highlight the previous matching instance, allowing you to backtrack and reevaluate the search results in reverse order.
Utilizing the Next and Previous buttons in conjunction with scrolling allows you to comprehensively navigate through the search results. By analyzing the context provided by the highlighted instances, you can determine which occurrences are most relevant to your search, helping you narrow down the information you seek.
One useful tip when using the Next and Previous buttons is to pay attention to the content around each highlighted occurrence. Sometimes, the exact instance of the keyword or phrase may not contain the desired information, but the surrounding text or context may provide valuable insight or clarification.
By effectively utilizing the Next and Previous buttons for navigation, you can efficiently explore the search results and locate the specific information you’re seeking. This feature provides you with greater control and flexibility in your search process, enhancing your browsing and research experience.
Whether you’re searching within a lengthy webpage or document, the Next and Previous buttons allow you to jump between occurrences, saving you time and effort in manually scrolling or searching through the content.
Familiarize yourself with the navigation options offered by the Next and Previous buttons, and leverage them to effortlessly navigate through the search results. By doing so, you can quickly find the desired information and make the most out of the Find feature on your iPhone.
Closing the Find Feature on iPhone
Once you have completed your search or found the specific information you were looking for using the Find feature on your iPhone, it’s important to know how to close it. Closing the Find feature effectively removes the search bar and highlighted instances, allowing you to continue reading or exploring the webpage or document without any distractions. Here’s how you can close the Find feature on your iPhone.
To begin, simply tap outside the search bar. This action will exit the Find feature and remove the search bar from the top of the screen. You will no longer see the highlighted instances of the searched keyword or phrase.
By closing the Find feature, you can fully immerse yourself in the content without any overlays or distractions. It allows you to continue reading, scrolling, or interacting with the webpage or document as you normally would.
It’s worth noting that even after you have closed the Find feature, you can easily re-enable it by tapping on the search bar again. If you need to perform another search or revisit the highlighted instances, you can simply bring back the search bar by tapping on it.
This flexibility to close and re-enable the Find feature allows you to seamlessly switch between searching and reading, enhancing your overall browsing experience on your iPhone.
Remember, closing the Find feature does not clear your search terms. If you decide to reopen the Find feature, your previously entered search keywords or phrases will still be there, ready for you to continue your search or explore further within the content.
Mastering the ability to close and re-enable the Find feature gives you full control over your browsing and research sessions. By being able to seamlessly transition between searching and reading, you can optimize your productivity and focus on the content that matters most.
Take advantage of this feature to keep your browsing experience smooth and uninterrupted. By closing the Find feature when you’re done searching, you can fully engage with the webpage or document and extract the information you need without any distractions.
Alternative Methods for Finding Information on iPhone
While the Find feature on your iPhone is a convenient and powerful tool for searching within webpages and documents, there are alternative methods you can utilize to find information on your device. These methods can offer additional flexibility and options depending on your browsing preferences and needs. Here are some alternative methods for finding information on your iPhone.
1. Manual Scrolling: One of the simplest methods is manually scrolling through the webpage or document. By visually scanning the content, you may come across the information you’re looking for without the need for using a search feature. While this method may take more time and effort, it allows you to explore the entire page and potentially discover other relevant information along the way.
2. Table of Contents or Index: If you’re browsing a lengthy document such as an e-book or a research paper, there may be a table of contents or an index. Utilizing these navigational aids can help you quickly jump to specific sections, chapters, or topics, allowing you to locate information more efficiently. Simply tap on the table of contents or index entry to access the desired section.
3. Website Search Bar: If you’re browsing a website that offers its own search functionality, take advantage of the website’s search bar. Many websites have dedicated search features that allow you to search for specific keywords or topics within their content. Look for a search icon or a search field within the website’s navigation or menu to initiate your search.
4. Spotlight Search: Your iPhone comes equipped with a powerful search function known as Spotlight Search. To access it, swipe down on the home screen to reveal the search bar. Spotlight Search allows you to search for various types of information on your device, including apps, contacts, emails, messages, and more. It can be a quick and efficient way to find information stored on your iPhone.
5. Voice Search: If you prefer a hands-free approach, you can use the Siri voice assistant on your iPhone to perform searches. Simply activate Siri by holding down the home button or using the “Hey Siri” command. You can then ask Siri to search for specific information or answer specific questions. This method can be particularly useful when you’re on the go or when you need quick responses.
By considering these alternative methods for finding information on your iPhone, you can broaden your search capabilities and adapt to different browsing scenarios. Experiment with different approaches to find the method that works best for you, depending on the content you’re looking for and your personal preferences.
Remember, the Find feature is just one of the tools at your disposal. The iPhone offers a range of options to help you discover and access information efficiently, making your browsing and research experiences more versatile and productive.
Troubleshooting Common Issues with Control F on iPhone
While the Find feature on your iPhone is a useful tool for searching within webpages and documents, you may encounter certain issues or challenges when using Control F. Understanding common issues and knowing how to troubleshoot them can help ensure a smooth and effective search experience. Here are some common issues you may encounter with Control F on your iPhone and how to troubleshoot them.
1. Search Not Working: If you find that the search feature is not working or not producing any results, first double-check that you have entered the correct keywords or phrases in the search bar. Make sure there are no typos or errors in your search terms. Additionally, verify that the content you’re searching within actually contains the keywords you’re looking for. If the issue persists, try closing the webpage or document, reopening it, and re-enabling the Find feature.
2. No Find Option: If you’re using a specific app or document viewer that doesn’t provide an in-app Find feature, you won’t have the option to use Control F. In such cases, try exporting or copying the content to a different app or platform that offers a Find feature, allowing you to search for specific keywords or phrases.
3. Limited Search Functionality: Some webpages or documents may have restrictions on the search feature. For example, certain websites or PDF files may not allow you to search within the content. In such cases, you may need to resort to alternative methods for finding information, such as manual scrolling, utilizing a website’s search bar, or utilizing the in-app navigation options provided by the document viewer.
4. Unresponsive Next or Previous Buttons: If the Next or Previous buttons are unresponsive or not functioning as expected, try closing the Find feature and reopening it. This can help reset any temporary glitches that may be affecting the functionality of these buttons. Additionally, ensure that you have a stable internet connection, as a weak or unstable connection may interfere with the responsiveness of the buttons.
5. Compatibility Issues: In some cases, compatibility issues between the webpage or document and the browser or app you’re using may affect the functionality of the Find feature. Check for any available updates for the app or browser you’re using, as newer versions often address compatibility issues and improve search functionality.
If you continue to experience issues with the Find feature on your iPhone, it may be helpful to seek assistance from the app developer or consult the support resources available for your specific browser or document viewer. They may be able to provide further guidance or troubleshooting steps tailored to their specific software.
By troubleshooting common issues with Control F on your iPhone, you can overcome any challenges and maximize the effectiveness of your search capabilities. Don’t let these issues discourage you; instead, explore alternative methods for finding information or seek guidance to ensure a seamless search experience on your iPhone.