
What is Chromecast?
Chromecast is a media streaming device developed by Google that allows you to wirelessly display content from your computer, smartphone, or tablet to your TV. It is a small, affordable, and easy-to-use gadget that plugs into the HDMI port on your TV, transforming it into a smart TV.
Using Chromecast, you can stream a wide range of content, including movies, TV shows, videos, music, photos, and even display your computer’s desktop on the big screen. It provides a seamless and convenient way to enjoy your favorite entertainment without the need for complex setups or cables.
One of the key features of Chromecast is its ability to use the “cast” function, which enables you to wirelessly transmit content from your device to the TV. This is accomplished by connecting your Chromecast device to your TV and establishing a connection between your device and the Chromecast through your Wi-Fi network.
Chromecast supports multiple platforms, including Windows, Mac, Android, and iOS, making it compatible with a wide range of devices. It also supports popular streaming applications like Netflix, YouTube, Hulu, and Spotify, allowing you to easily access and enjoy your favorite content directly from your TV.
Additionally, Chromecast offers a user-friendly interface that can be controlled using your device, allowing you to browse, search, select, and play content effortlessly. You can even use your smartphone or tablet as a remote control, adjusting the volume, pausing or resuming playback, and even streaming content from multiple devices simultaneously.
Overall, Chromecast provides a cost-effective and flexible way to enhance your TV viewing experience. Whether you want to watch movies, stream videos, listen to music, or display your computer’s desktop, Chromecast offers a simple solution that brings entertainment to the big screen with just a few taps or clicks.
Setting up your Chromecast device
Setting up your Chromecast is a straightforward process that only takes a few minutes. Follow the steps below to get your Chromecast ready to use:
- Unbox your Chromecast device and ensure that you have the necessary components, including the Chromecast dongle, HDMI extender, power adapter, and USB cable.
- Plug the Chromecast dongle into the HDMI port of your TV. If the HDMI port is difficult to access or obstructed, you can use the HDMI extender provided to improve connectivity.
- Connect the USB cable from your Chromecast to the power adapter, and then plug the power adapter into a power outlet. Your Chromecast should power on automatically.
- Turn on your TV and select the appropriate HDMI input where your Chromecast is connected.
- On your computer, smartphone, or tablet, install the Google Home app from the App Store or Google Play Store. If you already have the app installed, ensure that it is up to date.
- Open the Google Home app and follow the on-screen instructions to set up your Chromecast. It will prompt you to connect your device to the same Wi-Fi network as your Chromecast.
- Once connected, the app will search for available Chromecast devices. When it detects your Chromecast, tap on it to proceed with the setup process.
- The app will display a code on your device screen. Ensure that the code matches the one displayed on your TV. If they match, tap on “Yes” to continue.
- Select your preferred language, give your Chromecast a name, and choose the Wi-Fi network you want to connect it to.
- Follow any additional instructions provided by the app, such as signing in to your Google account.
- Once the setup process is complete, you will see a confirmation message on your device and your TV. Your Chromecast is now ready to use.
By following these simple steps, you can easily set up your Chromecast device and start enjoying seamless streaming and content casting on your TV.
Connecting your Chromecast to your TV
Connecting your Chromecast device to your TV is a simple process that can be completed in just a few steps. Here’s how to do it:
- Locate an available HDMI port on your TV. Make sure you have easy access to the HDMI port and that it is not blocked or obstructed by other devices or cables.
- Insert the Chromecast dongle into the HDMI port on your TV. If the HDMI port is difficult to reach or there is limited space, you can use the HDMI extender included with your Chromecast to improve accessibility.
- Connect the USB cable from your Chromecast to a power source. This can be done by plugging the USB cable into a USB port on your TV if it has one, or by using the included power adapter and connecting it to a power outlet.
- Turn on your TV and switch to the appropriate HDMI input. Use your TV’s remote control to select the HDMI input that corresponds to the port where your Chromecast is connected. You should see the Chromecast setup screen on your TV.
Once your Chromecast is correctly plugged in and connected to your TV, you are ready to proceed with the setup process. Follow the instructions provided by the Google Home app or the setup screen on your TV to connect your Chromecast to your Wi-Fi network and complete the setup process.
It’s worth noting that if you have multiple HDMI ports on your TV, you may want to take note of which port your Chromecast is connected to. This will come in handy in case you want to switch inputs or if you have multiple devices connected to different HDMI ports.
By following these steps, you can easily connect your Chromecast to your TV and start enjoying a wide range of streaming content and casting options right on your big screen.
Connecting your Chromecast to your computer
Connecting your Chromecast to your computer allows you to extend your desktop or mirror your screen onto your TV. Follow the steps below to connect your computer to your Chromecast:
- Make sure your computer and Chromecast are connected to the same Wi-Fi network.
- Open the Google Chrome browser on your computer. If you don’t have it installed, you can download it from the official website.
- Click on the three-dot menu icon in the top-right corner of the browser window, then select “Cast” from the drop-down menu.
- A small window with available casting devices will appear. Locate and select your Chromecast from the list.
- You may be prompted to confirm your selection. Click on “Cast desktop” to share your entire desktop or “Cast tab” to share only a specific browser tab.
- If you selected “Cast desktop,” a new window will appear, allowing you to choose the specific screen or desktop you want to share. Select the desired screen and click on “Share.”
- If you selected “Cast tab,” the specific tab you selected will be mirrored onto your TV.
- Your computer screen should now be displayed on your TV via the Chromecast. You can use it to watch videos, give presentations, play games, or browse the internet.
- To stop casting, click on the “Cast” icon in the Chrome browser and select “Stop casting” from the drop-down menu.
It’s important to note that the performance and quality of the casting experience may vary depending on your computer’s hardware capabilities and network stability. For the best results, ensure that both your computer and Chromecast are connected to a stable Wi-Fi network and that your computer meets the system requirements for casting.
By following these steps, you can easily connect your computer to your Chromecast and enjoy the flexibility of extending or mirroring your desktop onto your TV screen.
Enabling desktop sharing on your computer
Before you can connect your computer to your Chromecast and share your desktop on your TV, you need to ensure that desktop sharing is enabled on your computer. The process may vary depending on your operating system. Follow the steps below to enable desktop sharing on Windows and macOS:
Windows:
- Right-click on the desktop and select “Display settings” from the context menu.
- In the “Display” settings window, scroll down and click on “Advanced display settings.”
- Click on the link that says “Display adapter properties for [your display name].”
- In the new window that opens, go to the “Intel(R) Graphics Control Panel” or the graphics control panel for your specific graphics card.
- Look for the “Multiple Displays” or “Multiple Monitor” option. Enable the “Extended Desktop” or “Mirror Display” mode, depending on your preference.
- Save the settings and close the graphics control panel.
macOS:
- Click on the Apple menu in the top-left corner of the screen and select “System Preferences” from the drop-down menu.
- In the System Preferences window, click on “Displays.”
- Go to the “Arrangement” tab.
- Check the box that says “Mirror Displays” if you want to mirror your desktop or uncheck it if you want to extend your desktop.
After enabling desktop sharing on your computer, you can proceed to connect your computer to your Chromecast and share your desktop on your TV by following the steps outlined in the previous section.
It’s worth mentioning that some computers may require additional software or drivers to enable desktop sharing or to achieve optimal performance when casting. Check the support documentation for your computer or contact the manufacturer for further assistance if needed.
By enabling desktop sharing on your computer, you can conveniently extend or mirror your desktop onto your TV using Chromecast, allowing for a more immersive and enjoyable viewing experience.
Connecting your computer to your Chromecast
Once you have set up your Chromecast device and enabled desktop sharing on your computer, you are ready to connect your computer to your Chromecast and start displaying your desktop on your TV. Follow the steps below to connect your computer to your Chromecast:
- Make sure your computer and Chromecast are connected to the same Wi-Fi network. This is crucial for establishing a connection between the two devices.
- Open the Google Chrome browser on your computer. If you don’t have it installed, you can download it from the official website.
- Click on the three-dot menu icon in the top-right corner of the browser window, then select “Cast” from the drop-down menu.
- A small window with available casting devices will appear. Locate and select your Chromecast from the list.
- You may be prompted to confirm your selection. Click on “Cast desktop” to share your entire desktop or “Cast tab” to share only a specific browser tab.
- If you selected “Cast desktop,” a new window will appear, allowing you to choose the specific screen or desktop you want to share. Select the desired screen and click on “Share.”
- If you selected “Cast tab,” the specific tab you selected will be mirrored onto your TV.
- Your computer screen should now be displayed on your TV via the Chromecast. You can use it to watch videos, give presentations, play games, or browse the internet.
- To stop casting, click on the “Cast” icon in the Chrome browser and select “Stop casting” from the drop-down menu.
It’s important to note that while casting your desktop, you may experience some latency between the computer and the TV. This can vary depending on factors such as the quality of your Wi-Fi connection, the performance of your computer, and the complexity of the content being displayed.
Additionally, some applications or streaming services may have restrictions on casting certain content due to copyright or licensing agreements. In such cases, you may not be able to cast certain videos or content to your TV via Chromecast.
By following these steps, you can easily connect your computer to your Chromecast and enjoy the convenience of displaying your desktop on your TV screen.
Adjusting display settings
Once you have successfully connected your computer to your Chromecast and displayed your desktop on your TV, you may want to adjust some display settings to optimize the viewing experience. Here are a few settings you can consider adjusting:
Screen Resolution:
Depending on your TV’s capabilities and the resolution of your computer screen, you may need to adjust the screen resolution to ensure that the content is displayed properly. To change the screen resolution on Windows, right-click on the desktop, select “Display settings,” and choose the appropriate resolution from the dropdown menu. On macOS, go to “System Preferences,” click on “Displays,” and adjust the resolution from the “Display” tab.
Display Mode:
You may have the option to choose between “Extended Desktop” and “Mirror Display” mode. Extended Desktop mode allows you to have different content on your computer screen and TV screen, providing more versatility for multitasking. Mirror Display mode mirrors your computer screen exactly on the TV screen, making it ideal for presentations or sharing content with others. You can usually adjust this setting in your computer’s display settings.
Audio Output:
If you want to change the audio output to play through your TV speakers or a surround sound system connected to your TV, you can adjust the audio output settings on your computer. On both Windows and macOS, you can access the audio settings by right-clicking on the volume icon in the taskbar (Windows) or clicking on the volume icon in the menu bar (macOS).
Scaling and Overscan:
In some cases, you may notice that the edges of your desktop are cut off or not fully visible on your TV screen. This is due to overscan, a feature designed to compensate for older TVs. To address this issue, you can adjust the scaling and overscan settings in your computer’s display settings. Look for options like “Adjust Screen Size” or “Overscan Compensation” and make the necessary adjustments.
Remember that the availability of these settings and the specific options may vary depending on your computer’s operating system and graphics card. Explore the display settings on your computer to see what options are available and customize them according to your preferences and requirements.
By adjusting the display settings, you can optimize the visuals and audio to ensure a more enjoyable and immersive experience when using Chromecast to display your computer’s desktop on your TV.
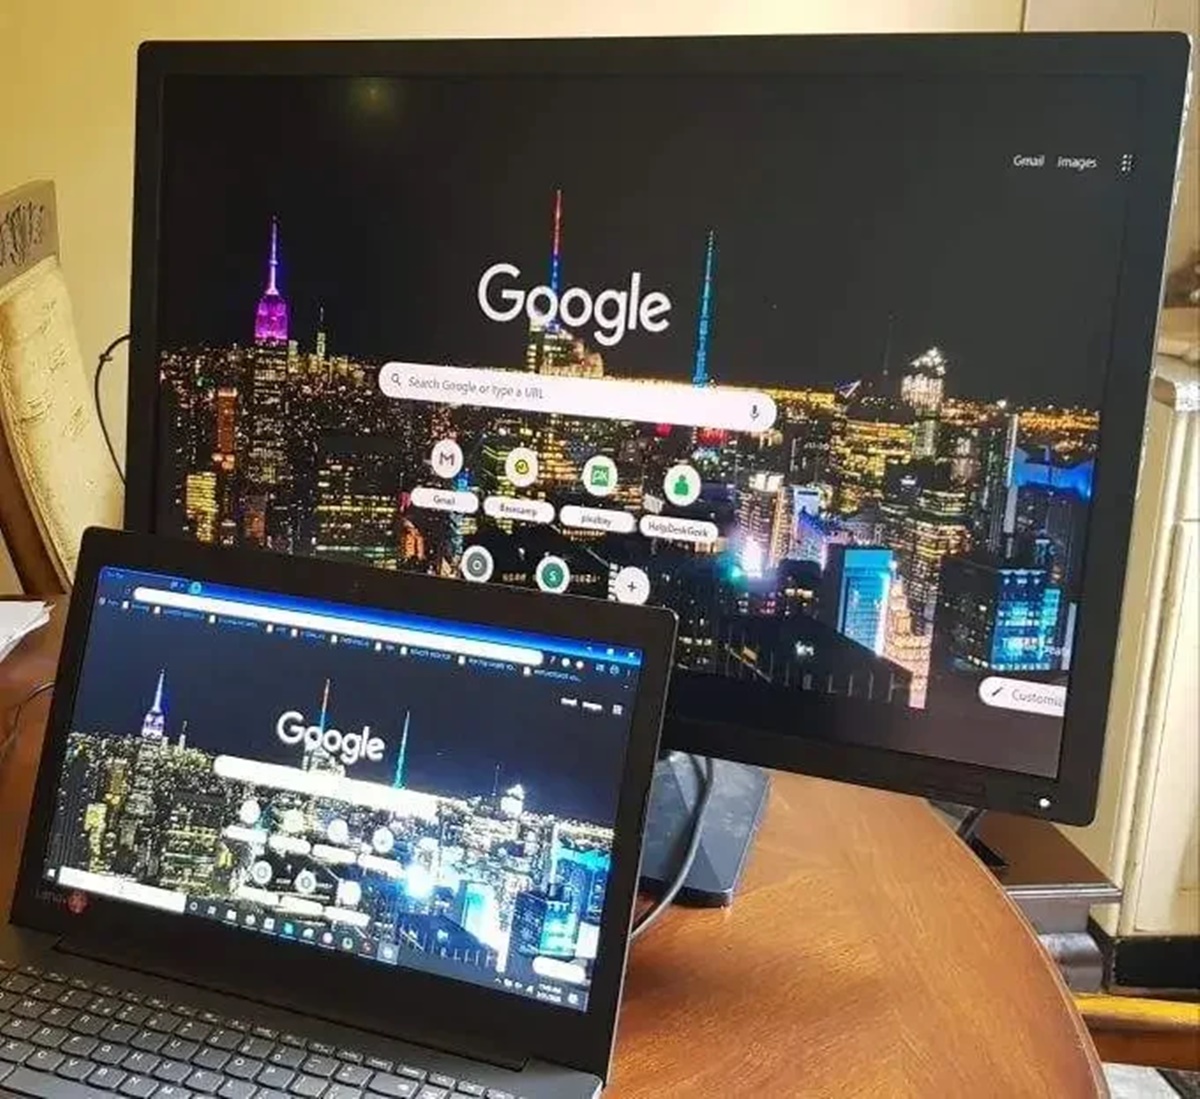
Displaying your Windows desktop on your TV
If you’re using Windows and want to display your desktop on your TV using Chromecast, you can easily do so by following these steps:
- Make sure your Chromecast and computer are connected to the same Wi-Fi network.
- Open the Google Chrome browser on your computer. If you don’t have it installed, download it from the official website.
- Click on the three-dot menu icon in the top-right corner of the browser window and select “Cast” from the drop-down menu.
- A small window will appear. Click on the down arrow next to “Cast to” and select “Cast desktop” from the options.
- Choose your Chromecast device from the list of available devices.
- Click on “Share” to start casting your desktop to the TV.
Your Windows desktop should now be displayed on your TV screen through Chromecast. You can watch videos, play games, browse the internet, or perform any other tasks on your TV using your computer.
It’s important to note that while casting your desktop, there might be a slight delay between your actions on the computer and what is displayed on the TV. This latency is due to the nature of wireless streaming and can vary based on factors such as your Wi-Fi network’s stability and the specifications of your computer.
If you encounter any issues or experience lag during casting, try reducing the resolution of your display or closing resource-intensive programs on your computer to optimize performance.
Additionally, it’s worth mentioning that certain video streaming platforms or apps may have limitations on content playback when casting the entire desktop. In such cases, it’s recommended to use the native streaming or casting functionality provided by those platforms, if available.
By following these steps, you can easily cast your Windows desktop onto your TV using Chromecast and enjoy a more immersive viewing experience.