
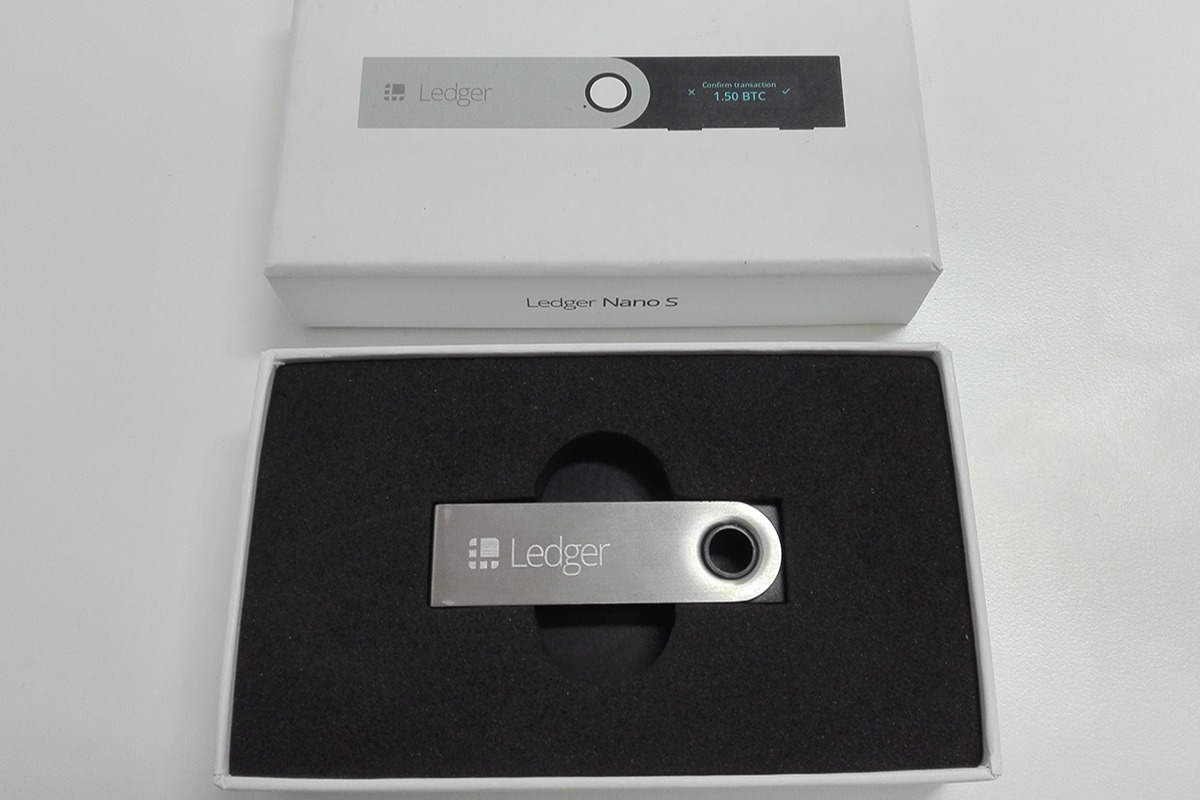
Connecting Your Ledger Nano S
Connecting your Ledger Nano S is the first step towards depositing funds and ensuring the security of your digital assets. Follow these simple steps to successfully connect your Ledger Nano S:
- Start by plugging the USB cable into your computer and then connecting the other end to the USB port on your Ledger Nano S. Ensure that the device is securely connected.
- After connecting, the Ledger Nano S will display a welcome message along with a series of words. This is the device’s unique recovery phrase and should be kept private and secure. Make sure to write down these words on the recovery sheet provided by Ledger. This phrase will help recover your wallet if your device is ever lost or damaged.
- Next, press the right button on your Ledger Nano S to navigate through the setup process. Set a 4-8 digit PIN that you will use to unlock your device. Make sure to choose a PIN that is easy for you to remember but difficult for others to guess.
- Once the PIN is set, you will be prompted to confirm it by re-entering it on the device.
- After confirming the PIN, your Ledger Nano S will display another series of words. This is your recovery phrase verification. Make sure to carefully confirm that the words displayed on the device match the words on your recovery sheet.
- Press the right button on your Ledger Nano S to proceed with the setup process. Your device will then display a message indicating that your Ledger Nano S is now ready to use.
By following these steps, you have successfully connected your Ledger Nano S. Now you are ready to install the necessary software and create a new wallet to securely store your cryptocurrencies.
Installing the Ledger Live Software
In order to manage your Ledger Nano S and deposit funds, you need to install the Ledger Live software on your computer. This software provides a user-friendly interface for interacting with your device. The installation process is straightforward:
- Visit the official Ledger Live website and download the software compatible with your operating system (Windows, Mac, or Linux).
- Once the download is complete, open the installation file and follow the on-screen instructions to install the Ledger Live software.
- After installation, launch the Ledger Live software on your computer.
- Connect your Ledger Nano S to your computer using the USB cable. Make sure your device is unlocked by entering your PIN.
- If prompted, select “Use a device already initialized” option in Ledger Live and follow the instructions displayed on your computer screen to finish the setup process.
- Once your Ledger Nano S is successfully connected to the Ledger Live software, you will see a dashboard displaying the available cryptocurrencies and their respective balances.
The Ledger Live software is now installed and configured, and your Ledger Nano S is ready to be used for managing your digital assets. With this software, you can easily add accounts, view transaction history, and deposit funds to your Ledger Nano S with just a few clicks.
Creating a New Wallet
Now that you have successfully connected your Ledger Nano S and installed the Ledger Live software, it’s time to create a new wallet to securely store your cryptocurrencies. Follow these steps to create a new wallet:
- Launch the Ledger Live software on your computer if it’s not already open.
- In the Ledger Live dashboard, click on the “Add Account” button.
- A list of supported cryptocurrencies will appear. Choose the cryptocurrency you want to create a wallet for and click on it.
- Next, select the option to create a “New Account”.
- On your Ledger Nano S device, confirm the account creation by pressing the right button.
- Once the account is created, it will be added to your Ledger Live dashboard, and you can view the account balance and transaction history.
Repeat these steps for each cryptocurrency you want to add to your Ledger Nano S. Creating separate wallets for different cryptocurrencies allows you to manage and track them individually.
It’s worth mentioning that even if you lose access to your computer or Ledger Live software, you can still recover your wallets and access your funds using your Ledger Nano S device and the recovery phrase you initially set up. Ensure you keep your recovery phrase in a safe and secure location, as it is your key to accessing your wallets in case of emergencies.
With your new wallet created, you are now ready to securely deposit funds into your Ledger Nano S and start managing your cryptocurrencies.
Setting up Your Ledger Nano S PIN
Setting up a PIN for your Ledger Nano S is a crucial step in ensuring the security of your digital assets. Follow these steps to set up a PIN for your device:
- Ensure your Ledger Nano S is connected to your computer and the Ledger Live software is open.
- In the Ledger Live dashboard, click on the “Manager” tab.
- You will see a list of installed apps on your Ledger Nano S. Select the “Settings” app and click on the “Install” button if it is not already installed.
- Once the “Settings” app is installed, click on the “Open” button to launch it.
- In the “Settings” app, scroll down to find the “Security” section.
- Click on the “Change PIN” option.
- Enter your existing PIN if you have set one or create a new PIN following the on-screen instructions. Make sure to choose a PIN that is easy for you to remember but difficult for others to guess.
- After entering your new PIN, confirm it by re-entering it on your Ledger Nano S device.
Once the PIN is set up, your Ledger Nano S will now require it every time you want to access your device or authorize a transaction. This additional layer of security ensures that even if your Ledger Nano S is lost or stolen, your funds remain inaccessible to unauthorized individuals.
Remember to keep your PIN confidential and avoid sharing it with anyone. Also, avoid using easily guessable PIN codes such as birthdays or repetitive numbers. Set a unique and strong PIN to protect your digital assets.
With your PIN set up, you can now proceed with creating a backup of your recovery phrase to ensure you can recover your wallet in case of any unforeseen circumstances.
Backing Up Your Recovery Phrase
Backing up your recovery phrase is a critical step in securing your cryptocurrency funds stored on your Ledger Nano S. The recovery phrase acts as a backup to restore your wallet in case your device is lost, stolen, or damaged. Follow these steps to back up your recovery phrase:
- Ensure your Ledger Nano S is connected to your computer and the Ledger Live software is open.
- In the Ledger Live dashboard, click on the “Manager” tab.
- Select the “Security” app and click on the “Install” button if it is not already installed on your device.
- Once the “Security” app is installed, click on the “Open” button to launch it.
- Scroll down to find the “Recovery Phrase” section in the “Security” app.
- Click on the “Backup” button.
- Your Ledger Nano S will display a series of words, usually 24 in total. Write down these words on the recovery sheet provided by Ledger or on a piece of paper. Make sure to write in the correct order.
- After writing down the words, confirm the restoration phrase by entering words randomly to ensure you have written them correctly. This step helps prevent any errors during the backup process.
Once you have completed these steps, store the recovery sheet or paper containing the words in a safe and secure location. Avoid digital storage methods such as saving it on your computer or in the cloud, as they can be vulnerable to hacking or data loss. Consider using a fireproof and waterproof safe or a safety deposit box as a secure storage option.
It’s important to note that anyone with access to your recovery phrase can gain control over your funds. Therefore, make sure to keep it private and only share it with trusted individuals who can assist in the recovery process if necessary.
By backing up your recovery phrase, you have taken an essential step in securing your cryptocurrency funds on your Ledger Nano S device. Now, in case of any unfortunate events, you can restore your wallet and regain access to your digital assets.
Updating Your Ledger Nano S Firmware
Keeping your Ledger Nano S firmware up to date is crucial for maintaining the security and functionality of your device. Firmware updates often include bug fixes, security enhancements, and new features. Follow these steps to update your Ledger Nano S firmware:
- Ensure your Ledger Nano S is connected to your computer and the Ledger Live software is open.
- In the Ledger Live dashboard, click on the “Manager” tab.
- If a firmware update is available for your Ledger Nano S, you will see a notification next to the device name. Click on the “Update” button.
- Follow the on-screen instructions displayed on the Ledger Live software and your Ledger Nano S device to start the firmware update process.
- During the update, your Ledger Nano S will display messages and progress indicators. Do not disconnect your device or close the Ledger Live software until the update is complete.
- Once the firmware update is finished, your Ledger Nano S will automatically restart.
It is recommended to regularly update your Ledger Nano S firmware to ensure you have the latest security patches and improvements. Firmware updates are essential in safeguarding your digital assets from potential vulnerabilities and attacks.
During the firmware update process, it’s important to note that your cryptocurrencies remain secure as the update only modifies the firmware on your device. However, it is always a good practice to have a backup of your recovery phrase before performing any firmware updates to ensure the safety of your funds.
By keeping your Ledger Nano S firmware up to date, you are taking proactive measures to protect your digital assets and maintain the optimal performance of your device. Stay vigilant and regularly check for firmware updates to ensure you have the latest features and security enhancements.
Installing the App for Your Cryptocurrency
In order to deposit funds to your Ledger Nano S, you need to install the specific app for the cryptocurrency you want to manage. Here are the steps to install the app:
- Ensure your Ledger Nano S is connected to your computer and the Ledger Live software is open.
- In the Ledger Live dashboard, click on the “Manager” tab.
- You will see a list of available cryptocurrencies. Locate and click on the cryptocurrency for which you want to install the app.
- Click on the “Install” button next to the cryptocurrency app.
- Follow the on-screen instructions displayed on the Ledger Live software and your Ledger Nano S device to confirm the installation.
- Once the installation is complete, the app will appear on your Ledger Nano S device’s app list.
Repeat these steps for each cryptocurrency you want to manage on your Ledger Nano S. Installing the specific cryptocurrency app allows you to securely interact with and manage that particular cryptocurrency’s funds.
It’s important to note that the storage capacity of the Ledger Nano S is limited, so you may need to uninstall apps to make space for new ones. However, uninstalling an app does not affect the security or balance of your funds as long as you have your recovery phrase.
By installing the app for your desired cryptocurrency, you can easily and securely deposit, manage, and transact with that specific digital asset. Ledger Live provides a convenient and user-friendly interface to access your cryptocurrencies and monitor their balances.
Keep in mind that Ledger periodically releases updates for the cryptocurrency apps, so it’s recommended to regularly check for app updates in the Ledger Live software to stay up to date with the latest security enhancements and features.
Opening the App on Your Ledger Nano S
After installing the app for your desired cryptocurrency on your Ledger Nano S, the next step is to open the app and access your wallet. Here’s how to do it:
- Ensure your Ledger Nano S is connected to your computer and the Ledger Live software is open.
- In the Ledger Live dashboard, click on the “Accounts” tab.
- Locate the cryptocurrency account you want to access and click on it.
- The Ledger Live software will display a prompt instructing you to unlock your Ledger Nano S device.
- On your Ledger Nano S device, navigate to the app list and find the corresponding cryptocurrency app.
- Select the app by pressing both buttons on your Ledger Nano S simultaneously.
- The app will launch on your Ledger Nano S device, and the Ledger Live software will detect the connection.
- Your wallet balance and transaction history for the selected cryptocurrency will be displayed on the Ledger Live software.
Opening the app on your Ledger Nano S allows you to securely access your wallet and perform various functions such as sending, receiving, and managing your cryptocurrency funds. The Ledger Nano S acts as a hardware wallet, ensuring the highest level of security for your digital assets.
Remember to always verify the address on your Ledger Nano S device’s screen before confirming any transactions. This helps protect against phishing attempts and ensures the accuracy of the destination address.
By opening the app on your Ledger Nano S, you can easily manage your cryptocurrency holdings and securely control your assets. Ledger Live’s integration with Ledger Nano S provides a convenient and secure platform for interacting with your digital assets.
Choosing the Right Account on Ledger Live
When using Ledger Live to manage your Ledger Nano S, it’s important to choose the right account to ensure you are working with the correct cryptocurrency. Ledger Live allows you to have multiple accounts for different cryptocurrencies, and here’s how you can choose the right account:
- Ensure your Ledger Nano S is connected to your computer and the Ledger Live software is open.
- In the Ledger Live dashboard, click on the “Accounts” tab.
- You will see a list of your cryptocurrency accounts that are linked to your Ledger Nano S. Each account represents a different cryptocurrency.
- Scroll through the list of accounts and locate the one corresponding to the cryptocurrency you want to work with.
- Click on the account to select it. The Ledger Live software will display the balance and transaction history of the selected account.
By choosing the right account on Ledger Live, you ensure that you are working with the correct cryptocurrency and have access to the specific wallet for that digital asset. This is particularly important if you have multiple cryptocurrencies and want to manage them separately.
It’s worth noting that Ledger Live supports a wide range of cryptocurrencies, including popular ones like Bitcoin, Ethereum, and Litecoin. If you don’t see the desired cryptocurrency account in the list, make sure you have installed the app for that specific cryptocurrency on your Ledger Nano S.
Having multiple accounts on Ledger Live allows you to easily switch between cryptocurrencies and manage your digital assets more efficiently. Each account will display its respective balance, transaction history, and other relevant information.
By selecting the right account on Ledger Live, you can confidently perform transactions, check balances, and monitor the activity of the specific cryptocurrency you are working with, all while maintaining the highest level of security provided by your Ledger Nano S device.
Initiating the Deposit on the Exchange or Wallet
After setting up your Ledger Nano S and installing the necessary cryptocurrency app, the next step is to initiate the deposit from the exchange or wallet where you hold the funds. Here’s how you can initiate the deposit:
- Ensure your Ledger Nano S is connected to your computer and the Ledger Live software is open.
- Log in to the exchange or wallet where your funds are currently stored.
- Navigate to the “Deposit” or “Send” section of the platform. The exact location and terminology may vary depending on the specific exchange or wallet.
- Select the cryptocurrency you want to deposit. Make sure to choose the corresponding cryptocurrency that matches the app you installed on your Ledger Nano S.
- The platform will generate a deposit address for the selected cryptocurrency. Copy the address to your clipboard or scan the provided QR code.
- Return to the Ledger Live software and locate the selected cryptocurrency account under the “Accounts” tab.
- Click on the “Receive” button next to the account. The Ledger Live software will display your Ledger Nano S device’s address for receiving funds.
- Paste the previously copied deposit address from the platform into the recipient address section of the Ledger Live software.
- Specify the amount you want to deposit, ensuring it meets any minimum deposit requirements. Double-check the amount to avoid any errors.
- Review the deposit details to ensure the correct information has been entered.
- Click on the “Send” or “Initiate Deposit” button on the platform to initiate the deposit.
After initiating the deposit, you will need to wait for the transaction to be confirmed on the blockchain. The time required for confirmation may vary based on the cryptocurrency and network congestion. You can monitor the progress of the transaction using the blockchain explorer or the Ledger Live software.
By following these steps, you can safely initiate a deposit from an exchange or wallet to your Ledger Nano S. The Ledger Nano S ensures the security of your funds, and Ledger Live provides a convenient interface to monitor your transaction history and balances.
Confirming the Deposit on Your Ledger Nano S
Once you have initiated a deposit from an exchange or wallet to your Ledger Nano S, the next step is to confirm the transaction on your Ledger Nano S device itself. Here’s how to confirm the deposit:
- Ensure your Ledger Nano S is connected to your computer and unlocked with your PIN.
- Open the app for the specific cryptocurrency on your Ledger Nano S. Navigate to the app using the device’s buttons.
- In the Ledger Live software, locate the selected cryptocurrency account under the “Accounts” tab.
- Verify that the transaction details shown on the Ledger Live software match the transaction details of the deposit you initiated.
- On your Ledger Nano S, carefully review the transaction details displayed on the device’s screen. This includes the recipient address, the amount, and any additional transaction information.
- If the details are correct, press the right button on your Ledger Nano S to confirm the transaction. Alternatively, if there is an issue, press the left button to cancel the transaction.
- Wait for the Ledger Nano S to confirm the transaction. It may display a verification message, such as “Confirm transaction” or “Transaction sent.”
- Once the transaction is successfully confirmed on your Ledger Nano S, the Ledger Live software will update to reflect the new balance in your cryptocurrency account.
By confirming the deposit on your Ledger Nano S, you ensure that the transaction is authorized and executed securely within the device. The Ledger Nano S acts as a hardware wallet, providing an additional layer of protection for your funds.
Double-checking the transaction details on both the Ledger Live software and your Ledger Nano S device helps prevent any errors or fraudulent activity. It’s crucial to verify the recipient address and amount before confirming the transaction.
In case you encounter any discrepancies or issues during the confirmation process, it’s recommended to seek assistance from the official Ledger support channels or the platform from which you initiated the deposit.
With the confirmation complete, the deposited funds are now securely stored in your Ledger Nano S wallet. You can now view and manage your cryptocurrency balance with confidence, knowing that your funds are protected by the Ledger Nano S’s advanced security features.
Verifying the Transaction on Ledger Live
After confirming a transaction on your Ledger Nano S, the final step is to verify the transaction on the Ledger Live software. Here’s how to verify the transaction:
- Ensure your Ledger Nano S is still connected to your computer and unlocked with your PIN.
- In the Ledger Live software, navigate to the “Accounts” tab and locate the relevant cryptocurrency account.
- Check the transaction history within the account to find the transaction you just confirmed.
- Verify that the transaction details displayed in the Ledger Live software match the details of the deposit you initiated.
- Double-check the recipient address, transaction amount, and any additional information related to the transaction.
- Ensure that the status of the transaction is shown as “Confirmed” or a similar indication that the transaction is completed on the blockchain.
- If all the details are correct and the transaction is confirmed, you can be assured that the funds have been successfully transferred to your Ledger Nano S wallet.
Verifying the transaction on Ledger Live provides an additional layer of confirmation and validation that the transaction has been processed and recorded on the blockchain. It allows you to ensure the accuracy and integrity of the transaction history within the Ledger Live software.
If you notice any discrepancies or issues with the details of the transaction, such as an incorrect recipient address or an unexpected transaction amount, it’s important to reach out to the appropriate support channels for assistance. This may include contacting the platform or exchange from which you initiated the deposit or consulting the official Ledger support resources.
By verifying the transaction on Ledger Live, you can have peace of mind knowing that your Ledger Nano S is securely managing your cryptocurrency transactions and that the transaction history within the Ledger Live software accurately reflects the movement of your digital assets.
Checking the Balance on Your Ledger Nano S
After completing a deposit transaction on your Ledger Nano S, you can easily check the balance of your cryptocurrency holdings on the device itself. Here’s how to check your balance:
- Ensure your Ledger Nano S is connected to your computer and unlocked with your PIN.
- Open the app for the specific cryptocurrency on your Ledger Nano S. Navigate to the app using the device’s buttons.
- In the Ledger Live software, navigate to the “Accounts” tab and locate the corresponding cryptocurrency account.
- Verify that both the Ledger Nano S and Ledger Live display the same cryptocurrency account.
- On your Ledger Nano S screen, you will see the cryptocurrency’s balance, which represents the total amount of that specific cryptocurrency held in the corresponding wallet.
- In the Ledger Live software, the balance of the selected cryptocurrency account will also be displayed, matching the balance shown on your Ledger Nano S.
By checking the balance on your Ledger Nano S, you can keep track of your cryptocurrency holdings and monitor any changes in the balances of your individual accounts. This allows you to stay informed about the value of your digital assets and make informed decisions about managing them.
It’s important to note that the balance displayed on your Ledger Nano S represents the current state of your cryptocurrency holdings. Any recent deposits or transactions may not be immediately reflected in the balance due to network confirmation times.
If you encounter any discrepancies in the balance or have any concerns regarding the displayed balance, it is advisable to consult the Ledger Live software, the Ledger Live support resources, or reach out to the appropriate support channels for assistance.
With the ability to check the balance on your Ledger Nano S, you have a convenient and secure method to monitor the value of your cryptocurrency holdings and ensure the accuracy and integrity of your digital assets.