
Setting Up Quick Replies
Apple Watch allows you to set up quick replies, which are pre-written responses that you can easily send in a variety of messaging situations. These quick replies help you save time and quickly respond to your contacts. Here’s how you can set them up:
- Open the “Watch” app on your iPhone.
- Navigate to the “My Watch” tab.
- Scroll down and tap on “Messages”.
- Select “Default Replies”.
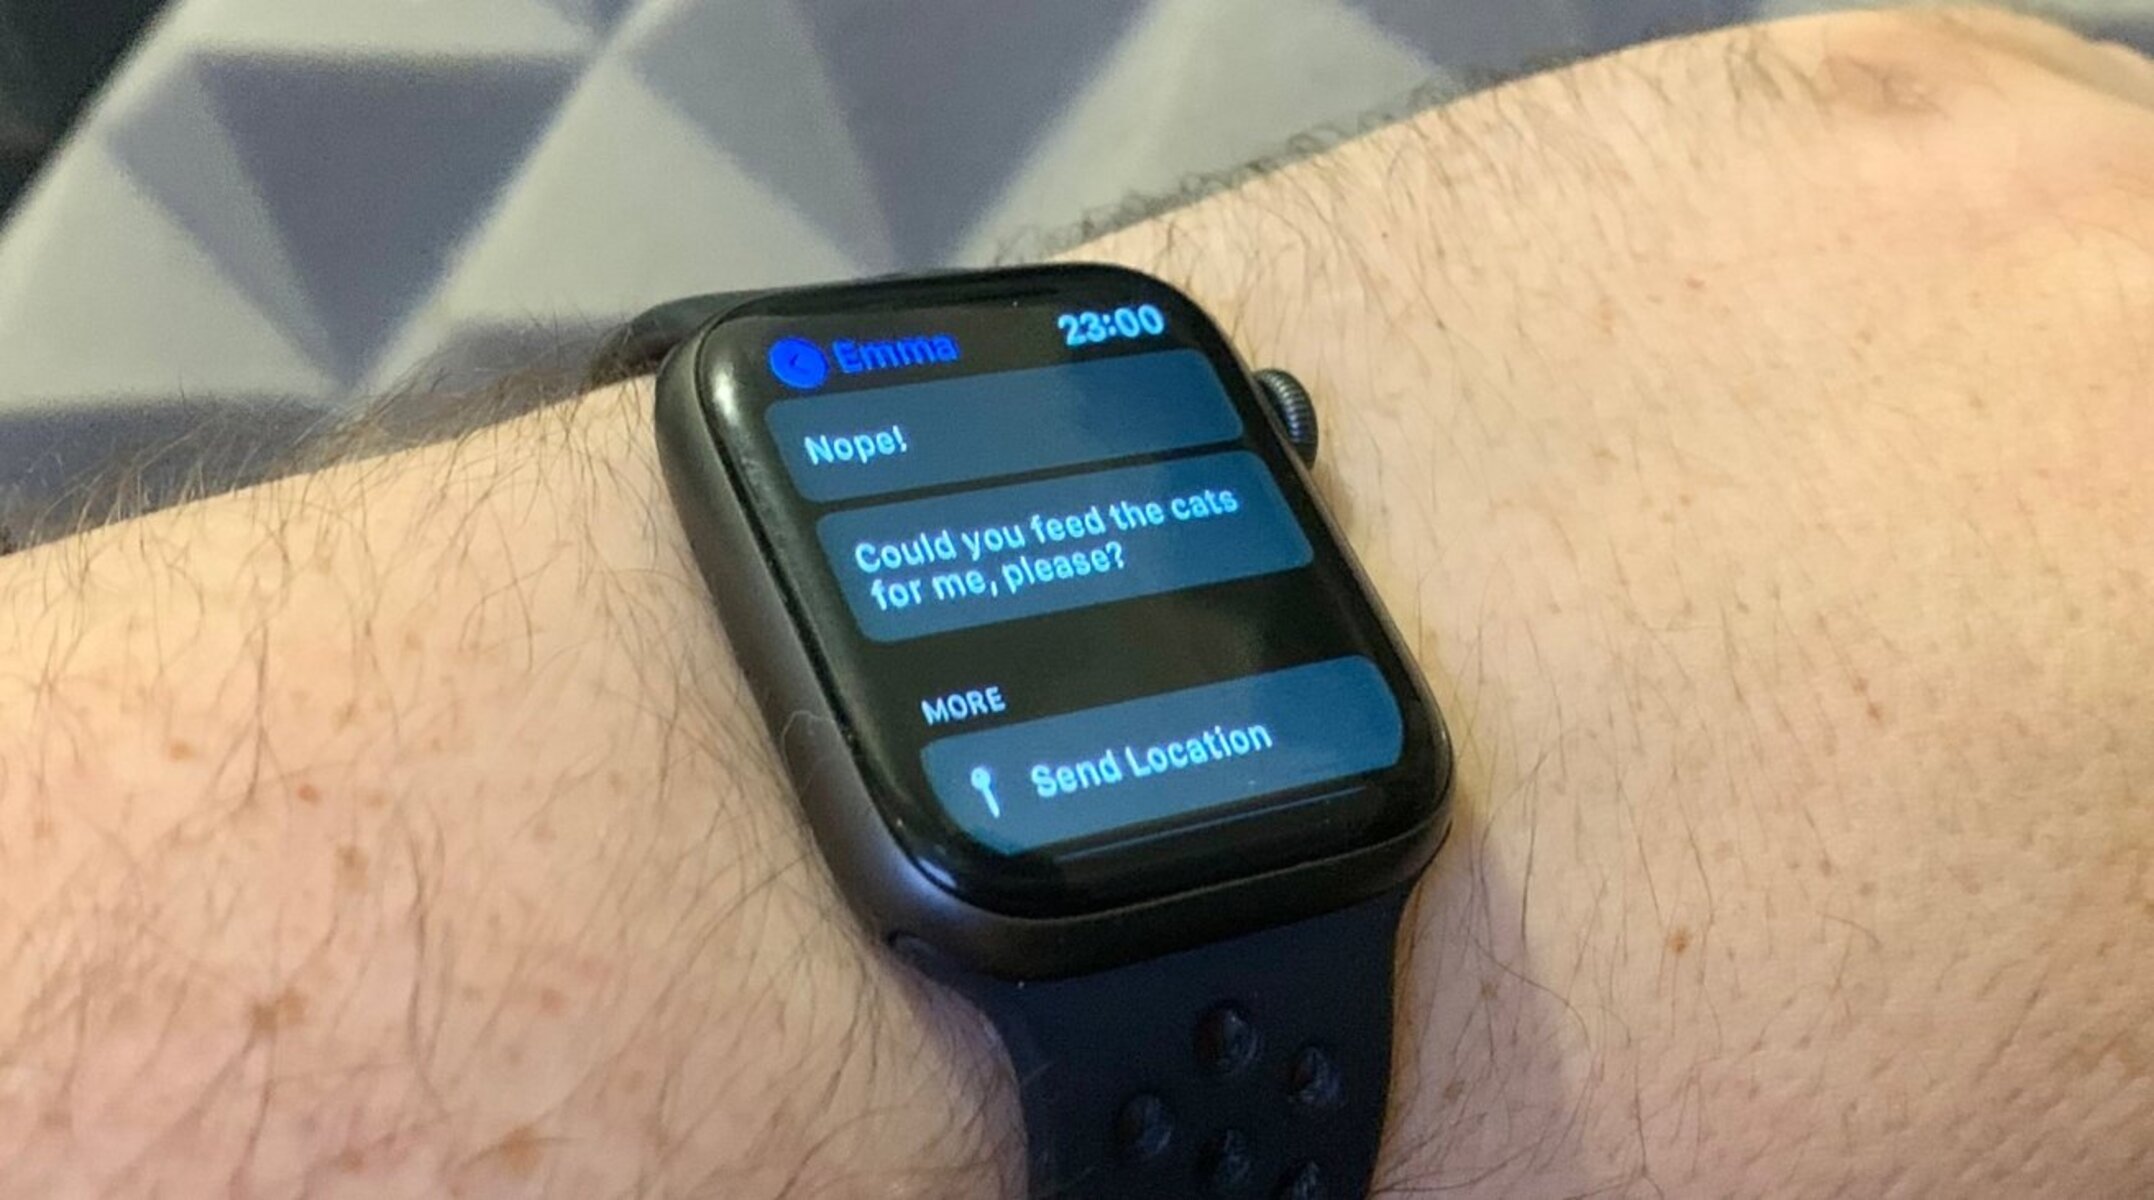
- You will see a list of pre-set messages. You can tap on any of them to use it as a quick reply.
- If you want to add your own custom quick reply, tap on “Add Reply”.
- Type in the text for your custom quick reply using the keyboard on your iPhone.
- Tap “Save” to save your custom quick reply.
With quick replies set up, you can now easily respond to messages without typing out a full reply each time. These pre-set messages are especially useful for common responses like “Yes,” “No,” or “I’m busy right now.”
Once your quick replies are set up, you can access them directly from your Apple Watch when you receive a message. Simply tap on the quick reply option, and your chosen response will be instantly sent. It’s a convenient way to engage in quick conversations without needing to take out your iPhone.
Note that setting up quick replies on your Apple Watch is tied to your iPhone’s default messaging app. So, any changes you make to your quick replies will reflect on your Apple Watch as well.
Creating Custom Messages
While the default quick replies provided by Apple Watch are convenient, you may find the need to create your own custom messages for a more personalized touch. Custom messages can help you express yourself in a unique way or provide specific responses tailored to your contacts. To create custom messages on your Apple Watch, follow these steps:
- Open the “Watch” app on your iPhone.
- Go to the “My Watch” tab.
- Scroll down and tap on “Messages”.
- Select “Default Replies”.
- Tap on “Add Reply”.
- Using the virtual keyboard, enter the text for your custom message.
- Tap “Save” to store your custom message.
With custom messages set up, you now have even more flexibility in responding to messages with a personal touch. Whether it’s a heartfelt message, a witty response, or a specific reply for certain contacts, you can easily select and send the custom message directly from your Apple Watch.
Custom messages can be a great way to show your personality and make your conversations more engaging. You can create messages that reflect your sense of humor, interests, or even inside jokes with your contacts. Remember to keep them concise and to the point, as you want them to be quick and easy to use.
Furthermore, custom messages can also be helpful in professional settings. You can create professional-sounding responses that are appropriate for work-related messages or inquiries.
By taking the time to create custom messages, you can ensure that your responses on Apple Watch feel more personal and tailored to the situation or contact at hand.
Managing Default Replies
Apple Watch provides a list of default replies that you can use as quick responses to messages. These default replies offer convenient options for common replies like “Yes,” “No,” or “I’m on my way.” However, you also have the option to manage and customize these default replies to better fit your needs. Here’s how you can manage default replies on your Apple Watch:
- Open the “Watch” app on your iPhone.
- Navigate to the “My Watch” tab.
- Scroll down and tap on “Messages”.
- Select “Default Replies”.
- Here, you will see a list of default replies that are currently available.
- To remove a default reply, simply swipe left on it and tap “Delete”.
- If you want to add a new default reply, tap on “Add Reply”.
- Type in the text for the new default reply using your iPhone’s keyboard.
- Tap “Save” to finalize the new default reply.
- If you want to reorder the default replies, tap on “Edit” in the top-right corner.
- Drag and drop the replies in the desired order.
- Tap “Done” when you’re finished rearranging the default replies.
By managing the default replies, you can tailor them to align with your most frequently used responses or remove ones that you don’t find useful. This allows for a more personalized and efficient messaging experience on your Apple Watch.
Remember that any changes made to the default replies on your iPhone will be synced to your Apple Watch, ensuring consistency between the two devices.
Take advantage of this feature to optimize your messaging workflow and ensure that your quick reply options align with your communication style and preferences.
Using Dictation to Send Messages
With Apple Watch, you have the convenient option to use dictation to send messages quickly and easily, without the need for typing. Dictation allows you to speak your message, and the Apple Watch will convert your speech into text. Here’s how you can use dictation to send messages on your Apple Watch:
- When you receive a message notification on your Apple Watch, raise your wrist to wake the watch and view the message.
- Tap on the reply button, which looks like a speech bubble.
- Speak your message aloud clearly and distinctly.
- After you finish speaking, the Apple Watch will convert your speech into text.
- Review the transcribed message on the screen.
- If the transcription is accurate, tap on “Send” to send the message.
- If there are any errors, you can tap on the text to make edits manually.
- Once the message is corrected, tap on “Send” to send it.
Dictation on Apple Watch is a fantastic feature that allows you to effortlessly compose and send messages with just your voice. This can be especially beneficial when you’re on the go or in situations where typing may not be convenient.
It’s important to speak clearly and at a moderate pace to ensure accurate transcription. While the dictation feature is generally reliable, it’s a good idea to proofread the transcribed message before sending it to avoid any misunderstandings.
With dictation, you can respond to messages quickly and efficiently, allowing for a seamless and hands-free messaging experience on your Apple Watch.
Enabling and Disabling Replies on Apple Watch
Apple Watch allows you to enable or disable the option to reply to messages directly on your watch. This gives you control over how you interact with incoming messages and whether you want to respond from your watch or use your iPhone instead. Here’s how you can enable or disable replies on your Apple Watch:
- Open the “Watch” app on your iPhone.
- Go to the “My Watch” tab.
- Scroll down and tap on “Messages”.
- Select “Customize” under the heading “Message Replies”.
- Toggle the switch next to “Always Show” to enable or disable reply options on your Apple Watch.
When the “Always Show” option is enabled, you will see the reply button along with the received message on your Apple Watch. This allows you to quickly respond to messages directly from your watch without needing to take out your iPhone. This is especially useful in situations where you want to send a quick reply on the go.
When the “Always Show” option is disabled, you will still receive message notifications on your Apple Watch, but you won’t have the option to reply directly from the watch. Instead, you can view the message and reply using your iPhone.
By enabling or disabling replies on your Apple Watch, you can tailor your messaging experience to your preferences and needs. Whether you prefer to respond from your watch or utilize your iPhone for more comprehensive replies, the option is yours to customize.
Keep in mind that if you disable replies on your Apple Watch, you can still view messages and perform other functions like reading notifications or using apps on your watch.
Take advantage of this flexibility to optimize your messaging workflow and choose the most convenient method of responding to messages on your Apple Watch.
Setting Up Replies on iPhone
In addition to setting up quick replies and custom messages directly on your Apple Watch, you can also manage and set up replies for messages on your iPhone. This allows you to have more control over your messaging options and ensures consistency between your devices. Here’s how you can set up replies on your iPhone:
- Open the “Settings” app on your iPhone.
- Scroll down and tap on “Messages”.
- Under the “Messages” settings, tap on “Send & Receive”.
- You will see a list of phone numbers and email addresses associated with your Apple ID.
- Tap on your Apple Watch in the list of devices.
- Here, you can customize the list of addresses that receive messages on your Apple Watch.
- Tap on “Add Another Email” or “Add Another Phone Number” to include additional addresses or phone numbers.
- Select the desired option and follow the prompts to add the address or phone number.
- Once added, you can toggle the switches next to the addresses to enable or disable message forwarding to your Apple Watch.
- You can also rearrange the order of the addresses by tapping and dragging the handles on the right side.
- Tap “Back” to save your changes.
By setting up replies on your iPhone, you can ensure that messages sent to your various email addresses and phone numbers are also synced and received on your Apple Watch. This allows you to respond to messages on either device while maintaining a seamless messaging experience.
Additionally, customizing the list of addresses that receive messages on your Apple Watch gives you control over what messages you can access and reply to directly from your watch.
Make sure to keep your messaging preferences up-to-date on your iPhone, as any changes you make will be reflected on your Apple Watch. This allows for a consistent messaging experience across both devices.
Take advantage of the flexibility and customization options available to you to streamline your messaging workflow and ensure you never miss an important message, whether you’re using your iPhone or Apple Watch.
Personalizing Replies on Apple Watch
Personalizing your message replies on Apple Watch can add a unique touch to your conversations and make them feel more personal and engaging. With a few simple steps, you can customize and personalize the way you respond to messages on your Apple Watch. Here’s how you can personalize your replies:
- Open the “Watch” app on your iPhone.
- Go to the “My Watch” tab.
- Scroll down and tap on “Messages”.
- Select “Default Replies”.
- Tap on any default reply that you want to personalize.
- Using the virtual keyboard, edit the text to your desired message.
- Tap “Save” to save your personalized reply.
By personalizing your replies, you can make them more reflective of your style, personality, and preferences. Instead of using generic pre-set messages, you can customize them to suit your voice and communication style.
Personalized replies can also be a way to enhance your relationships with your contacts. For example, you can create specific replies for friends, family members, or colleagues that resonate with your unique connection or inside jokes.
Remember to keep your personalized replies concise and to the point. Apple Watch is designed for quick and efficient communication, and shorter, personalized replies can help you maintain that seamless experience.
With the ability to customize your default replies on Apple Watch, you can add your personal touch to every message and create a more meaningful and enjoyable conversation experience.
Explore different ways to personalize your replies and have fun experimenting with different phrases, expressions, and tones to truly make your messages on Apple Watch your own.
Adding Emojis to Message Responses
Emojis can add a fun and expressive element to your message responses on Apple Watch. They can help convey emotions, enhance humor, or simply add a touch of personality to your conversations. Fortunately, adding emojis to your message responses on Apple Watch is easy. Here’s how you can do it:
- When composing a message response on your Apple Watch, tap on the emoji button located near the bottom left corner of the screen. This will open up the emoji keyboard.
- Swipe left or right on the emoji keyboard to browse different categories of emojis.
- When you find the desired emoji, tap on it to insert it into your message response.
- Continue typing your message or add more emojis as desired.
- Once you’re satisfied with your response, tap on “Send” to send the message with the emojis.
Adding emojis to your message responses can help you convey tone, mood, and intent more effectively. They can also make your messages more visually appealing and engaging.
Emojis can be especially useful in situations where you want to add a lighthearted or playful touch to your conversations. They can also help you save time and space in your message responses, as a single emoji can often express a sentiment that would require multiple words.
However, it’s important to use emojis in moderation and consider the context and recipient of your messages. Not all situations or conversations may warrant the use of emojis, so it’s essential to gauge the appropriateness of using emojis based on the nature of your relationship and the content of the conversation.
Experiment with different emojis to find ones that best represent your intended meaning or mood. Remember that emojis add personality, but clear and concise communication is still key.
By adding emojis to your message responses on Apple Watch, you can infuse a touch of creativity and playfulness into your conversations, making them more enjoyable and memorable for both you and your contacts.
Editing and Deleting Custom Messages
Having the ability to edit and delete custom messages on Apple Watch allows you to refine and manage your pre-set responses to fit your evolving needs. Whether you want to make changes to the wording or remove outdated messages, here’s how you can edit and delete custom messages:
- Open the “Watch” app on your iPhone.
- Navigate to the “My Watch” tab.
- Scroll down and tap on “Messages”.
- Select “Default Replies”.
- Locate the custom message that you want to edit or delete.
- To edit the message, tap on it, make the desired changes using the virtual keyboard, and tap “Save” to save the updated message.
- To delete the message, swipe left on it and tap “Delete”. Confirm the deletion if prompted.
Editing custom messages is a great way to refine your pre-set responses to better align with your communication style. You can update the wording, add or remove certain phrases, or even change the tone of your messages as necessary.
Deleting custom messages is useful when you no longer find a particular response relevant or if you want to create space for new custom messages.
Regularly reviewing and editing your custom messages ensures that your Apple Watch is equipped with the most up-to-date and useful response options.
Remember that any changes you make to your custom messages on your iPhone will be automatically synced to your Apple Watch, providing a seamless and consistent messaging experience across both devices.
Take advantage of these editing and deleting capabilities to keep your custom messages fresh, relevant, and tailored to your evolving messaging needs on Apple Watch.
Disabling Auto Replies While Driving
Apple Watch offers a feature called “Do Not Disturb While Driving” that can help minimize distractions and promote safe driving practices. When this feature is enabled, it can automatically silence notifications and prevent you from being interrupted by messages while behind the wheel. However, you may still want to disable the auto-reply feature to ensure that messages are not automatically sent while driving. Here’s how you can disable auto replies on Apple Watch while driving:
- On your iPhone, open the “Settings” app.
- Scroll down and tap on “Do Not Disturb”.
- Under the “Do Not Disturb While Driving” section, tap on “Activate”.
- Select the “Manually” option.
By choosing the “Manually” option for Do Not Disturb While Driving, you retain control over when to enable or disable the feature. This means that auto-reply to messages will not be triggered automatically while you’re driving.
When you’re ready to disable the auto-reply feature while driving, follow these steps:
- On your Apple Watch, swipe up on the watch face to access the Control Center.
- Tap on the car icon, which represents the “Do Not Disturb While Driving” mode.
- Choose the “I’m not driving” option to disable the auto-reply feature.
Once you’ve disabled the auto-reply feature, you can manually respond to messages when it’s safe and convenient for you to do so. This allows you to have more control over your messaging activity while ensuring you’re not being distracted by unnecessary notifications while driving.
Remember, it’s important to prioritize safety on the road and avoid using your Apple Watch or any mobile device excessively while driving. Always abide by local traffic laws and guidelines to ensure your safety and the safety of others.
By disabling auto replies on Apple Watch while driving, you can proactively promote responsible and focused driving habits while still having the flexibility to respond to messages when it’s appropriate to do so.