
Understanding Automation in Ableton
Automation is a vital component in music production, allowing you to control various parameters and add movement and dynamics to your tracks. Ableton Live, a popular digital audio workstation (DAW), provides a powerful automation system that enables you to automate virtually any parameter within your project.
Automation in Ableton refers to the process of recording and manipulating changes in parameters over time. These parameters can include volume, panning, effects, filters, and more. By automating these parameters, you can create dynamic variations, build tension, and bring life to your music.
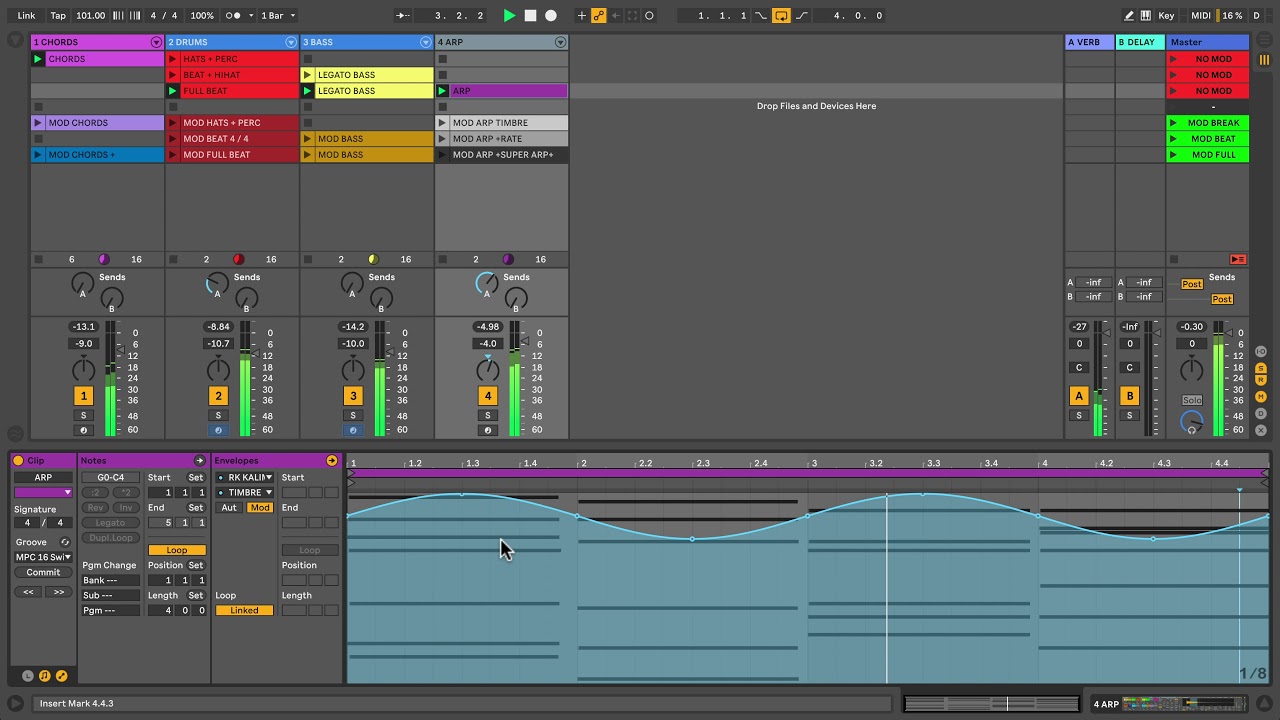
Understanding automation in Ableton starts with grasping the concept of automation lanes. Each track in Ableton has its own automation lane, where you can draw and edit automation curves. These curves represent the changes in the parameter’s value over time.
To access the automation lanes, simply click on the track’s name in the arrangement view or the mixer view. This will display the available parameters that can be automated. You can then draw, edit, and delete automation points to shape the parameter’s behavior.
A key aspect of understanding automation in Ableton is the difference between session view automation and arrangement view automation. In the session view, automation is recorded in real-time while performing, giving you the flexibility to experiment and improvise with different sound variations. In the arrangement view, automation is meticulously programmed and edited, allowing you to craft and fine-tune every detail of your track.
Another essential concept in automation is the timebase. Ableton provides three different timebase options: absolute, which relates to the global timeline; relative, which is relative to the clip’s position; and off, which freezes the automation values. Understanding and choosing the appropriate timebase for your automation is crucial to achieving the desired results.
Automation in Ableton allows you to create smooth and gradual changes or sharp and abrupt jumps in parameter values. By combining different automation techniques, you can build tension, create compelling transitions, and add an extra layer of musicality to your compositions.
In the next sections, we will explore the different types of automation available in Ableton and discuss various techniques to shape and enhance your automation. Whether you are a beginner or an experienced producer, mastering automation in Ableton is crucial for taking your music to the next level.
Different Types of Automation
Automation in Ableton offers a wide range of possibilities for controlling and shaping various parameters. Understanding the different types of automation available will help you unleash your creativity and add depth to your music.
1. Volume Automation: Controlling the volume of individual tracks or specific sections of your arrangement is an essential technique in music production. Automating volume allows you to create fade-ins, fade-outs, or emphasize certain parts for an impactful effect.
2. Panning Automation: Adjusting the stereo position of audio signals can add movement and width to your mix. By automating panning, you can create interesting spatial effects, such as a sound moving from left to right or vice versa, immersing the listener in a dynamic sonic experience.
3. Effect Automation: Ableton provides a vast array of effects, such as reverb, delay, filters, and more. By automating these effects, you can shape the sound in real-time, adding texture, depth, and evolving sonic landscapes to your tracks.
4. Device Automation: Ableton’s devices, including synthesizers, samplers, and drum machines, offer numerous parameters that can be automated. Modifying parameters like filter cutoff, oscillator detuning, or envelope settings can bring new life and expression to your sounds.
5. Clip Automation: Ableton’s clip envelope feature allows you to automate parameters within individual MIDI or audio clips. This gives you the option to have different automation settings for multiple sections of the same track, adding variation and complexity without affecting the entire arrangement.
6. Track Automation: In addition to clip automation, Ableton allows you to automate parameters on a track level. This means that any changes in volume, panning, or other parameters will affect all clips within that track, offering a global control over your track’s elements.
7. Macro Knob Automation: Macros in Ableton are customizable parameters that can control multiple parameters simultaneously. Automating macro knobs allows you to create complex and evolving sound transformations with just a single automation curve.
Understanding the different types of automation in Ableton opens up a world of possibilities for designing and sculpting your audio. Experiment with different automation techniques, combine them creatively, and watch your tracks come to life with movement, excitement, and a sense of progression.
In the following sections, we will dive deeper into specific automation techniques and explore how to effectively shape and manipulate automation in Ableton.
Basic Automation Techniques
Automation is a powerful tool for adding movement and dynamics to your tracks in Ableton. Understanding some basic automation techniques will help you get started with adding that extra touch of creativity to your music.
1. Draw and Edit Automation Curves: The most straightforward way to automate a parameter in Ableton is by drawing and editing automation curves. Simply select the parameter you want to automate, activate automation mode, and use the pencil tool to draw your desired automation curve. You can then edit the curve by adding or deleting points and adjusting their values.
2. Copy and Paste Automation: To save time and maintain consistency in your automation, you can easily copy and paste automation curves across different time ranges or tracks. Select the automation you want to copy, right-click, and choose “Copy.” Then, navigate to the desired location, right-click, and choose “Paste.” This technique is particularly useful for repeating patterns or maintaining consistent effects throughout a track.
3. Relative Automation: Ableton provides the option to switch automation between absolute and relative modes. Absolute mode sets the parameter value at a specific point in time, while relative mode adds or subtracts value from the initial parameter position. Relative automation is useful for creating incremental changes, such as gradually increasing the filter cutoff or adding subtle variations to a synth’s modulation depth.
4. Recording Automation in Real-Time: In addition to manually drawing automation curves, you can also record automation in real-time while your track is playing. Activate the automation recording mode, tweak the parameter you want to automate, and Ableton will record your changes as an automation curve. This technique allows for expressive and dynamic control over your music, enabling you to capture the nuances of your performance.
5. Automation Quantization: For precise and consistent automation, Ableton offers automation quantization options. By enabling automation quantization, any recorded or drawn automation will snap to the grid, ensuring smooth and accurate transitions between automation points. You can set the quantization value to match your project’s tempo and grid settings, enhancing the overall cohesiveness of your automation.
6. Automation Smoothing: To achieve smoother transitions between automation points, Ableton provides an automation smoothing feature. Smoothing allows you to reduce sharp changes in automation curves, resulting in more natural and gradual parameter shifts. Adjust the smoothing value to find the right balance between maintaining control and creating seamless automation transitions.
By grasping these basic automation techniques in Ableton, you will have the foundation to start experimenting with dynamic and expressive automation in your tracks. Take the time to practice and explore different automation possibilities, as it is a skill that can greatly enhance your music production process.
Using Envelopes to Shape Automation
In Ableton, envelopes are a powerful tool for shaping and manipulating automation. Envelopes allow you to apply dynamic changes to parameters over time, giving you fine control over the evolution of your sound.
1. Volume Envelope: The volume envelope is perhaps the most commonly used envelope in music production. It allows you to shape the amplitude of a sound to create fades, swells, and other dynamic effects. By adjusting the attack, decay, sustain, and release parameters, you can control how the volume changes over time, giving your sounds a natural and expressive quality.
2. Filter Envelope: The filter envelope is a staple in shaping the frequency spectrum of a sound. By modulating the filter cutoff with an envelope, you can create movement, emphasis, and timbral variations. Increase the attack time for a gradual opening of the filter, or decrease it for a quick and punchy effect. Experimenting with the envelope’s parameters will help you achieve the desired filter sweeps and dynamic filtering effects.
3. Pitch Envelope: The pitch envelope is an effective tool for adding a pitch bend or a transient effect to your sounds. By applying a pitch envelope, you can create rising or falling pitch sweeps, emulate natural instrument articulations, or bring a synthetic sound to life with a touch of modulation. Adjusting the envelope’s time and depth parameters will allow you to control the speed and intensity of the pitch modulation.
4. Modulation Envelopes: Ableton provides various modulation devices, such as LFOs (Low-Frequency Oscillators), that can be used as envelopes. These modulation envelopes can be assigned to any parameter, allowing you to create rhythmic and evolving modulation effects. By adjusting the envelope’s rate, depth, and waveform, you can generate complex and dynamic sonic movements.
5. Velocity Envelope: In addition to traditional envelopes, Ableton offers a velocity envelope feature. This envelope allows you to modulate parameters based on the velocity of incoming MIDI notes. For example, you can increase the filter cutoff when playing a note softly or add more reverb when hitting the keys harder. The velocity envelope provides an expressive and responsive way to shape your sounds based on your playing dynamics.
Using envelopes to shape automation in Ableton gives you precise control over the movement and evolution of your sound. Experiment with different envelopes and their parameters to create expressive and dynamic changes in your music. The combination of envelopes with other automation techniques will take your tracks to new heights of creativity and musicality.
Adding Complexity with Modulation
In Ableton, modulation is a powerful technique that allows you to introduce complexity and movement to your sounds. Modulation involves using one parameter to control another, resulting in evolving and dynamic textures.
1. LFO Modulation: One of the most common forms of modulation is using Low-Frequency Oscillators (LFOs). LFOs generate cyclical waveforms at a frequency below the audible range. By assigning an LFO to a parameter, such as filter cutoff or oscillator pitch, you can create rhythmic and cyclic movements. Adjusting the LFO rate, depth, and waveform shape will determine the speed and intensity of the modulation effect.
2. Envelope Modulation: Envelopes can also be used to modulate parameters. By mapping an envelope to a parameter, you can create time-based changes. For example, you can use an envelope to modulate the volume of a sound, resulting in a fade-in or fade-out effect. Envelope modulation brings a sense of dynamics and movement to your sounds, adding depth and expression to your music.
3. Sidechain Compression: Sidechain compression is a popular modulation technique used in many electronic music genres. It involves using the amplitude of one sound source to control the compression of another sound. By sidechaining a kick drum to a bassline, for example, the bassline will momentarily decrease in volume every time the kick drum hits, creating a rhythmic pumping effect. Sidechain compression is a powerful way to create space and separation in your mix.
4. Random Modulation: Random modulation introduces an element of unpredictability and organic variation. By incorporating randomness into your modulation, you can add subtle nuances and evolving textures to your sound. Ableton’s devices and Max for Live offer various tools and plugins that generate random values to modulate parameters, allowing for unique and ever-changing sound exploration.
5. Macro Modulation: Macro knobs in Ableton can be assigned to multiple parameters simultaneously. By modulating a macro knob, you can simultaneously affect multiple aspects of your sound, creating complex and evolving transformations. Map an LFO or envelope to a macro knob, and fine-tune the modulation amount to achieve intricate and intricate sound modulation.
Adding complexity with modulation in Ableton opens up endless creative possibilities. Experiment with different modulation techniques, combine them creatively, and take your sounds on a journey of transformation and exploration. Modulation adds depth, movement, and a sense of life to your music, enhancing the overall sonic experience for your listeners.
Creative Ways to Use Automation
Automation in Ableton is not just a tool for controlling parameters – it’s also a powerful creative tool that can transform your music and elevate your productions to new heights. Here are some creative ways you can use automation in Ableton to add depth, interest, and excitement to your tracks.
1. Buildups and Drops: Automation is perfect for creating tension and impact in your tracks. Use volume automation to gradually increase the volume of your instruments, effects, or the overall track to build anticipation before a drop. Conversely, use a sudden volume drop or filter sweep to create a dramatic drop that captivates listeners.
2. Morphing Sounds: Adding automation to parameters like filter cutoff, resonance, or modulation depth can transform your sounds and create unique and evolving timbres. Layer different instances of the same sound or different sounds with automated parameters to create dynamic and compelling textures that constantly shift and morph.
3. Movement and Panorama: Use automation to create movement in your mix by automating the panning of individual tracks or elements within a track. This technique can simulate the sensation of sounds moving from left to right or vice versa, or even create circular movements for a surround sound experience. Adding movement through panning automation adds a sense of depth and immersion to your mix.
4. Parameter Modulation: Instead of using traditional modulation sources like LFOs or envelopes, experiment with using automation as a modulation source. For example, automate the rate or depth of an LFO or the amount of an effect parameter to create dynamic and evolving modulation effects that change over time, giving your sounds a unique and constantly shifting character.
5. Rhythmic Glitches and Stutters: Automate parameters like volume, pitch, or effect parameters in a rhythmic pattern to create glitchy and stuttering effects. Use short and precise automation curves to create intricate rhythmic patterns that add complexity and interest to your music.
6. Dynamic Mix Adjustments: Automation is not limited to controlling individual track parameters. Use automation to make dynamic mix adjustments, such as automating the levels of different tracks or elements in specific sections of your arrangement. This technique can create interesting contrasts and emphasize certain elements at key moments in your song.
Let your imagination run wild with automation in Ableton. Play around with different ideas, experiment with unconventional approaches, and don’t be afraid to take risks. Automation is a powerful tool that can breathe life and creativity into your music, allowing you to create unique and captivating sonic experiences for your listeners.
Tips and Tricks for Advanced Automation
Automation is a versatile and powerful feature in Ableton, and mastering advanced automation techniques can elevate your music productions to the next level. Here are some tips and tricks to help you take full advantage of automation in Ableton.
1. Use Automation Modulation Devices: Ableton offers a wide range of modulation devices, such as Auto Filter, Auto Pan, and Auto-Beat Repeat. These devices have built-in automation capabilities, allowing you to easily create complex and rhythmic automation patterns. Experiment with different modulation devices to add movement and excitement to your tracks.
2. Record Automation in Session View: In addition to the arrangement view, Ableton allows you to record automation in real-time in the session view. This is particularly useful for live performances or when you want to experiment with different automation variations on the fly. Simply arm the track for recording, enable automation recording mode, and start tweaking parameters as your track plays.
3. Utilize Automation Follow Actions: Automation Follow Actions in Ableton can trigger different automation patterns or switch between automation lanes based on predefined rules. This feature is useful for adding randomized variations or creating dynamic and evolving automation sequences. Experiment with different follow actions to introduce unpredictability and creativity into your automation.
4. Combine Automation with MIDI Controllers: Take advantage of MIDI controllers to have hands-on control over your automation. Assign parameters to knobs, sliders, or faders on your MIDI controller and record or manipulate automation in real-time. This allows for a more expressive and dynamic performance, giving you greater control over the nuances of your automation curves.
5. Experiment with Time and Pitch Automation: Don’t limit yourself to volume and filter automation. Explore automating time-based and pitch-related parameters to create mind-bending effects. Automate parameters like grain size, time-stretching, pitch shifting, or detuning to add unique textures and transformations to your sounds.
6. Create Macro Variations: Macros in Ableton allow you to control multiple parameters simultaneously. Use automation to morph, sequence, or morph between different macro settings. This technique lets you create intricate and evolving sound variations with a single automation curve, offering a dynamic and expressive way to shape your music.
7. Combine Automation with Max for Live: If you have access to Max for Live, you can utilize the extensive programming capabilities to create custom automation devices and effects. Max for Live allows you to design unique automation tools with custom behaviors and interactions, giving you limitless possibilities for creating innovative and personalized automation workflows.
By experimenting with these advanced automation techniques in Ableton, you can push the boundaries of your music production. Let your creativity guide you, try new approaches, and don’t be afraid to explore uncharted territories with automation. With practice, you’ll develop your unique style of automation that sets your music apart and captivates your audience.
Troubleshooting Common Automation Issues
Automation is a powerful tool in Ableton, but sometimes you may encounter issues or hiccups that disrupt your intended automation. Here are some common automation issues and troubleshooting tips to help you overcome them.
1. Unwanted Automation Jumps or Glitches: If you notice sudden jumps or glitches in your automation, check for accidental automation points that have been added or removed unintentionally. Zoom in closely to your automation curve and make sure there are no unexpected spikes or gaps. Delete or adjust any unwanted automation points to ensure smooth transitions.
2. Inconsistent Automation Curves: If you’re experiencing inconsistent automation curves, double-check the time resolution of your automation. Make sure it is set to a value appropriate for the level of detail you require. Adjusting the time resolution can help you achieve smoother automation and more accurate parameter control.
3. Automation Not Playing Back Correctly: If your automation is not playing back correctly, ensure that the automation is properly recorded and enabled. Check that the automation lane is soloed or armed for recording, and that automation is not disabled or overridden by other settings or automation modes.
4. Parameter Changes Not Reflected in Automation: If you’re making parameter changes but they’re not being reflected in the automation, ensure that automation recording is enabled for the track or parameter you’re working with. Also, make sure that the automation lane is selected for displaying and editing the correct parameter.
5. Automation Clashes or Overlapping: When working with multiple tracks or automating multiple parameters, it’s important to ensure that automation curves don’t clash or overlap in a way that causes unwanted conflicts or unintended effects. Take a step back and review the overall automation movement to identify and resolve any clashes or overlaps to maintain clarity and control in your automation.
6. Automation Delay or Latency: If you notice a delay or latency between the intended automation and its effect on the parameter, check your track’s latency compensation settings. Some plugins or processing chains may introduce latency, causing a discrepancy between the automation and the actual parameter change. Adjusting the latency compensation settings can help synchronize the automation accurately.
7. Automation Range Beyond Parameter Limits: Occasionally, you may inadvertently set an automation value that exceeds the parameter’s allowed range. This can lead to unexpected and unwanted results. Double-check the parameter limits and ensure that your automation remains within those boundaries. If necessary, adjust the automation curve to stay within the permissible range.
By troubleshooting these common automation issues, you can ensure that your automation behaves as intended, allowing you to create precise and expressive movements in your music. Regularly save your projects, experiment with different approaches, and consult Ableton’s documentation or online resources for further guidance on automation-related topics.