
What are Scenes?
Scenes are a powerful feature of the Philips Hue lighting system that allow you to create customized lighting setups for different moods and activities. With scenes, you can adjust the brightness, color, and even the effects of your Hue lights to create the perfect ambiance in any room.
Imagine transforming your living room into a cozy and inviting space with warm, dimmed lights, or creating a vibrant and energetic atmosphere for a party with bright and colorful lights. Scenes allow you to easily switch between these pre-set lighting configurations with just a few taps or voice commands.
Whether you want to relax, entertain, work, or simply enhance the aesthetics of your home, scenes provide a convenient way to optimize your lighting to suit your needs. They offer endless possibilities for personalization, allowing you to set the stage for any occasion.
Scenes can be created and customized using the official Philips Hue app, as well as through various third-party apps and integrations that offer advanced features and additional effects. They can be scheduled to activate automatically at specific times or triggered by voice commands through popular voice assistants like Amazon Alexa or Google Assistant.
The ability to share scenes across multiple devices adds flexibility and convenience, so you can enjoy the same lighting experience in different rooms or with friends and family. Plus, scenes can be synced with other smart devices in your home, such as music speakers or smart thermostats, to create a fully immersive and interconnected environment.
With scenes, you have the power to transform your living space into a customized oasis of light and color. So whether you’re looking to create a calming sanctuary, a vibrant party zone, or a productive workspace, scenes in Philips Hue provide a simple yet powerful way to achieve the perfect lighting setup.
Getting Started with Scenes
Creating and using scenes in the Philips Hue lighting system is a straightforward process. Follow these steps to get started:
1. Obtain a Philips Hue Starter Kit: To use scenes, you’ll need a Philips Hue Bridge and at least one Hue bulb. The starter kit includes everything you need to set up your Hue system and start creating scenes.
2. Set up your Hue Bridge: Connect the Hue Bridge to your Wi-Fi router using the included Ethernet cable and power adapter. Follow the instructions provided in the starter kit to complete the setup process.
3. Install the Philips Hue app: Download the official Philips Hue app from the App Store or Google Play Store onto your smartphone or tablet. The app is available for both iOS and Android devices.
4. Pair your Hue Bridge with the app: Launch the Philips Hue app and follow the on-screen instructions to pair your Hue Bridge with the app. This will allow you to control and customize your Hue lights using your mobile device.
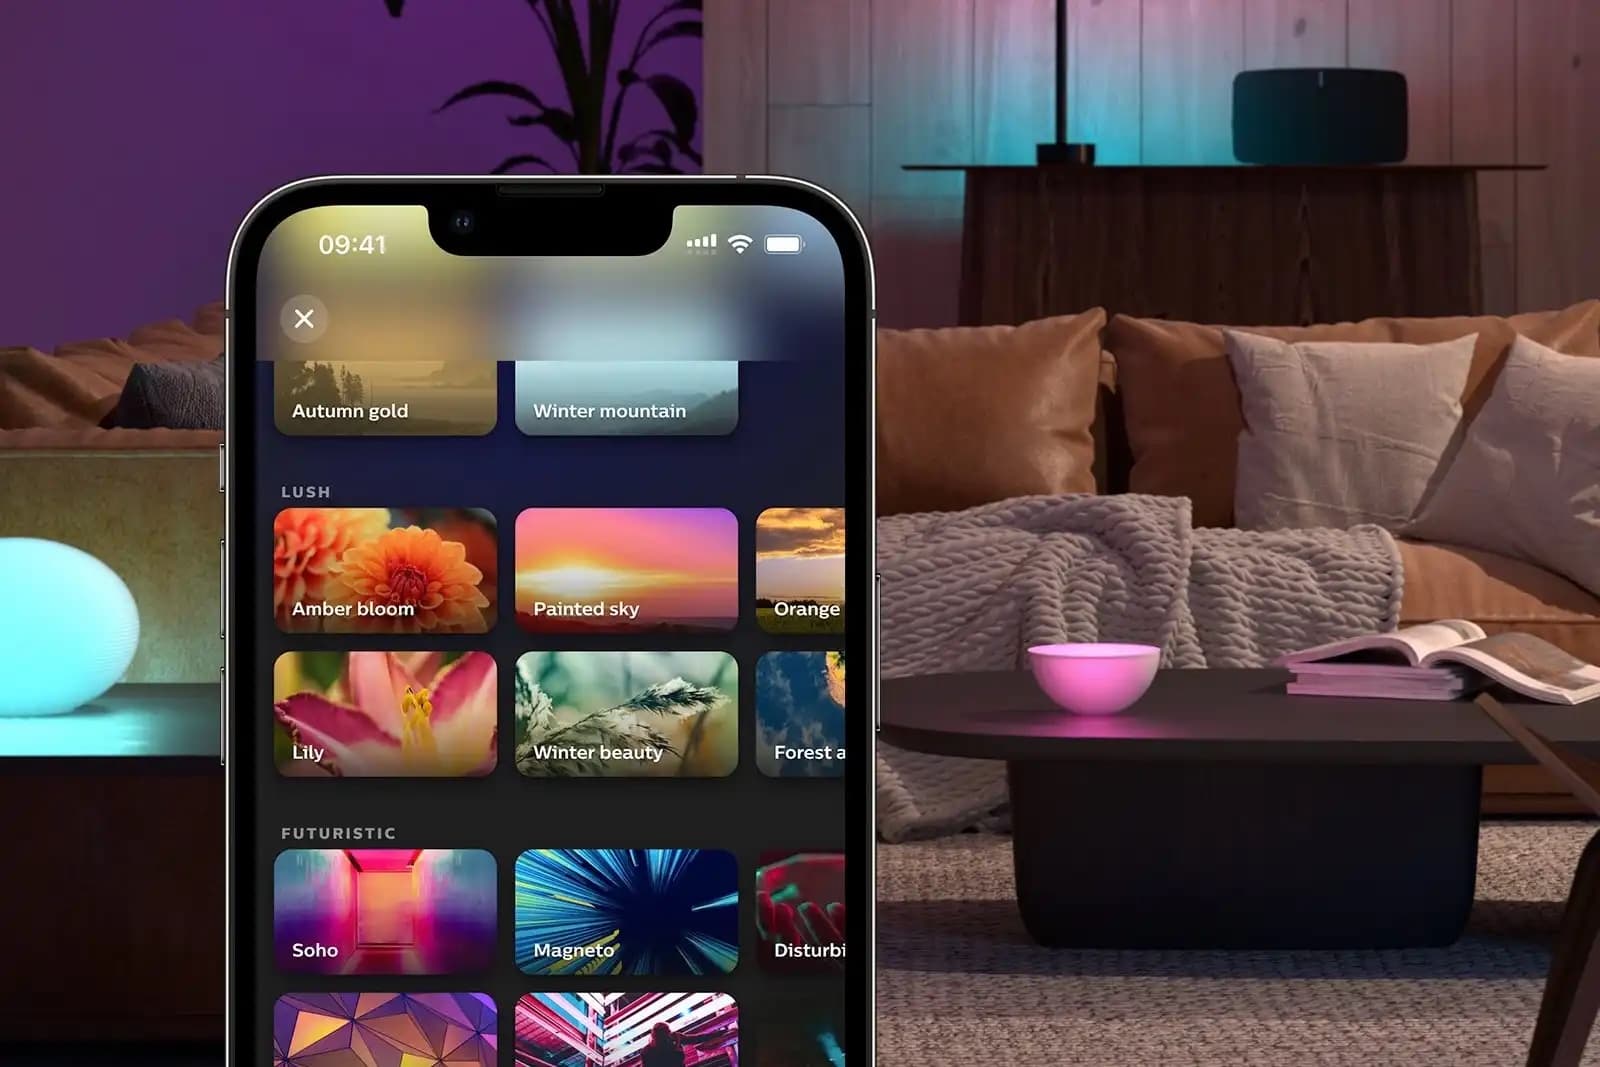
5. Create your first scene: Once your Hue Bridge is paired with the app, you can start creating scenes. Open the app and navigate to the “Scenes” section. Tap on the “Create Scene” button to begin.
6. Customize your scene: Give your scene a name that reflects its purpose or ambiance, such as “Relaxing Evening” or “Party Time.” Then, choose the lights you want to include in the scene and adjust their brightness and color settings to your liking.
7. Save and activate your scene: After customizing the lights and colors, save your scene. You can then activate it by tapping on the scene’s name in the app or using voice commands if you have a compatible voice assistant connected to your Hue system.
8. Add more scenes: Repeat the above steps to create additional scenes for different moods or activities. Experiment with different combinations of lights, colors, and effects to unleash your creativity and personalize your lighting setup.
That’s it! You’re now ready to enjoy the benefits of scenes in the Philips Hue system. Take some time to explore the app and discover the various features and options available to you. With scenes, you can transform your living space with just a tap or a voice command, bringing your lighting to life in exciting and innovative ways.
Creating a Scene in the Philips Hue App
The Philips Hue app provides a user-friendly interface for creating and customizing scenes to suit your preferences. Follow the steps below to create a scene:
1. Open the Philips Hue app: Launch the Philips Hue app on your mobile device after ensuring that it is connected to the same Wi-Fi network as your Hue Bridge.
2. Navigate to the Scenes section: Tap on the “Scenes” tab located at the bottom of the app screen. This will take you to the scene management page.
3. Create a new scene: Tap on the “+” or “Create Scene” button to start creating a new scene. You will be prompted to enter a name for your scene.
4. Choose lights for the scene: Select the lights you want to include in your scene by tapping on them. You can choose individual lights, specific rooms, or even your entire lighting setup.
5. Adjust brightness and color: Once you have selected the lights, you can adjust their brightness and color settings. Use the sliders or color wheel provided in the app to customize the lighting exactly how you want it.
6. Add effects (optional): The Philips Hue app also offers various effects that you can apply to your scene, such as color loops, dynamic scenes, or candle flicker. Explore the effects section and select the one that enhances the ambiance you desire.
7. Preview the scene: Before saving the scene, take a moment to preview it. This allows you to see how the lights will look and make any necessary adjustments to ensure the desired effect.
8. Save the scene: Once you are satisfied with your customized scene, tap on the “Save” button. The scene will now be added to your list of scenes in the Philips Hue app.
9. Activate the scene: To activate the scene, simply tap on its name in the app. The lights included in the scene will adjust to the preset brightness, color, and effects you have chosen.
10. Customize further (optional): If you want to make changes to a scene later on, you can always edit it by tapping on the scene name in the app. This allows you to refine the lighting settings or add new effects as you see fit.
The Philips Hue app makes it easy to create scenes that suit any occasion or mood. Experiment with different combinations of lights, colors, and effects to create unique and immersive lighting experiences in your home.
Adjusting Lights and Colors in a Scene
Once you have created a scene in the Philips Hue app, you can further customize and fine-tune the lights and colors to achieve your desired ambiance. Here’s how to adjust lights and colors in a scene:
1. Open the Philips Hue app: Launch the app on your mobile device and navigate to the “Scenes” tab where your created scenes are listed.
2. Select the scene: Tap on the name of the scene you want to adjust. This will open the scene editor where you can modify the lights and colors.
3. Change brightness: Adjust the brightness of the lights by using the slider provided in the app. Slide to the left to decrease brightness or to the right to increase brightness. This allows you to set the perfect level of illumination for your scene.
4. Modify color: If your Hue lights support color, you can change the color scheme of the scene. The app provides a color wheel or color palette for you to select the exact hue you desire. Experiment with different colors to create the desired ambiance.
5. Apply color temperature: Some lights, such as white ambiance bulbs, allow you to adjust the color temperature from warm to cool. This can be done in the app by using a slider or selecting pre-set temperature options. Finding the right color temperature can enhance the mood and atmosphere of your scene.
6. Add color effects: The Philips Hue app offers various color effects that can be applied to your scene. These effects include color loops, dynamic scenes, or candle flicker. Select an effect that aligns with the ambiance you want to create.
7. Preview changes: As you make adjustments, take advantage of the preview feature provided by the app. This allows you to see how the lights and colors will appear before saving the changes. Make any necessary modifications to achieve the desired effect.
8. Save changes: Once you are satisfied with the adjustments, tap on the “Save” button to update the scene. The lights and colors in the scene will now reflect the modifications you have made.
By adjusting the lights and colors in your scenes, you can create a truly personalized lighting scheme that caters to your specific preferences. Whether you prefer soft and warm lighting or vibrant and dynamic colors, the Philips Hue app gives you full control to craft the perfect ambiance.
Setting Up and Activating Scenes with Voice Assistants
With the integration of voice assistants like Amazon Alexa or Google Assistant, you can easily control and activate your scenes in the Philips Hue system using voice commands. Here’s how to set up and activate scenes with voice assistants:
1. Ensure compatibility: Make sure that your Philips Hue system is compatible with your chosen voice assistant. Check the compatibility list or documentation provided by the voice assistant manufacturer.
2. Set up voice assistant: Follow the instructions provided by the voice assistant manufacturer to set up and connect your voice assistant device or app to your smart home ecosystem, including your Philips Hue Bridge and lights.
3. Enable Hue skill or app: For voice assistants like Amazon Alexa, you will need to enable the Philips Hue skill through the associated app. For Google Assistant, you may need to link your Philips Hue account to the Google Assistant app.
4. Discover devices: After enabling the Philips Hue skill or linking your account, use the voice assistant app to discover the Philips Hue devices and scenes connected to your Hue Bridge.
5. Assign scenes to voice assistant: In the voice assistant app, you can assign specific scenes to individual voice commands. For example, you can assign the “Relaxing Evening” scene to the command “Alexa, activate relaxing scene.”
6. Activate scenes with voice commands: Once your scenes are assigned to voice commands, you can activate them by simply speaking the designated voice command to your voice assistant device or using the voice assistant app on your smartphone or tablet.
7. Customize voice commands (optional): Some voice assistant apps allow you to customize the voice command assigned to a scene. This allows you to create personalized and easy-to-remember commands for activating your scenes.
8. Enjoy voice control: With the setup complete, you can now use your voice assistant to activate your scenes effortlessly. Simply use the assigned voice commands to transform your lighting to your desired scene with a simple voice instruction.
The integration of voice assistants with Philips Hue not only adds convenience but also enhances the immersive experience of your lighting scenes. Whether you want to relax, entertain, or set the mood for a specific activity, the power of voice command gives you effortless control over your lighting system.
Scheduling Scenes to Activate Automatically
One of the convenient features of the Philips Hue system is the ability to schedule scenes, allowing them to activate automatically at specific times. This allows you to enjoy the perfect lighting setup without the need for manual intervention. Here’s how to schedule scenes in the Philips Hue app:
1. Open the Philips Hue app: Launch the app on your mobile device and ensure that it is connected to the same Wi-Fi network as your Hue Bridge.
2. Navigate to the Schedule section: Tap on the “Schedule” or “Routines” tab located at the bottom of the app screen. This will take you to the scheduling management page.
3. Create a new schedule: Tap on the “+” or “Create Schedule” button to start creating a new schedule. You will be prompted to choose the scene you want to schedule.
4. Select the scene: Choose the scene you want to schedule from the list of available scenes. This will be the scene that will automatically activate at the scheduled time.
5. Set the schedule: Specify the time and days of the week when you want the scene to activate. You can choose a specific time or select options like “Sunrise” or “Sunset” to align with natural lighting conditions.
6. Choose additional options: The Philips Hue app offers additional options to customize your scheduled scenes. You can set the scene to fade in gradually, adjust the transition time, or even add a random offset to create a more natural effect.
7. Save the schedule: Once you have set the desired options, tap on the “Save” button to create the schedule. The scheduled scene will now appear in the list of active schedules in the app.
8. Modify or delete schedules: If you need to make changes to a schedule or delete it altogether, you can do so by selecting the schedule from the list and choosing the appropriate option (edit or delete) in the app.
By scheduling scenes, you can effortlessly transform the lighting in your home to match different times of the day or specific activities. Whether it’s waking up to a gentle sunrise scene or setting the mood for a cozy evening, scheduled scenes provide an automated and immersive lighting experience.
Using Third-Party Apps and Integrations for Advanced Scenes
In addition to the official Philips Hue app, there are various third-party apps and integrations available that offer advanced features and expanded capabilities for creating and controlling scenes. These apps and integrations enhance your Philips Hue experience and allow you to unlock even more possibilities for your lighting setup. Here’s how you can use third-party apps and integrations for advanced scenes:
1. Explore third-party apps: Search for and discover third-party apps that are compatible with Philips Hue. These apps can be found in the app stores for iOS and Android devices. Some popular examples include “Hue Essentials,” “Hue Disco,” and “Lightbow.”
2. Download and install: Once you have identified a third-party app that interests you, download and install it on your mobile device just like any other app. Make sure it is compatible with your device’s operating system.
3. Connect to your Hue system: Open the third-party app and follow the instructions provided to connect it to your Philips Hue Bridge. This usually involves entering your account credentials or allowing access to your Hue system.
4. Access advanced scene options: Once the third-party app is connected to your Hue Bridge, you will usually find a range of advanced scene options not available in the official Philips Hue app. These may include additional color palettes, pre-set scenes, or effects.
5. Create and customize scenes: Use the features provided by the third-party app to create and customize scenes to your liking. These apps often offer more granular control over lighting parameters, allowing you to fine-tune the brightness, color, and effects of your scenes.
6. Experiment with effects and animations: Many third-party apps include unique effects and animations that go beyond what is available in the official app. This allows you to add dynamic movement, pulsating colors, or even sync your lights to music, creating an immersive lighting experience.
7. Discover integrations: In addition to standalone third-party apps, explore integrations with other smart home devices and platforms. For example, Philips Hue is compatible with platforms like Apple HomeKit, SmartThings, and IFTTT, enabling you to create scenes that interact with other devices or trigger actions based on specific events.
8. Research and read reviews: Before installing and using third-party apps or integrations, it’s a good idea to research and read reviews to ensure they meet your specific needs and have a positive reputation. This will help you find reliable and well-regarded options.
By incorporating third-party apps and integrations into your Philips Hue setup, you can take your scenes to the next level. Explore the advanced features, effects, and integrations available to create truly unique and personalized lighting experiences throughout your home.
Sharing and Syncing Scenes Across Multiple Devices
One of the advantages of the Philips Hue lighting system is the ability to share and sync scenes across multiple devices. This feature allows you to enjoy the same lighting experiences on different devices and ensures consistency throughout your home. Here’s how to share and sync scenes across multiple devices:
1. Create scenes on one device: Start by creating scenes on one device using the official Philips Hue app or a compatible third-party app. Customize the lights, colors, and effects to create the desired ambiance.
2. Sign in with a Philips Hue account: Ensure that all devices you want to sync scenes on are signed in with the same Philips Hue account. This is necessary for syncing scenes across devices.
3. Enable syncing: Open the Philips Hue app on each device and go to the settings. Look for the option to enable scene syncing or scene sharing. Enable this feature on all devices you want to synchronize scenes with.
4. Sync scenes: Once scene syncing is enabled, the scenes you have created on one device will be automatically synced and appear on the other devices. The scenes will retain their settings, including lights, colors, and effects.
5. Make changes or additions: If you want to make changes or add new scenes to your setup, you can do so on any of the synced devices. The changes will be reflected on all devices once they are saved.
6. Disable syncing (optional): If you no longer want to sync scenes across devices, you can disable this feature in the settings of each device. This will allow you to have independent scenes on each device.
Sharing and syncing scenes across multiple devices ensures a consistent lighting experience throughout your home. Whether you want to create the same ambiance in different rooms or have the ability to control the lighting from any device, scene sharing and syncing are valuable features of the Philips Hue system.
Tips and Tricks for Creating the Perfect Scene
Creating the perfect scene in your Philips Hue lighting system involves a combination of creativity, experimentation, and attention to detail. Here are some tips and tricks to help you craft the ideal ambiance:
1. Consider the purpose: Think about the purpose of the scene. Is it for relaxation, focus, or entertainment? Understanding the desired outcome will guide your choices in terms of lighting intensity, color, and effects.
2. Use warm white for relaxation: Warm white or softer tones create a calming and cozy atmosphere, ideal for relaxation. Experiment with lower color temperatures to achieve a warm, inviting glow.
3. Play with colors for vibrancy: If you want to create an energetic or vibrant scene, explore a wide range of colors. Mix and match hues to evoke the desired mood and add a touch of excitement to the environment.
4. Balance lighting intensity: Find the right balance between ambient lighting and task lighting. Combine different light sources, such as floor lamps or table lamps, to create layers of light that can be adjusted independently.
5. Experiment with color combinations: Don’t be afraid to experiment with color combinations. Complementary colors, such as blue and orange, or analogous colors, such as shades of purple, can create striking and harmonious effects.
6. Use dynamic effects sparingly: Dynamic effects can add excitement and movement to a scene. However, use them sparingly to avoid overwhelming the environment. Subtle effects, like gentle transitions or slow color loops, can be more pleasing and less distracting.
7. Embrace natural lighting transitions: Take advantage of natural lighting transitions by scheduling scenes to coincide with sunrise or sunset. This mimics the beauty of natural light and creates a seamless transition between daytime and nighttime scenes.
8. Sync scenes with music: If you enjoy a multi-sensory experience, sync your scenes with music using compatible apps or integrations. This creates a captivating and immersive atmosphere for entertainment or relaxation.
9. Create scene variations: Consider creating variations of a scene to suit different preferences or occasions. For example, a “cozy evening” scene could have variations for reading, watching movies, or having conversations.
10. Get inspired and learn from others: Explore online communities, social media platforms, and official Philips Hue resources for inspiration and ideas. Learn from the experiences and shared scenes of other users to discover new possibilities.
By employing these tips and tricks, you can unleash your creativity and craft scenes that are tailored to your preferences and create captivating and immersive lighting experiences in your home.
Troubleshooting Scenes in Philips Hue
While Philips Hue makes it easy to create and customize scenes, you may encounter certain issues or obstacles along the way. Here are some common troubleshooting tips to help you address any problems you may encounter:
1. Ensure proper connectivity: Check that your Hue Bridge and lights are properly connected to power and Wi-Fi. Make sure they are within range of each other and verify that your mobile device or voice assistant is connected to the same Wi-Fi network.
2. Verify software and firmware: Ensure that you are using the latest version of the Philips Hue app and that your Hue Bridge and lights have up-to-date firmware installed. Outdated software or firmware can sometimes cause compatibility issues.
3. Restart devices: Try restarting your Hue Bridge, lights, and mobile device if you are experiencing connectivity issues or if scenes are not activating or syncing correctly. This can help refresh the connection and resolve minor glitches.
4. Check network bandwidth: If you have a large number of Hue lights or other devices connected to your Wi-Fi network, it may affect the bandwidth available for smooth communication between the app and your Hue system. Disconnecting unnecessary devices may help improve performance.
5. Reset lights and scenes: If a specific light is not responding or a scene is not functioning as expected, you can try resetting the light or scene in the Philips Hue app. Go to the light’s settings or scene options and choose the reset option if available.
6. Ensure proper naming: Double-check that all scenes have unique names and that there are no naming conflicts. Duplicate names can cause confusion and may prevent certain scenes from functioning correctly.
7. Check compatibility with third-party apps: If you’re using third-party apps or integrations for scenes, ensure that they are compatible with your specific Philips Hue setup. Check for updates or contact the app developer for assistance if scenes are not working or syncing properly.
8. Contact technical support: If you have exhausted all troubleshooting options and are still experiencing issues with your scenes, it may be helpful to reach out to the Philips Hue technical support team. They can provide further assistance and guidance specific to your setup.
Remember that troubleshooting steps may vary depending on your specific hardware, software, and network configuration. It’s always a good idea to consult official Philips Hue documentation or support resources for more in-depth troubleshooting steps if needed.