
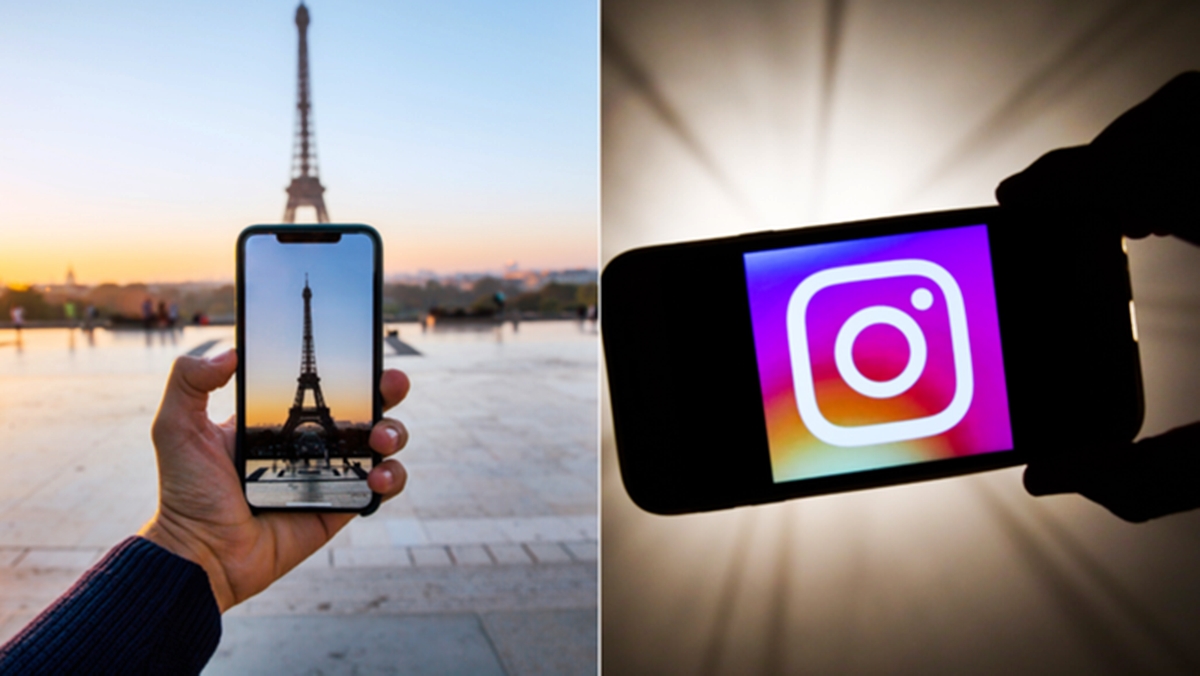
What is an Instagram Best Nine Collage?
If you’ve been active on Instagram, you’ve likely come across the popular trend of the “Best Nine” collage. It’s a compilation of the nine most liked photos from your account over the past year. This visually appealing collage allows you to showcase your most cherished moments and memories on one captivating image.
The Best Nine collage has become a beloved tradition among Instagram users as it allows them to reflect on their journey throughout the year. Not only is it a great way to celebrate your achievements and milestones, but it also serves as a visual representation of your personal brand or artistic style.
The concept behind the Best Nine collage is simple but powerful. It’s a way to highlight the moments that resonated the most with your followers, capturing the essence of your Instagram presence. By showcasing your most popular posts, you can engage with your audience and create a sense of connection and nostalgia.
Moreover, the Best Nine collage serves as a visual time capsule, reminding you of the events, experiences, and emotions that defined your year on Instagram. It’s a beautiful way to relive those memories and share them with others.
Creating an Instagram Best Nine collage not only appeals to your followers but also allows you to celebrate and appreciate your own accomplishments. It’s a reminder of the dedication and creativity you put into your content throughout the year. Whether you’re a business looking to showcase your top-performing products or an individual sharing personal moments, the Best Nine collage is a fantastic way to curate and memorialize your Instagram journey.
In the next sections, we’ll walk you through the step-by-step process of creating your very own Instagram Best Nine collage. So, let’s dive in and bring your best moments to life!
Step 1: Decide on the Best Nine Photos
Before you start creating your Instagram Best Nine collage, you need to decide on the nine photos that will represent your most loved and memorable moments from the past year. This is an essential step as it sets the foundation for a visually appealing and meaningful collage.
Here are a few tips to help you choose the best photos:
- Select Photos with High Engagement: Look for images that have received a significant number of likes and comments. These photos are an indication of what resonated the most with your audience and are likely to make your Best Nine collage more impactful.
- Showcase Diversity: Try to include a mix of different types of content, including selfies, landscapes, food, travel, and other subjects that represent your interests and passions. This ensures that your collage is visually dynamic and captivating.
- Momentous Occasions: Consider including photos that capture special moments or milestones in your life. It could be a graduation, a wedding, a vacation, or any other moment that holds significance to you.
- Personal Connection: Choose images that hold personal meaning for you. These could be photos with loved ones, cherished memories, or emotionally impactful visuals. Including these photos will make your Best Nine collage more authentic and sentimental.
- Consider Aesthetics: Think about the overall aesthetic appeal of your chosen photos. Look for images that complement each other in terms of colors, composition, and visual style. This will result in a cohesive and visually pleasing Best Nine collage.
Take the time to review your Instagram feed, explore your memories from the past year, and select the nine photos that truly represent your Instagram journey.
Once you’ve gathered the nine photos that resonate with you the most, you’re ready to move on to the next step: collecting the photos!
Step 2: Collect the Photos
Now that you’ve decided on the nine photos for your Instagram Best Nine collage, it’s time to gather them in preparation for creating the collage. Collecting the photos can be done in a few simple steps:
1. Review Your Instagram Feed
Start by scrolling through your Instagram feed and locating the selected photos. This is the easiest and most convenient way to collect your chosen images. Take note of the photo order and remember which ones you have included.
2. Download the Photos
If you don’t already have the chosen photos saved on your device, you’ll need to download them from Instagram. One way to do this is by using third-party apps or websites that allow you to download Instagram photos. Simply enter the URL or the username of your Instagram account, select the desired photos, and download them to your device.
3. Organize the Photos
Once you have all the photos downloaded, create a separate folder on your computer or device to store them. This will help you keep track of the images and make it easier to access them when it’s time to create the collage.
4. Verify the Image Quality
Before proceeding, ensure that the downloaded photos are of good quality. Check for any blurriness, pixelation, or other issues that may affect the appearance of the final collage. If necessary, consider replacing low-quality photos with higher-resolution alternatives.
5. Backup Your Photos
As a precautionary measure, it’s always a good idea to create a backup of your selected photos. This ensures that you have a copy of the images in case of any unforeseen circumstances.
By following these steps, you will have successfully collected the nine photos that will make up your Instagram Best Nine collage. With the images ready, you can move on to the next step: editing the photos if necessary.
Step 3: Edit the Photos if Necessary
Now that you have collected the photos for your Instagram Best Nine collage, it’s time to make sure they are optimized for the final composition. Editing the photos, if necessary, will ensure that they look their best when combined in the collage.
1. Crop and Resize
If any of the photos have unwanted elements or need to be adjusted for composition purposes, consider cropping them. This can help enhance the visual appeal and create a more balanced collage. Additionally, check if the photos need to be resized to fit the chosen collage template.
2. Adjust Lighting and Colors
Review each photo individually and make adjustments to the lighting and colors if needed. You can use photo editing tools or apps to enhance brightness, contrast, saturation, or any other elements that will make the photos more visually appealing. Keep in mind that consistency in lighting and color tones across the photos will contribute to a cohesive collage.
3. Apply Filters or Effects
If you have a preferred Instagram filter or a specific aesthetic you want to achieve, consider applying the same filter or effect to all the photos. This will create a consistent look and feel throughout the Best Nine collage, tying the images together.
4. Check for Distortions or Imperfections
Inspect each photo for any distortions, unwanted objects, or imperfections that might distract from the overall aesthetics of the collage. Use appropriate tools to remove blemishes, correct red-eye, or address any other issues that might detract from the final result.
5. Maintain Authenticity
While editing can enhance the visual appeal of your photos, it’s important to stay true to the essence of the original images. Make sure you don’t over-edit or significantly alter the content of the photos, as it may compromise the authenticity of your Best Nine collage.
By following these steps and editing the photos as necessary, you can ensure that your Instagram Best Nine collage showcases the best versions of your chosen photos. Once the editing process is complete, you’re ready to move on to the next step: choosing a collage template.
Step 4: Choose a Collage Template
With your edited photos ready, it’s time to select a collage template that will bring your Instagram Best Nine to life. The template you choose will determine how your photos are arranged and presented within the collage.
1. Research Collage Apps and Websites
Start by exploring various collage apps and websites that offer a wide range of templates. Look for platforms that are user-friendly, have positive reviews, and provide customization options. Popular options include Canva, Adobe Spark, and PicCollage, among others.
2. Consider Aesthetic Appeal
When choosing a collage template, consider the overall aesthetic appeal and how well it complements your selected photos. Look for templates that align with your desired visual style, whether it’s clean and minimalist, colorful and vibrant, or vintage and nostalgic.
3. Select a Layout
Templates come with different layout options, such as a grid layout, mosaic layout, or various artistic arrangements. Assess which layout suits your photos best and accentuates the individual and collective beauty of the images.
4. Evaluate Customization Options
Check if the chosen collage app or website offers customization options. This includes the ability to adjust image size, spacing, border color, and the option to add text or graphics. Customization allows you to add your personal touch and make the collage truly unique.
5. Preview and Experiment
Most collage apps and websites allow you to preview your photos in different templates before making a final decision. Take advantage of this feature and experiment with different templates to see which one showcases your Best Nine photos most effectively.
6. Consider Instagram’s Grid
If you plan to post your Best Nine collage directly on your Instagram profile, consider how the collage will blend with the rest of your grid. Choose a template that maintains consistency with your existing Instagram aesthetic and ensures a visually harmonious feed.
By carefully considering these factors, you’ll be able to find a collage template that perfectly complements your selected photos and aligns with your creative vision. Once you’ve made your choice, you’re one step closer to creating your captivating Best Nine collage!
Step 5: Create the Best Nine Collage using an App or Website
Now that you have chosen a collage template, it’s time to create your Instagram Best Nine collage using a preferred collage app or website. These platforms offer intuitive tools and features that make the collage creation process straightforward and enjoyable.
1. Open the Collage App or Website
Launch the collage app or website that you have selected for creating your Best Nine collage. If you haven’t already done so, sign up or log in to your account to get started.
2. Upload Your Edited Photos
Within the collage app or website, locate the option to upload photos and select the previously edited photos from your device. Most platforms allow you to upload multiple photos at once, simplifying the process.
3. Arrange Your Photos
Once the photos are uploaded, use the provided tools to arrange them in the desired order. Follow the template’s layout and guidelines to ensure a visually appealing composition. Drag and drop the photos into their respective positions within the collage.
4. Customize the Collage
Explore the customization options available within the app or website to make your Best Nine collage unique and personalized. This may include adjusting the layout, resizing the photos, changing the background color, adding borders, or applying additional effects.
5. Add Text or Graphics (Optional)
If desired, you can enhance your Best Nine collage by adding text overlays or graphics. This could include captions, dates, quotes, or any other elements that add context or creativity to the collage. Ensure that the text and graphics blend seamlessly with the overall design.
6. Preview and Make Adjustments
Before finalizing your collage, take advantage of the preview feature to see how it looks with all the components in place. Make any necessary adjustments to ensure the photos, layout, and customization options align with your desired outcome.
7. Save or Export the Collage
Once you’re satisfied with the final result, save or export the collage to your device or the cloud. This will allow you to access and share your Instagram Best Nine collage easily whenever you’d like.
By following these steps and utilizing the tools provided by the collage app or website, you’ll be able to create a stunning Instagram Best Nine collage that beautifully represents your most loved moments from the past year.
Step 6: Customize the Collage
Now that you have created the initial version of your Instagram Best Nine collage, it’s time to customize it further to make it truly unique and reflective of your personal style. Customization will add the finishing touches to your collage, making it stand out and capture the attention of your audience.
1. Adjust Photo Placement
Experiment with the arrangement of your photos within the collage. Move them around, resize them, or rotate them to create a visually appealing composition. Play with different placements and see what works best for your selected photos and the overall design of the collage.
2. Explore Color and Background Options
Consider changing the background color or pattern of your collage to add visual interest. Many collage apps and websites offer various background options to choose from. Select a color that complements your photos or opt for a subtle pattern that enhances the overall aesthetics of your Best Nine collage.
3. Add Filters or Effects
If desired, you can apply filters or effects to your photos within the collage. This can unify the visual style of the images and create a cohesive look. Experiment with different filters or effects to find the ones that enhance the overall mood and atmosphere of your Best Nine collage.
4. Incorporate Text or Captions
Add a personal touch to your collage by including text or captions. This could be a short description, a quote, or even the year. Choose a font and size that complements the overall design and make sure that the text is legible and does not detract from the main focus of the photos.
5. Include Graphics or Icons
If you want to add extra flair to your Best Nine collage, consider incorporating graphics or icons. This can be in the form of icons representing each photo category, stickers that symbolize special moments, or any other visual elements that enhance the meaning and context of your collage.
6. Play with Borders or Frames
Experiment with different border or frame options to accentuate the individual photos within the collage. This can help create a cohesive look and add a polished finish to your Best Nine collage. Choose borders that complement the overall design and do not distract from the main focus.
Remember, customization is about adding your personal touch and making the Best Nine collage uniquely yours. Don’t be afraid to experiment, try out different options, and trust your creative instincts. Once you’re satisfied with the customized look, you’re ready to save and share your Instagram Best Nine collage with the world!
Step 7: Save and Share the Collage on Instagram
After putting in the effort to create your customized Instagram Best Nine collage, it’s time to save and share it on your Instagram profile. This step allows you to showcase your Best Nine photos to your followers and celebrate your Instagram journey.
1. Save the Collage
Before sharing your Best Nine collage, save it to your device or cloud storage. This will ensure that you have a copy of the collage saved for future reference and easy access.
2. Prepare a Caption
Craft a meaningful caption to accompany your Best Nine collage. Reflect on the significance of the photos, express gratitude to your followers, or share your thoughts and emotions about the past year. A well-thought-out caption can add depth to your collage and further engage your audience.
3. Share on Instagram
Open the Instagram app on your mobile device and tap the plus icon at the bottom center of the screen to create a new post. Select the saved Best Nine collage from your device’s photo library and proceed to the editing screen.
4. Edit and Enhance
Use Instagram’s built-in editing tools to further enhance your Best Nine collage. You can adjust the brightness, contrast, saturation, or apply filters to achieve a desired look. Ensure that the edits you make align with the original vision and maintain the coherence of the collage.
5. Write a Caption
Paste the caption you prepared earlier into the caption field. You can also add relevant hashtags to increase the visibility of your post. Remember to incorporate any relevant account mentions or tags to acknowledge and credit people or brands featured in the photos.
6. Tag Locations and People (Optional)
If applicable, tag relevant locations, establishments, or people in your Best Nine collage. This will create additional engagement opportunities and increase the discoverability of your post.
7. Share and Interact
Once you’re satisfied with the edits, caption, location, and tags, tap the “Share” button to publish your Best Nine collage on your Instagram profile. Engage with your audience by responding to comments and interacting with fellow Instagram users who appreciate your collage.
By following these steps, you can proudly share your Instagram Best Nine collage with your followers, friends, and loved ones. It’s a fantastic way to celebrate your Instagram journey and share the significant moments that have shaped your online presence.
Step 8: Reflect on Your Instagram Journey
As you wrap up the process of creating and sharing your Instagram Best Nine collage, take a moment to reflect on your Instagram journey. This final step is an opportunity to appreciate the growth, memories, and connections you have experienced throughout your time on the platform.
1. Gratitude
Express gratitude for the support and engagement from your followers. Take a moment to acknowledge their role in making your Instagram journey memorable and rewarding. Thank them for their likes, comments, and continuous support.
2. Celebrate Milestones
Reflect on any milestones or achievements you reached during the past year on Instagram. Did you hit a certain follower count, create valuable collaborations, or achieve significant engagement? Celebrate these accomplishments and applaud yourself for the progress made.
3. Recognize Growth
Consider the ways in which you’ve grown as an individual, artist, or brand on Instagram. Have you refined your photography skills, developed a consistent visual style, or honed your storytelling abilities? Recognize the progress you’ve made and take pride in your growth.
4. Remember Special Moments
Take a moment to reminisce about the special moments that you captured and shared on Instagram. Whether it was a memorable trip, a joyful celebration, or an important personal achievement, these moments are an integral part of your Instagram journey. Remembering them allows you to cherish and relive those experiences.
5. Learn from Challenges
Reflect on any challenges or obstacles you encountered on your Instagram journey. Consider how you overcame them or what lessons you learned from those experiences. Challenges can be valuable opportunities for growth and resilience, so embrace the lessons they taught you.
6. Set New Goals
Use this reflection as an opportunity to set new goals and aspirations for the upcoming year on Instagram. What do you hope to achieve? Whether it’s increasing your engagement, exploring new content themes, or expanding your network, setting goals gives you a sense of direction and motivation.
7. Engage with Your Community
Engage with your Instagram community by taking the time to respond to comments, ask questions, and foster meaningful connections. Your followers are an essential part of your journey, so make an effort to engage and create a positive and supportive online environment.
Reflecting on your Instagram journey allows you to appreciate the moments, growth, and connections that have shaped your experience on the platform. Be proud of your accomplishments, learn from challenges, and look forward to the new opportunities that await you on your continued Instagram journey.