
Why Create an Event on Facebook?
When it comes to organizing and promoting events, Facebook has become a go-to platform for individuals, businesses, and organizations alike. With its massive user base of over 2 billion active users worldwide, creating an event on Facebook provides numerous benefits and opportunities for engagement. Let’s explore why creating an event on Facebook is a smart move:
1. Reach a wider audience: Facebook’s extensive user base means your event has the potential to reach a large and diverse audience. By tapping into Facebook’s robust social network, you can leverage the power of word-of-mouth and easily spread the word about your event to potential attendees.
2. Built-in event management tools: Facebook offers a range of features to help you effectively manage your event. From creating event invitations to tracking RSVPs, sending reminders, and even selling tickets, Facebook provides a comprehensive set of tools to streamline the event planning process.
3. Boost event visibility: With Facebook’s News Feed algorithm, your event has the chance to appear in the feeds of people who may be interested in attending. Additionally, Facebook allows you to promote your event through targeted advertising, ensuring that your event reaches the right audience and maximizes its visibility.
4. Easy event sharing and collaboration: Facebook makes it effortless for event organizers and attendees to share event details with their friends and networks. Users can easily RSVP, comment, and share event posts, generating buzz and creating a sense of community around the event.
5. Seamless communication with attendees: Facebook provides a platform for event organizers to communicate important updates, changes, or additional information directly to attendees. This eliminates the need for multiple communication channels and ensures that all attendees are kept informed and engaged.
6. Insights and analytics: Facebook offers valuable insights and analytics that allow event organizers to understand their event’s performance. From tracking the number of views and responses to analyzing demographic data, these insights provide actionable information to refine future event planning strategies.
By harnessing the power of Facebook’s event features, you can create a buzzworthy event, attract a wider audience, and maximize attendee engagement. From small gatherings to large conferences, Facebook provides an all-inclusive platform for event planning and promotion.
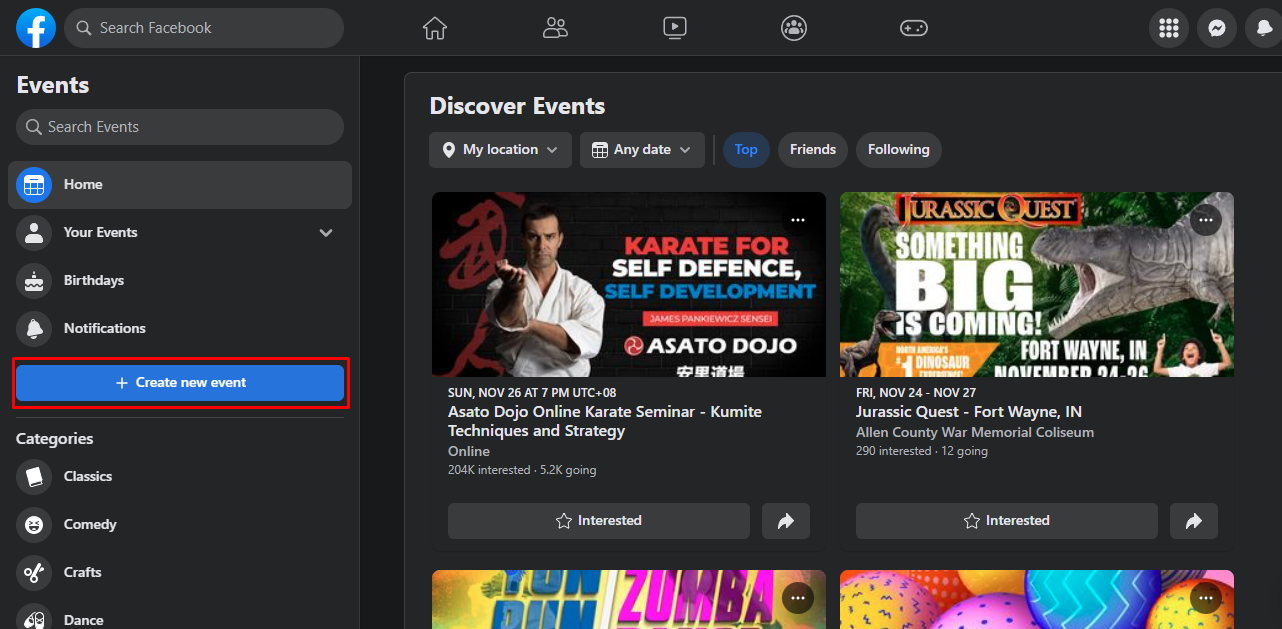
Step 1: Accessing the Facebook Event feature
Creating an event on Facebook is a straightforward process that begins with accessing the Event feature on your Facebook account. Here’s how you can get started:
1. Log in to your Facebook account: Open your preferred web browser and navigate to Facebook’s homepage. Enter your login credentials to access your account.
2. Navigate to the Events tab: Once you’re logged in, locate the Events tab on the left-hand side of the Facebook homepage. Click on it to access the Events page.
3. Click on “Create Event”: On the Events page, you will find several options, including “Create Event.” Click on this button to initiate the event creation process.
4. Select the event type: Facebook offers different event types to choose from, such as “Private Event,” “Public Event,” and “Online Event.” Select the one that best suits your event’s nature and purpose.
5. Fill in the event details: After selecting the event type, you’ll be prompted to fill in various details about the event. This includes the event name, date, time, and location. Make sure to provide accurate and relevant information to give attendees a clear understanding of the event.
6. Choose event settings: Facebook allows you to customize several event settings, such as the privacy level, ticketing options, and co-hosts. Determine the appropriate settings based on your event’s requirements and preferences.
By following these steps, you’ll be able to access the Facebook Event feature and begin the process of creating your event. Remember to double-check the event details and settings before moving on to the next step.
Step 2: Choosing the Event type and filling in the details
Once you’ve accessed the Facebook Event feature and clicked on “Create Event,” the next step is to choose the event type and fill in the necessary details. This step is essential for providing attendees with accurate and relevant information about your event. Here’s how you can proceed:
1. Select the event type: Facebook offers several event types to choose from, including “Private Event,” “Public Event,” “Online Event,” and more. Carefully consider the nature and purpose of your event to determine the most suitable option.
2. Enter the event name: A catchy and descriptive event name will attract potential attendees. Choose a name that effectively communicates the essence of your event.
3. Add a detailed event description: The event description provides an opportunity to provide more in-depth information about the event. Include key details such as the event’s objective, activities, expected outcomes, and any requirements attendees may have.
4. Create event tags: Tags can help categorize your event and make it more discoverable to relevant audiences. Choose tags that accurately reflect the event’s topic, theme, or industry.
5. Choose event co-hosts: Co-hosts can help add credibility and increase engagement for your event. Select individuals or organizations that are relevant to the event and can actively contribute to its success.
6. Upload event images or videos: Visual content can capture attendees’ attention and create a positive impression. Choose compelling images or videos that represent the event and enhance its appeal.
7. Specify event ticketing or registration details: If your event requires tickets or registration, include the relevant information, such as ticket prices, registration deadlines, and any additional instructions attendees need to follow.
Remember to review the details you’ve entered to ensure accuracy and clarity. Once you’re satisfied with the chosen event type and the filled-in details, you can proceed to the next step in creating your event on Facebook.
Step 3: Adding a compelling event title and description
The event title and description play a crucial role in grabbing the attention of potential attendees and enticing them to learn more about your event. By crafting a compelling and informative event title and description, you can generate curiosity and generate interest in attending your event. Here’s how you can create an attention-grabbing event title and description:
1. Create a catchy event title: Your event title should be concise, memorable, and reflect the essence of your event. Use appealing words and phrases that capture the attention of potential attendees and convey the unique selling proposition of your event.
2. Highlight the key benefits: In the event description, clearly outline the benefits and value attendees can expect from participating in your event. This could include learning opportunities, networking prospects, access to industry experts, or exclusive experiences.
3. Provide event details: Make sure to include specific details about the event, such as the date, time, duration, and location. This information is crucial for potential attendees to evaluate whether they can attend or not.
4. Showcase the event’s agenda: Give attendees an overview of what they can expect during the event. Highlight key sessions, workshops, or activities that will add value to their participation.
5. Use persuasive language: Craft your event description using persuasive language that appeals to the emotions and motivations of your target audience. Use descriptive adjectives, power words, and storytelling techniques to create intrigue and excitement.
6. Include relevant keywords: Incorporate relevant keywords in your event title and description to improve its visibility in search engines and Facebook’s algorithm. Choose terms that your target audience is likely to search for when looking for events similar to yours.
7. Keep it concise: Aim for a balance between providing sufficient details and keeping the event description concise. Long paragraphs may deter readers, so use bullet points, subheadings, and short sentences to enhance readability.
By adding an attention-grabbing event title and a compelling description, you’ll increase the chances of attracting potential attendees and generating excitement around your event. Remember to proofread your title and description to ensure they are error-free and consistent with your event’s objectives and target audience.
Step 4: Setting the event date, time, and location
The event date, time, and location are crucial details that potential attendees need to know to plan their participation. Setting these parameters accurately and thoughtfully is essential for a successful event. Here’s how you can effectively choose and communicate the event’s date, time, and location:
1. Select the event date: Choose a date that aligns with your event’s objectives and target audience. Consider factors such as availability of key speakers, holidays, and potential conflicts with other major events. Aim for a date that provides sufficient time for event promotion and attendee planning.
2. Determine the event start and end times: Set clear start and end times for your event to ensure attendees know when to arrive and when the event will conclude. Be mindful of the duration and schedule breaks if needed, particularly for longer events or conferences.
3. Choose the event location: Select a suitable venue for your event, keeping in mind factors such as capacity, accessibility, and relevance to the event theme. If your event is virtual or online, specify the platform or website where attendees can participate.
4. Provide detailed address or instructions: If your event is an in-person gathering, include the full address of the venue, along with any specific directions or instructions for attendees to easily locate it. If it’s an online event, mention the platform or website where attendees should join.
5. Consider travel and accommodation options: If your event requires attendees to travel, provide information about nearby airports, public transportation, and accommodation options. This can be helpful for out-of-town attendees who need assistance in planning their trip.
6. Factor in time zones, if applicable: If you’re targeting an international audience or hosting a virtual event with participants from different regions, consider time zone differences. Clearly communicate the event start time in a format that is easily understandable for all attendees.
7. Mention any restrictions or special requirements: If there are any restrictions or special requirements related to the event date, time, or location, such as age limits or dress codes, make sure to clearly communicate those in the event details.
By setting the event date, time, and location accurately and providing clear instructions, you’ll enable potential attendees to plan their participation effectively. Remember to double-check these details before proceeding to the next step in creating your event on Facebook.
Step 5: Creating a custom event URL
Creating a custom event URL on Facebook can make it easier for attendees to find and remember your event. Instead of a long and random URL, a custom URL gives your event a more professional and personalized touch. Follow these steps to create a custom URL for your event:
1. Access the event settings: Once you’ve entered the event details, navigate to the event settings page. Look for the option to customize the event URL.
2. Choose a custom URL: Select a unique and descriptive URL that reflects your event’s name or topic. Keep it simple and easy to remember, as well as relevant to your event.
3. Check for availability: Facebook will check the availability of the URL you’ve chosen. If it’s already taken, try adding additional words or characters to make it unique.
4. Confirm and save the custom URL: Once you’ve found an available custom URL, confirm your choice and save it. Facebook will update the event’s URL accordingly.
5. Share the custom URL: Once you’ve set the custom URL, make sure to share it with your audience. Include it in your event promotions, social media posts, and any other marketing materials to direct attendees straight to your event page.
6. Use the custom URL in event communications: Incorporate the custom URL in your event invitations, email communications, and any other channels you’re using to promote the event. This will make it easier for potential attendees to access the event page directly.
7. Monitor the custom URL: Keep track of how attendees are interacting with the custom URL. You can use Facebook’s insights and analytics tools to understand the traffic and engagement coming through the custom URL.
By creating a custom event URL, you enhance the professionalism and accessibility of your event. A memorable URL makes it easier for attendees to find your event and increases the chances of participation. Remember to choose a unique and relevant custom URL that aligns with your event’s name or topic.
Step 6: Selecting the event privacy settings
Selecting the appropriate event privacy settings on Facebook is essential to ensure the right level of visibility and access for your event. Facebook offers various privacy options that cater to different event types and purposes. Here’s how you can choose the right event privacy settings:
1. Access the event settings: Once you’re on the event creation page or event settings page, navigate to the privacy settings section. This is where you can customize the visibility and accessibility of your event.
2. Understand the available privacy options: Facebook provides several privacy options for events, including “Public,” “Friends,” “Friends of Guests,” and “Private.” Each option offers different levels of visibility and access to the event.
3. Choose the appropriate privacy setting: Consider the nature of your event and the intended audience when selecting the privacy setting. If you want to maximize event visibility and reach, a “Public” setting will make the event visible to a broader audience. If you want to limit the event’s accessibility to specific individuals, choose a more restricted setting such as “Private.”
4. Consider the impact on event promotion: Be mindful that the privacy setting you choose will affect the promotion and discoverability of your event. Public events can be shared and discovered by anyone on Facebook, while more restricted settings may require additional efforts to invite and promote the event to specific individuals or groups.
5. Communicate the privacy setting to potential attendees: Clearly communicate the privacy setting of your event to potential attendees. If the event is private or restricted, specify how attendees can request to join or receive an invitation. Include this information in your event description or any promotional materials.
6. Review and update privacy settings: Periodically review your event’s privacy settings to ensure they align with your event’s goals and objectives. You can make adjustments as needed, especially when there are changes in the event’s accessibility or target audience.
By selecting the appropriate event privacy settings, you can control who can view and access your event on Facebook. Whether you want to create a public event for maximum reach or a private event for a specific audience, Facebook’s privacy options provide flexibility in tailoring your event’s visibility and accessibility.
Step 7: Adding event tags and co-hosts
Adding relevant event tags and co-hosts can greatly enhance the visibility, credibility, and engagement of your event on Facebook. By strategically utilizing tags and collaborating with co-hosts, you can attract a wider audience and create a sense of community around your event. Here’s how to effectively add event tags and co-hosts:
Adding Event Tags:
1. Identify relevant keywords and phrases: Think about the topics, themes, and industry your event is associated with. Identify keywords and phrases that accurately represent your event and resonate with your target audience.
2. Add the tags in the event settings: In the event creation or event settings page, look for the section where you can add event tags. Enter the relevant keywords and phrases that reflect the nature and purpose of your event.
3. Choose tags that are popular and specific: Select tags that strike a balance between popularity and specificity. Popular tags will increase the chances of your event being discovered, while specific tags allow you to reach a more targeted audience.
4. Experiment with different combinations: Don’t be afraid to try different combinations of tags to see which ones yield better results. You can refine and optimize your event tags based on the feedback and engagement you receive.
Adding Co-hosts:
1. Identify potential co-hosts: Look for individuals or organizations that align with your event’s objectives, industry, or expertise. Consider reaching out to influencers, industry experts, or relevant community groups.
2. Initiate a co-host request: Reach out to potential co-hosts and propose the idea of collaborating on your event. Explain the benefits of co-hosting, such as increased exposure and engagement.
3. Discuss roles and responsibilities: Clearly define the roles and responsibilities of the co-hosts. Determine how they can contribute to the event, such as promoting it to their own networks, sharing expertise, or moderating discussions.
4. Add co-hosts in the event settings: Once the co-host agreement is confirmed, access the event settings and add the co-hosts. This will give them visibility and recognition as official partners in the event.
5. Communicate the co-host collaboration: Promote the co-host collaboration on your event page, website, and other promotional materials. Highlight the expertise and credibility of the co-hosts to attract potential attendees.
By adding relevant event tags and collaborating with co-hosts, you can enhance the visibility and credibility of your event on Facebook. Utilize keywords and phrases that reflect your event, and choose co-hosts that align with your event’s objectives to create a compelling and engaging event experience.
Step 8: Customizing the event appearance with a cover photo
Customizing the appearance of your event with a captivating cover photo can significantly impact its visual appeal and attract potential attendees. A well-designed cover photo can convey the essence of your event and create a positive first impression. Let’s explore how you can effectively customize the event appearance with a compelling cover photo:
1. Select a high-quality image: Choose an image that is of high resolution and visually appealing. It should be relevant to your event and reflect its theme or purpose. Avoid blurry or pixelated images that can detract from the overall appearance.
2. Showcase key elements: The cover photo should highlight the main features or attractions of your event. Incorporate visuals that give attendees a glimpse of what they can expect, such as the venue, featured speakers, or activities.
3. Consider branding elements: If you have a logo or specific branding colors associated with your event or organization, incorporate them into the cover photo. This helps create visual consistency and reinforces your brand identity.
4. Keep it clean and uncluttered: Avoid overcrowding the cover photo with too much text or excessive design elements. Keep it clean, simple, and attention-grabbing. Leave enough negative space for the event details and other graphical elements.
5. Use contrasting colors: Choose colors that complement each other and create a visually striking cover photo. Contrast between text and background can improve legibility, so ensure that text overlays are easily readable.
6. Include event details: If possible, incorporate essential event details such as the date, time, location, or event hashtag into the cover photo. This helps attendees quickly gather the necessary information at a glance.
7. Follow Facebook’s guidelines and dimensions: Ensure that your cover photo adheres to Facebook’s guidelines and recommended dimensions. This ensures that it displays correctly on both desktop and mobile devices without any cropping or distortion.
8. Test the cover photo: Before finalizing the cover photo, consider sharing it with a small group of friends or colleagues to gather feedback. This can help identify any improvements or adjustments that may enhance its visual impact.
By customizing the event appearance with a professionally designed cover photo, you can capture the attention of potential attendees and create a positive first impression. A visually appealing cover photo can convey the excitement and essence of your event, leaving a lasting impression on those who come across it.
Step 9: Adding event tickets or a registration form (if applicable)
If your event requires attendees to purchase tickets or register in advance, it is important to provide a seamless and convenient process. By adding event tickets or a registration form on Facebook, you can streamline the registration process and ensure a smooth experience for potential attendees. Here’s how you can effectively include event tickets or a registration form:
1. Select the appropriate ticketing or registration option: Facebook offers various options for ticketing and registration, including integration with external ticketing platforms or the option to create a custom registration form within Facebook. Choose the option that best fits your event requirements and preferences.
2. Create the ticket or registration form: If you’re using an external ticketing platform, follow the instructions to set up the ticketing details and pricing. If you’re using Facebook’s built-in registration form, fill in the necessary fields such as attendee information, ticket types (if applicable), and any additional questions you want to collect from registrants.
3. Specify ticket availability and pricing: Clearly state the availability of tickets and any pricing tiers or discounts. If your event has limited capacity, communicate when tickets will be sold or registration closes to create a sense of urgency.
4. Promote ticketing or registration information: Spread the word about the availability of tickets or the registration form through various channels such as social media, email, and your event website. Encourage potential attendees to secure their spot early and take advantage of early bird discounts, if applicable.
5. Share the ticket or registration link: Once you have set up the ticketing or registration process, share the link to the ticketing platform or registration form on Facebook. You can do this in the event description, event posts, or through direct messages to individuals who have shown interest in attending.
6. Set up ticket reminders: Facebook allows event organizers to send reminders to attendees who have purchased tickets or registered. Take advantage of this feature to send timely updates, event details, and any additional information attendees need to know.
7. Monitor ticket or registration sales: Regularly check the ticket or registration sales metrics available through Facebook or your ticketing platform. This will help you gauge the event’s popularity, identify any issues, and make necessary adjustments to your marketing strategies.
By adding event tickets or a registration form, you can make it easy for potential attendees to secure their spot at your event. This streamlined process enhances attendee satisfaction and allows you to efficiently manage event capacity and logistics.
Step 10: Promoting the event and inviting guests
Promoting your event and inviting guests is key to ensuring a successful turnout and maximizing attendee engagement. With Facebook’s wide reach and powerful networking capabilities, promoting your event on the platform can significantly boost its visibility. Here’s how you can effectively promote your event and invite guests:
1. Create engaging event posts: Craft compelling and visually appealing posts about your event. Highlight key details, speaker bios, exciting activities, or exclusive offers to generate interest among your target audience.
2. Utilize event sharing features: Encourage attendees and interested individuals to share and invite their friends to the event. Enable the event sharing features on Facebook, making it easy for attendees to spread the word.
3. Share updates and countdowns: Regularly share updates, countdowns, or exciting event announcements to build anticipation and remind potential attendees about your event. Use engaging visuals and creative captions to catch their attention.
4. Collaborate with influencers or partners: Reach out to influencers or relevant industry partners who align with your event’s theme. Collaborate with them to promote your event to their followers or networks, leveraging their reach and credibility.
5. Send personalized invitations: Utilize Facebook’s event invitation feature to send personalized invitations to individuals within your network who may be interested in attending. Craft a personalized message explaining why they would enjoy and benefit from your event.
6. Create event-related content: Generate buzz and create interest by creating event-related content such as blog posts, videos, or podcasts. Share this content on your Facebook page and other platforms to attract potential attendees and build credibility.
7. Utilize targeted ads: Consider running targeted advertisements on Facebook to reach a specific audience demographic or location. Facebook provides robust targeting options that allow you to narrow down your audience and maximize your ad spend.
8. Collaborate with event partners: If you have event partners or sponsors, leverage their networks and resources to promote the event. Encourage them to share event information with their audiences and collaborate on joint promotional efforts.
9. Engage with event attendees: Interact with individuals who have shown interest in your event by responding to comments, answering questions, and engaging with them in conversations. This increases engagement and fosters a sense of community around the event.
10. Utilize other marketing channels: Beyond Facebook, promote your event on other marketing channels such as email newsletters, your website, and industry-specific forums. Cross-promote your event to reach a wider audience outside of the Facebook platform.
By actively promoting your event and inviting guests through various channels, you can increase awareness, attract attendees, and create a buzz around your event. These efforts will contribute to a higher turnout and a more engaged audience.
Step 11: Setting notifications and updates for attendees
Setting notifications and updates for attendees is crucial for keeping them informed, engaged, and excited about your event. By providing timely and relevant information, you can enhance attendee experience and ensure smooth communication throughout the event journey. Here’s how you can effectively set notifications and updates for event attendees:
1. Use Facebook’s built-in notification system: Facebook offers a notification system that allows you to send updates directly to attendees. Take advantage of this feature to send reminders, important announcements, or any changes to the event schedule.
2. Send welcome messages: Kickstart attendee engagement by sending personalized welcome messages to registered attendees. Thank them for their interest and provide a brief overview of what they can expect from the event.
3. Share event updates: Regularly share event updates and information leading up to the event. This can include details about speakers, session highlights, or any additional attractions that have been added. Keep attendees in the loop and build anticipation.
4. Provide logistical information: Prior to the event, send attendees logistical information such as parking details, public transportation options, or any special instructions they need to be aware of. This helps them plan their journey and ensures a smooth arrival.
5. Send reminders: As the event date approaches, send reminders to registered attendees with key details such as the event date, time, location, or any required materials they need to bring. Send follow-up reminders closer to the event to keep it top-of-mind.
6. Announce any changes or updates: If there are any changes to the event schedule, speakers, or other important details, promptly notify attendees. This helps manage expectations and allows them to plan accordingly.
7. Share relevant resources or pre-event materials: Provide value to attendees by sharing pre-event resources such as reading materials, whitepapers, or relevant content that can enhance their event experience. Keep attendees engaged and excited about what’s to come.
8. Encourage attendee participation: Drive attendee engagement by encouraging them to ask questions, share their thoughts, or participate in pre-event discussions. Active participant involvement creates a sense of community and builds excitement.
9. Monitor attendee feedback: Throughout the event planning process and during the event itself, pay attention to attendee feedback and questions. Respond promptly and address any concerns or inquiries to ensure a positive attendee experience.
10. Collect feedback post-event: After the event, send a feedback survey to attendees to gather their thoughts and suggestions. Use this feedback to improve future events and show attendees that their opinions are valued.
By setting notifications and providing regular updates to attendees, you can keep them informed, engaged, and excited about your event. Timely communication and relevant information contribute to a positive attendee experience and increased attendee satisfaction.
Step 12: Managing and tracking event performance
Managing and tracking the performance of your event is essential to measure its success and identify areas for improvement. By effectively managing and tracking event performance, you can gather valuable insights, make data-driven decisions, and optimize future events. Here’s how you can effectively manage and track the performance of your event:
1. Set clear goals and Key Performance Indicators (KPIs): Define specific goals for your event, such as the number of attendees, engagement levels, or revenue targets. Establish KPIs that align with these goals and will help you track progress and success.
2. Utilize Facebook’s event insights: Facebook provides event organizers with insights and analytics. Monitor metrics such as event views, responses, reach, and engagement to assess the event’s performance and audience engagement.
3. Track ticket sales or registration numbers: If you have ticket sales or registration, monitor the number of tickets sold or registrations received. Compare against your target or previous events to gauge attendee interest and identify trends.
4. Monitor attendee feedback and reviews: Pay attention to attendee feedback and reviews, both during and after the event. This valuable feedback can provide insights into attendee satisfaction, areas for improvement, and ideas for future events.
5. Analyze social media engagement: Track social media metrics such as likes, comments, shares, and mentions related to your event. Analyze the sentiment and level of engagement to gain insight into audience perception and identify areas of success or improvement.
6. Review attendee demographics: Facebook’s insights can also provide demographic data about your event attendees. Analyze this information to understand your target audience better and tailor future events to their preferences and needs.
7. Assess financial performance: Evaluate the financial performance of your event by analyzing revenue, expenses, and profit margin. Assess whether the event met or exceeded financial targets and identify areas where costs can be optimized.
8. Collect testimonials and success stories: Gather testimonials and success stories from attendees, sponsors, or partners. These firsthand accounts can be used as valuable marketing assets for future events and demonstrate the positive impact of your event.
9. Reflect on event objectives: Compare the event’s outcomes against the initial goals and objectives you set. Evaluate whether these objectives were met and identify areas where improvements can be made for future events.
10. Document lessons learned: Keep a record of the lessons learned during the event planning and execution process. Note down what worked well, areas for improvement, and any valuable insights to inform your future event strategies.
By effectively managing and tracking the performance of your event, you can evaluate its success and make data-backed decisions for future events. Continuously analyze the metrics, feedback, and insights to refine your event planning strategies and deliver exceptional experiences to your attendees.