
What You Will Need
Before you can start controlling your lights with Alexa, you will need a few essential things:
- Smart Lights: Make sure you have compatible smart lights that can be controlled with Alexa. There are several popular brands available in the market, such as Philips Hue, LIFX, and TP-Link.
- Alexa-enabled Device: You will need an Alexa-enabled device, such as an Amazon Echo, Echo Dot, or Echo Show. These devices act as the central hub for your voice commands.
- Alexa App: Download and install the Alexa app on your smartphone or tablet. This app is available for both iOS and Android devices and is crucial for setting up and managing your Alexa-enabled devices.
- Stable Wi-Fi Connection: Ensure you have a stable Wi-Fi connection at home. A reliable internet connection is necessary for your smart lights to communicate with the Alexa app and respond to your voice commands.
- Account Credentials: Make sure you have your Amazon account credentials handy. You will need these credentials to log in to the Alexa app and link your smart lights.
Once you have gathered all the necessary items mentioned above, you are ready to proceed to the next steps and set up your smart lights with Alexa.
Step 1: Set Up Your Smart Lights
The first step in controlling lights with Alexa is to set up your smart lights. Follow these instructions to get started:
- Unbox your smart lights and make sure all the components are included.
- Read the manufacturer’s instructions carefully and identify any specific setup requirements for your smart lights.
- Install the smart lights in the desired locations around your home. Make sure they are connected to a power source.
- If necessary, download the manufacturer’s dedicated app for your smart lights from the iOS App Store or Google Play Store.
- Launch the app and create an account if required. Follow the app’s prompts to connect your smart lights to your Wi-Fi network.
- Once the smart lights are connected to your Wi-Fi network, test them using the manufacturer’s app to ensure they are functioning correctly.
It’s essential to have your smart lights set up and operational before moving on to the next steps. Once you have confirmed that your smart lights are working correctly, you can proceed to connect them to the Alexa app.
Step 2: Connect Your Lights to the Alexa App
Now that you have your smart lights set up, the next step is to connect them to the Alexa app. Follow these steps to link your lights:
- Open the Alexa app on your smartphone or tablet.
- Tap on the “Devices” tab at the bottom of the screen.
- Choose the “+” icon in the top right corner to add new devices.
- Select “Add Device” and choose the type of device you want to add. In this case, select “Light”.
- The app will search for available devices. Make sure your smart lights are in pairing mode. Refer to the manufacturer’s instructions if you are unsure how to activate pairing mode.
- Once your smart lights are discovered, select them from the list.
- Follow the on-screen prompts to complete the setup process and link your smart lights to the Alexa app.
The Alexa app will now be able to control your smart lights. You can test the connection by using voice commands or through the app’s controls.
Note: If you encounter any issues during the pairing process, make sure your smart lights are properly set up and connected to your Wi-Fi network. Restarting the smart lights or the Alexa app may also help resolve any connectivity problems.
Step 3: Enable the Light Control Skill
After connecting your smart lights to the Alexa app, the next step is to enable the light control skill. The skill allows Alexa to communicate with your smart lights and execute commands. Follow these steps to enable the skill:
- Launch the Alexa app on your smartphone or tablet.
- Tap on the “Skills & Games” option in the menu.
- Search for the specific skill associated with your smart lights. For example, if you are using Philips Hue, search for “Philips Hue skill”.
- Select the skill from the search results.
- Tap the “Enable” button to enable the skill.
- Follow any additional prompts or instructions to complete the skill setup process.
Enabling the light control skill is crucial as it allows Alexa to understand and execute your voice commands specific to your smart lights. Once the skill is enabled, you can proceed to discover your devices and start controlling your lights with Alexa.
Note: Make sure you are using the correct skill associated with your smart lights brand. Different smart light brands may have their own dedicated skills in the Alexa app.
Step 4: Discover Devices
After enabling the light control skill, the next step is to discover your smart lights within the Alexa app. The discovery process allows Alexa to recognize and communicate with your connected lights. Follow these steps to discover your devices:
- Open the Alexa app on your smartphone or tablet.
- Tap on the “Devices” tab at the bottom of the screen.
- Choose the “+” icon in the top right corner to add new devices.
- Select “Add Device”.
- The app will begin searching for new devices. Wait for the app to finish the discovery process.
- Once the discovery is complete, you will see a list of all the devices found. This list should include your connected smart lights.
- Select the smart lights you want to control with Alexa from the list.
- Tap “Add to Group” if you want to assign the lights to a specific group for easier control. Otherwise, you can skip this step.
- Follow the on-screen prompts to complete the device discovery process.
By discovering your devices within the Alexa app, you are ensuring that Alexa recognizes and can communicate with your smart lights. This step is crucial for seamless control and integration between Alexa and your smart lights.
Note: If any of your smart lights are not discovered during the process, make sure they are properly connected to your Wi-Fi network and that the light control skill is enabled. You may need to restart the app, the devices, or repeat the discovery process to resolve any connectivity issues.
Step 5: Group Your Lights
Grouping your lights allows you to control multiple smart lights simultaneously with a single command. This step can be particularly useful when you want to adjust the lighting in a room or create different lighting scenes. Follow these steps to group your lights:
- Open the Alexa app on your smartphone or tablet.
- Tap on the “Devices” tab at the bottom of the screen.
- Choose the “+” icon in the top right corner to add new devices.
- Select “Add Group”.
- Choose a name for the group, such as “Living Room Lights” or “Bedroom Lights”.
- Select the smart lights you want to include in the group from the list of discovered devices.
- Tap “Save” to create the group.
Once you have successfully grouped your lights, you can control them together by using a single command. For example, you can say, “Alexa, turn off the living room lights,” and all the lights in the living room group will turn off simultaneously.
Grouping your lights allows for more convenient and efficient control, particularly when you want to control multiple lights in the same area or create lighting scenes to suit different moods or activities. You can create different groups based on your specific needs and preferences.
Note: You can also create custom groups with specific names based on your preferences. For example, if you have a reading nook with a specific light, you can create a group called “Reading Nook” and include only the relevant light in that group. This gives you even more flexibility in controlling your lights with Alexa.
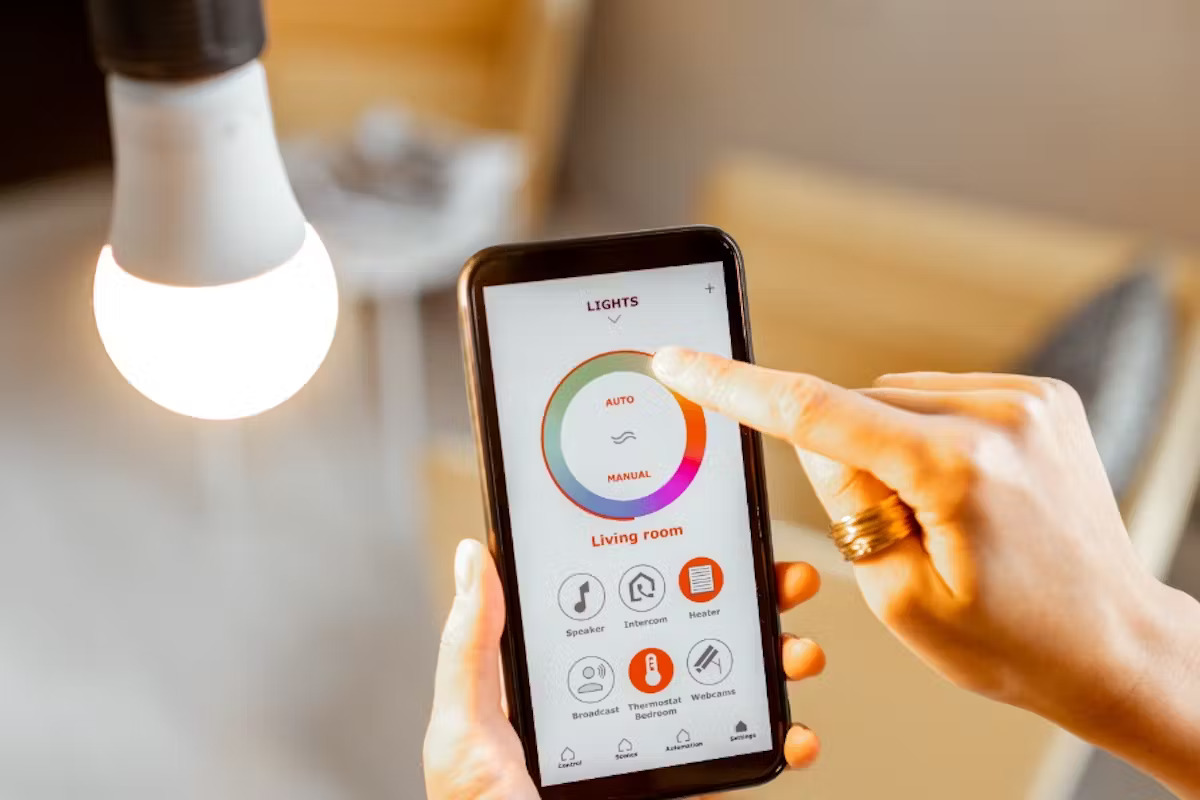
Step 6: Control Your Lights with Alexa
Now that you have set up and grouped your lights, it’s time to start controlling them with Alexa. Alexa allows you to use voice commands to control your lights, making it easy and convenient to adjust the lighting in your home. Here’s how you can control your lights with Alexa:
- To turn on a specific light or group of lights, simply say, “Alexa, turn on [light/group name].” For example, “Alexa, turn on the living room lights.”
- To turn off the lights, say, “Alexa, turn off [light/group name].” For example, “Alexa, turn off the bedroom lights.”
- If you want to dim the lights, say, “Alexa, dim [light/group name] to [desired percentage].” For example, “Alexa, dim the kitchen lights to 50%.”
- If your smart lights support color changing, you can ask Alexa to change the lights’ colors. For example, “Alexa, set the bedroom lights to blue.”
- To create a specific lighting scene, you can save a preset command in the Alexa app. For example, you can create a scene called “Movie Night” that dims the living room lights and turns on the TV. Then, you can say, “Alexa, activate movie night.”
Controlling your lights with Alexa adds convenience and simplicity to your daily routines. You no longer have to manually switch each light on or off; instead, you can use voice commands to control them effortlessly.
Note: Ensure that your Alexa-enabled device is within range and can accurately hear your voice commands. If Alexa has difficulty understanding your commands, try to speak clearly and at a normal volume.
Step 7: Customize Your Light Commands
While Alexa provides default commands to control your lights, you can also customize your commands to suit your preferences. Customizing your light commands allows for a more personalized and intuitive control experience. Here’s how you can customize your light commands:
- Open the Alexa app on your smartphone or tablet.
- Tap on the “Devices” tab at the bottom of the screen.
- Select the group or individual light you want to customize.
- Tap on the three-dot menu icon in the top-right corner.
- Choose “Edit Name” to change the name of the light or group. This allows you to use a more specific or personalized name when giving voice commands. For example, you can change the master bedroom light group name to “Bedtime Lights.”
- Additionally, you can set up routines in the Alexa app to create specific actions for your lights. Routines allow you to automate a series of actions with a single voice command or schedule. For example, you can create a routine called “Good Morning” that turns on the kitchen lights, starts your coffee machine, and plays your favorite morning playlist.
- To create a routine, go to the “Routines” section in the Alexa app and follow the prompts to set up the desired actions and trigger phrase for your routine.
By customizing your light commands and creating routines, you can make controlling your lights even more tailored to your needs and preferences. This level of customization enhances the overall smart home experience and makes interacting with your lights through Alexa seamless and intuitive.
Note: Take advantage of the range of customizations available in the Alexa app to personalize your light control experience. Experiment with different group names, routine setups, and trigger phrases until you find the setup that works best for you.
Step 8: Troubleshooting Common Issues
While setting up and controlling your lights with Alexa is usually smooth, you may encounter some common issues along the way. Here are some troubleshooting tips to help you resolve these issues:
- If Alexa is having trouble discovering your lights, try restarting both your smart lights and your Alexa-enabled device. Sometimes, a simple restart can help establish a better connection.
- Check your Wi-Fi connectivity. If your smart lights are not properly connected to your Wi-Fi network, Alexa won’t be able to control them. Ensure that your Wi-Fi signal is strong and stable, and that your smart lights are within range.
- Make sure you have the latest firmware or updates installed for both your smart lights and your Alexa-enabled device. Updates can often fix any bugs or compatibility issues.
- Double-check that you have enabled the correct skill associated with your smart lights. Using the wrong skill can lead to connectivity problems. If necessary, disable and re-enable the skill to refresh the connection.
- If you are having trouble with specific voice commands, try rephrasing them. Alexa sometimes has difficulty understanding certain phrases or accents. Experiment with different ways of phrasing your commands to find what works best.
- If your smart lights are not responding consistently, it could be due to a weak or congested Wi-Fi network. Consider adding a Wi-Fi extender or optimizing your network to ensure better signal strength and reliability.
If you have tried these troubleshooting steps and are still experiencing issues, it may be helpful to consult the support documentation or contact the customer support for your specific smart lights brand or the Alexa support team. They can provide further guidance and assistance in resolving any persistent issues.
Remember, troubleshooting is a normal part of setting up and integrating smart home devices. With a little patience and persistence, you can overcome any obstacles and enjoy the convenience and control of using Alexa to manage your lights.