Checking Compatibility
Before connecting wireless headphones to your Xbox One, it’s crucial to ensure compatibility. There are a few factors to consider when determining if your wireless headphones will work seamlessly with your gaming console.
Firstly, check if your wireless headphones are compatible with Xbox One. Most modern wireless headphones are compatible, but it’s always wise to double-check by referring to the manufacturer’s specifications or contacting their customer support.
Secondly, make sure your wireless headphones support the audio format used by Xbox One. Xbox One primarily uses two audio formats: stereo and surround sound. Ensure that your headphones can handle the specific audio format you desire for an immersive gaming experience.
Furthermore, verify the type of connection your wireless headphones offer. Xbox One supports different connection methods, including USB, optical cable, 3.5mm audio jack, and Bluetooth. Ensure that your headphones have the appropriate connection port or feature to connect to the console.
Remember that not all wireless headphones use the same wireless technology. Some use Bluetooth, while others employ proprietary wireless protocols specific to their brand. Ensure that your wireless headphones support the same wireless technology as the Xbox One to establish a seamless wireless connection.
It’s also crucial to check if your wireless headphones require any additional adapters or accessories to connect to the Xbox One. Some headphones may need a wireless audio adapter or a specific cable to connect to the console, so be sure to check the requirements beforehand.
Lastly, consider the range and battery life of your wireless headphones. Make sure the range is sufficient to maintain a strong connection with the console, and that the battery life allows for extended gaming sessions without interruptions.
By thoroughly checking the compatibility of your wireless headphones with the Xbox One, you can ensure a smooth and hassle-free experience. Once you’ve confirmed compatibility, you can proceed to connect your wireless headphones to your gaming console and enjoy immersive audio while gaming.
Connecting Wireless Headphones Using an Adapter
If your wireless headphones do not have a built-in compatibility with the Xbox One, you can use an adapter to connect them. Xbox offers a wireless audio adapter specifically designed for connecting wireless headphones to the console.
Here is a step-by-step guide on how to connect wireless headphones to Xbox One using an adapter:
- Plug the Xbox Wireless Audio Adapter into the USB port on the Xbox One console.
- Turn on your wireless headphones and set them to pairing mode. Refer to the user manual of your headphones for instructions on how to activate pairing mode.
- Press and hold the pairing button on the Xbox Wireless Audio Adapter until the light starts flashing.
- On your wireless headphones, locate the Bluetooth button or the pairing button and press it. This will initiate the pairing process with the Xbox Wireless Audio Adapter.
- Once the pairing process is successful, the light on the Xbox Wireless Audio Adapter will stop flashing, indicating that the connection is established.
- Go to the Xbox settings menu, select “Display & Sound,” and then choose “Audio Output.”
- Under the “Speakers” option, select “Xbox Wireless Adapter” to route the audio output to your wireless headphones.
It is essential to remember that the specific steps and button locations might vary depending on the brand and model of your wireless headphones and the Xbox Wireless Audio Adapter. Consult the user manuals of both devices for detailed instructions.
Once connected, you can adjust the audio settings on your Xbox One to optimize the sound quality according to your preferences. Enjoy the freedom of wireless audio while gaming on your Xbox One!
Connecting Wireless Headphones with an Optical Cable
If your wireless headphones have an optical input and your Xbox One has an optical output, you can connect them using an optical cable for high-quality audio transmission.
Follow these steps to connect wireless headphones to Xbox One using an optical cable:
- Locate the optical audio output port on your Xbox One console. It is usually labeled “Optical audio” or “TOSLINK.”
- Connect one end of the optical cable to the optical audio output port on the Xbox One console.
- Plug the other end of the optical cable into the optical input port on your wireless headphones.
- Turn on your wireless headphones and set them to the correct audio input source (optical).
- Go to the Xbox settings menu, select “Display & Sound,” and then choose “Audio Output.”
- Under the “Speakers” option, select “Stereo Uncompressed” or “Surround Sound” to optimize the audio output based on your headphones’ capabilities.
- Adjust the volume level on your wireless headphones and enjoy the immersive audio experience while gaming on your Xbox One.
It is important to note that not all wireless headphones support optical input. Ensure that your headphones have an optical input port before attempting this connection method.
If your headphones do not have an optical input port, you can explore other connection options, such as using an adapter or connecting through a 3.5mm AUX cable.
By connecting your wireless headphones to Xbox One using an optical cable, you can enjoy high-quality audio output, enhancing your gaming experience with crisp and immersive sound.
Connecting Wireless Headphones with a 3.5mm Aux Cable
If your wireless headphones have a 3.5mm audio jack and your Xbox One controller has a corresponding 3.5mm headphone jack, you can connect them using a 3.5mm aux cable.
Follow these steps to connect wireless headphones to Xbox One using a 3.5mm aux cable:
- Locate the 3.5mm headphone jack on your wireless headphones.
- Insert one end of the 3.5mm aux cable into the headphone jack of your wireless headphones.
- Locate the 3.5mm headphone jack on your Xbox One controller. It is typically located at the bottom.
- Insert the other end of the 3.5mm aux cable into the headphone jack of your Xbox One controller.
- Turn on your wireless headphones and set them to the correct audio input source (line-in or auxiliary).
- Go to the Xbox settings menu, select “Display & Sound,” and then choose “Audio Output.”
- Under the “Speakers” option, select “Headset” to route the audio output to your wireless headphones.
- Adjust the volume level on your wireless headphones and enjoy the immersive audio experience while gaming on your Xbox One.
If you prefer to use the chat headset connected to the Xbox One controller, make sure to disable the microphone on your wireless headphones to avoid audio conflicts.
It is important to note that not all wireless headphones have a 3.5mm audio jack. Ensure that your headphones have a 3.5mm audio jack before attempting this connection method.
By connecting your wireless headphones to Xbox One using a 3.5mm aux cable, you can enjoy personalized audio output without disturbing others and experience gameplay with enhanced sound quality.
Pairing Wireless Headphones with Xbox One using Bluetooth
If your wireless headphones support Bluetooth connectivity, you can easily pair them with your Xbox One console and enjoy a wireless audio experience.
Here is a step-by-step guide on how to pair wireless headphones with Xbox One using Bluetooth:
- Turn on your wireless headphones and put them into pairing mode. Consult the user manual of your headphones for instructions on how to activate pairing mode.
- On your Xbox One, go to the settings menu, select “Devices & connections,” and then choose “Bluetooth.”
- Toggle on the Bluetooth feature to enable Bluetooth connectivity on your Xbox One.
- On your Xbox One, select “Add Bluetooth & other devices” and choose “Everything else.”
- Your Xbox One will start searching for nearby Bluetooth devices. Once your wireless headphones appear in the list of available devices, select them.
- If prompted, enter the passkey or PIN provided by your wireless headphones manufacturer.
- Once paired, your wireless headphones will be connected to your Xbox One via Bluetooth, and you can start enjoying wireless audio while gaming.
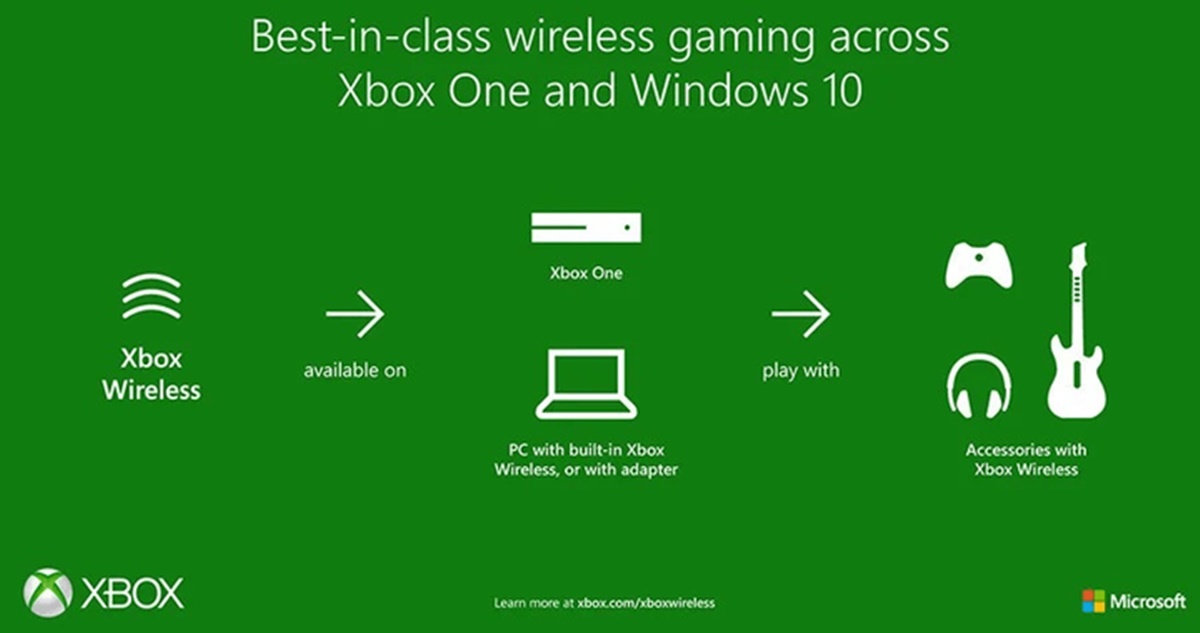
It is important to note that not all Xbox One consoles support Bluetooth connectivity. Only the newer models, such as the Xbox One S and Xbox One X, have built-in Bluetooth capabilities. If you have an older Xbox One model, you may need to use an Xbox Wireless Adapter (sold separately) to enable Bluetooth connectivity.
Additionally, keep in mind that Bluetooth connections may introduce latency or audio quality limitations compared to other connection methods. If you prioritize low-latency or high-quality audio, consider using an adapter or a wired connection instead.
By pairing your wireless headphones with Xbox One using Bluetooth, you can enjoy the convenience of wireless audio without the need for additional cables or adapters.
Troubleshooting Common Issues when Connecting Wireless Headphones to Xbox One
While connecting wireless headphones to Xbox One can enhance your gaming experience, you may encounter a few common issues along the way. Here are some troubleshooting steps to help resolve these problems:
1. Connection Dropouts: If you experience frequent audio dropouts or interruptions, try the following:
- Ensure that your wireless headphones are within the recommended range of the Xbox One console for a stable connection.
- Move any potential sources of interference, such as other wireless devices or walls, away from the wireless headphones and the console.
- Check for any firmware updates for your wireless headphones or Xbox One console, as manufacturers often release updates to improve connectivity.
2. Audio Lag or Delay: If you notice a delay between the actions on-screen and the corresponding audio, try these solutions:
- Disable any audio processing or enhancement features on your wireless headphones or Xbox One settings, as they can introduce additional latency.
- Use a wired connection method, such as an adapter or a 3.5mm aux cable, instead of relying solely on wireless connectivity.
- Ensure that your wireless headphones and Xbox One console are within close proximity to minimize potential latency caused by distance.
3. Poor Audio Quality: If the audio quality is distorted or lacks clarity, consider the following troubleshooting steps:
- Check the audio settings on your Xbox One console and adjust them according to the capabilities of your wireless headphones.
- Ensure that the audio codec used by your headphones (such as AAC or aptX) is supported by both the headphones and the Xbox One console.
- Try changing the audio format on your Xbox One console to test if a different format improves the audio quality.
4. Device Compatibility: If you find that your wireless headphones are not recognized or compatible with Xbox One, consider the following solutions:
- Check for any updates or firmware upgrades for your wireless headphones from the manufacturer’s website or support resources.
- Explore alternative connection methods, such as using an adapter or a compatible cable, if your wireless headphones do not support the desired connection options.
- Consult the user manual or contact the manufacturer’s customer support for specific guidance on compatibility with Xbox One.
If you are still experiencing issues after trying these troubleshooting steps, it is advisable to contact the customer support of both your wireless headphones’ manufacturer and Xbox One for further assistance and guidance tailored to your specific situation.