
What is a Philips Hue Light Strip?
A Philips Hue Light Strip is a versatile and innovative lighting solution that allows you to add a vibrant and customizable ambiance to your home. It consists of flexible LED lights that can be easily mounted and placed in various locations, offering a wide range of creative lighting possibilities.
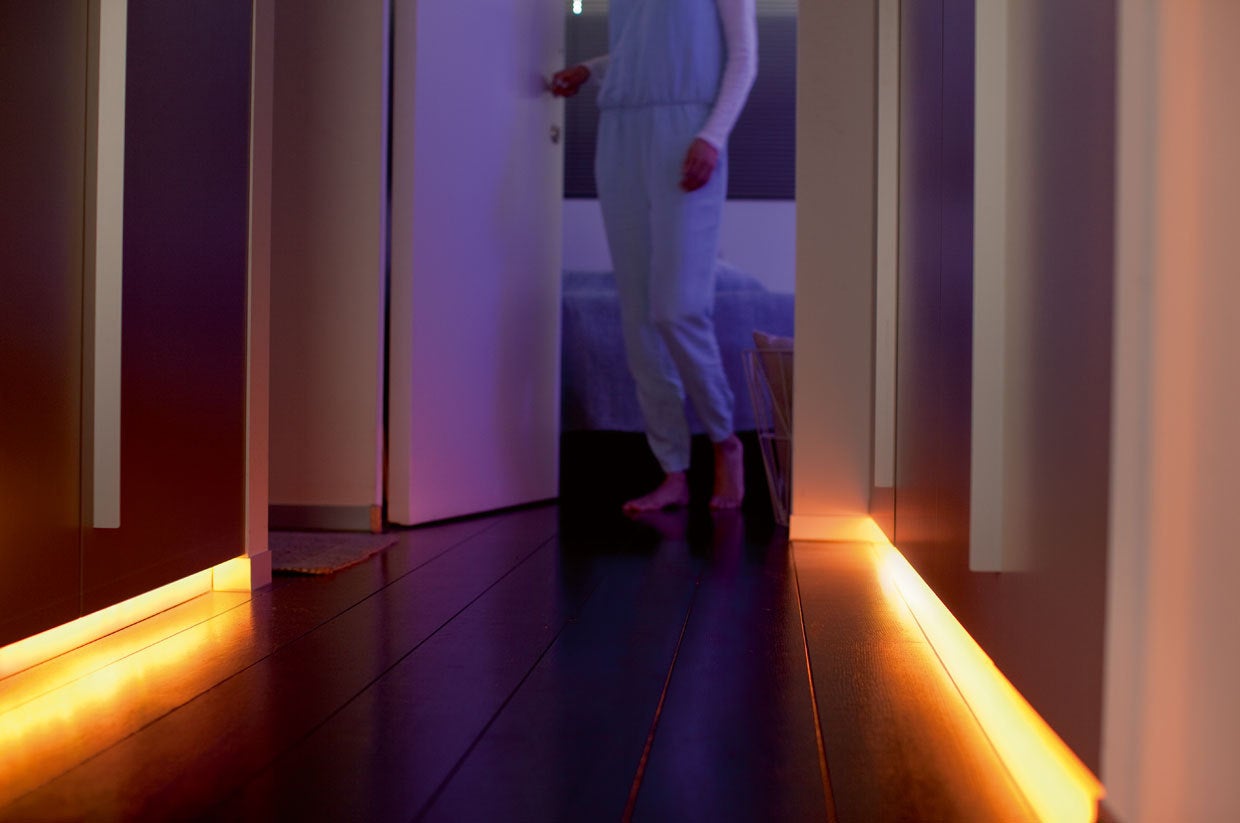
Unlike traditional light bulbs, the Philips Hue Light Strip is designed to provide indirect lighting, turning any space into a captivating and atmospheric environment. Whether you want to highlight architectural features, create a stunning backlight effect, or simply add a touch of color to a room, the Philips Hue Light Strip can help you achieve your desired lighting setup.
One of the standout features of the Philips Hue Light Strip is its smart functionality. It is compatible with the Philips Hue ecosystem, which allows you to control and customize your lights using a smartphone app or voice commands. With this system, you can easily adjust the brightness, color, and even the timing of your lights, ensuring that your lighting matches your mood and preferences.
The Philips Hue Light Strip comes in different lengths to accommodate different areas and installations. It can be cut at designated marks or extended by connecting additional strips, providing flexibility to fit your unique lighting needs. Additionally, the light strip can be placed under cabinets, along the edges of furniture, or even behind televisions to create stunning visual effects.
Whether you are looking for a subtle lighting effect or a bold statement of color, the Philips Hue Light Strip offers endless possibilities to transform your living space. It’s not just a regular lighting fixture; it’s a modern and intelligent lighting solution that brings both style and functionality to your home.
Step 1: Unboxing and Setup
Before you can start enjoying the vibrant lighting experience of the Philips Hue Light Strip, you’ll need to go through the unboxing and setup process. Follow these steps to get started:
- Unbox the Package: Gently open the packaging of your Philips Hue Light Strip and take out all the included components. You should find the light strip itself, a power adapter, and the Philips Hue Bridge.
- Connect the Bridge: Find a suitable location near your Wi-Fi router to connect the Philips Hue Bridge. Plug one end of the Ethernet cable into the bridge and the other end into an available Ethernet port on your router.
- Power Up the Bridge: Plug the power adapter into the back of the Philips Hue Bridge and connect it to a power source. The bridge will start up and show a solid blue light indicating a successful connection.
- Position the Light Strip: Decide where you want to install the Philips Hue Light Strip. Ensure that it is within reach of a power outlet and will be easy to connect to the bridge. The adhesive backing on the light strip will help secure it in place.
- Connect the Light Strip: Begin connecting the light strip by attaching the male end of the light strip to the female connector on the power adapter. Make sure the connection is secure and the pins are properly aligned.
- Plug in and Power up: Plug the power adapter into a nearby power outlet and switch it on. The light strip should light up, indicating a successful power connection.
With these simple steps, you have successfully unboxed and set up your Philips Hue Light Strip. Now you’re ready to move on to the next steps and explore the numerous customization options available to create the perfect lighting ambiance in your home.
Step 2: Download and Install the Philips Hue App
To fully utilize the features of the Philips Hue Light Strip, you’ll need to download and install the Philips Hue app on your smartphone or tablet. Here’s how you can do it:
- Head to the App Store: If you’re using an iOS device, open the App Store. For Android users, open the Google Play Store.
- Search for Philips Hue: In the search bar, type “Philips Hue” and tap on the official Philips Hue app when it appears in the search results.
- Install the App: Tap the “Install” button to download and install the app on your device. The app is free to download, so you won’t have to worry about any additional costs.
- Open the App: Once the installation is complete, tap the “Open” button to launch the Philips Hue app.
- Create an Account: If you’re using the app for the first time, you’ll need to create a Philips Hue account. Simply follow the on-screen instructions and provide the necessary details to set up your account.
- Discover Devices: Once you’ve created an account, the app will automatically search for and discover the Philips Hue Bridge. Make sure your smartphone or tablet is connected to the same Wi-Fi network as the bridge.
- Follow the Prompts: The app will guide you through the setup process, including assigning a name to your bridge and configuring its settings. Follow the prompts and provide the requested information to proceed.
After completing these steps, you will have successfully downloaded and installed the Philips Hue app on your device. This app will serve as your control center for managing and customizing your Philips Hue Light Strip. You can now move on to the next steps and connect your light strip to the app to unleash its full potential.
Step 3: Connecting the Light Strip to the Philips Hue Bridge
Now that you have the Philips Hue app installed on your device, it’s time to connect your Philips Hue Light Strip to the Philips Hue Bridge. Follow these steps to establish a connection:
- Open the Philips Hue App: Launch the Philips Hue app on your smartphone or tablet.
- Access the Settings: Look for the “Settings” option in the app’s menu, usually represented by a gear icon. Tap on it to access the settings menu.
- Select “Light Setup”: In the settings menu, locate and tap on “Light Setup” to initiate the process of connecting your light strip to the bridge.
- Tap “Add Light”: You will be presented with an option to add a new light to your system. Tap on “Add Light” to proceed.
- Choose the Light Strip: From the list of available light types, select “Lightstrip” or “Lightstrip Plus” depending on the model of your Philips Hue Light Strip.
- Power on the Light Strip: Make sure the light strip is powered on and emitting light. If it’s not already plugged in, connect it to a power source and wait for it to turn on.
- Confirm Connection: The app will now search for the nearby devices. Once it detects your light strip, confirm the connection by following the on-screen instructions.
- Assign a Name: You will be prompted to give a unique name to your light strip. Choose a name that is easy to remember and represents the location or purpose of the light strip.
- Test the Connection: The app will now check the connection to ensure that your light strip is successfully connected to the Philips Hue Bridge. If the test is successful, you can proceed to the next steps.
By following these steps, you have now successfully connected your Philips Hue Light Strip to the Philips Hue Bridge using the Philips Hue app. The bridge serves as the central hub for controlling and customizing your light strip, allowing you to unleash its full potential.
Step 4: Configuring the Light Strip in the App
After connecting your Philips Hue Light Strip to the Philips Hue Bridge, it’s time to configure the settings and customize the lighting experience according to your preferences. Follow these steps to configure the light strip in the app:
- Open the Philips Hue App: Launch the Philips Hue app on your smartphone or tablet.
- Access the Light Controls: Look for the “Lights” tab or icon in the app’s menu and tap on it to access the light controls.
- Find the Light Strip: In the list of available lights, locate and select the name you assigned to your Philips Hue Light Strip during the connection process.
- Adjust Brightness: Use the on-screen controls or sliders to adjust the brightness of the light strip. Move the slider to the right to increase the brightness and to the left to decrease it.
- Choose Colors: If your light strip supports color options, you can select from a wide range of colors or create your own custom color. Use the color wheel or preset options to choose the desired color.
- Create Scenes: Scenes are pre-set lighting configurations that you can save and activate with a single tap. Experiment with different combinations of brightness and colors to create scenes that match different moods or occasions.
- Set Schedules: Take advantage of the scheduling feature to automatically turn on or off the light strip at specific times. This is particularly useful for creating a wake-up routine or simulating occupancy while you’re away.
- Explore Additional Settings: Explore the app’s settings to access advanced features such as synchronization with music or setting up motion sensors for automated lighting control.
By following these steps, you have successfully configured the settings of your Philips Hue Light Strip using the Philips Hue app. Take the time to explore the different options and find the perfect lighting setup that suits your needs and preferences. With the customization options available in the app, you’ll be able to create stunning lighting effects and transform the atmosphere of any room with ease.
Step 5: Setting Up Schedules and Routines
One of the key features of the Philips Hue Light Strip is the ability to set up schedules and routines. This allows you to automate the lighting according to your daily routines or specific events. Follow these steps to set up schedules and routines in the Philips Hue app:
- Open the Philips Hue App: Launch the Philips Hue app on your smartphone or tablet.
- Access the Routine or Schedule Feature: Look for the “Routines” or “Schedules” tab in the app’s menu and tap on it to access the automation settings.
- Create a New Routine or Schedule: Tap on the “Add” or “Create” button to start creating a new routine or schedule.
- Specify Time and Days: Set the time and days when you want the routine or schedule to activate. For example, you can set a routine to turn on the light strip in the evening on weekdays.
- Choose Actions: Specify the actions you want the light strip to perform when the routine or schedule is active. This can include turning the light on or off, adjusting the brightness, or changing the color.
- Save and Activate: Once you have configured the settings, save the routine or schedule and activate it. The light strip will now automatically follow the programmed actions at the specified times.
- Modify or Delete: If you ever need to make changes to an existing routine or schedule, you can easily modify or delete it in the app’s settings.
- Experiment and Refine: Take the time to experiment with different schedules and routines to find what works best for you. You can create different routines for different occasions or customize the lighting according to your needs.
By setting up schedules and routines, you can enhance the convenience and energy efficiency of your Philips Hue Light Strip. Whether you want the light strip to automatically turn on as you wake up in the morning or create a welcoming ambiance before you arrive home, the automation features in the app make it easy to achieve.
Step 6: Controlling the Light Strip with Voice Assistants
If you have a voice assistant like Amazon Alexa or Google Assistant, you can further enhance your experience with the Philips Hue Light Strip by controlling it using your voice. Follow these steps to set up and control the light strip with voice assistants:
- Make Sure Your Voice Assistant is Set Up: Ensure that your voice assistant device is properly set up and connected to your smart home network. Follow the manufacturer’s instructions to complete the setup process.
- Connect the Philips Hue Bridge to Your Voice Assistant: Open the Alexa or Google Home app on your device and navigate to the connected devices section. Follow the prompts to link your Philips Hue Bridge to your voice assistant.
- Discover Devices: In the voice assistant app, initiate a device discovery or scan for connected devices. The app will search for and discover the Philips Hue Light Strip along with other Philips Hue devices connected to the bridge.
- Name Your Light Strip: Assign a unique name to your Philips Hue Light Strip in the voice assistant app. This will allow you to control it individually or as part of a group.
- Control with Voice Commands: Once the setup is complete, you can use voice commands to control your light strip. For example, you can say “Hey Alexa, turn on the living room light strip” or “Hey Google, dim the light strip to 50%.”
- Create Personalized Routines: Take advantage of the features in your voice assistant app to create personalized routines that trigger specific actions for your light strip. For example, you can create a “movie night” routine that dims the lights and sets the light strip to a relaxing color.
- Experiment with Voice Control: Explore the different voice commands and capabilities of your voice assistant to unlock the full potential of controlling your Philips Hue Light Strip. From adjusting colors to setting scenes, you’ll find various ways to customize your lighting experience.
By integrating your Philips Hue Light Strip with a voice assistant, you can enjoy the convenience of controlling your lighting with simple voice commands. It adds an extra layer of flexibility and ease of use, allowing you to adjust your light strip without even needing to touch your smartphone or tablet.
Troubleshooting Guide
While the Philips Hue Light Strip is designed to provide a seamless lighting experience, you may encounter some issues along the way. Here are some common troubleshooting steps to help you resolve any problems:
- Check Power Connection: Make sure the power adapter is securely plugged into both the light strip and the power source. Ensure that there are no loose connections or faulty cables.
- Reset the Bridge: If you are experiencing connectivity issues, try resetting the Philips Hue Bridge by unplugging it from the power source for a few seconds and then plugging it back in.
- Check Wi-Fi Signal: Ensure that the Philips Hue Bridge is within range of your Wi-Fi router and that the Wi-Fi signal is strong. If the connection is weak, consider moving the bridge closer to the router or using a Wi-Fi extender.
- Restart the App: If you are experiencing difficulties with the Philips Hue app, try closing the app and reopening it. This can help refresh the connection and resolve any temporary issues.
- Update Firmware: Check for firmware updates for both the Philips Hue Bridge and the light strip. Keeping the firmware up to date can improve performance and compatibility.
- Ensure Proper Placement: Verify that the light strip is properly installed and positioned. Make sure it is securely attached and that there are no obstructions blocking the light.
- Reset the Light Strip: If the light strip is not responding, you can try resetting it by disconnecting and reconnecting the power source. Refer to the user manual for specific instructions on how to reset your light strip model.
- Check Network Settings: Make sure that your smartphone or tablet is connected to the same Wi-Fi network as the Philips Hue Bridge. In case of network issues, try restarting your router.
- Contact Support: If you have tried all the troubleshooting steps and are still experiencing issues, reach out to Philips Hue customer support for further assistance. They can provide detailed guidance and help you resolve any complex technical problems.
Remember, troubleshooting can vary depending on the specific issue you are facing. It’s always a good idea to consult the Philips Hue user manual or visit their official support website for additional troubleshooting tips and resources.
Tips and Tricks for Using the Philips Hue Light Strip
The Philips Hue Light Strip offers numerous possibilities for creating stunning lighting effects in your home. Here are some tips and tricks to help you maximize your experience with the light strip:
- Create Ambiance: Experiment with different colors and brightness levels to set the perfect ambiance for any occasion. Dim the lights for a relaxing movie night or choose bright, vibrant colors for a lively gathering.
- Use Light Strip Extensions: If you need to cover a larger area or create unique shapes and patterns, consider using light strip extensions. These extensions allow you to connect multiple light strips together for increased flexibility.
- Explore Third-Party Apps: The Philips Hue ecosystem offers a wide range of third-party apps that extend the functionality of your light strip. Discover specialized apps that offer dynamic lighting effects, music synchronization, and more.
- Sync with Entertainment: Take your movie or gaming experience to the next level by syncing your light strip with your entertainment system. Apps like Philips Hue Sync can analyze audio and video signals to create immersive lighting effects that match what’s happening on the screen.
- Set Up Geofencing: Use geofencing features in the Philips Hue app to automatically turn on or off the light strip based on your location. This is especially useful for ensuring your lights are turned off when you leave home or turned on as you approach.
- Experiment with Light Placement: Don’t limit yourself to traditional placements. Explore unique ways to incorporate the light strip, such as mounting it behind furniture, under cabinets, or even along staircases to create a dramatic effect.
- Utilize Voice Control: If you have a compatible voice assistant, take advantage of the convenience of voice control. Set up voice commands to turn on or off the light strip, change colors, or activate specific scenes with a simple voice prompt.
- Integrate with Smart Home Systems: Connect your Philips Hue Light Strip to your smart home ecosystem and create automation routines. For example, you can set up the light strip to turn on when a motion sensor detects movement in a specific area.
- Keep the Firmware Up to Date: Regularly check for firmware updates for your Philips Hue products and ensure they are up to date. Firmware updates often include performance improvements and compatibility enhancements.
- Have Fun with the Philips Hue Community: Engage with the Philips Hue community through online forums and social media groups. Get inspired by other users’ lighting setups, share your own creations, and discover new ideas for using the light strip.
By incorporating these tips and tricks into your use of the Philips Hue Light Strip, you can unleash its full potential and create captivating lighting experiences throughout your home. Embrace creativity, experiment with different settings, and enjoy the endless possibilities that this innovative lighting solution offers.