
Check Your TV’s Wi-Fi Capability
Before attempting to connect your smart TV to Wi-Fi, it’s essential to check if your TV is equipped with built-in Wi-Fi capability. While most modern smart TVs come with Wi-Fi connectivity, some older models may require an external Wi-Fi adapter.
To determine if your TV has Wi-Fi capability, refer to the user manual or product specifications. Look for terms like “wireless”, “Wi-Fi”, or “network connectivity” in the TV’s features list. Alternatively, you can check the TV’s settings menu for a wireless or network section.
If your TV doesn’t have built-in Wi-Fi, you may need to purchase a compatible Wi-Fi adapter. These adapters connect to your TV’s USB or Ethernet port, allowing it to connect to Wi-Fi networks. Ensure that the adapter you choose is compatible with your TV model and follows the manufacturer’s recommendations.
It’s also important to note that some smart TVs offer both wired and wireless connectivity options. If your TV supports a wired connection using an Ethernet cable, you have the option to connect directly to your router for a more stable connection.
By verifying your TV’s Wi-Fi capabilities, you can ensure that it has the necessary hardware to connect wirelessly to the internet. This step is crucial before proceeding with the Wi-Fi setup process on your smart TV.
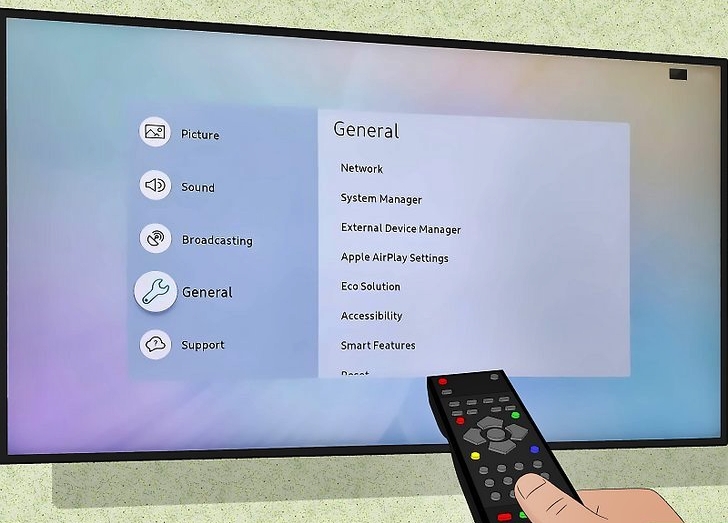
Find the Wi-Fi Settings on Your Smart TV
Once you’ve confirmed that your smart TV has Wi-Fi capability, the next step is to locate the Wi-Fi settings on your TV. Although the exact steps may vary depending on the TV brand and model, the following general instructions will help guide you in the right direction.
1. Start by turning on your smart TV and remote control. On most remote controls, there will be a dedicated “Menu” or “Settings” button. Locate and press this button to access the TV’s settings menu.
2. Using the arrow keys on your remote, navigate through the menu options until you find the “Network” or “Wi-Fi” section. This might be listed under “Settings” or “Setup” depending on your TV’s interface.
3. Once you’ve entered the network settings section, look for the option to “Connect to Wi-Fi” or “Wireless Network Setup.” Select this option to proceed to the Wi-Fi setup screen.
4. On the Wi-Fi setup screen, you should see a list of available Wi-Fi networks in your vicinity. If your home network is displayed, select it from the list. If not, choose the option to “Scan for Networks” to allow your TV to search for available networks.
5. After selecting your desired Wi-Fi network, you may be prompted to enter the Wi-Fi password. Use the on-screen keyboard provided by your TV to input the password correctly. Take care while entering the password, as Wi-Fi passwords are case-sensitive.
6. Finally, press the “Connect” or “OK” button to establish a connection to the selected Wi-Fi network. Your TV will now attempt to connect to the network, and once successfully connected, you will gain access to online streaming services, apps, and other internet-based features on your smart TV.
Remember that the specific steps may differ slightly depending on your TV model and interface. If you encounter any difficulties, refer to the user manual or seek assistance from the TV manufacturer’s support resources.
Connect Your Smart TV to Wi-Fi Network
After locating the Wi-Fi settings on your smart TV, you are now ready to connect it to a Wi-Fi network. Here are the steps to follow:
1. On the Wi-Fi setup screen, select your desired Wi-Fi network from the list of available networks. Make sure you choose your own home network or the network you wish to connect to.
2. If the selected network is secured with a password, you will be prompted to enter the Wi-Fi password. Use the on-screen keyboard or remote control to enter the password accurately. Be cautious with uppercase and lowercase letters as they are case-sensitive.
3. Double-check the password before proceeding. A small mistake can prevent your TV from connecting to the Wi-Fi network. Once you are confident that the password is correct, select “Connect” or “OK” to begin the connection process.
4. Wait for a few moments as your smart TV attempts to establish a connection with the Wi-Fi network. This process may take a couple of minutes, so be patient. If successful, you will see a confirmation message indicating that your TV is now connected to the Wi-Fi network.
5. To ensure the connection is stable and reliable, consider performing a connection test. This test is often available in the network settings menu and will provide information about the signal strength and speed of your Wi-Fi connection.
Once you have successfully connected your smart TV to the Wi-Fi network, you can start enjoying the benefits of internet connectivity on your TV. Stream your favorite shows, access apps, browse the web, and take advantage of other online features that your smart TV offers.
In case you encounter any issues during the connection process, reset your TV’s network settings, reboot your Wi-Fi router, or consult the TV’s user manual or manufacturer’s support resources for troubleshooting instructions specific to your TV model.
Enter Wi-Fi Password on Your Smart TV
When connecting your smart TV to a Wi-Fi network, you may come across a step where you need to enter your Wi-Fi password. This is a crucial part of the setup process to ensure a secure connection. Follow these steps to enter your Wi-Fi password on your smart TV:
1. On the Wi-Fi setup screen of your TV, select your desired Wi-Fi network from the list.
2. If the selected network is protected by a password, you will be prompted to enter it. Use the on-screen keyboard or your remote control to type in the password. Be mindful of uppercase and lowercase letters, as Wi-Fi passwords are case-sensitive.
3. Take your time to enter the password accurately. A single mistake can prevent your TV from connecting to the Wi-Fi network. Double-check the characters you input before proceeding.
4. Once you have entered the password, select “Connect” or “OK” to initiate the connection process.
5. Your smart TV will attempt to connect to the Wi-Fi network using the provided password. This may take a few moments, as the TV establishes a secure connection with the network.
6. If the Wi-Fi password you entered is correct, your smart TV will successfully connect to the Wi-Fi network. You may see a confirmation message or an icon indicating a successful connection.
If you are unsure about the correct Wi-Fi password, refer to your Wi-Fi router documentation or contact your internet service provider for assistance. Make sure to enter the password exactly as provided and be aware of any special characters or spaces.
It’s important to keep your Wi-Fi password secure to protect your network and personal information. Avoid sharing your Wi-Fi password with unauthorized individuals and periodically update your password for added security.
By correctly entering your Wi-Fi password on your smart TV, you can enjoy seamless and secure connectivity to your home network, allowing you to access a wide range of online content and services on your smart TV.
Troubleshooting Tips for Smart TV Wi-Fi Connection
While connecting your smart TV to Wi-Fi is usually a straightforward process, you may encounter issues that hinder a successful connection. Here are some troubleshooting tips to help you resolve common Wi-Fi connection problems on your smart TV:
1. Check your Wi-Fi signal strength: Low signal strength can cause a weak or unstable connection. Ensure that your smart TV is within range of your Wi-Fi router and try relocating your TV closer if the signal is weak. Additionally, reducing signal interference from other devices and objects can improve Wi-Fi performance.
2. Restart your devices: Restarting both your smart TV and Wi-Fi router can often resolve temporary connection issues. Turn off your TV, unplug the power cable from the router, wait for a few seconds, and then plug it back in. Once the router has fully restarted, turn on your TV and attempt to reconnect to Wi-Fi.
3. Check for firmware updates: Manufacturers frequently release firmware updates to address bugs and improve performance. Check your TV’s settings menu or the manufacturer’s website for any available updates. Installing the latest firmware can potentially resolve connectivity issues.
4. Verify Wi-Fi credentials: Double-check that you have entered the correct Wi-Fi network name (SSID) and password. Typos or incorrect credentials can prevent your smart TV from connecting to the network. If unsure, refer to your router’s documentation or contact your internet service provider for the correct Wi-Fi information.
5. Reset network settings: If you are still experiencing connectivity problems, try resetting your TV’s network settings. This will clear any saved Wi-Fi networks and allow you to start the connection process from scratch. Refer to your TV’s user manual or support resources for instructions on resetting network settings.
6. Connect via Ethernet: If possible, consider connecting your smart TV directly to your Wi-Fi router using an Ethernet cable. This eliminates potential Wi-Fi signal issues and provides a stable and reliable connection.
7. Update router settings: Access your router’s settings page and ensure that it is configured correctly. Consider adjusting the Wi-Fi channel or enabling QoS (Quality of Service) settings to prioritize your smart TV’s network traffic. Consult your router’s documentation for instructions on making these adjustments.
By following these troubleshooting tips, you can often resolve common Wi-Fi connection problems on your smart TV. If the issues persist, consider reaching out to the TV manufacturer’s support resources or seeking assistance from a qualified technician to further diagnose and troubleshoot the problem.
Considerations for a Smoother Wi-Fi Connection on Smart TV
Having a smooth and stable Wi-Fi connection is essential for an optimal streaming experience on your smart TV. Here are some considerations to improve your Wi-Fi connection quality:
1. Position your Wi-Fi router strategically: Place your router in a central location within your home. Avoid placing it near obstacles like walls, furniture, or electronic devices that can interfere with the Wi-Fi signal. A central location helps distribute the Wi-Fi signal evenly throughout the house.
2. Use a dual-band router: Dual-band routers can operate on both 2.4GHz and 5GHz frequencies. Utilizing the 5GHz frequency can provide faster and more stable internet connectivity, especially in crowded Wi-Fi environments.
3. Enable Wi-Fi security: Protect your Wi-Fi network by enabling WPA2 or WPA3 encryption. This ensures that only authorized devices can connect to your network, enhancing security and preventing unauthorized access that can impact your connection speed.
4. Reduce interference from other devices: Other wireless devices like cordless phones, baby monitors, and microwave ovens can interfere with Wi-Fi signals. Keep these devices away from your router and smart TV to minimize signal disruptions.
5. Limit concurrent connections: If multiple devices are connected to your Wi-Fi network simultaneously, it may cause congestion and slowdowns. Consider limiting the number of connected devices, especially bandwidth-intensive ones, to ensure a smoother streaming experience on your smart TV.
6. Upgrade your router: If you have an older or outdated router, it may not provide the necessary performance for seamless streaming. Consider upgrading to a newer model that supports the latest Wi-Fi standards for faster and more reliable connections.
7. Use Wi-Fi extenders or mesh systems: If you experience weak Wi-Fi signals in certain areas of your home, Wi-Fi extenders or mesh systems can help extend the coverage. These devices amplify the Wi-Fi signal and provide a stronger connection in hard-to-reach areas.
8. Optimize your smart TV settings: Some smart TVs allow you to adjust specific settings to optimize Wi-Fi performance. Look for settings related to network connectivity, such as selecting the appropriate Wi-Fi band or adjusting the signal strength.
By considering these factors, you can ensure a smoother Wi-Fi connection on your smart TV. Remember to periodically perform speed tests to evaluate your network’s performance and make any necessary adjustments to improve your streaming experience.
Additional Tips to Improve Smart TV Wi-Fi Performance
To enhance your smart TV’s Wi-Fi performance, consider implementing the following tips:
1. Update your smart TV’s firmware: Just like routers, smart TVs receive periodic firmware updates that address performance issues and enhance compatibility. Check for firmware updates in your TV’s settings menu or visit the manufacturer’s website for the latest firmware version.
2. Use a dedicated streaming device: If your smart TV’s Wi-Fi performance is consistently slow, consider using a dedicated streaming device like a Roku, Apple TV, or Amazon Fire TV Stick. These devices often have stronger Wi-Fi capabilities and are optimized for streaming, resulting in improved performance.
3. Reduce network bandwidth usage: Bandwidth-heavy activities like downloading large files or streaming content on multiple devices simultaneously can impact your smart TV’s Wi-Fi performance. Limit these activities or schedule them during off-peak times to free up bandwidth for your TV’s streaming.
4. Prioritize your smart TV’s traffic: Most modern routers offer Quality of Service (QoS) settings that allow you to prioritize certain devices or traffic types. Prioritize your smart TV’s traffic to ensure it receives sufficient bandwidth for seamless streaming.
5. Use a wired connection: For the best possible connection, consider connecting your smart TV to your router using an Ethernet cable. Wired connections are generally more stable and reliable compared to Wi-Fi connections, especially if your TV is located near the router.
6. Monitor connected devices: Regularly check the devices connected to your Wi-Fi network. Unauthorized or unknown devices could be causing network congestion and impacting your TV’s Wi-Fi performance. Remove any unfamiliar devices from your network to optimize performance.
7. Clear cache and data on smart TV apps: Over time, app cache and data can accumulate on your smart TV, which may slow down performance. Clearing the cache and data of streaming apps can help improve their performance and overall Wi-Fi performance on your TV.
8. Optimize router settings: Access your router’s settings and optimize them for better Wi-Fi performance. Consider adjusting the Wi-Fi channel, enabling smart network selection, or upgrading to a router with advanced features like beamforming or MU-MIMO (Multi-User, Multiple-Input, Multiple-Output) technology.
Implementing these additional tips can help ensure a smoother and more enjoyable streaming experience on your smart TV. Experiment with different techniques to find the combination that works best for your specific setup and enjoy uninterrupted streaming and online content on your smart TV.