
Gather the necessary tools and materials
Before you begin cleaning your desktop computer, it is important to gather all the necessary tools and materials. Having everything prepared beforehand will make the cleaning process more efficient and seamless. Here are the essential items you will need:
- Clean, lint-free cloths or microfiber towels
- Compressed air canister or air compressor
- Antistatic brush or soft-bristled brush
- Isopropyl alcohol or electronic cleaning solution
- Cotton swabs
- Small screwdriver set
- Cable ties or zip ties
- Grounding strap (optional, but recommended)
Clean, lint-free cloths or microfiber towels are essential for wiping down the external surfaces of your computer without leaving behind any residue or scratches. Compressed air canisters or air compressors will help you effectively remove dust and debris from the internal components of the computer, such as the cooling fan and the motherboard. An antistatic brush or soft-bristled brush is perfect for gently cleaning delicate components without causing any damage.
Isopropyl alcohol or electronic cleaning solution is necessary for cleaning stubborn stains or spots on the case or exterior surfaces. Cotton swabs are ideal for reaching into small crevices or tight spaces. Having a small screwdriver set on hand will allow you to easily remove the computer case cover and access the internal components. Cable ties or zip ties can be used to manage and organize the cables inside the computer for a neater and more efficient setup. And finally, a grounding strap is recommended to prevent any accidents caused by static electricity while working on the computer.
By ensuring you have all the necessary tools and materials ready, you can proceed with confidence and efficiency when it comes time to clean your desktop computer.
Shut down the computer properly
Before you begin cleaning your desktop computer, it is important to properly shut it down. This will ensure that you can safely work on the internal components without any risk of damage or interference. Follow these steps to shut down your computer:
- Save your work: Make sure to save any open documents or projects to avoid losing any unsaved data.
- Close all programs: Close any open software or applications that you are currently using.
- Log out of your accounts: If you have any accounts or programs that require login credentials, be sure to log out of them.
- Disconnect from the internet: If your computer is connected to the internet, disconnect it to prevent any automatic updates or interruptions during the cleaning process.
- Shut down the computer: Click on the Start button in the bottom-left corner of your screen, then select “Shut down” from the options. Allow the computer to completely shut down before proceeding.
It is important to shut down your computer properly to avoid potential data loss and ensure the safety of the internal components. This will also create a clean starting point for the cleaning process, as the computer will be fully powered off and ready for maintenance.
Unplug the computer and accessories
Once you have shut down your desktop computer properly, the next step in the cleaning process is to unplug it and disconnect all accessories. This is crucial to ensure your safety and prevent any electrical mishaps. Here’s how to proceed:
- Turn off the power strip or surge protector if your computer is connected to one. This will cut off the power supply to the computer and all connected devices.
- Unplug the computer’s power cord from the electrical outlet or power strip.
- Disconnect any peripherals or accessories that are attached to the computer, such as monitors, keyboards, mice, speakers, USB devices, and network cables.
- If you have a desktop computer, locate the monitor cable that connects the computer to the screen and unplug it as well.
- Remove any other external devices, such as external hard drives or printers, that may be connected to the computer.
By unplugging the computer and all associated accessories, you eliminate the risk of electrical shock or damage during the cleaning process. This step also allows for easier access to the internal components of the computer, making it more convenient to remove dust and debris effectively.
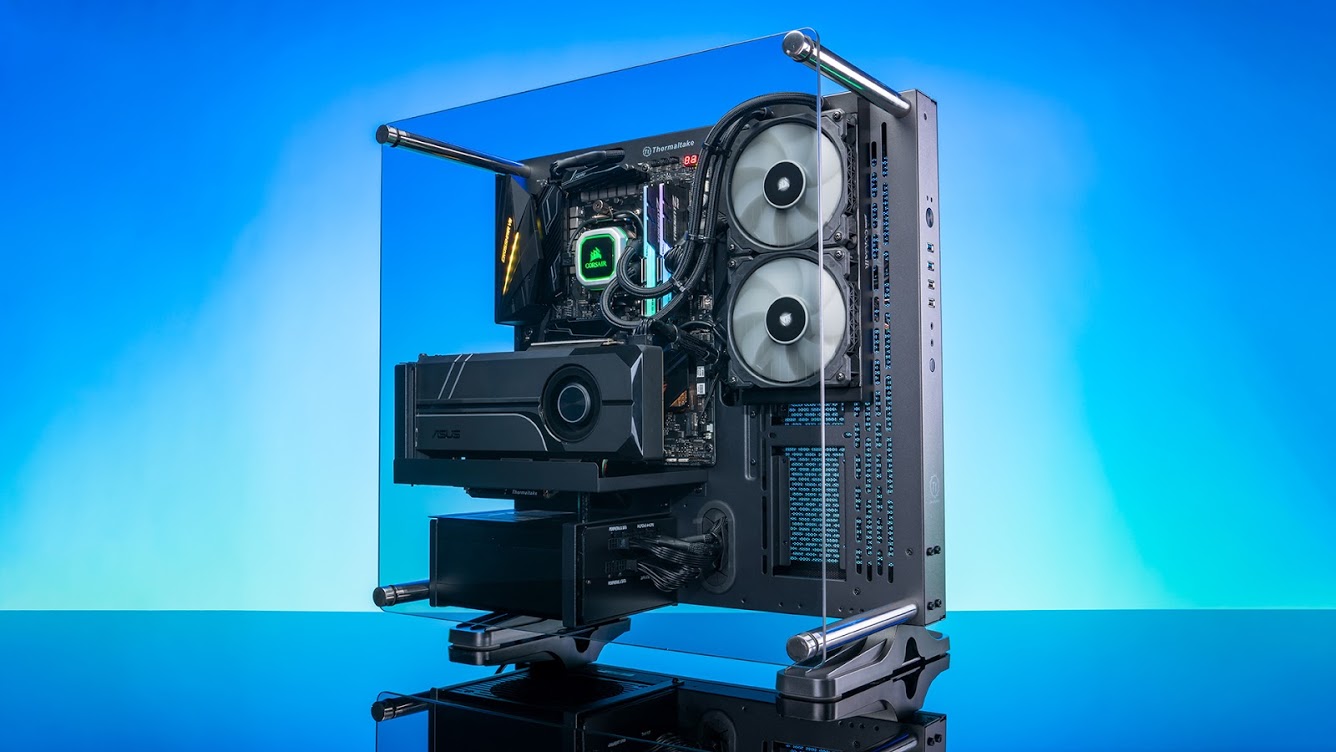
Open the computer case
In order to clean the internal components of your desktop computer, you will need to open the computer case. This will give you access to the motherboard, RAM, hard drives, and other internal hardware. Follow these steps to open the computer case:
- Place your computer on a stable and clean surface. Make sure you have enough space to work comfortably.
- Locate the screws or latches that hold the computer case together. These are usually located on the back or side of the computer case.
- Using a screwdriver or your hands, remove the screws or unlatch the latches to loosen the computer case. Be careful not to force anything or apply excessive pressure.
- Once the screws or latches are undone, carefully slide or lift off the computer case cover. Set it aside in a safe place.
Opening the computer case gives you a direct view of the internal components, allowing you to clean them thoroughly. However, it is important to note that some computer cases may have additional screws or latches in different places, depending on the model and design. Refer to the computer’s user manual if you are unsure of how to open the case properly.
When removing the computer case cover, be mindful of any cables or connections that may be attached to it. Check for any clips or hooks that may be securing the cover to the case, as these will need to be detached before lifting the cover off completely. Take your time and exercise caution to avoid accidentally damaging any internal components or cables.
Once the computer case is open, you are ready to proceed with cleaning the internal components and removing any accumulated dust or debris.
Use compressed air to remove dust from internal components
A common problem with desktop computers is the accumulation of dust and debris inside the case. This buildup can lead to overheating and poor performance. Using compressed air is an effective method to remove dust from the internal components of your computer. Follow these steps to properly clean the internal components:
- Ensure that you are in a well-ventilated area to avoid inhaling the dust particles.
- Hold the compressed air canister upright and steady. Do not shake the canister as it may release freezing agents or liquids.
- Identify the components that need cleaning, such as the cooling fan, heatsink, and the gaps between the RAM modules and expansion cards.
- Use short bursts of compressed air to blow away the dust from each component. Start from the top and work your way down, ensuring that you cover the entire surface of the component.
- Pay special attention to the cooling fan as it often collects a significant amount of dust. Hold the fan blades steady and use the compressed air to blow away the dust from both sides of the fan.
- Continue blowing away the dust from other components, such as the motherboard, hard drives, and power supply unit.
When using compressed air, it is important to follow some safety precautions:
- Keep the canister upright to prevent any excess liquid from being released.
- Hold the canister a few inches away from the components to avoid damaging them with excessive force or pressure.
- Use short bursts of air to prevent the canister from getting too cold.
- Do not tilt or shake the canister while spraying. This can cause the release of foreign substances that may damage the components.
Regularly using compressed air to clean the dust from your computer’s internal components will help maintain optimal performance and extend the lifespan of your hardware. However, if the dust buildup is excessive or you are uncomfortable performing this task, it is recommended to seek assistance from a professional technician.
Remove and clean the cooling fan
The cooling fan plays a crucial role in keeping your desktop computer’s internal components cool. However, over time, it can accumulate dust and debris, causing it to become less efficient. Cleaning the cooling fan is essential to maintain proper airflow and prevent overheating. Follow these steps to remove and clean the cooling fan:
- Ensure that the computer is powered off and unplugged to avoid any accidents during the cleaning process.
- Open the computer case following the instructions provided in the previous section.
- Locate the cooling fan inside the case. It is usually positioned near the back or top of the case.
- Identify the screws or clips that secure the cooling fan in place. Use a screwdriver or your hands to remove the screws or unclip the fan.
- Gently lift the cooling fan out of its housing. Be mindful of any cables or wires that may be connected to the fan.
- Inspect the fan for any visible signs of dust or debris. Use a soft-bristled brush or a can of compressed air to carefully remove the dirt from the fan blades and the surrounding area.
- If necessary, dampen a cloth or cotton swab with isopropyl alcohol and gently wipe the blades to remove stubborn grime or residue.
- Once the fan is clean, inspect it for any damage or excessive wear. Replace the fan if necessary.
- Clean the area where the fan was installed to remove any dust or debris that may have accumulated.
- Reinstall the cooling fan by securing it back in place with the screws or clips.
- Close the computer case and reattach any cables or wires that were disconnected.
By regularly cleaning the cooling fan, you can ensure optimal airflow and prevent your computer from overheating. This simple maintenance task can significantly improve the performance and longevity of your desktop computer. However, if you are unsure or uncomfortable performing these steps, it is recommended to seek assistance from a professional technician.
Clean the motherboard and other components with an antistatic brush
The motherboard is the central component of your desktop computer, connecting all the hardware and allowing them to communicate with each other. Over time, dust and debris can accumulate on the motherboard and other components, potentially causing poor performance or even damage. Cleaning the motherboard with an antistatic brush is a safe and effective method to remove this buildup. Follow these steps to clean the motherboard and other components:
- Ensure that the computer is powered off and unplugged to avoid any accidents during the cleaning process.
- Open the computer case following the instructions provided in the previous section.
- Inspect the motherboard and other components for any visible signs of dust or debris.
- Using an antistatic brush, gently brush away the dust and debris from the surface of the motherboard, paying attention to the slots, connectors, and chips. Follow the natural direction of the components to avoid any damage.
- Brush other components, such as RAM modules, expansion cards, and connectors, using the same gentle motion.
- If necessary, lightly dampen the antistatic brush with isopropyl alcohol or electronic cleaning solution. Be sure to wring out any excess liquid before using it on the components.
- Carefully brush any stubborn grime or residue with the dampened brush, taking extra caution not to let any liquid come into contact with the motherboard or other sensitive components.
- Allow the components to air dry completely before reassembling the computer.
- Inspect the components and clean any remaining dust or debris if necessary.
- Close the computer case and reattach any cables or wires that were disconnected.
By cleaning the motherboard and other components with an antistatic brush, you remove dust and debris that can hinder performance and potentially cause damage. Regular maintenance of your desktop computer’s internal components is crucial for optimal functioning and longevity. However, if you are uncertain or uncomfortable performing these steps, it is recommended to seek assistance from a professional technician.
Clean the case and exterior surfaces
The case and exterior surfaces of your desktop computer are prone to acquiring dust, fingerprints, and other smudges over time. Cleaning these areas not only improves the overall appearance of your computer but also helps maintain its functionality. Follow these steps to effectively clean the case and exterior surfaces:
- Power off your computer and unplug it from the electrical outlet.
- Use a clean, lint-free cloth or microfiber towel to wipe down the case and exterior surfaces. Start from the top and work your way down, covering all sides of the computer.
- If there are any stubborn stains or marks, lightly dampen the cloth with isopropyl alcohol or electronic cleaning solution. Ensure that the cloth is only slightly damp and not dripping with liquid.
- Gently wipe the affected areas with the slightly dampened cloth, applying minimal pressure to avoid scratching the surface. Be cautious around any openings, ports, or buttons.
- For hard-to-reach areas or small crevices, use a cotton swab dipped in isopropyl alcohol or electronic cleaning solution to carefully clean those areas.
- If your computer has a removable front panel or faceplate, detach it according to the manufacturer’s instructions. Clean it separately using the same method as mentioned above.
- Pay special attention to any ventilation areas, including fan grills or vents, where dust tends to accumulate. Use a can of compressed air to blow away the dust from these areas.
- Once you have cleaned the case and exterior surfaces, allow them to air dry completely before reconnecting the computer.
Cleaning the case and exterior surfaces of your desktop computer not only helps to maintain its aesthetic appeal but also promotes better airflow and cooling. By removing dust and debris from these areas, you can prevent overheating and improve the overall performance of your computer.
Remember to exercise caution while cleaning to avoid causing any damage to the case or sensitive components. If you are uncertain or uncomfortable performing these steps, it is recommended to seek assistance from a professional technician.
Replace the computer case cover
After you have finished cleaning the internal components and exterior surfaces of your desktop computer, it is important to properly replace the computer case cover. This step ensures the protection of the internal components and maintains the overall integrity of your computer. Follow these steps to securely reattach the computer case cover:
- Ensure that all the internal components are properly seated and connected within the computer case.
- Carefully align the computer case cover with the corresponding edges of the case.
- Slide or press the cover into place, allowing it to fit snugly and securely. Be mindful of any clips or hooks that may need to be engaged to properly secure the cover.
- If your computer case uses screws to hold the cover in place, insert the screws into the designated holes and tighten them using a screwdriver. Ensure that the screws are not overtightened, as this can cause damage to the case or its components.
- Double-check that the computer case cover is aligned and properly attached, with no gaps or loose areas.
Replacing the computer case cover properly is essential for maintaining the integrity of your computer. It helps to protect the internal components from dust, debris, and potential damage. By securely attaching the cover, you also help to ensure proper airflow and cooling within the computer case.
Take your time during this step and ensure that the cover is aligned and attached correctly. If you encounter any difficulties or uncertainty, refer to the user manual for your specific computer case model or seek assistance from a professional technician.
Plug in and reconnect all the cables and accessories
After completing the cleaning process, it is crucial to properly reconnect all cables and accessories to ensure that your desktop computer functions properly. Follow these steps to safely plug in and reconnect everything:
- Refer to any notes or pictures you took before cleaning to remember the proper connections of cables and accessories.
- Start by connecting the power cord to the back of the computer and then plug the other end into a reliable electrical outlet or surge protector.
- Reconnect any necessary peripherals or accessories, such as monitors, keyboards, mice, speakers, USB devices, and network cables. Ensure that each connection is secure and properly aligned.
- If you have a desktop computer, connect the monitor cable to the appropriate port on the back of the computer and secure it in place.
- Reattach any other external devices, such as external hard drives or printers, that you previously disconnected.
- Check that all cables are neatly organized and not tangled or obstructing any airflow within the computer case.
- If you are using cable ties or zip ties, use them to bundle and secure any excess cables, creating a cleaner and more organized setup.
Ensuring that all cables and accessories are properly plugged in and reconnected is crucial for the smooth functioning of your desktop computer. Poor connections or loose cables can cause disruptions or even permanent damage to your computer or its components.
Take your time to check each connection and ensure that everything is securely plugged in. If you encounter any difficulties or uncertainty, consult the user manual for your specific computer or seek assistance from a professional technician.
Power on the computer and check for any issues
Once you have completed the cleaning and reconnection process, the final step is to power on your desktop computer and verify that everything is functioning properly. This will help ensure that the cleaning did not cause any unexpected issues. Follow these steps to power on your computer and perform a quick check:
- Double-check that all cables and accessories are securely connected and properly plugged in.
- Press the power button on your computer to turn it on. Observe the computer’s startup sequence and listen for any unusual noises.
- Monitor the screen to ensure that it displays the necessary information, such as the manufacturer’s logo or the operating system startup screen.
- Listen for the fan noise to make sure it is running smoothly.
- Observe the computer for any error messages or unexpected behavior during the startup process.
- If the computer boots up properly, log in to your user account and perform a general assessment of its performance. Open a few applications and check for any responsiveness or lag.
- Test all the connected peripherals and accessories to make sure they are functioning correctly.
- If you encounter any issues, such as error messages, abnormal sounds, or poor performance, take note of the problem and consider seeking assistance from a professional technician if it persists.
Powering on your computer and thoroughly checking for any issues after cleaning will give you peace of mind and ensure that your computer is functioning optimally. It is important to address any problems promptly to prevent further complications or potential damage.
If everything appears to be working fine, you can continue to use your newly cleaned and maintained desktop computer with confidence.