Why is it important to clean your electronic throttle body?
The electronic throttle body is a critical component of your vehicle’s engine system. It regulates the airflow into the engine, controlling the throttle plate’s position based on inputs from the accelerator pedal. Over time, however, the throttle body can become dirty, leading to various issues that affect engine performance.
One of the main reasons to clean your electronic throttle body is to maintain optimal engine efficiency. When dirt, debris, and carbon build-up accumulate on the throttle plate and housing, it restricts the airflow. This restriction can disrupt the air-to-fuel ratio, causing a mixture that is either too rich or too lean. As a result, the engine may experience hesitation, rough idling, or stalling.
Cleaning the throttle body also helps to prevent throttle plate sticking. As dirt builds up, it can cause the throttle plate to become sticky, leading to problems with acceleration and deceleration. By regularly cleaning the throttle body, you can remove any residue and ensure smooth operation of the throttle plate, improving throttle response and overall performance.
Another significant benefit of cleaning the electronic throttle body is the potential for improved fuel economy. When the airflow is restricted due to a dirty throttle body, the engine may compensate by burning more fuel to maintain performance. By removing the debris and carbon deposits, you can restore proper airflow and potentially see an improvement in fuel efficiency.
In addition to performance and fuel efficiency, regular cleaning of the throttle body can help extend the lifespan of other engine components. When the throttle body is dirty, the contaminants can find their way into other parts of the engine, such as the intake manifold and valves. This buildup can lead to clogging and damage over time. By keeping the throttle body clean, you can reduce the risk of damage to these vital components and avoid costly repairs.
What tools will you need to clean your electronic throttle body?
Before you start cleaning your electronic throttle body, it’s essential to gather the necessary tools to ensure a smooth and successful process:
1. Throttle Body Cleaner: Invest in a good quality throttle body cleaner specifically designed for removing dirt, carbon, and debris from the throttle body. Avoid using general-purpose cleaners, as they may damage sensitive throttle body components.
2. Cleaning Brush/Cloth: A small, soft-bristle brush or a clean cloth will be handy for scrubbing and wiping down the throttle body surfaces. Ensure that the brush or cloth is clean and free from any contaminants to avoid introducing additional dirt into the throttle body.
3. Intake Hose Removal Tools: Depending on your vehicle’s make and model, you may need specific tools to remove the intake hose safely. Common tools include screwdrivers, pliers, or wrenches. Refer to your vehicle’s manual or consult with a mechanic to determine the appropriate tools for your specific vehicle.
4. Gloves and Safety Glasses: It’s always a good idea to protect your hands and eyes during the cleaning process. Wear a pair of gloves to prevent any harmful chemicals from coming into contact with your skin. Safety glasses or goggles will safeguard your eyes from any potential splashes or spray-back.
5. Battery Disconnect Tool: To ensure your safety and prevent any accidental electrical discharge, use a battery disconnect tool or wrench to disconnect the negative battery terminal. This step is crucial when working on electronic components to avoid any potential damage to the electrical system.
These are the essential tools you will need to clean your electronic throttle body. It’s important to have everything prepared and within reach before you start the cleaning process to avoid any unnecessary delays or interruptions.
Step 1: Disconnect the battery
Before you begin cleaning your electronic throttle body, it’s crucial to ensure your safety by disconnecting the battery. This step will prevent any accidental starting of the engine or electrical discharge during the cleaning process.
Follow these steps to disconnect the battery:
1. Locate the battery: Open the hood of your vehicle and locate the battery. It is usually situated in the engine compartment and may be covered by a plastic battery cover.
2. Identify the negative terminal: The negative terminal is marked with a negative (-) sign and is usually black. It is important to disconnect the negative terminal first to avoid any electrical mishaps.
3. Use the appropriate tool: Depending on the type of battery terminal, you may need a wrench, pliers, or a battery disconnect tool. Loosen the nut or use the tool to disconnect the negative terminal.
4. Insulate the terminal: Once the negative terminal is disconnected, insulate it with a cloth or electrical tape to prevent accidental reconnection or contact with other metal surfaces.
With the battery safely disconnected, you can proceed with the throttle body cleaning without worrying about any electrical hazards. Remember to be cautious and avoid touching any exposed electrical connections or terminals.
Note: It’s important to consult your vehicle’s manual or seek professional advice if you are unsure about disconnecting the battery on your specific vehicle model. Follow the manufacturer’s instructions to ensure a safe and proper disconnection.
Step 2: Locate the throttle body
After disconnecting the battery, the next step in cleaning your electronic throttle body is to locate its position within the engine compartment. The throttle body is typically located on the intake manifold, and its appearance may vary depending on the make and model of your vehicle.
Follow these steps to locate the throttle body:
1. Open the hood: Ensure that your vehicle’s engine is off and the hood is securely propped open. This will provide you with clear access to the engine compartment.
2. Identify the intake manifold: Look for the large, durable hose that connects the air filter box to the engine. The intake manifold is usually attached to the end of this hose.
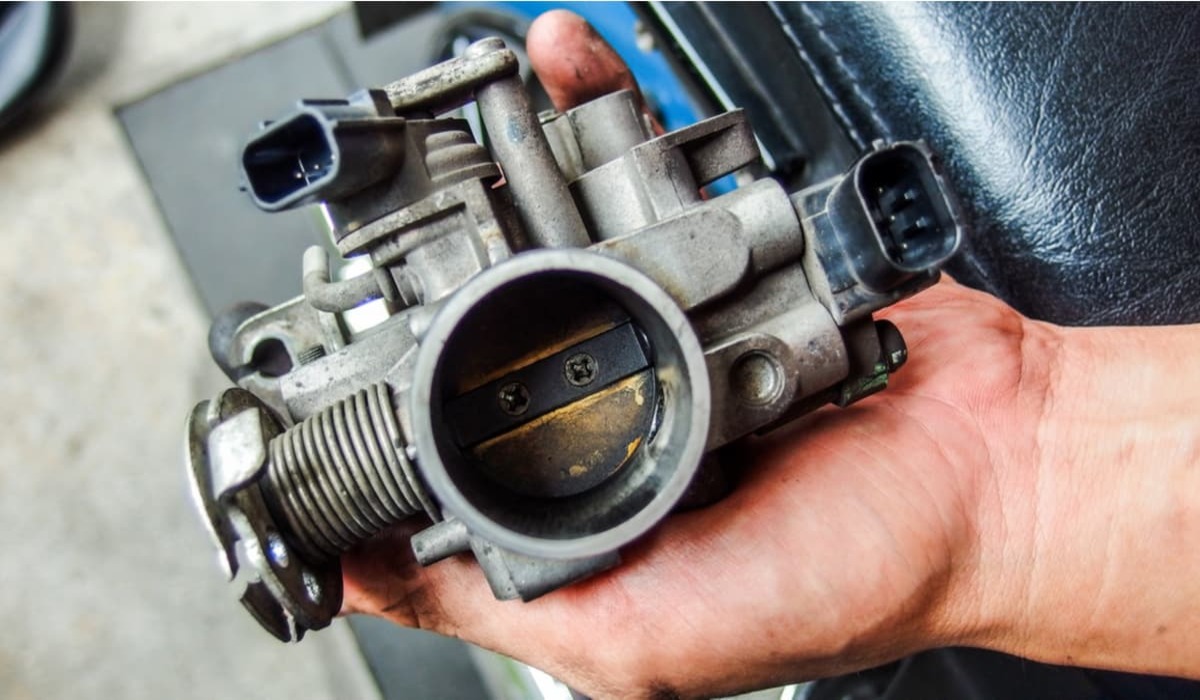
3. Look for a metal component: The throttle body is a metal component connected to the intake manifold. It is typically cylindrical in shape and has a round plate called the throttle plate or butterfly valve.
4. Check for electrical connections: In modern vehicles, the throttle body may have electrical connections, such as sensors or actuators. Take note of these connections as you will need to reconnect them later.
5. Refer to the vehicle manual: If you are having trouble locating the throttle body, consult your vehicle’s manual for specific instructions and diagrams. The manual will provide you with accurate information tailored to your vehicle’s make and model.
Once you have located the throttle body, you are ready to move on to the next step in the cleaning process. Remember to exercise caution and avoid touching any sensitive electrical components or connections.
Step 3: Remove the intake hose
With the throttle body located, the next step in cleaning your electronic throttle body is to remove the intake hose. The intake hose connects the air filter box to the throttle body and allows air to flow into the engine.
Follow these steps to remove the intake hose:
1. Identify the intake hose connection points: Locate the points where the intake hose attaches to the air filter box and the throttle body. These connection points may be secured with clamps or screws.
2. Loosen the clamps or screws: Using the appropriate tool, whether it’s a screwdriver or pliers, loosen the clamps or screws that secure the intake hose to the throttle body and air filter box. Take note of the type of clamps used as some may require a specific tool or technique to loosen them.
3. Gently pull the intake hose: Once the clamps or screws are loosened, gently pull the intake hose away from the throttle body and air filter box. It may require some wiggling or twisting to loosen it completely.
4. Inspect the intake hose: Take a moment to inspect the intake hose for any signs of damage or wear. Check for cracks, tears, or holes that may affect the performance of your engine. If necessary, consider replacing the intake hose before reassembling.
5. Set aside the intake hose: Once removed, set the intake hose aside in a safe and clean location. Take care to avoid any dirt or debris from entering the hose or throttle body opening.
With the intake hose removed, you now have clear access to the throttle body for cleaning. Make sure to keep track of any screws or clamps removed from the intake hose, as you will need them for reassembly later.
Step 4: Inspect the throttle body for dirt and debris
With the intake hose removed, it’s time to inspect the throttle body for any dirt, debris, or carbon build-up. This step is crucial as it will help you determine the extent of cleaning required for optimal performance.
Follow these steps to inspect the throttle body:
1. Visual inspection: Carefully examine the inside of the throttle body, paying close attention to the throttle plate and housing. Look for any signs of dirt, debris, or carbon deposits. These may appear as black or dark brown residue, coating the surfaces of the throttle body.
2. Check the throttle plate movement: Gently move the throttle plate back and forth using your finger. It should move freely without any sticking or resistance. If you notice any sticking, it may indicate a more severe build-up that needs to be addressed during the cleaning process.
3. Look for signs of corrosion or damage: Check for any signs of corrosion or damage on the throttle body surfaces. Corrosion can hinder proper functioning, while damage may require additional repairs or replacement.
4. Note any abnormalities: Take note of any unusual findings during the inspection, such as loose or disconnected hoses, broken or worn-out gaskets, or loose throttle body components. These issues may require attention and should be addressed accordingly.
By thoroughly inspecting the throttle body, you can assess its condition and determine the appropriate level of cleaning necessary. It will also help you identify any additional maintenance or repair needs, ensuring the throttle body operates optimally.
Remember to handle the throttle body with care during the inspection to avoid any accidental damage. If you encounter any significant issues or concerns, it is recommended to consult a professional mechanic for further guidance and assistance.
Step 5: Spray throttle body cleaner onto the throttle plate and housing
Now that you have inspected the throttle body, it’s time to begin the cleaning process. Starting with the throttle plate and housing, you will use a throttle body cleaner to remove dirt, debris, and carbon build-up.
Follow these steps to spray throttle body cleaner onto the throttle plate and housing:
1. Shake the throttle body cleaner: Before using the throttle body cleaner, shake the can well to ensure that the contents are properly mixed.
2. Locate the throttle plate and housing: Identify the throttle plate, which is a circular plate inside the throttle body. The housing refers to the area surrounding the throttle plate.
3. Prepare the area: Place a clean rag or towel beneath the throttle body to catch any excess cleaner and prevent it from dripping onto other engine components.
4. Spray the throttle plate and housing: Holding the throttle body cleaner can approximately 6-8 inches away from the throttle body, spray a liberal amount of cleaner onto the throttle plate and housing. Make sure to direct the cleaner towards the visible dirt and carbon deposits.
5. Focus on heavily soiled areas: Pay extra attention to areas with significant dirt or carbon build-up. Spray cleaner onto these areas and let it soak for a few minutes to help break down the deposits.
6. Avoid electrical connections: Take care to avoid spraying the cleaner directly onto any electrical connections or sensors attached to the throttle body. Excessive exposure to the cleaner can potentially damage these components.
7. Let the cleaner sit: Once you have sprayed the throttle plate and housing, allow the cleaner to sit on the surfaces for a few minutes. This will give it time to penetrate and loosen the dirt and carbon.
By spraying throttle body cleaner onto the throttle plate and housing, you will effectively break down and dissolve the stubborn dirt and carbon deposits. This step sets the foundation for proper cleaning and improved throttle body performance.
Step 6: Use a brush or cloth to scrub the throttle body
After allowing the throttle body cleaner to sit on the throttle plate and housing, it’s time to scrub away the loosened dirt and carbon. Using a brush or cloth, you will gently scrub the surfaces to ensure a thorough cleaning.
Follow these steps to scrub the throttle body:
1. Choose a suitable brush or cloth: Select a soft-bristle brush or a clean cloth that will effectively remove the loosened dirt without damaging the throttle body surfaces. Avoid using abrasive materials or brushes with hard bristles that may scratch or scrape the throttle body components.
2. Begin scrubbing: Dip the brush or cloth into a small amount of throttle body cleaner, ensuring it is damp but not excessively soaked. Gently scrub the throttle plate and housing in a back-and-forth motion, focusing on areas with visible dirt or carbon build-up. Pay attention to the edges and corners where debris may accumulate.
3. Be thorough but cautious: While scrubbing, be thorough in your cleaning efforts. However, exercise caution to avoid applying too much pressure or causing damage to the throttle body components. Maintain a gentle touch throughout the process.
4. Clean hard-to-reach areas: Use the brush or cloth to clean hard-to-reach areas, such as the inner corners of the throttle body or around sensors and electrical connections. Take your time and ensure that you remove all visible traces of dirt and carbon.
5. Wipe off excess cleaner: As you scrub, periodically wipe off any excess cleaner and loosened debris using a clean cloth. This will help prevent the cleaned areas from becoming recontaminated with dirt.
6. Inspect the throttle body: Once you have finished scrubbing, inspect the throttle body for any remaining dirt or carbon build-up. If necessary, repeat the process of spraying the throttle body cleaner and scrubbing until the surfaces are visibly clean.
By using a brush or cloth to scrub the throttle body, you will ensure that all loosened dirt and carbon are removed, leaving the surfaces clean and ready for reinstallation. Take your time during this step to achieve the best cleaning results without causing any damage to the throttle body components.
Step 7: Reinstall the intake hose
Now that you have completed the cleaning of the throttle body, it is time to reattach the intake hose. The intake hose connects the throttle body to the air filter box and ensures proper airflow into the engine.
Follow these steps to reinstall the intake hose:
1. Position the intake hose: Align the intake hose properly with the throttle body and the air filter box. Ensure that the hose is placed in the correct orientation and there are no kinks or twists.
2. Tighten the clamps or screws: Use the appropriate tool to tighten the clamps or screws that secure the intake hose to the throttle body and air filter box. Make sure they are tight enough to prevent any air leaks but avoid overtightening, as it may damage the hose or throttle body.
3. Check for proper fit: Double-check that the intake hose is securely attached to both the throttle body and air filter box. Confirm that there are no gaps or loose connections.
4. Inspect the hose and connections: Take a moment to inspect the installed intake hose for any signs of damage, such as cracks, tears, or loose fittings. If any issues are detected, address them promptly to prevent any future air leaks or performance problems.
5. Reconnect any electrical connections: If your vehicle has electrical connections, such as sensors or actuators, ensure that they are properly reconnected to the throttle body. Follow the manufacturer’s instructions or reference your vehicle’s manual for the correct placement and orientation of these connections.
Completing this step ensures that the intake hose is securely reinstalled, allowing proper airflow into the engine. A secure and well-fitted intake hose is essential for the engine’s performance and overall functionality.
Before moving on to the next step, take a moment to ensure that all connections and clamps are properly tightened and that the intake hose is securely attached. This will help prevent any potential air leaks and ensure the smooth functioning of your vehicle.
Step 8: Reconnect the battery
After completing the throttle body cleaning process and reinstalling the intake hose, the next step is to reconnect the battery. This step ensures the electrical power is restored to your vehicle’s systems.
Follow these steps to reconnect the battery:
1. Inspect the battery terminals: Before reconnection, inspect the battery terminals for any signs of corrosion or damage. If necessary, clean the terminals using a battery terminal cleaner or a mixture of baking soda and water, followed by a thorough rinse with clean water.
2. Locate the negative terminal: Identify the negative terminal on the battery, which is usually marked with a minus (-) sign. It is typically connected to a black cable.
3. Position the cable: Position the negative cable over the negative terminal and ensure it is aligned properly for connection. Avoid allowing the cable to accidentally touch any metal surfaces, as it may cause a spark or electrical discharge.
4. Reconnect the negative cable: Using the appropriate tool, tighten the clamp or nut on the negative terminal to securely fasten the negative cable. Make sure it is snug but avoid over-tightening, as it may damage the terminal or cable.
5. Insulate the connection: Once the negative cable is connected, use a protective covering such as a rubber terminal protector or electrical tape to insulate the terminal connection. This helps prevent accidental contact and short circuits.
With the battery reconnected, you have restored the electrical power to your vehicle’s systems. It is important to note that reconnecting the battery may reset certain electronic settings or require a relearning process for the vehicle’s computer. Refer to your vehicle’s manual or consult a professional if you are uncertain about any specific procedures that need to be followed after battery reconnection.
Before proceeding to the next step, double-check that the battery is securely connected and all terminals are properly tightened. This ensures a safe and reliable power supply to your vehicle’s electrical components.
Step 9: Start the engine and ensure everything is working properly
Now that you have completed the throttle body cleaning process and reconnected the battery, it’s time to start your vehicle’s engine and ensure that everything is working as expected.
Follow these steps to start the engine and perform a thorough check:
1. Sit in the driver’s seat: Take your position in the driver’s seat, ensuring that you have a clear view of the instrument panel and all the necessary controls.
2. Insert the key or press the start button: Depending on your vehicle’s ignition system, use the key to start the engine or press the start button if equipped with a push-to-start feature.
3. Observe the idle and engine response: Once the engine starts, pay close attention to the idle speed and engine response. The engine should run smoothly without any hesitation or roughness.
4. Check for warning lights: Monitor the dashboard for any illuminated warning lights. If you notice any unusual or persistent warning lights that were not present before the throttle body cleaning, consult your vehicle’s manual or seek professional assistance.
5. Test the accelerator response: Gradually press the accelerator pedal to test the throttle response. The engine should respond promptly and smoothly to changes in accelerator input without any hesitation or stalling.
6. Listen for abnormal sounds: While the engine is running, listen for any abnormal sounds such as squealing, knocking, or hissing. Unusual noises may indicate an underlying issue that requires attention.
7. Confirm proper operation of accessories: Test all the vehicle’s accessories, such as the air conditioning, headlights, windshield wipers, and radio, to ensure they are functioning as intended.
8. Conduct a test drive: If everything appears to be working properly, take the vehicle for a short test drive. Pay attention to the engine performance, throttle response, and overall vehicle behavior.
By starting the engine and carefully evaluating its performance, you can ensure that the throttle body cleaning process was successful and that there are no immediate issues or concerns. If you notice any ongoing problems or experience persistent performance issues, it is recommended to consult a professional mechanic for further diagnosis and assistance.
How often should you clean your electronic throttle body?
The frequency at which you should clean your electronic throttle body depends on several factors, including your driving conditions and the manufacturer’s recommendations. While some manufacturers may provide specific intervals for throttle body cleaning, others may not have a designated schedule. As a general guideline, it is recommended to clean your electronic throttle body every 30,000 to 50,000 miles or approximately every two to three years.
However, it is important to note that certain driving conditions may require more frequent cleaning. If you frequently drive in dusty or dirty environments or experience symptoms such as rough idling, hesitation, or a noticeable decrease in engine performance, it may be necessary to clean the throttle body more often.
Additionally, certain vehicles with direct fuel injection systems or those that operate on lower-quality fuels may experience a faster rate of carbon buildup. In these cases, it may be beneficial to clean the throttle body more frequently, perhaps every 15,000 to 20,000 miles.
Ultimately, it is essential to pay attention to your vehicle’s performance and consult your vehicle’s manual for specific recommendations from the manufacturer. Regular inspection of the throttle body during routine maintenance checks can also help determine if cleaning is needed sooner than the recommended intervals.
Remember, maintaining a clean throttle body is crucial for optimal engine performance and fuel efficiency. A clean throttle body ensures smooth airflow and prevents the accumulation of dirt and carbon deposits that can hinder throttle response and lead to engine problems.
By following a regular maintenance schedule and keeping an eye out for signs of reduced performance, you can determine when it is necessary to clean your electronic throttle body and ensure your vehicle operates at its best.