
Symptoms of a Faulty Electronic Throttle Body
An electronic throttle body is a critical component of a car’s fuel injection system. It controls and regulates the airflow into the engine, allowing for smooth and precise acceleration. When this component starts to malfunction, it can lead to various symptoms that can negatively impact the performance and drivability of your vehicle. Here are some common signs of a faulty electronic throttle body:
- Stalling: One of the most noticeable symptoms of a faulty throttle body is stalling. When the throttle body fails to regulate the airflow properly, the engine may struggle, hesitate, or even stall altogether. This can be dangerous, especially in high-traffic situations.
- Poor Acceleration: If you notice a lack of power or a delay in acceleration when you press the gas pedal, it could indicate a problem with the throttle body. A faulty throttle body may fail to open fully, restricting the amount of air entering the engine.
- Idling Issues: A malfunctioning throttle body can cause irregular or high idling speed. You may notice that the engine revs up and down on its own, or it might idle too high or too low. These fluctuations in idle speed can be inconvenient and may lead to engine stalls.
- Poor Fuel Efficiency: When the throttle body is not functioning properly, the engine may not receive the correct air-to-fuel ratio, resulting in poor fuel efficiency. You may notice a drop in your vehicle’s MPG (miles per gallon) or find yourself refueling more frequently than usual.
- Check Engine Light: A faulty throttle body often triggers the check engine light on the dashboard. The vehicle’s onboard diagnostic (OBD) system detects the irregularities in engine performance and alerts you to a potential problem. It is important not to ignore this warning and have your vehicle diagnosed by a professional.
If you experience any of these symptoms, it is recommended to have your electronic throttle body inspected and, if needed, repaired or replaced as soon as possible. Taking prompt action can prevent further damage to your vehicle’s engine and ensure a safer and more reliable driving experience.
Precautions before Testing the Electronic Throttle Body
Before conducting any tests on the electronic throttle body, it’s essential to take certain precautions to ensure your safety and prevent any damage to the vehicle or its components. Here are some important precautions to consider:
- Disconnect the Battery: To avoid the risk of electrical shock or damage to the electronic systems, start by disconnecting the negative terminal of the vehicle’s battery. This will help prevent any accidental activation of the throttle body during the testing process.
- Consult the Vehicle Manual: Familiarize yourself with the specific instructions and precautions outlined in the vehicle’s manual regarding the electronic throttle body. Different vehicles may have different testing procedures or specific steps to follow.
- Ensure a Well-Ventilated Area: Testing the throttle body may involve the use of cleaning solvents, which can produce fumes. It’s important to work in a well-ventilated area, preferably outdoors or in a garage with proper ventilation, to prevent inhaling any harmful chemicals.
- Gather the Necessary Tools: Before starting the testing process, ensure that you have all the required tools and equipment readily available. This may include a multimeter, screwdrivers, cleaning solution, and any other specific tools mentioned in the vehicle manual or testing procedure.
- Wear Personal Protective Equipment: To protect yourself from any potential harm, wear appropriate safety gear such as gloves, safety glasses, and, if necessary, a mask. This will help prevent any accidental injuries while working with the throttle body.
By adhering to these precautions, you can minimize the risk of accidents or damage during the testing process. It’s important to prioritize your safety and follow the recommended guidelines to ensure a smooth and successful testing experience.
Tools and Equipment needed for Testing
When it comes to testing the electronic throttle body, having the right tools and equipment is crucial to ensure accurate results and a smooth testing process. Here are some essential tools and equipment you will need:
- Multimeter: A multimeter is a versatile tool that can measure voltage, resistance, and continuity. It is essential for testing the electrical connections and components of the throttle body.
- Screwdrivers: Depending on the vehicle model, you may need various screwdrivers to remove the necessary components and access the throttle body. It’s recommended to have a set of Phillips head and flathead screwdrivers available.
- Cleaning Solution: A cleaning solution suitable for throttle bodies is necessary to remove any carbon buildup or debris from the throttle body and its components. Make sure to choose a product specifically designed for this purpose.
- Cleaning Brush: A small brush with soft bristles can help you effectively clean the throttle body without causing any damage to its delicate parts.
- Rags or Shop Towels: You will need rags or shop towels to wipe away any excess cleaning solution or debris during the cleaning process. These will also come in handy for general cleaning and maintenance tasks.
- Protective Gloves and Eyewear: To protect your hands and eyes from any potential hazards or chemical exposure, it’s important to wear gloves and safety glasses during the testing and cleaning procedures.
Ensure that you have all the necessary tools and equipment ready before starting the testing process. This will help you carry out the tests accurately and efficiently without any interruptions. If you are unsure about which tools are required for your specific vehicle model, consult the vehicle manual or seek advice from a qualified mechanic.
Step-by-Step Guide on Testing the Electronic Throttle Body
Testing the electronic throttle body is a systematic process that requires careful attention to detail. Follow these step-by-step instructions to effectively test the throttle body:
- Disconnect the Battery: Start by disconnecting the negative terminal of the vehicle’s battery. This will prevent any accidental activation of the throttle body during the testing process.
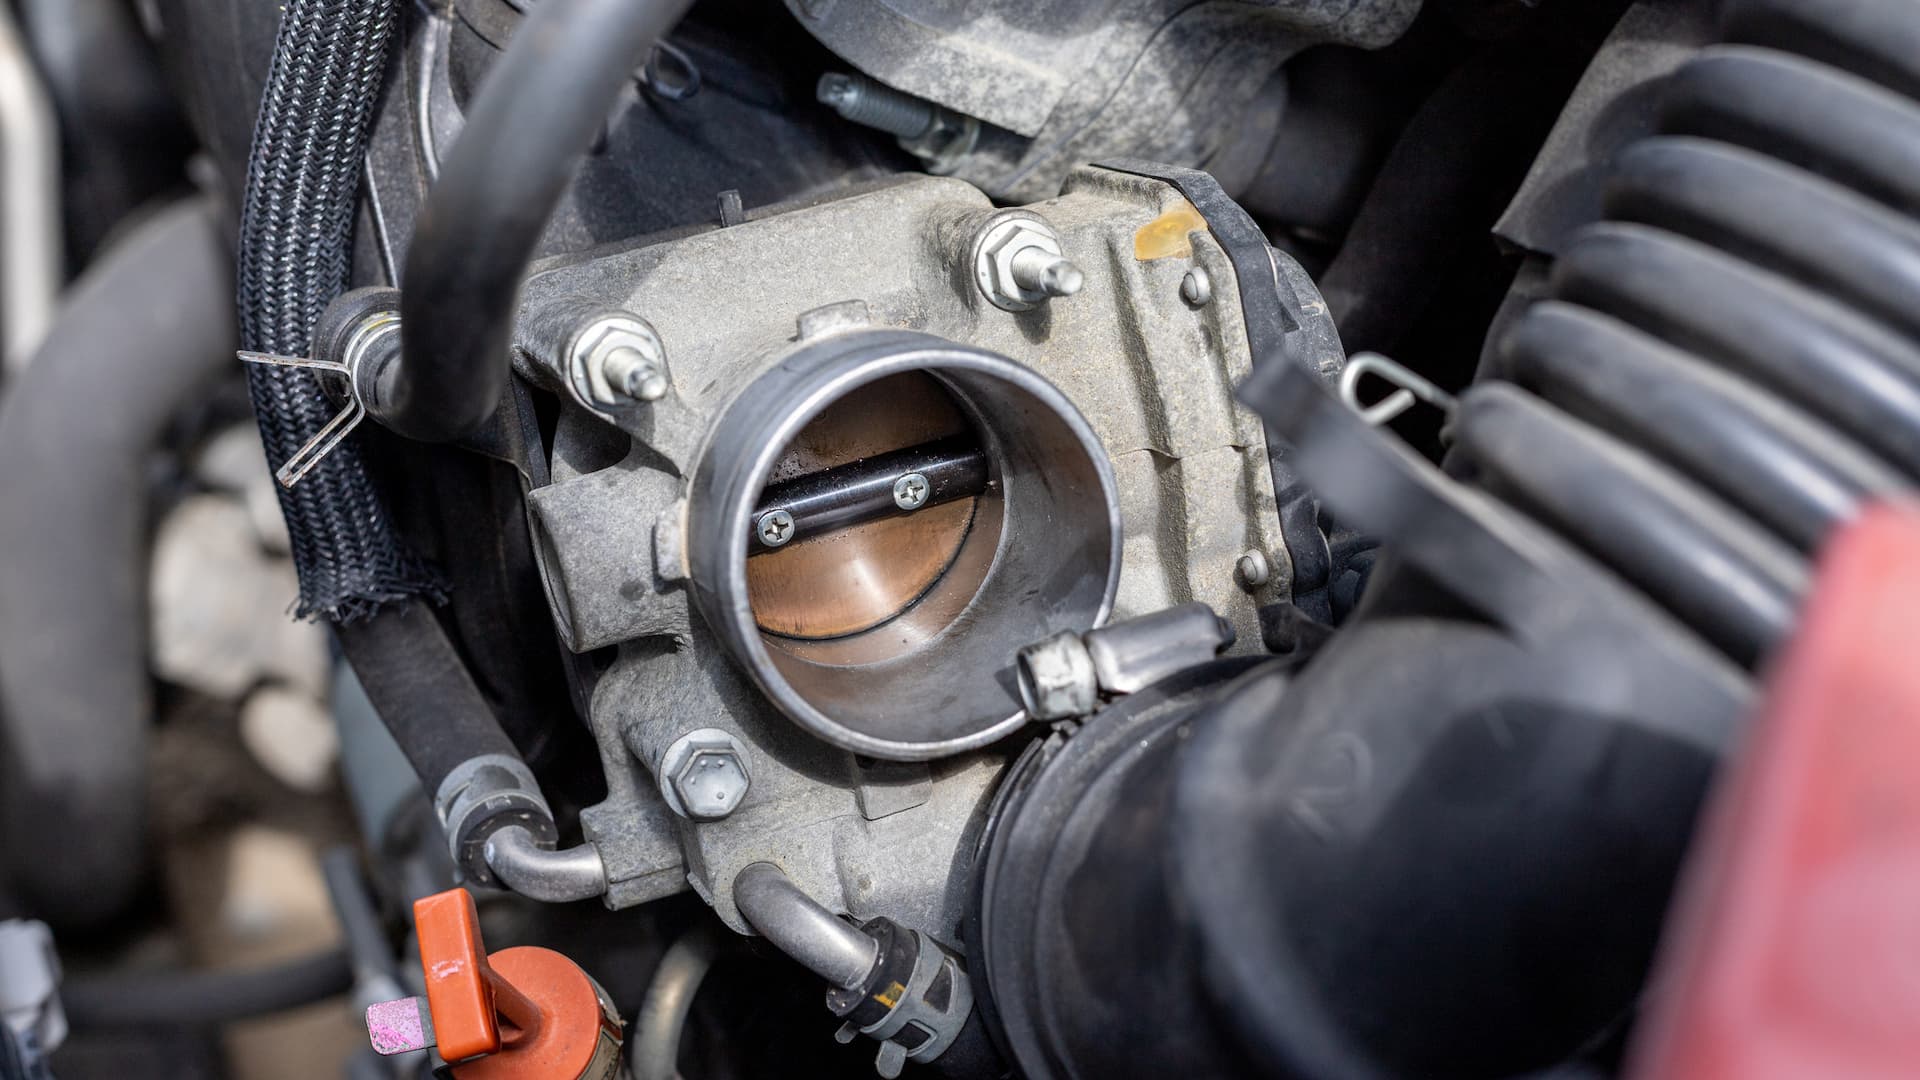
- Locate the Throttle Body: Identify the throttle body, which is usually located near the intake manifold. Refer to the vehicle manual if you’re unsure about its exact location.
- Inspect the Throttle Body: Check the throttle body for signs of physical damage, such as cracks or leaks. Ensure that all connections are secure and free from corrosion or debris.
- Testing the Throttle Body Motor: Use a multimeter set to the appropriate voltage range to test the throttle body motor. Measure the voltage across the motor terminals while gradually opening and closing the throttle manually. If the voltage readings are within the specified range, the motor is functioning correctly.
- Testing the Throttle Body Position Sensor: Again, using a multimeter set to the appropriate voltage range, test the throttle body position sensor. Check for voltage changes as you move the throttle body manually. If the sensor is working correctly, the multimeter readings should correspond to the throttle opening and closing.
- Checking for Power Supply to the Throttle Body: With the battery still disconnected, use the multimeter to check for the presence of power supply to the throttle body. Connect the multimeter probes to the appropriate connectors and measure the voltage. If there is no voltage or the readings are significantly lower than expected, there may be an issue with the power supply circuit.
- Cleaning the Throttle Body: If necessary, clean the throttle body using an appropriate cleaning solution and a soft brush. Gently remove any carbon buildup or debris from the throttle plate and the surrounding areas. Wipe away excess cleaning solution with a rag or shop towel.
- Reinstalling the Throttle Body: Once the testing and cleaning are complete, reassemble and reinstall the throttle body, ensuring that all connections are secure. Reconnect the negative terminal of the vehicle’s battery.
It’s important to refer to the specific instructions outlined in the vehicle manual for your particular make and model. If you encounter any difficulties or are unsure about any steps, consult a professional mechanic or seek guidance from a reputable source.
Checking for Power Supply to the Throttle Body
Ensuring that the electronic throttle body receives a proper power supply is crucial for its optimal functioning. Follow these steps to check for power supply to the throttle body:
- Disconnect the Battery: Prior to testing, disconnect the negative terminal of the vehicle’s battery to prevent any electrical mishaps.
- Locate the Electrical Connectors: Identify the electrical connectors on the throttle body. These connectors carry the power supply to the throttle body.
- Set the Multimeter: Set the multimeter to the appropriate voltage range, depending on the specifications mentioned in the vehicle manual.
- Connect the Multimeter: Connect the multimeter probes to the appropriate electrical connectors on the throttle body. The red probe should be connected to the positive terminal, and the black probe should be connected to the negative terminal.
- Turn on the Ignition: With the battery still disconnected, turn on the ignition key to the “on” position without starting the engine. This will activate the electrical systems in the vehicle.
- Read the Voltage: Read the voltage displayed on the multimeter. The reading should be within the specified range mentioned in the vehicle manual. If the voltage is significantly lower than expected or there is no voltage at all, there may be an issue with the power supply circuit.
- Inspect the Wiring: Inspect the wiring and connectors for any signs of damage, corrosion, or loose connections. If any issues are found, repair or replace the faulty components as necessary.
- Reconnect the Battery: Once the testing is complete, reconnect the negative terminal of the vehicle’s battery to restore power to the system.
It’s important to note that power supply issues to the throttle body can be caused by various factors, such as blown fuses, relay failures, or wiring problems. If you are unsure about any of the steps or encounter any difficulties during the testing process, it’s recommended to seek assistance from a qualified mechanic or refer to the vehicle manual for specific instructions.
Inspecting the Throttle Body Position Sensor
The throttle body position sensor plays a vital role in the proper functioning of the electronic throttle body. It helps monitor the position of the throttle plate, allowing the engine control unit to adjust the air-to-fuel ratio accordingly. Here are the steps to inspect the throttle body position sensor:
- Locate the Throttle Body Position Sensor: Identify the throttle body position sensor, which is typically located on or near the throttle body. Refer to the vehicle manual if you’re unsure about its exact location.
- Visual Inspection: Perform a visual inspection of the sensor, looking for any signs of physical damage, such as cracks, corrosion, or loose connections. Ensure that the wires leading to the sensor are intact and properly connected.
- Check for Proper Mounting: Ensure that the throttle body position sensor is properly mounted and aligned. Loose or misaligned mounting can affect the accuracy of the sensor readings and lead to incorrect throttle body performance.
- Inspect the Wiring Harness: Examine the wiring harness that connects to the throttle body position sensor. Look for any signs of damage, fraying, or exposed wires. Make sure that the harness is securely connected to the sensor and free from any corrosion or debris.
- Perform Resistance Test: With the battery disconnected, use a multimeter set to the appropriate resistance or Ohm range. Connect the multimeter probes to the appropriate terminals of the throttle body position sensor and measure the resistance. Refer to the vehicle manual for the specific resistance values that the sensor should exhibit.
- Compare Readings: Compare the resistance readings with the specified range mentioned in the vehicle manual. If the readings are significantly higher or lower than expected, it may indicate a faulty throttle body position sensor that needs to be replaced.
- Clean or Replace: If the throttle body position sensor appears dirty or contaminated, clean it using an appropriate electrical cleaner or contact cleaner. If the sensor is damaged or the readings are out of range, it is recommended to replace the throttle body position sensor with a new one.
- Reassembly: Once the inspection, cleaning, or replacement is complete, reassemble any components that were removed and ensure that all connections are secure.
By carefully inspecting the throttle body position sensor and addressing any issues found, you can ensure that the electronic throttle body functions optimally and helps maintain smooth engine performance.
Testing the Throttle Body Motor
The throttle body motor is responsible for controlling the opening and closing of the throttle plate in an electronic throttle body system. To ensure the proper functioning of this motor, it is important to conduct a thorough test. Here are the steps to test the throttle body motor:
- Locate the Throttle Body Motor: Identify the throttle body motor, which is typically connected to the throttle body assembly. Refer to the vehicle manual if you’re unsure about its exact location.
- Prepare the Multimeter: Set the multimeter to the appropriate voltage range, checking the specifications in the vehicle manual. Ensure the probes are in working order and correctly connected to the multimeter.
- Connect the Multimeter: Connect the positive (red) probe of the multimeter to the positive terminal of the throttle body motor. Connect the negative (black) probe to the negative terminal on the motor.
- Activate the Throttle Body Motor: Turn on the ignition key, but do not start the engine. Use the vehicle’s controls to activate the throttle body motor. This can usually be done by pressing the accelerator pedal.
- Observe the Multimeter Reading: Monitor the multimeter to observe the voltage reading while the throttle body motor is activated. The voltage should vary as the motor opens and closes the throttle plate.
- Compare Readings: Compare the voltage readings on the multimeter with the specifications mentioned in the vehicle manual. If the readings are within the specified range, it indicates the throttle body motor is functioning correctly.
- Inspect for Smooth Movement: While activating the throttle body motor, visually inspect the movement of the throttle plate. It should move smoothly without any jerking or hesitation. Any irregularities may indicate a problem with the motor or throttle body assembly.
- Address Any Issues: If the multimeter readings are outside the specified range or if you notice any irregular movement of the throttle plate, it may indicate a faulty throttle body motor. In such cases, the motor may need to be replaced or further diagnostics and repairs may be necessary.
Thoroughly testing the throttle body motor is crucial to ensure proper engine performance and responsiveness. If you encounter any difficulties or are unsure about any of the steps, it is recommended to consult the vehicle manual or seek the assistance of a qualified mechanic.
Cleaning and Reinstalling the Throttle Body
Regular cleaning of the throttle body is essential to maintain its optimal performance and prevent the build-up of dirt, carbon deposits, and other contaminants. Here are the steps to properly clean and reinstall the throttle body:
- Gather Cleaning Supplies: Prepare the necessary cleaning supplies, including a throttle body cleaner or an appropriate cleaning solution specifically designed for throttle bodies, a soft brush or cloth, and shop towels.
- Disconnect the Battery: Start by disconnecting the negative terminal of the vehicle’s battery to prevent any electrical mishaps.
- Locate the Throttle Body: Identify the throttle body, usually located near the intake manifold. Refer to the vehicle manual if you are unsure about its exact location.
- Spray Cleaning Solution: Liberally spray the cleaning solution onto the throttle body, paying particular attention to the throttle plate and the surrounding areas where carbon deposits tend to accumulate.
- Gently Scrub: Use a soft brush or cloth to gently scrub the throttle plate and the interior walls of the throttle body. Be cautious not to damage any delicate components or electrical connections.
- Wipe Away Residue: Use shop towels or a clean cloth to wipe away the loosened residue and excess cleaning solution. Ensure that all surfaces are thoroughly cleaned and free from any debris.
- Inspect for Any Remaining Deposits: Upon cleaning, inspect the throttle body for any remaining deposits. If necessary, repeat the cleaning process to ensure a thorough cleaning job.
- Reinstall the Throttle Body: Once the throttle body is clean and dry, carefully reinstall it in its original position. Ensure that all connections are secure and properly aligned.
- Reconnect the Battery: Finally, reconnect the negative terminal of the vehicle’s battery to restore power to the system.
Cleaning the throttle body helps maintain smooth airflow and ensures proper functioning of the engine. It is recommended to follow the vehicle manufacturer’s guidelines and specific cleaning instructions mentioned in the vehicle manual. If you are unsure or uncomfortable performing this task, it’s best to seek the assistance of a qualified mechanic.
Tips and Tricks for Testing an Electronic Throttle Body
Testing an electronic throttle body can sometimes be a complex task. Here are some tips and tricks to help you successfully test the throttle body and ensure accurate results:
- Refer to the Vehicle Manual: Always consult the vehicle manual for specific instructions and guidelines regarding the testing procedures for your particular make and model. It provides valuable information and can help avoid any potential mistakes.
- Use the Correct Tools: Ensure that you have the appropriate tools and equipment for testing the throttle body, such as a multimeter set to the correct range, screwdrivers, cleaning solution, and a soft brush. Using the right tools will make the testing process smoother and more efficient.
- Take Precautions: Prior to testing, disconnect the battery to prevent any electrical mishaps. Wear protective gloves and eyewear to safeguard yourself from any potential harm. Working in a well-ventilated area is also crucial when using cleaning solvents.
- Follow a Systematic Approach: When testing the throttle body, follow a step-by-step approach to ensure that you don’t miss any critical components or connections. This helps in accurate diagnosis and troubleshooting.
- Don’t Forget About Cleaning: Thoroughly cleaning the throttle body is an important part of the testing process. Removing carbon deposits and debris can improve its performance and responsiveness. Use a proper throttle body cleaner and take care not to damage any sensitive components.
- Seek Professional Help if Unsure: If you are unsure about any step of the testing process or encounter difficulties, it’s always better to seek the assistance of a qualified mechanic or an automotive professional. They have the expertise and experience to diagnose and resolve complex throttle body issues.
- Perform Regular Maintenance: Along with testing, it’s essential to perform regular maintenance on the throttle body. This includes periodic cleaning to prevent carbon build-up and the accumulation of debris. Regular maintenance can prolong the lifespan of the throttle body and ensure smooth engine performance.
By following these tips and tricks, you can effectively test the electronic throttle body and address any issues that may arise. Always prioritize your safety and do not hesitate to seek professional assistance when needed.