
Gather the necessary supplies
Before you begin cleaning your printer or scanner, it’s important to gather all the necessary supplies. Having everything you need on hand will make the cleaning process smooth and efficient. Here’s a list of items you’ll need:
- Clean, lint-free cloths or microfiber towels
- Isopropyl alcohol or glass cleaner
- Cotton swabs or small soft-bristled brushes
- Compressed air canister or air blower
- Small vacuum cleaner or dusting brush
- Disposable gloves (optional)
The clean, lint-free cloths or microfiber towels will be used to wipe the exterior surfaces of the printer or scanner, as well as the glass or scanning bed. Make sure they are slightly damp with isopropyl alcohol or glass cleaner to effectively remove any dirt or smudges.
Cotton swabs or small soft-bristled brushes will come in handy for cleaning hard-to-reach areas such as paper trays and input/output rollers. They can also be used to gently remove any ink or toner residue that may have accumulated.
Using a compressed air canister or air blower will help to blow away any loose dust or debris from the inside of the printer or scanner. Be cautious not to blow air directly onto sensitive components, as it may damage them.
A small vacuum cleaner or dusting brush can be used to remove larger debris or loose dirt from the printer or scanner. This will ensure a clean working environment and prevent any particles from causing further issues.
Lastly, wearing disposable gloves is optional but recommended, especially if you are cleaning a printer that has a lot of accumulated ink or toner. It will protect your hands from coming into direct contact with these substances and minimize the mess.
Once you have gathered all these supplies, you are ready to start cleaning your printer or scanner. Remember, regular maintenance and cleaning are essential to keep your devices functioning optimally and producing high-quality prints or scans.
Start with the exterior
When cleaning your printer or scanner, it’s important to begin with the exterior. This will involve wiping down surfaces and removing any visible dirt or dust. Here’s a step-by-step guide to help you clean the exterior:
- Start by turning off the printer or scanner and disconnecting it from the power source. This will ensure your safety during the cleaning process.
- Use a clean, lint-free cloth or microfiber towel slightly dampened with isopropyl alcohol or glass cleaner to wipe down the exterior surfaces. Make sure to clean all sides of the device, including the top, sides, and bottom.
- Pay attention to areas where dirt or smudges may be more noticeable, such as buttons, control panels, and display screens. Use a cotton swab or soft-bristled brush to gently clean these areas if needed.
- If there are any stubborn stains or sticky residue, apply a small amount of isopropyl alcohol directly on the cloth or cotton swab and gently rub the affected area until the stain is removed.
- Be cautious not to use excessive liquid or apply too much pressure while cleaning. This can prevent any liquid from seeping into the device and causing damage. Use gentle, circular motions to ensure a thorough cleaning.
- Once you have wiped down all the exterior surfaces, allow the device to air dry completely before reconnecting it to the power source and turning it back on.
By starting with the exterior, you remove any superficial dirt or dust that could potentially transfer to the interior components. This step also helps to improve the overall appearance of your printer or scanner.
Regular cleaning of the exterior will not only keep your device looking clean and presentable but also prevent dust and dirt from entering the internal mechanisms. This can ultimately extend the lifespan of your printer or scanner and ensure reliable performance.
Clean the paper tray and input/output rollers
As you continue cleaning your printer or scanner, it’s essential to pay attention to the paper tray and input/output rollers. These components can easily accumulate dust, debris, and even bits of paper over time, leading to paper jams and print quality issues. Follow these steps to effectively clean the paper tray and rollers:
- Start by removing any paper from the paper tray and set it aside.
- If the paper tray is removable, take it out and examine it for any loose debris or dust. Use a clean cloth or microfiber towel to wipe away any dirt or particles.
- For input/output rollers, check for any visible dirt or residue. Gently wipe them down using a lint-free cloth dampened with isopropyl alcohol. Make sure to rotate the rollers as you clean to ensure all sides are thoroughly cleaned.
- In case some dirt or debris is difficult to remove, use a cotton swab moistened with isopropyl alcohol to carefully clean those areas. Be cautious not to leave behind any cotton fibers that could cause issues later on.
- Once the paper tray and rollers are cleaned, allow them to air dry completely before reinserting the paper tray into the printer or scanner.
- Before loading the paper back into the tray, make sure it is clean and free from wrinkles or folds. Dust off the paper with a clean cloth or blow any loose particles away with a compressed air canister.
- Finally, load the paper back into the tray ensuring it is aligned properly and adjust the paper guides if necessary.
Regularly cleaning the paper tray and input/output rollers not only helps prevent paper jams but also ensures smooth paper feeding and optimal print quality. By removing accumulated dust and debris, you maintain the integrity of these essential components, extending the lifespan of your printer or scanner.
Remember to consult your device’s manual for any specific instructions on cleaning these components. Different models may have varying mechanisms, so it’s always best to follow the manufacturer’s guidelines.
Clean the inside of the printer or scanner
After addressing the exterior and the paper tray, it’s time to clean the inside of your printer or scanner. This step is crucial for maintaining the quality of your prints or scans and ensuring the smooth operation of the device. Follow these steps to effectively clean the interior:
- Start by turning off the printer or scanner and disconnecting it from the power source to avoid any electrical mishaps.
- If possible, remove any removable parts such as ink cartridges, toner cartridges, or the scanning lid. Refer to your device’s manual for specific instructions on removing these components.
- Using a compressed air canister or an air blower, blow away any loose dust or debris from the inside of the printer or scanner. Be mindful of not blowing air directly onto the sensitive components to avoid damage.
- For stubborn dust or debris in hard-to-reach areas, use a small soft-bristled brush or a cotton swab moistened with isopropyl alcohol. Gently brush or rub the affected areas to remove the dirt.
- Pay special attention to areas around the rollers, gears, and any other mechanical parts. These areas are prone to accumulating dust and debris, which can affect the performance of your printer or scanner.
- If there are any visible ink or toner residue inside the device, use a lint-free cloth slightly dampened with isopropyl alcohol to carefully wipe it away. Take caution not to touch any electrical contacts or sensitive components while cleaning.
- Once the inside of the printer or scanner is cleaned, allow it to air dry completely before reassembling the device.
By regularly cleaning the inside of your printer or scanner, you minimize the risk of clogged nozzles, smudged prints, or scanning errors. Removing dust and debris from the internal components not only ensures optimal performance but also extends the lifespan of your device.
Remember to consult your device’s manual for any specific instructions on cleaning the inside. Different models may require different methods, so it’s essential to follow the manufacturer’s guidelines to avoid any damage.
Remove any ink or toner residue
Over time, ink or toner residue can accumulate inside your printer or scanner. This can affect the quality of your prints or scans and potentially cause smudging or streaking on the output. To maintain optimal performance and print quality, it’s important to remove any ink or toner residue. Follow these steps to effectively clean the ink or toner residue:
- Start by turning off the printer or scanner and disconnecting it from the power source.
- If your printer has ink cartridges, remove them carefully following the manufacturer’s instructions. For scanners, refer to the manual to determine if there are any removable parts that need to be taken out.
- Using a clean, lint-free cloth or microfiber towel, gently wipe the ink or toner residue in the affected areas. Take care not to apply excessive pressure or scrub too vigorously, as this can damage the components.
- If there are stubborn ink or toner stains that are difficult to remove, moisten a cloth or cotton swab with isopropyl alcohol and gently dab the affected areas. Avoid saturating the cloth or swab with too much liquid to prevent any liquid from seeping into the device.
- For printers, if ink cartridges have leaked or there is significant ink residue, it may be helpful to use a damp cloth or cotton swab to clean the contacts on the cartridges and inside the cartridge holder to ensure proper connectivity.
- Once the ink or toner residue has been removed, allow the components to air dry completely before reinserting the ink cartridges or reassembling the scanner.
Regularly cleaning ink or toner residue helps maintain the integrity of your printer or scanner by preventing buildup that can potentially clog the nozzles or affect the performance of the device. It also ensures clear, crisp prints or scans without any smudging or streaking.
Remember to consult your device’s manual for any specific instructions on cleaning ink or toner residue. Different printers or scanners may have different methods, so it’s important to follow the manufacturer’s guidelines to avoid any damage to the device.
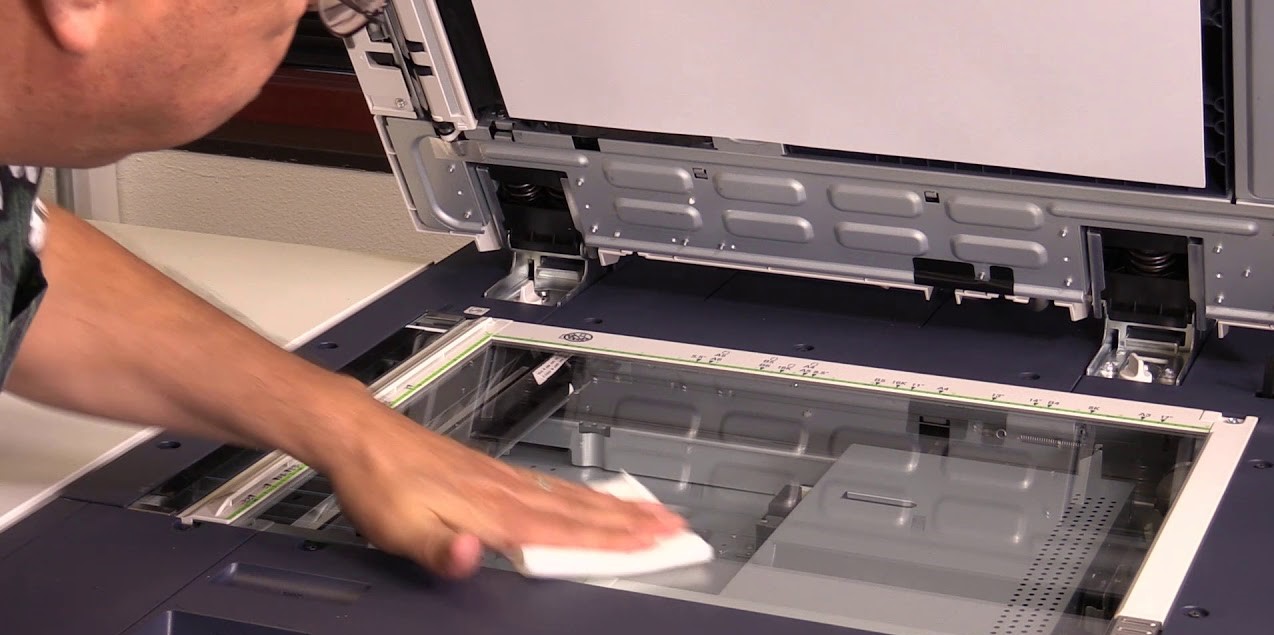
Clean the glass or scanning bed
The glass or scanning bed of your scanner or all-in-one printer plays a crucial role in producing clear and accurate scans. Over time, dust, fingerprints, and smudges can accumulate on the glass surface, which can result in blurry or distorted scans. To maintain optimal scan quality, it’s important to regularly clean the glass or scanning bed. Follow these steps to effectively clean it:
- Start by turning off the scanner or all-in-one printer and disconnecting it from the power source.
- Open the scanner lid or top cover, exposing the glass or scanning bed.
- Using a clean, lint-free cloth or microfiber towel, gently wipe the glass surface to remove any dust or loose particles. Start from one end and work your way to the other, using smooth, even strokes.
- Pay close attention to areas where fingerprints or smudges are visible. If necessary, dampen the cloth slightly with isopropyl alcohol or glass cleaner to remove stubborn stains. Always make sure the cloth is only slightly damp, as excessive moisture can seep into the scanner and cause damage.
- For scanners with a scanning bed that moves, make sure to clean both the glass and the white backing beneath it. Dust or debris on the white backing can also affect scan quality.
- Once the glass or scanning bed is clean, allow it to air dry completely before closing the scanner lid or top cover.
Regularly cleaning the glass or scanning bed ensures that your scanned images and documents are free from artifacts, spots, or smears. It allows for accurate reproduction of colors and details, resulting in high-quality digital copies or prints.
Remember to consult your scanner or all-in-one printer’s manual for any specific instructions on cleaning the glass or scanning bed. Different models may have varying cleaning methods, so it’s important to follow the manufacturer’s guidelines to avoid damaging the device.
Clean the scanner lid or top cover
When cleaning your scanner or all-in-one printer, it’s important not to overlook the scanner lid or top cover. This component can accumulate dust, smudges, and fingerprints, which can affect the scan quality or even leave unwanted marks on your copies. Follow these steps to effectively clean the scanner lid or top cover:
- Start by turning off the scanner or all-in-one printer and disconnecting it from the power source.
- Gently open the scanner lid or top cover, exposing the underside of the lid.
- Using a clean, lint-free cloth or microfiber towel, wipe the underside of the lid to remove any dust or loose particles. Pay attention to areas where fingerprints or smudges are visible.
- If necessary, dampen the cloth slightly with isopropyl alcohol or glass cleaner to remove stubborn stains or smudges. Ensure that the cloth is only slightly damp, as excessive moisture can damage the scanner or printer.
- For scanner lids with glass components, such as a built-in document feeder, wipe the glass surface using the same cleaning technique as mentioned in the previous section.
- Once the underside of the lid is clean, close it gently and wipe the top cover of the scanner or all-in-one printer using a clean, slightly damp cloth.
- Allow the lid and top cover to air dry completely before reconnecting the scanner or all-in-one printer to the power source and turning it back on.
Regularly cleaning the scanner lid or top cover ensures that dust, smudges, or fingerprints do not interfere with the scanning process. It helps maintain optimal scan quality and prevents any unwanted markings on your scanned documents or photos.
Remember to consult your scanner or all-in-one printer’s manual for any specific instructions on cleaning the scanner lid or top cover. Different models may have varying recommendations or features, so it’s always best to follow the manufacturer’s guidelines to avoid any damage to the device.
Clean the scanning mechanism
The scanning mechanism of your scanner or all-in-one printer is responsible for capturing accurate and high-quality scans. However, over time, dust, dirt, and debris can accumulate on the scanning mechanism, which can result in blurry scans or even paper jams. Cleaning the scanning mechanism is crucial to ensure optimal performance. Follow these steps to clean the scanning mechanism effectively:
- Start by turning off the scanner or all-in-one printer and disconnecting it from the power source.
- Open the scanner lid or any access panels that allow you to access the scanning mechanism.
- Gently inspect the scanning mechanism for any visible dust, dirt, or debris. Pay close attention to the track or bar on which the scanning head moves.
- Utilize a can of compressed air or an air blower to blow away any loose dust or debris from the scanning mechanism. Exercise caution to prevent the blowing air from directly hitting the glass or sensitive components.
- If there are stubborn particles on the scanning mechanism, you can use a small soft-bristled brush or a cotton swab slightly dampened with isopropyl alcohol to gently remove them. Always ensure the cloth or swab is only slightly damp to avoid any liquid damage.
- Allow the scanning mechanism to air dry completely before closing the scanner lid or access panels.
Regularly cleaning the scanning mechanism is essential for maintaining optimal scan quality and preventing potential paper jams. Removing dust and debris ensures smooth movement of the scanning head, resulting in clear and accurate scans.
Remember to consult your scanner or all-in-one printer’s manual for any specific instructions on cleaning the scanning mechanism. Different models may have varying mechanisms and specific cleaning recommendations, so it’s important to follow the manufacturer’s guidelines to avoid damaging the device.
Reassemble and test the printer or scanner
After thoroughly cleaning all the components of your printer or scanner, it’s time to reassemble the device and ensure that it is functioning properly. Follow these steps to reassemble and test your printer or scanner:
- Start by collecting all the components you removed during the cleaning process, such as ink or toner cartridges, scanning lids, or removable trays.
- Make sure that all the components are clean and dry before reinserting them into their respective places. Take care to align them correctly and secure them as per the manufacturer’s instructions.
- Once all the components are reassembled, connect the printer or scanner back to the power source.
- Turn on the device and allow it to go through its startup process. This may involve some recalibration or initialization.
- To ensure that everything is functioning properly, perform a test print or a test scan. Use a sample document or image to verify that the output quality is clear and crisp.
- Check for any unusual noises, error messages, or malfunctions during the test. If you encounter any issues, refer to the device’s manual for troubleshooting steps or seek professional assistance.
Reassembling and testing the printer or scanner ensures that all the components are properly aligned and functioning correctly after the cleaning process. It enables you to verify that the device is ready to meet your printing or scanning needs.
Remember to consult your device’s manual for any specific instructions on reassembly and testing. Different models may have varying procedures and troubleshooting steps, so it’s important to follow the manufacturer’s guidelines for optimal results.