
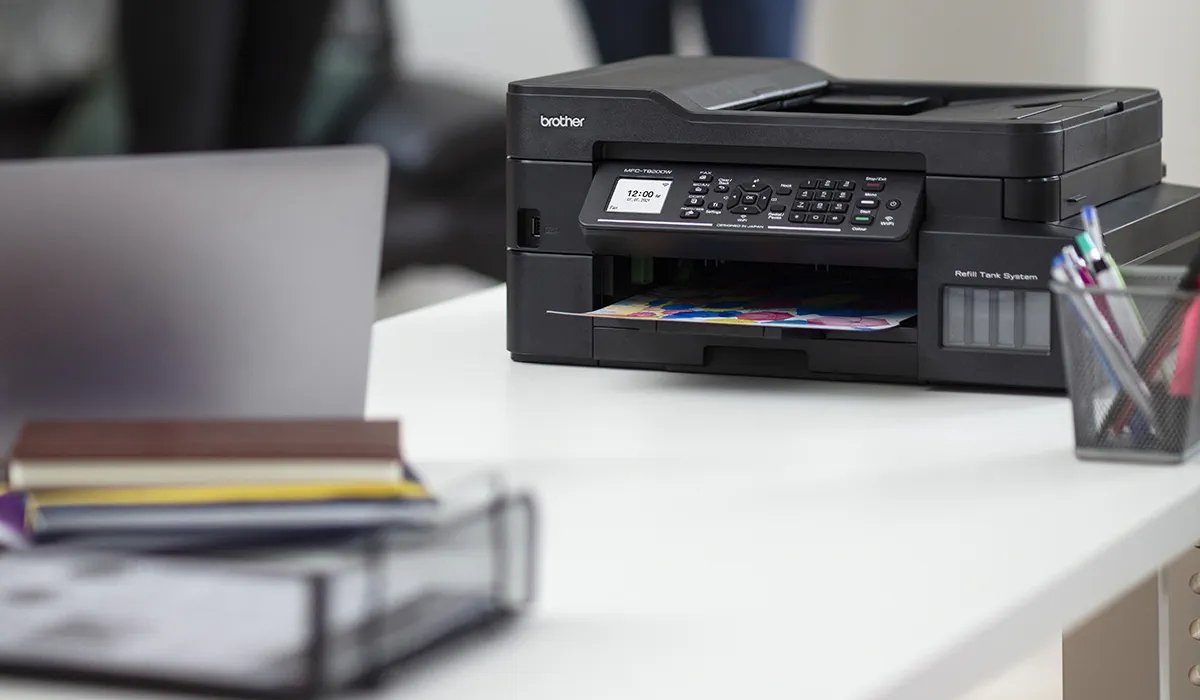
Choosing the Right Printer Scanner
When it comes to selecting a printer scanner for your computer, you need to consider a few key factors to ensure that you choose the right one for your needs. With the wide range of options available in the market, it’s important to understand your requirements and budget before making a decision. Here are some essential factors to consider when choosing a printer scanner:
- Printing and Scanning Speed: Determine how quickly you need your documents printed or scanned. If you’ll be handling large volume jobs on a regular basis, opt for a printer scanner with high-speed capabilities to save you time.
- Resolution: The resolution of a printer scanner determines the quality of the output. Higher resolutions produce sharper and more detailed prints and scans. Consider the type of documents you’ll be printing or scanning to determine the appropriate resolution for your needs.
- Connectivity Options: Check whether the printer scanner offers the connectivity options you require. USB, Wi-Fi, Ethernet, and Bluetooth connectivity are common options to consider depending on your preference and the devices you’ll be connecting to.
- Size and Design: Consider the space available in your workspace and choose a printer scanner that fits comfortably. Additionally, consider the design and aesthetics to ensure it complements the overall aesthetic of your setup.
- Functionality: Evaluate the additional functionalities that the printer scanner offers. Some models provide features like duplex printing, automatic document feeders, or specific scanning modes like OCR (optical character recognition) or photo scanning. Determine which functionalities are essential for your specific needs.
- Brand Reputation and Support: Research and choose a reputable brand known for producing reliable and durable printer scanners. Additionally, look for excellent customer support, warranty options, and easily accessible technical assistance.
- Price: Set a budget for your printer scanner purchase and compare prices across different models. Keep in mind that while a higher price tag may indicate better quality and functionality, it may not always be necessary for your specific needs.
By considering these factors, you can narrow down the options and choose a printer scanner that aligns with your requirements. Remember to read reviews, compare specifications, and seek expert advice before making your final decision. Taking the time to choose the right printer scanner will ensure that you have a reliable and efficient device that meets all your printing and scanning needs.
Checking for Compatibility
Before connecting a printer scanner to your computer, it’s important to ensure compatibility between the two devices. This step is crucial to avoid any issues or technical difficulties during the setup process. Here’s a step-by-step guide to checking for compatibility:
- Operating System: Check if the printer scanner is compatible with your computer’s operating system. Whether you’re using Windows, macOS, or Linux, make sure the printer scanner’s drivers and software are supported by your OS.
- Interface: Verify that the printer scanner has the necessary interface to connect to your computer. Common interfaces include USB, Ethernet, Wi-Fi, or Bluetooth. Ensure that your computer has the corresponding connection options available.
- System Requirements: Review the system requirements specified by the printer scanner manufacturer. Check if your computer meets the minimum requirements in terms of processor, RAM, available storage space, and other specifications.
- Driver Compatibility: Ensure that the printer scanner’s drivers are compatible with your computer’s architecture (32-bit or 64-bit). Downloading and installing the incorrect driver version can lead to malfunctioning or limited functionality.
- Software Compatibility: Confirm if the accompanying software provided by the printer scanner manufacturer is compatible with your computer. Some advanced features and functionalities may require specific software or applications.
- Connectivity: Check if the printer scanner can be connected to your computer through your preferred method. Ensure that your computer has the necessary ports or wireless capabilities to establish a connection.
It’s important to note that compatibility can vary depending on the specific model and brand of the printer scanner. Refer to the manufacturer’s website or user manual for detailed compatibility information. When in doubt, consider reaching out to the manufacturer’s support team for assistance.
By verifying compatibility between your computer and the printer scanner, you can ensure a smooth and hassle-free setup process. This will save you time and frustration, allowing you to start using the printer scanner efficiently.
Connecting the Printer Scanner to a Power Source
Before you can start using your printer scanner, it’s important to connect it to a power source. This will provide the necessary electrical supply for the device to function properly. Here’s a step-by-step guide on how to connect the printer scanner to a power source:
- Locate the Power Cable: Find the power cable that came with your printer scanner. It is usually a thick cable with a plug at one end and a connection point at the other end.
- Identify the Power Input: Locate the power input port on the printer scanner. It is usually found at the back or side of the device.
- Connect the Power Cable: Take the plug end of the power cable and insert it into a power outlet or surge protector. Make sure the outlet is easily accessible and can handle the power requirements of the printer scanner.
- Insert the Power Connector: Take the connection point end of the power cable and plug it into the power input port of the printer scanner. Ensure a secure and snug connection.
- Switch On the Power: Locate the power button or switch on the printer scanner and turn it on. You may need to refer to the user manual for the specific location of the power button.
- Check the Power Indicator: Look for a power indicator light on the printer scanner. This light confirms that the device is receiving power and is ready for use.
It’s important to note that some printer scanners may have different power requirements or use a separate power adapter. Refer to the user manual or manufacturer’s instructions for any specific steps or precautions regarding the power connection process.
By following these steps, you can ensure that your printer scanner is properly connected to a power source. This will allow you to move on to the next step of connecting it to your computer and begin using it for printing and scanning tasks.
Connecting the Printer Scanner to the Computer
Once you have connected your printer scanner to a power source, the next step is to establish a connection between the device and your computer. This will allow you to send print and scan commands directly from your computer. Here’s a step-by-step guide on how to connect the printer scanner to the computer:
- Locate the Connection Cable: Find the appropriate connection cable that came with your printer scanner. The type of cable will depend on the connectivity options available for your device. Common connection cables include USB, Ethernet, or HDMI.
- Identify the Connection Ports: Determine the corresponding connection ports on both the printer scanner and your computer. These ports are usually labeled and easily identifiable.
- Connect the Cable to the Printer Scanner: Take one end of the connection cable and plug it into the appropriate port on the printer scanner. Ensure a secure and snug connection to establish a reliable connection.
- Connect the Cable to the Computer: Take the other end of the connection cable and plug it into the corresponding port on your computer. Make sure the cable is inserted correctly and securely.
- Power On the Printer Scanner: If the printer scanner has a separate power switch, turn it on. Ensure that the device is powered on and ready to establish a connection.
- Wait for the Computer to Recognize the Printer Scanner: Your computer should automatically detect the newly connected printer scanner. It may prompt you to install drivers or software for the device. Follow any on-screen instructions to complete the installation process.
- Test the Connection: Open a document or image file and try printing or scanning using your computer. If the printer scanner responds accordingly, it means the connection has been successfully established.
It’s worth noting that some printer scanners support wireless connections, eliminating the need for a physical cable. In such cases, follow the manufacturer’s instructions for connecting the device wirelessly to your computer.
By following these steps, you can successfully connect your printer scanner to your computer. This will enable you to efficiently perform printing and scanning tasks from the comfort of your computer.
Installing the Printer Scanner Drivers
Once you have connected your printer scanner to your computer, the next step is to install the necessary drivers. Printer scanner drivers are software programs that allow your computer to communicate with the device and enable proper functioning. Here’s a step-by-step guide on how to install the printer scanner drivers:
- Check for Included Installation Disc: Some printer scanners come with an installation disc that contains the necessary drivers and software. If you have an installation disc, insert it into your computer’s disc drive and follow the on-screen instructions.
- Download Drivers from Manufacturer’s Website: If your printer scanner didn’t come with an installation disc or if you prefer to install the most up-to-date drivers, visit the manufacturer’s website. Look for the support or downloads section, search for your specific model, and download the drivers compatible with your operating system.
- Run the Driver Installer: Once the drivers are downloaded, locate the installer file and double-click on it to run the installation process. Follow the on-screen prompts to proceed with the installation. It may require you to accept terms and conditions or specify installation preferences.
- Connect the Printer Scanner: If you haven’t already done so, ensure that the printer scanner is properly connected and powered on before continuing with the driver installation process. The installation will detect the connected device and prepare it for use.
- Wait for the Installation to Complete: Depending on the printer scanner and the computer system, the installation process may take a few minutes. Allow the installation to complete uninterrupted.
- Restart Your Computer (if prompted): After the installation is finished, you may be prompted to restart your computer. Follow the instructions and restart the system to finalize the driver installation.
- Test the Printer Scanner: Once your computer has restarted, open a document or image file and try printing or scanning using the printer scanner. If the device responds and functions properly, it indicates that the drivers have been successfully installed.
It’s important to regularly update your printer scanner drivers to ensure compatibility, enhanced functionality, and stability. Visit the manufacturer’s website or utilize automatic driver update software to stay up-to-date with the latest drivers for your device.
By following these steps, you can successfully install the printer scanner drivers on your computer. This will allow you to fully utilize all the features and capabilities of your printer scanner.
Setting Up the Printer Scanner Software
After installing the drivers for your printer scanner, the next step is to set up the accompanying software on your computer. The software provides additional functionalities and features that enhance the printing and scanning experience. Here’s a step-by-step guide on how to set up the printer scanner software:
- Open the Printer Scanner Software: Locate the software application that was installed along with the drivers. It is usually accessible through the Start menu or the desktop shortcut created during the installation process. Double-click to open the software.
- Explore the Software Interface: Take a moment to familiarize yourself with the software interface. Each printer scanner software differs, but you will typically find options to print, scan, adjust settings, and access additional features and functionalities.
- Configure Preferences: Navigate to the software’s settings or preferences section. Here, you can customize various options such as print quality, paper size, scan resolution, file formats, and default saving locations. Adjust these preferences according to your specific requirements.
- Set Up Scan Profiles: Some printer scanner software allows you to create and save scan profiles for different scanning scenarios. For example, you can create profiles for color scanning, black and white scanning, or high-resolution scanning. Configure scan profiles based on your needs and save them for quick access in the future.
- Explore Additional Features: Printer scanner software often comes with additional features and functionalities beyond basic printing and scanning. These may include image editing tools, OCR (optical character recognition), document management, or cloud integration. Take the time to explore and familiarize yourself with these features.
- Update Software (if applicable): Check for software updates from the manufacturer’s website or within the software itself. Regular software updates can bring bug fixes, security enhancements, and new features. Keep your printer scanner software up to date for optimal performance.
It’s important to note that the specific steps and options may vary depending on the manufacturer and model of your printer scanner. Refer to the user manual or online documentation provided by the manufacturer for detailed instructions and information regarding the software setup process.
By following these steps, you can successfully set up the printer scanner software on your computer. This will allow you to harness the full capabilities of your printer scanner and maximize your printing and scanning experience.
Testing the Printer Scanner
Once you have completed the setup of your printer scanner, it’s essential to perform a test to ensure that it is functioning correctly. Testing the printer scanner will allow you to verify its printing and scanning capabilities and address any potential issues early on. Here’s a step-by-step guide on how to test the printer scanner:
- Prepare a Test Document: Create a simple test document or locate an existing document or image that you can use for testing purposes. Ensure that the document contains various elements such as text, graphics, and colors.
- Open the Printer Application: Launch the application from which you usually print documents. This could be a word processing software, image editing software, or any other application that allows you to print files.
- Select the Printer Scanner: In the print settings or print dialogue box, choose the printer scanner as the selected device. Ensure that it is properly recognized by the application.
- Configure Printing Settings: Adjust the printing settings according to your preferences. This includes selecting the desired paper size, print quality, orientation, and other specific options available in the application.
- Send a Test Print: Click the ‘Print’ or ‘OK’ button to send the test document to the printer scanner. Monitor the printing process and ensure that the document prints without any issues such as paper jams or misalignments.
- Inspect the Print Quality: Examine the printed document and check for any abnormalities. Ensure that the text is clear and legible, and the graphics or images are accurately reproduced without any distortion or smudging.
- Perform a Test Scan: Open the scanner application or software on your computer. Place a document or photo on the scanner glass or load it in the automatic document feeder (if available). Initiate a test scan and monitor the scanning process.
- Review the Scanned Output: After the scanning process is complete, view the scanned image or document on your computer. Check for any issues such as misalignment, blurriness, or inaccurate color reproduction.
- Test the Additional Functionality: If your printer scanner has additional functionalities such as copying or faxing, test these features as well to ensure their proper functioning.
If any issues or errors arise during the testing process, consult the troubleshooting section of the printer scanner’s user manual or contact the manufacturer’s support for assistance. It’s important to resolve any problems early on to ensure smooth and reliable operation of your printer scanner.
By following these steps, you can confidently test your printer scanner and ensure that it is functioning properly for all your printing and scanning needs.
Troubleshooting Common Issues
While setting up and using a printer scanner, you may encounter certain issues or errors that can hinder its functionality. It’s important to be aware of common problems and troubleshooting steps to address these issues effectively. Here are some frequently encountered issues and troubleshooting tips:
- Connection Issues: If the printer scanner is not connecting to the computer, ensure that the cables are securely plugged in and the power is turned on. Restart both the printer scanner and the computer, and double-check the connection settings in the printer scanner software.
- Print Quality Issues: Poor print quality, such as faded text or streaks on the printed page, may indicate the need to clean the print heads or replace the ink cartridges. Refer to the printer scanner’s user manual for instructions on cleaning and maintaining the device.
- Scanning Problems: If the scanner is not scanning or producing distorted or blurry scans, ensure that the document or photo is placed correctly on the scanner glass without any obstructions. Additionally, check the scanning settings and adjust the resolution if needed.
- Paper Jams: Paper jams can occur when the paper is not properly loaded or when there is a blockage in the paper path. Follow the printer scanner’s user manual for instructions on how to clear a paper jam safely. Avoid using excessive force, as it can cause further damage.
- Driver or Software Issues: Outdated or incompatible drivers or software can lead to various problems. Ensure that you have installed the latest drivers available from the manufacturer’s website. If the software is not functioning correctly, try reinstalling it or updating it to the latest version.
- Network Connection Problems: If you are using a network-connected printer scanner, ensure that it is connected to the correct Wi-Fi network and has a stable internet connection. Restart your router or troubleshoot network issues if the printer scanner is not connecting to the network.
- Insufficient Memory: If you are facing errors related to insufficient memory while scanning or printing large files, consider increasing the available memory of your computer or reduce the resolution and file size settings in the printer scanner software.
If the troubleshooting steps mentioned above do not resolve the issue or if you encounter any other persistent problems, it is recommended to consult the printer scanner’s user manual or contact the manufacturer’s support team for further assistance. They will be able to provide specific guidance tailored to your device and situation.
Remember to always keep your printer scanner’s firmware, drivers, and software up to date to minimize the occurrence of issues and ensure optimal performance.
By familiarizing yourself with common issues and troubleshooting methods, you can effectively handle and resolve any problems that may arise while using your printer scanner.