
Gather Supplies
Before you begin cleaning your digital thermometer, it’s important to gather all the necessary supplies. Having everything ready will ensure a smooth and efficient cleaning process. Here are the supplies you’ll need:
- Sanitizing wipes: These wipes are essential for disinfecting the probe of the thermometer, removing any bacteria or germs that may be present.
- Mild soap: Use a gentle, non-abrasive soap to clean the thermometer probe and body.
- Water: You’ll need water to rinse off the soap and thoroughly clean the thermometer.
- Soft cloth or paper towel: This will be used to dry the thermometer after cleaning.
- Optional rubbing alcohol: If you prefer, you can use rubbing alcohol instead of sanitizing wipes to disinfect the probe.
- Container or basin: Prepare a container or basin to hold water for rinsing the thermometer.
Make sure to have all the supplies easily accessible before starting the cleaning process. This will save you time and help you avoid any interruptions.
Turn Off the Thermometer
Before you begin cleaning your digital thermometer, it’s important to turn it off to prevent any accidental readings or changes in settings during the cleaning process. Follow these steps to turn off the thermometer:
- Check the thermometer display to ensure it is on and functioning.
- Locate the power button or switch. This is usually located on the front or side of the thermometer.
- Press and hold the power button for a few seconds until the display turns off. Some thermometers may require multiple presses or a specific sequence of buttons to power off.
- Once the display is off, you can safely proceed with the cleaning process.
Turning off the thermometer will prevent any potential misreadings or accidental changes in temperature settings. It’s important to take this step to ensure accurate readings and to avoid any potential damage to the thermometer.
Remove the Probe Cover
Before you start cleaning the probe of your digital thermometer, you need to remove the probe cover. The probe cover is the protective cap that covers the tip of the thermometer. Follow these steps to safely remove the probe cover:
- Check the thermometer to locate the area where the probe cover is attached. This is typically found at the tip of the thermometer.
- Gently hold the base of the probe cover with one hand.
- With your other hand, carefully twist and pull the probe cover away from the thermometer. Make sure to do this gently to avoid any damage to the probe or the thermometer itself.
- Once the probe cover is removed, inspect it for any visible dirt, debris, or stains. If necessary, you can wipe it clean with a sanitizing wipe or a damp cloth.
Removing the probe cover is an important initial step in cleaning your thermometer. It allows you to directly access the probe for thorough cleaning and sanitization. Take your time and handle the probe cover with care to ensure a smooth removal process.
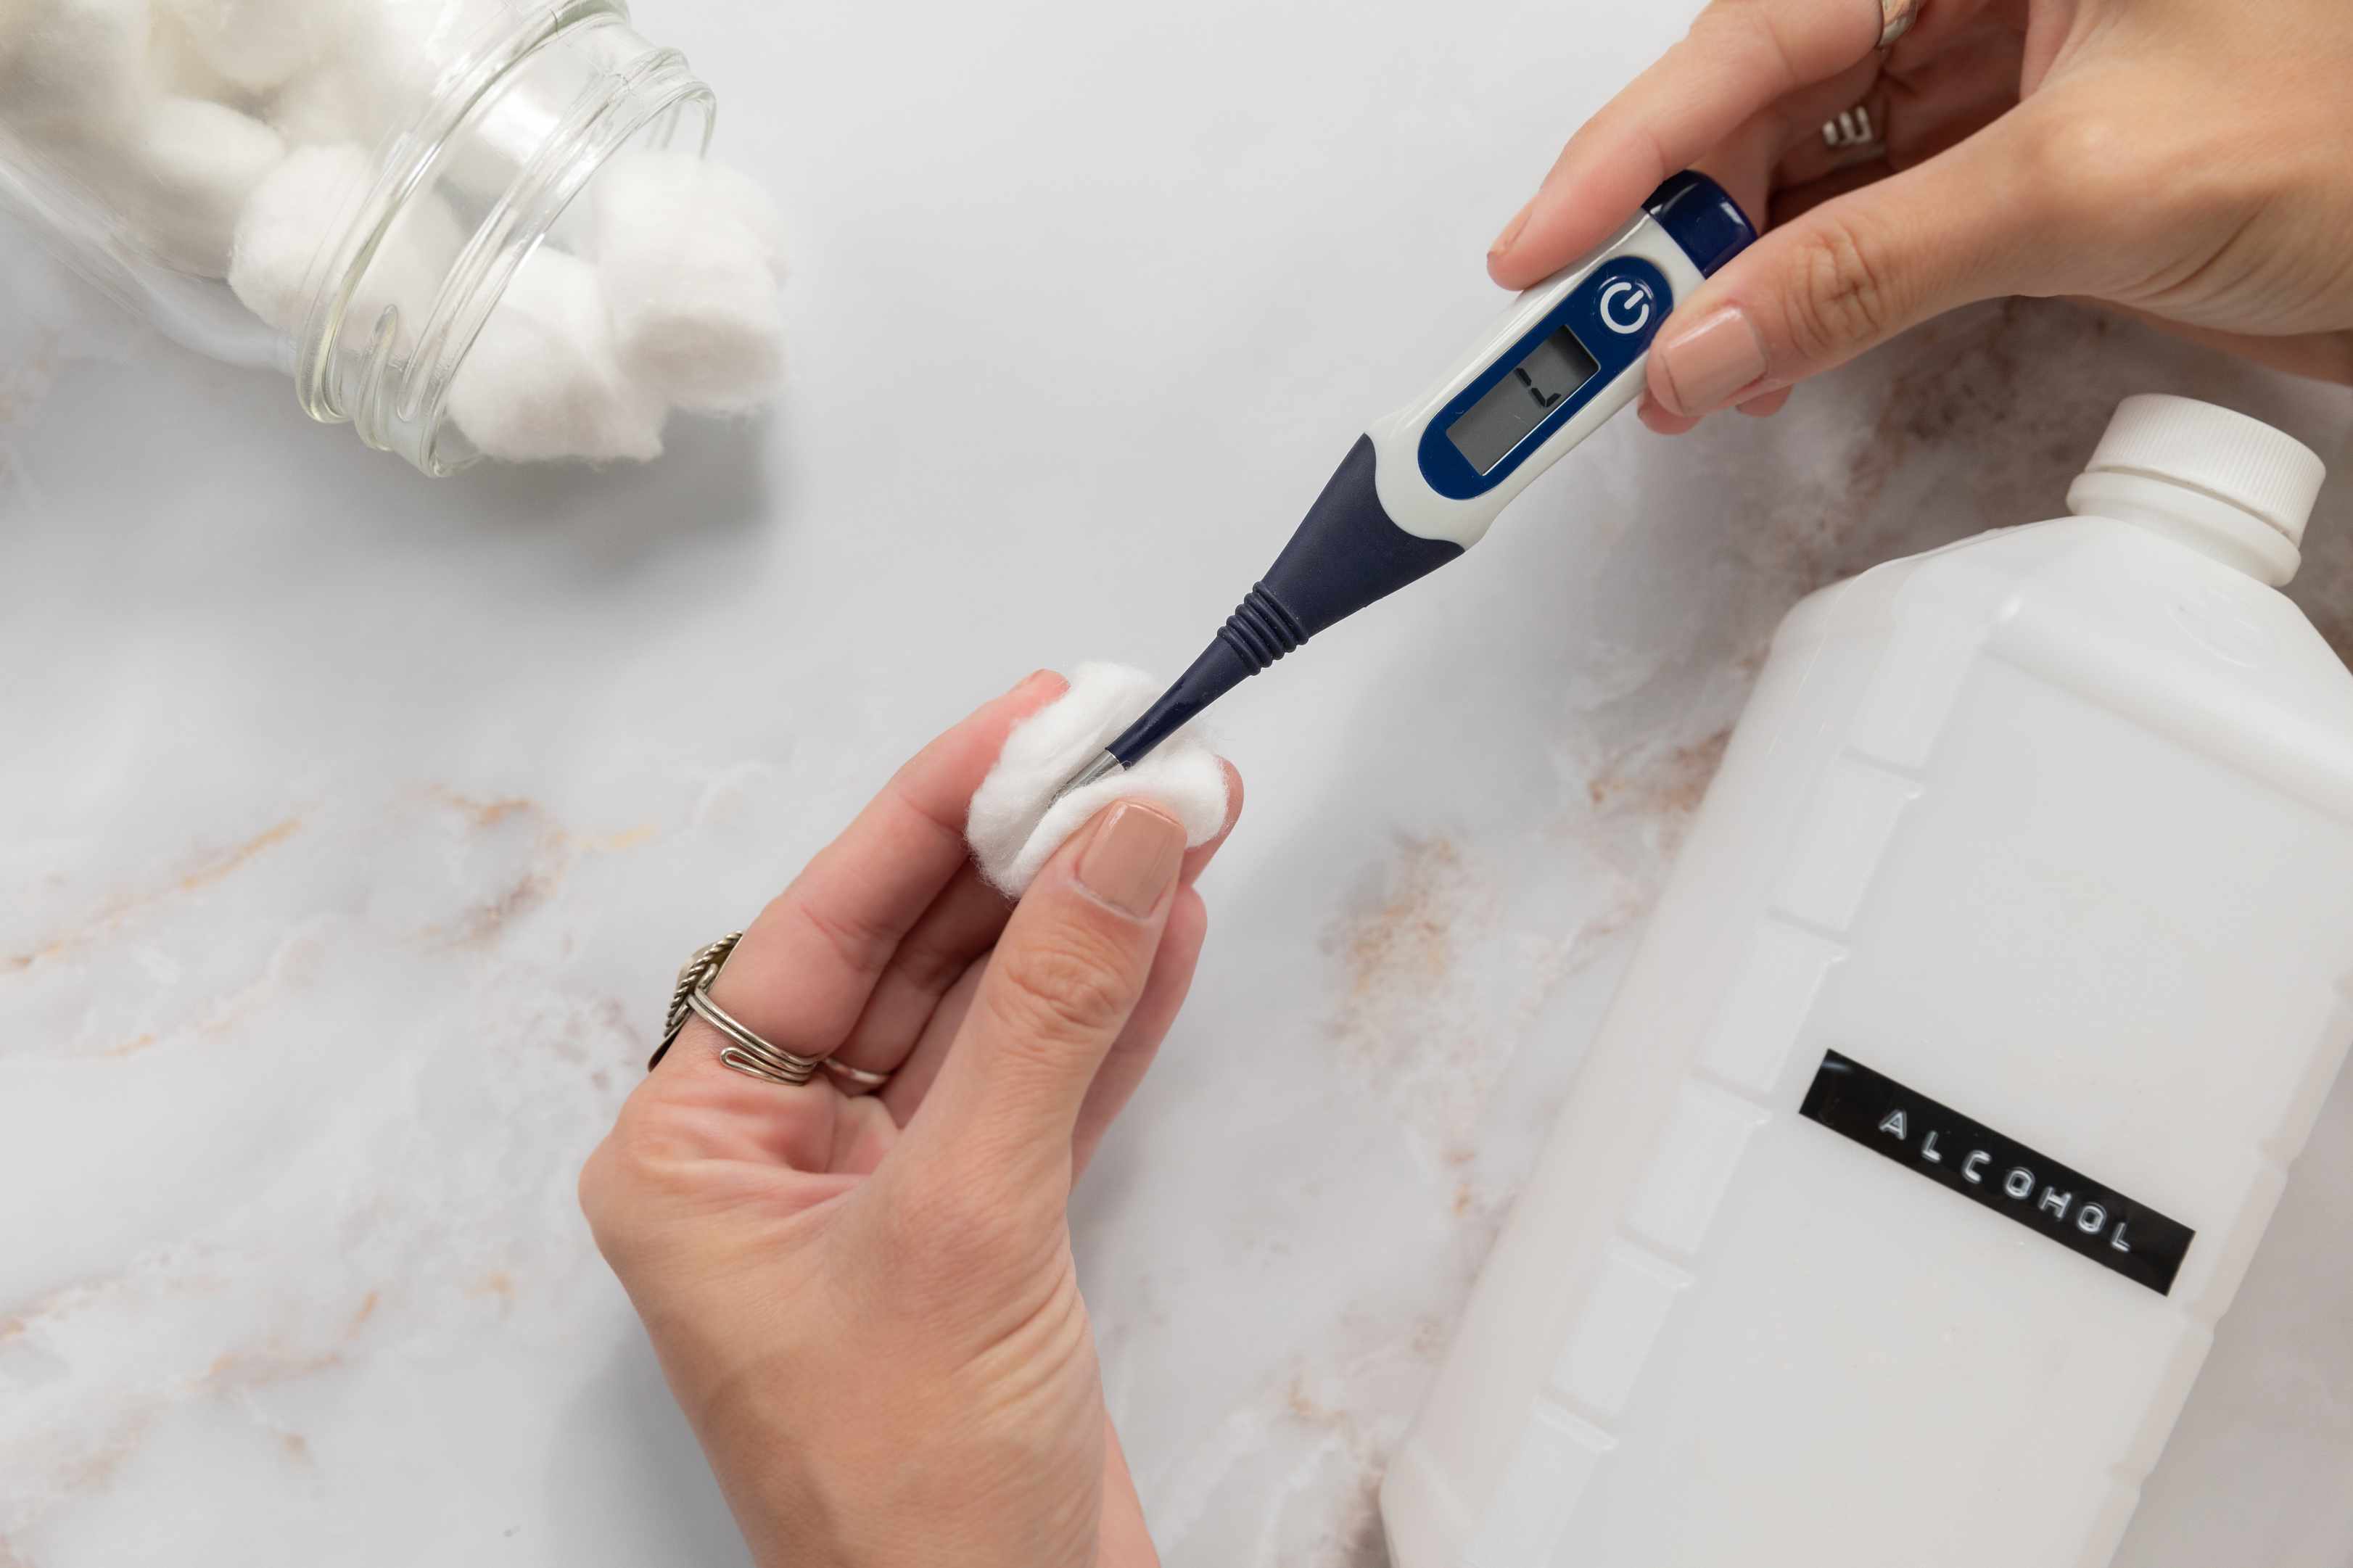
Wipe the Probe with a Sanitizing Wipe
After removing the probe cover, it’s time to clean and sanitize the probe of your digital thermometer. Using sanitizing wipes is an effective way to eliminate bacteria and germs. Follow these steps to wipe the probe:
- Take a sanitizing wipe and unfold it, exposing the moistened surface.
- Gently hold the probe of the thermometer with one hand.
- Using the sanitizing wipe, wipe the entire surface of the probe, including the tip and sides. Make sure to cover both visible and hidden areas.
- Apply slight pressure while wiping to ensure thorough cleaning.
- Continue wiping the probe for about 15-20 seconds to ensure proper sanitization.
Sanitizing wipes are designed to eliminate bacteria and germs effectively. By wiping the probe with a sanitizing wipe, you will reduce the risk of cross-contamination and ensure a clean and safe thermometer for future use.
Clean the Probe with Soap and Water
In addition to using sanitizing wipes, it’s important to clean the probe of your digital thermometer with soap and water. This step will help remove any residue or buildup that may not be fully eliminated by the wipes alone. Follow these steps to clean the probe:
- Prepare a bowl or basin with warm water.
- Take a mild soap or dishwashing liquid and apply a small amount to your hands or directly onto the probe.
- Gently rub the soap onto the probe, covering the entire surface.
- Continue to massage the probe with your hands for about 20-30 seconds, ensuring that the soap reaches all areas.
- Once you have thoroughly cleaned the probe, place it in the bowl or basin containing warm water.
- Swirl the probe in the water, allowing the soap to dissolve and rinse off.
Remember to keep the display and any electrical components of the thermometer away from the water. Focus only on cleaning the probe with soap and water.
Cleaning the probe with soap and water helps remove any stubborn dirt, oils, or residue that may be present. This step is crucial to maintaining a hygienic and accurate thermometer for future use.
Rinse the Probe with Water
After cleaning the probe of your digital thermometer with soap and water, the next step is to rinse off any remaining soap and residue. Rinsing the probe will ensure that it is thoroughly cleaned and ready for use. Follow these steps to rinse the probe:
- Hold the probe under running water, ensuring that the water covers the entire surface of the probe.
- Gently rotate the probe to allow the water to reach all areas and wash away any remaining soap.
- Continue rinsing the probe for about 10-15 seconds to ensure complete removal of soap and residue.
- Check visually to ensure that there is no visible soap or residue left on the probe.
It is important to rinse the probe thoroughly to ensure that there is no soap left which could interfere with future readings or cause skin irritation. Proper rinsing will help maintain the accuracy and functionality of your digital thermometer.
Dry the Probe Thoroughly
After rinsing the probe of your digital thermometer, the next step is to ensure that it is thoroughly dried. Proper drying will prevent the growth of bacteria and ensure the longevity of your thermometer. Follow these steps to dry the probe:
- Gently shake off any excess water from the probe.
- Use a soft cloth or paper towel to carefully dry the entire surface of the probe.
- Ensure that you reach all areas of the probe, including the tip and sides.
- Pay attention to any crevices or hard-to-reach spots to ensure thorough drying.
- Allow the probe to air dry for a few minutes to ensure complete drying.
It is crucial to dry the probe thoroughly to prevent moisture from accumulating. Moisture can lead to bacterial growth, affecting the accuracy and reliability of your digital thermometer. Ensuring that the probe is completely dry will help maintain its functionality and extend its lifespan.
Clean the Thermometer Body
While cleaning the probe of your digital thermometer is essential, it is also important to clean the thermometer body. The body of the thermometer may come into contact with your hands or other surfaces, so keeping it clean is essential for maintaining hygienic conditions. Follow these steps to clean the thermometer body:
- Dampen a soft cloth or sponge with warm water.
- Add a small amount of mild soap or dishwashing liquid to the cloth or sponge.
- Gently wipe the entire body of the thermometer, including the display, buttons, and any visible areas.
- Pay attention to any crevices or hard-to-reach spots and ensure thorough cleaning.
- Rinse the cloth or sponge to remove any soap residue and continue wiping over the body of the thermometer to remove any remaining soap.
- Take a clean, damp cloth and wipe down the entire thermometer body again to ensure any remaining residue is removed.
Cleaning the thermometer body will help maintain a hygienic surface and prevent the transfer of bacteria or germs. Regular cleaning of the body is important for the overall cleanliness and longevity of your digital thermometer.
Allow the Thermometer to Air Dry
After cleaning the probe and body of your digital thermometer, it’s important to allow it to air dry thoroughly. Air drying ensures that any remaining moisture evaporates naturally, eliminating the risk of bacterial growth. Follow these steps to allow your thermometer to air dry:
- Place the cleaned thermometer on a clean, dry surface.
- Ensure that the thermometer is in an upright position, with the probe facing downwards if possible.
- Leave the thermometer undisturbed in a well-ventilated area.
- Avoid using any additional heat sources or wiping the thermometer dry, as this can potentially damage the device.
- Allow the thermometer to air dry for at least 15-30 minutes or until it is completely dry to the touch.
- Once the thermometer is fully dry, you can proceed with reassembling and storing it properly.
By allowing the thermometer to air dry, you ensure that any remaining moisture evaporates naturally, reducing the risk of bacterial growth and maintaining the accuracy and functionality of your device. Patience is key during the air drying process to ensure a clean and fully functioning digital thermometer.
Reassemble the Thermometer
After cleaning and allowing the various parts of your digital thermometer to dry thoroughly, it’s time to reassemble the device. Proper reassembly ensures that your thermometer is ready for use and remains in good working condition. Follow these steps to reassemble the thermometer:
- Retrieve the cleaned probe cover and ensure it is dry and free from any moisture or residue.
- Hold the probe cover in one hand and align it with the opening on the tip of the thermometer.
- Gently push the probe cover into the opening until it fits snugly in place.
- Ensure that the probe cover is securely attached to the thermometer and does not come off easily.
- Check the display of the thermometer to ensure that it is still off or in standby mode.
- If needed, refer to the manufacturer’s instructions for any specific reassembly or calibration steps for your particular thermometer model.
Reassembling the thermometer completes the cleaning process and allows you to use the device with confidence. Taking proper care during reassembly ensures accurate temperature readings and helps prolong the lifespan of your digital thermometer.
Store the Thermometer Appropriately
Once your digital thermometer has been cleaned, dried, and reassembled, it’s important to store it properly to ensure its longevity and maintain its accuracy. Proper storage helps protect the thermometer from dust, damage, and potential contamination. Follow these guidelines to store your thermometer appropriately:
- Find a clean and dry storage location for your thermometer.
- Choose a place that is easily accessible but away from direct sunlight, extreme temperatures, or high humidity.
- Store the thermometer in a protective case or container if one was provided with the device. If not, you can use a clean and dry storage bag or a dedicated section in your medicine cabinet or first aid kit.
- Make sure the thermometer is fully dry before placing it in storage to avoid moisture buildup.
- Keep the thermometer away from any sharp objects or other items that could potentially damage the probe or the body.
- If your thermometer uses batteries, ensure that they are removed if the device is not going to be used for an extended period. This helps prevent battery leakage and damage to the thermometer.
- Keep the thermometer out of reach of children or pets to prevent accidental damage or misuse.
By storing your thermometer appropriately, you’ll help prolong its lifespan and ensure that it remains in good working order for future use. Remember to check the manufacturer’s instructions for any specific storage recommendations or precautions for your particular thermometer model.