
Choosing the Right Digital Meat Thermometer
When it comes to cooking meat to perfection, a digital meat thermometer is an essential kitchen tool. With its precise temperature readings, you can ensure that your dishes are cooked to the ideal doneness every time. However, with so many options available in the market, choosing the right digital meat thermometer can be a daunting task. Here are some key factors to consider when selecting the perfect thermometer for your culinary needs.
1. Accuracy: The most important feature of any thermometer is its accuracy. Look for a digital meat thermometer that provides accurate temperature readings within a narrow range. Check for reviews or certifications to ensure its reliability.
2. Probe Length: The length of the thermometer probe is crucial, especially when cooking larger cuts of meat. Make sure to choose a thermometer with a probe long enough to reach the center of the meat without your hand getting too close to the heat source.
3. Response Time: A fast response time is vital to prevent overcooking or undercooking. Look for a thermometer that provides quick and accurate temperature readings, allowing you to make timely adjustments to your cooking process.
4. Temperature Range: Different types of meat require different cooking temperatures. Ensure that the thermometer you choose has a wide temperature range suitable for your preferred cooking methods and types of meat you frequently prepare.
5. Display: Opt for a digital meat thermometer with a clear and easy-to-read display. The display should be large enough to see the temperature without straining your eyes, even in low-light conditions.
6. Versatility: Consider a thermometer that offers additional features, such as a timer or pre-set temperature settings for various meats. This can be advantageous for novice cooks or those who enjoy multitasking in the kitchen.
7. Durability: Look for a thermometer made from high-quality materials that can withstand the heat of your cooking environment. It should be durable enough to last for many years without losing accuracy.
By taking these factors into account, you’ll be able to choose a digital meat thermometer that meets your specific cooking needs. Investing in a reliable and accurate thermometer will not only enhance your culinary skills but also ensure that your meals are cooked to perfection each time.
Understanding Temperature Readings
When using a digital meat thermometer, it’s crucial to understand the temperature readings to ensure that your meat is cooked to the desired level of doneness. Here are the key temperature ranges you need to be familiar with:
1. Rare: For rare meat, the internal temperature should reach around 125°F (52°C). The meat will be cooked on the outside but still juicy and pink in the center.
2. Medium Rare: For medium-rare meat, aim for an internal temperature of about 135°F (57°C). The center of the meat will be slightly pink, with a warm and juicy texture.
3. Medium: If you prefer medium doneness, the internal temperature of the meat should be around 145°F (63°C). The center will be pinkish and moist, while the outer layers will be well-cooked.
4. Medium Well: For medium-well meat, the internal temperature should reach approximately 155°F (68°C). The center will have a slightly pink hue, but the meat will be noticeably drier than medium doneness.
5. Well Done: If you prefer your meat well done, aim for an internal temperature of 160°F (71°C) or higher. The meat will be uniformly cooked through, with little to no pinkness in the center.
It’s important to note that these temperature recommendations are general guidelines and may vary depending on the type and thickness of the meat. It’s always a good idea to consult a reliable source, such as a trusted recipe or cooking guide, to determine the appropriate temperature for a specific type of meat.
In addition to understanding the desired temperature range, it’s essential to know where to insert the thermometer to get an accurate reading. Insert the probe into the thickest part of the meat, away from bones or fat, as these areas can give misleading temperature readings.
By understanding the temperature readings and how they relate to the desired level of doneness, you’ll be able to achieve perfectly cooked meat that is safe to eat and bursting with flavor.
Preparing the Thermometer
Before using your digital meat thermometer, it’s important to properly prepare it to ensure accurate readings and maintain its longevity. Here are the steps to follow when preparing your thermometer:
1. Read the Instructions: Every digital meat thermometer may have specific instructions and guidelines for preparation. Take the time to thoroughly read the instruction manual provided by the manufacturer to understand the specific steps you need to follow.
2. Remove Packaging: If your thermometer comes in packaging or protective covers, remove them carefully. This will allow you to access the thermometer and ensure that it is ready for use.
3. Check Battery Level: Ensure that the battery level of your digital thermometer is sufficient for use. A low battery can result in inaccurate readings or prevent the thermometer from functioning altogether. If the battery is low, replace it with a fresh one according to the manufacturer’s instructions.
4. Calibrate if Necessary: Some digital meat thermometers may require calibration before the first use or periodically. Refer to the instruction manual for guidance on how to calibrate your specific thermometer. Calibration ensures that your thermometer is providing accurate temperature readings and maintaining its precision over time.
5. Clean the Probe: Before using your thermometer, clean the probe with warm soapy water and a soft cloth or sponge. This will remove any residue or contaminants on the surface of the probe. Rinse thoroughly and pat dry with a clean cloth.
6. Test for Accuracy: To ensure the accuracy of your thermometer, perform a simple boiling water test. Fill a pot with water and bring it to a rolling boil. Insert the probe into the boiling water, being careful not to touch the sides or bottom of the pot. The thermometer should read close to 212°F (100°C), the boiling point of water at sea level. If the reading is significantly off, consult the instruction manual or contact the manufacturer for further assistance.
By following these preparation steps, you can ensure that your digital meat thermometer is ready for use and will provide accurate temperature readings. Proper preparation and maintenance will not only enhance the performance of your thermometer but also help you achieve consistent cooking results with precision and confidence.
Inserting the Probe Correctly
Properly inserting the probe of your digital meat thermometer is crucial to obtain accurate temperature readings and ensure that your meat is cooked to perfection. Here are the steps to follow when inserting the probe:
1. Identify the Thickest Part: Locate the thickest part of the meat you’re cooking. This is typically the center of the meat and will give you the most accurate reading. Avoid inserting the probe near bones or into fatty areas, as this can lead to inaccurate temperature measurements.
2. Angle the Probe: When inserting the probe, angle it towards the center of the meat. This will allow the tip of the probe to reach the core temperature accurately. Avoid inserting the probe too far into the meat, as this can lead to inaccurate readings and may damage the thermometer.
3. Avoid Touching Bone: If you’re cooking meat with bones, make sure the probe is inserted away from the bone. The bone can conduct heat differently than the meat, resulting in an inaccurate temperature reading. Aim to insert the probe into the muscle or flesh surrounding the bone.
4. Insert from the Side: For larger cuts of meat, it may be necessary to insert the probe from the side instead of the top. This will ensure that the probe reaches the thickest part of the meat and gives an accurate reading. Insert the probe at a slight angle to get the best results.
5. Observe Proper Depth: Insert the probe into the meat until the tip reaches the desired depth. Be cautious not to push the probe too deeply, as this may result in hitting the bone or damaging the thermometer. Follow the guidelines provided by the thermometer manufacturer for recommended insertion depths.
6. Avoid Obstructing the Probe: Ensure that the probe is not obstructed by bones, fat, or other meat pieces. These obstructions can affect the accuracy of the temperature reading. Adjust the positioning of the probe if necessary to ensure a clear and unobstructed measurement.
By following these guidelines and inserting the probe correctly, you’ll be able to obtain accurate temperature readings and cook your meat to the desired level of doneness. Remember to clean and sanitize the probe after each use, following the manufacturer’s instructions, to maintain the functionality and reliability of your digital meat thermometer.
Using the Instant-Read Function
The instant-read function on your digital meat thermometer allows you to quickly measure the internal temperature of your meat at any given time without leaving the probe inserted. Here’s how to use the instant-read function effectively:
1. Preheat the Thermometer: Turn on the thermometer and ensure that it’s properly preheated, as indicated by the manufacturer. This is essential to get accurate readings and minimize the time the probe needs to be inserted into the meat.
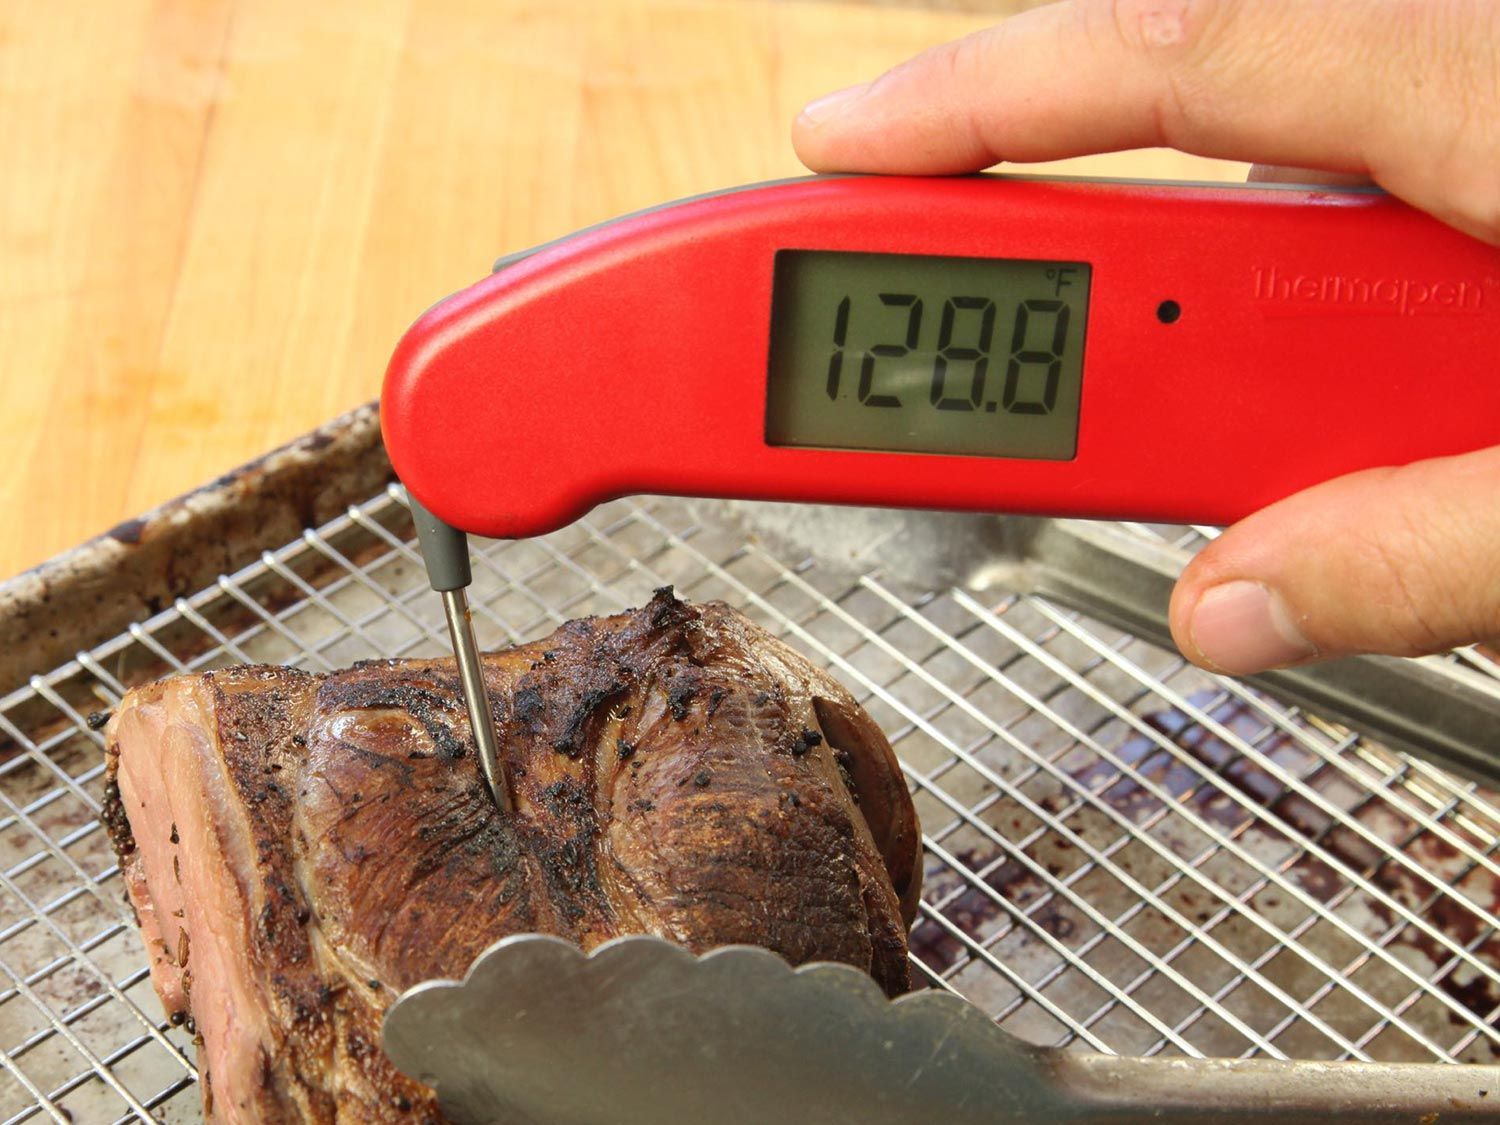
2. Insert the Probe: Insert the probe into the thickest part of the meat, as described in the previous section. Ensure that the tip of the probe is positioned in the center of the meat to obtain an accurate reading.
3. Wait for the Temperature Stabilization: Allow a few seconds for the temperature reading to stabilize. The thermometer will display the current internal temperature of the meat on its digital screen.
4. Read the Temperature: Take note of the temperature reading on the display. If the reading is close to the desired level of doneness, you can remove the probe and continue cooking accordingly.
5. Adjust Cooking Time if Needed: If the temperature reading is lower than the desired level of doneness, you may need to continue cooking the meat for a bit longer. Conversely, if the reading is higher than the desired level, you may want to remove the meat from the heat source to prevent overcooking.
6. Clean the Probe: After using the instant-read function, clean the probe thoroughly as per the manufacturer’s instructions. Keeping the probe clean and sanitized after each use will ensure accurate readings in the future, as well as prevent cross-contamination.
Using the instant-read function allows you to monitor the internal temperature of your meat quickly and conveniently. Not only does it eliminate the need for continuous probing, but it also helps you achieve the desired level of doneness without overcooking or undercooking. Practice using the instant-read functionality to enhance your cooking precision and create perfectly cooked meals every time.
Using the Leave-In Function
The leave-in function on your digital meat thermometer allows you to monitor the internal temperature of your meat throughout the cooking process without constantly opening the oven or grill. Here’s how to effectively use the leave-in function:
1. Preheat the Thermometer: Ensure that the leave-in thermometer is properly preheated and ready to use. This may involve turning on the thermometer or activating the leave-in function, as specified by the manufacturer’s instructions.
2. Insert the Probe: Insert the probe into the thickest part of the meat, making sure the tip is positioned correctly in the center. The probe will then remain in the meat throughout the entire cooking process.
3. Set Desired Temperature: Use the thermometer’s controls to set the desired temperature for your meat. This allows the thermometer to alert you when the meat reaches the desired level of doneness.
4. Cook the Meat: Place the meat in the oven, grill, or cooking apparatus, and close the lid or door. The leave-in thermometer will continuously monitor the temperature of the meat as it cooks.
5. Monitor the Temperature: Keep an eye on the thermometer’s display to monitor the internal temperature of the meat. The thermometer may beep or indicate when the meat is close to reaching the desired temperature or has reached it.
6. Adjust Cooking Time if Needed: Based on the thermometer’s readings, you can adjust the cooking time if the temperature is not yet at the desired level. This helps you cook the meat for the perfect length of time and achieve the desired level of doneness.
7. Remove the Meat: Once the leave-in thermometer alerts you that the meat has reached the desired temperature, it’s time to remove the meat from the heat source. Use oven mitts or tongs to handle the hot meat safely.
8. Clean the Probe: After use, clean the thermometer probe thoroughly, according to the manufacturer’s instructions. Cleaning the probe ensures proper hygiene and keeps the thermometer in good working condition for future use.
The leave-in function offers convenience and accuracy, allowing you to easily monitor the internal temperature of your meat without needing to open the cooking apparatus frequently. This feature ensures that you cook your meat to perfection, with consistent results every time.
Setting the Desired Temperature
Setting the desired temperature on your digital meat thermometer is a crucial step in achieving the perfect level of doneness for your meat. Here’s how to set the desired temperature effectively:
1. Understand the Recommended Temperatures: Familiarize yourself with the recommended internal temperatures for different types of meat, as mentioned in the “Understanding Temperature Readings” section. This will serve as a guide for setting the desired temperature on your thermometer.
2. Consider Personal Preference: Take your personal preference into account when setting the desired temperature. Some individuals prefer their meat cooked to a specific level of doneness, such as rare, medium-rare, or well-done. Adjust the temperature accordingly to achieve your desired outcome.
3. Refer to Recipes or Cooking Guides: If you’re following a specific recipe or using a cooking guide, it may provide a recommended internal temperature for the meat you’re cooking. Use this as a reference when setting the desired temperature on your thermometer.
4. Adjust for Carryover Cooking: Keep in mind that meat continues to cook even after it’s removed from the heat source, a process known as carryover cooking. To account for this, you may want to set the desired temperature slightly below the recommended temperature, knowing that the residual heat will continue to cook the meat to perfection.
5. Use the Thermometer’s Controls: Utilize the controls on your digital meat thermometer to set the desired temperature accurately. This may involve pressing buttons, turning dials, or navigating the thermometer’s interface to input the desired temperature.
6. Monitor the Temperature: Once the desired temperature is set, pay close attention to the thermometer’s display during the cooking process. The thermometer will indicate the current temperature of the meat and alert you when it approaches or reaches the desired temperature.
7. Adjust Cooking Time if Needed: Based on the temperature readings, you may need to adjust the cooking time. If the temperature is lower than the desired level, continue cooking the meat until it reaches the target temperature. If the temperature is higher, remove the meat from the heat source to prevent overcooking.
By setting the desired temperature accurately, you can ensure that your meat is cooked to your liking, maintaining its juiciness, tenderness, and flavor. Remember to consult trusted sources for recommended internal temperatures, and be sure to calibrate your thermometer if necessary to achieve the most accurate results.
Monitoring the Cooking Process
Monitoring the cooking process is crucial when using a digital meat thermometer to ensure that your meat is cooked to perfection. Here are some essential tips for effectively monitoring the cooking process:
1. Stay Close to the Cooking Area: During the cooking process, it’s important to stay near the cooking area so that you can monitor the temperature of the meat with ease. This allows you to make necessary adjustments promptly and prevent overcooking or undercooking.
2. Keep an Eye on the Thermometer: Regularly check the digital display of your meat thermometer to monitor the internal temperature of the meat. Some thermometers even offer real-time monitoring, displaying how the temperature changes over time.
3. Note the Cooking Time: As you monitor the temperature, note the cooking time as well. This will help you keep track of the cooking progress and estimate the remaining cooking time. Adjustments to the cooking temperature or time may be necessary along the way.
4. Avoid Frequent Probing: While it’s essential to monitor the internal temperature, avoid excessive probing with the thermometer. Every time you insert the probe, you risk releasing juices and potentially drying out the meat. Maintain a balance between monitoring and preserving the moisture of the meat.
5. Take Temperature Readings at Intervals: Instead of constant probing, take temperature readings at regular intervals, especially as the cooking time nears completion. This will give you a better idea of how the meat is progressing towards the desired doneness.
6. Use Timer Functions: Many digital meat thermometers come with timer functions, allowing you to set timers for specific cooking durations. Utilize this feature to keep track of the cooking time and set reminders for when temperature checks or adjustments are needed.
7. Consider Factors Beyond Temperature: While temperature is a crucial factor, consider other factors that can affect the cooking process. Factors such as the color, texture, and smell of the meat can provide additional clues about its doneness. Use your senses in conjunction with temperature readings for a more comprehensive assessment.
By actively monitoring the cooking process, you can effectively manage the temperature, adjust cooking time as needed, and achieve the desired level of doneness for your meat. Remember to follow the recommended temperature guidelines and trust your instincts to ensure a delicious and perfectly cooked meal.
Cleaning and Maintenance
Proper cleaning and maintenance of your digital meat thermometer are essential for accurate temperature readings and to ensure its longevity. Here are some key steps to follow:
1. Read the Instructions: Before cleaning the thermometer, refer to the manufacturer’s instructions for specific cleaning guidelines and any precautions to be taken.
2. Remove Batteries: If your thermometer uses batteries, remove them before cleaning to prevent any potential damage to the device.
3. Clean the Probe: Use a soft cloth or sponge and warm soapy water to clean the probe. Gently wipe the probe to remove any food particles or residue. Avoid submerging the entire thermometer in water, as it may damage the internal components.
4. Rinse and Pat Dry: Rinse the probe under running water to remove any soap residue. Pat the probe dry with a clean towel or allow it to air dry completely before reassembling the thermometer.
5. Sanitize: After cleaning, sanitize the probe using a food-safe sanitizing solution or wipe. This will ensure that any potentially harmful bacteria or contaminants are eliminated.
6. Clean the Display and Buttons: Use a soft, damp cloth to wipe the display and buttons of the thermometer. Avoid using harsh chemicals or abrasive cleaners that can damage the surface. Dry the display and buttons thoroughly.
7. Reassemble the Thermometer: Once the probe and display are clean and dry, reassemble the thermometer according to the manufacturer’s instructions.
8. Store Properly: Store your digital meat thermometer in a safe and dry place, away from extreme heat or cold temperatures. Consider using the original packaging or a protective case to prevent any damage.
9. Calibrate if Needed: Regularly check the accuracy of your thermometer by performing a boiling water test. If you find any inconsistencies, refer to the manufacturer’s instructions for calibrating the thermometer or contact their customer support for assistance.
10. Regular Maintenance: Regularly inspect your thermometer for any signs of damage or wear. Replace the batteries if they are low or no longer functioning properly. Keep an eye out for any loose connections or malfunctioning parts and address them promptly.
By following these cleaning and maintenance practices, you’ll ensure that your digital meat thermometer remains reliable, accurate, and in optimal condition for extended use. Taking care of your thermometer will not only contribute to the longevity of the device but also guarantee consistently delicious and safely cooked meals.
Troubleshooting Common Issues
While digital meat thermometers are reliable tools, occasional issues may arise that can affect their performance. Here are common issues you may encounter when using a digital meat thermometer and how to troubleshoot them:
1. Inaccurate Readings: If your thermometer is providing inconsistent or inaccurate readings, it may need calibration. Refer to the manufacturer’s instructions on how to calibrate your specific thermometer model. Alternatively, consult the manufacturer’s customer support for troubleshooting advice.
2. Slow Response Time: If you notice a delay in the thermometer’s response time, it could indicate a low battery. Replace the batteries as per the manufacturer’s instructions to restore the thermometer’s functionality and avoid delays in temperature readings.
3. Display Malfunctions: If you experience issues with the thermometer’s display, such as flickering, blank screen, or unreadable characters, it may indicate a loose connection or a battery issue. Ensure the batteries are properly inserted and functioning. If the problem persists, contact the manufacturer for further assistance.
4. Probe Damage: The probe of your thermometer may become damaged or bent, leading to inaccurate readings. Inspect the probe for any signs of damage or wear. If the probe is damaged, contact the manufacturer to inquire about replacement parts or a new thermometer.
5. Weak Signal or Connectivity Issues: Some digital meat thermometers feature wireless connectivity to a receiver or smartphone app. If you experience weak signals or connectivity issues, ensure that the thermometer and receiving device are within the specified range. Check if there are any obstructions or interference nearby that may affect the wireless connection.
6. Error Messages: If your thermometer displays error messages, consult the instruction manual to identify the specific error and its troubleshooting steps. Error messages can range from probe errors to ambient temperature issues. Follow the manufacturer’s instructions to resolve the error.
7. Waterproofing Issues: If your thermometer is advertised as waterproof, but you notice water damage or moisture inside the device, contact the manufacturer immediately. They can provide guidance on next steps, such as repair or replacement.
8. Cleaning Challenges: If you find it difficult to clean the probe or other parts of the thermometer, refer to the manufacturer’s cleaning instructions and ensure you are using appropriate cleaning methods and materials. Avoid using abrasive cleaners or immersing the entire thermometer in water, as this can damage the device.
If none of these troubleshooting steps solve the issue you’re experiencing with your digital meat thermometer, contact the manufacturer’s customer support for specific guidance and assistance. They are equipped to handle technical issues and provide solutions to get your thermometer back in proper working order.