
Checking the Hardware Requirements
Before diving into the immersive world of virtual reality, it is crucial to ensure that your PC meets the necessary hardware requirements. VR applications demand significant processing power, high-resolution displays, and fast graphics cards to deliver a seamless experience. Here’s a step-by-step guide to help you check if your PC is VR ready.
1. Processor: Start by checking your PC’s processor. Most virtual reality systems require at least an Intel Core i5 or AMD Ryzen 5 processor. Higher-end VR experiences may need an Intel Core i7 or AMD Ryzen 7 processor for optimal performance.
2. Graphics Card: A compatible graphics card is essential for a smooth VR experience. Check if your PC has a dedicated graphics card that meets the VR system’s requirements. NVIDIA’s GTX 1060 or AMD’s Radeon RX 480/580 are commonly recommended for entry-level VR. Higher-end VR headsets may require more powerful graphics cards like the NVIDIA RTX 2070 or AMD Radeon RX 5700 XT.
3. RAM: Virtual reality places a heavy strain on your system’s memory, so having enough RAM is vital. Ensure your PC has a minimum of 8GB of RAM to run VR applications smoothly. However, for optimal performance, having 16GB or more RAM is highly recommended.
4. USB Ports: VR headsets usually require multiple USB ports to connect sensors and peripherals. Check if your PC has enough available USB 3.0 ports to accommodate the headset’s requirements. USB 3.0 ensures faster data transfer, minimizing lag and latency issues.
5. Display and Resolution: Virtual reality relies on high-resolution displays to create a captivating and immersive experience. Verify if your PC’s monitor meets the recommended resolution specifications for the VR system. Most VR headsets require a display resolution of 1080 x 1200 pixels per eye or higher.
6. VR Headset Compatibility: Different VR headsets have varying compatibility with PC systems. Check the specific requirements of the VR headset you plan to use and ensure that your PC meets all the recommended specifications.
7. Internet Connection: Although not directly related to hardware, a stable and fast internet connection is essential for downloading VR content, updates, and online multiplayer experiences. Make sure your internet connection can handle the demands of VR usage.
8. VR Compatibility Tool: Some VR manufacturers provide compatibility tools that automatically analyze your PC’s hardware and inform you if it meets the requirements. Consider using these tools to simplify the checking process and get accurate results.
9. Software Updates: Ensure that your PC’s operating system and graphics drivers are up to date. VR applications often require the latest software versions to function correctly, so installing updates is crucial for compatibility and performance.
10. Additional Requirements: Apart from the hardware specifications mentioned above, some VR systems may have additional requirements. These can include specific USB controller cards, audio devices, or even room-scale setup considerations. Be sure to check for any additional requirements specific to your VR system.
By thoroughly checking your PC’s hardware compatibility with virtual reality systems, you can ensure a smooth and enjoyable VR experience without any frustrating performance issues or compatibility glitches.
Checking the Operating System
The operating system (OS) of your PC plays a crucial role in determining its compatibility with virtual reality. Different VR systems have specific OS requirements to ensure optimal performance. Here’s a step-by-step guide to help you check if your PC’s operating system is VR ready.
1. Windows OS: The majority of VR systems are designed to work with Windows operating systems, such as Windows 10. Ensure your PC is running a compatible version of Windows to avoid any compatibility issues. Check for the recommended Windows version specified by the VR system manufacturer.
2. macOS and Linux: While Windows is the most commonly supported OS for virtual reality, some VR systems may also work with macOS or Linux. If you are using either of these OS, make sure to check if your VR system supports it and install any necessary drivers or software required for compatibility.
3. OS Updates: Keeping your operating system up to date is crucial for optimal performance and compatibility with VR applications. Regularly check for updates and install any available OS updates to ensure that your PC is running the latest version of the operating system.
4. 32-bit vs. 64-bit: Confirm whether your PC is running a 32-bit or 64-bit operating system. Many VR systems require a 64-bit OS for compatibility. If your PC is running a 32-bit OS, you may need to upgrade to a 64-bit version to ensure VR compatibility.
5. Required System Specifications: Check the specific system specifications required by the VR system manufacturer. Some VR applications may have minimum requirements for the operating system version, such as specific service packs or updates. Ensure that your PC meets these requirements to ensure a smooth VR experience.
6. Compatibility Tools: VR manufacturers may provide compatibility tools that analyze your PC’s operating system and inform you if it meets the necessary requirements. Consider using these tools to simplify the checking process and ensure accurate results.
7. Virtual Machines: If you are using a virtual machine or emulator to run your operating system, double-check if your VR system supports virtualized environments. Some virtual machines may not have the necessary drivers or features to support VR applications, leading to compatibility issues.
8. VR System Software: In addition to the operating system, some VR systems may require specific software or drivers to be installed. Check the manufacturer’s website or documentation for any additional software requirements and make sure to install them correctly to ensure full compatibility.
By thoroughly checking your PC’s operating system for compatibility with virtual reality, you can ensure a hassle-free VR experience without any operating system-related issues. Keep in mind that different VR systems may have specific requirements, so it’s essential to review the manufacturer’s guidelines and recommendations for your specific VR setup.
Checking the Graphics Card
The graphics card is a critical component for running virtual reality applications smoothly and delivering high-quality visuals. To ensure a seamless VR experience, it’s essential to check if your PC’s graphics card meets the necessary requirements. Here’s a step-by-step guide to help you check your graphics card’s compatibility with VR systems.
1. Minimum Specifications: Start by checking the minimum graphics card requirements specified by the VR system manufacturer. Commonly recommended graphics cards for entry-level VR experiences include the NVIDIA GTX 1060 or the AMD Radeon RX 480/580. Ensure that your PC’s graphics card meets or exceeds these minimum specifications.
2. Recommended Specifications: For more demanding VR applications or higher-end headsets, consider checking the recommended graphics card specifications. VR systems like the HTC Vive Pro or the Oculus Rift S may require more powerful graphics cards such as the NVIDIA RTX 2070 or the AMD Radeon RX 5700 XT for optimal performance.
3. DirectX Support: Verify that your graphics card supports the required DirectX version for VR applications. Most VR systems rely on DirectX 11 or higher. To check the DirectX version on your PC, simply type “dxdiag” in the Windows search bar and run the DirectX Diagnostic Tool.
4. VR-Ready Certification: Many graphics card manufacturers offer VR-ready certifications for specific models. Check if your graphics card has a VR-ready certification from the manufacturer. This certification ensures that the graphics card meets the necessary criteria for seamless VR performance.
5. VR Benchmarking Tools: There are various benchmarking tools available that can assess the VR readiness of your graphics card. These tools evaluate the card’s performance in VR-specific scenarios and provide an overall score. Consider using these tools to get a more detailed analysis of your graphics card’s compatibility with VR systems.
6. Check VR Forums and Communities: Participating in VR forums and communities is a great way to gather insights and experiences from other users. You can find discussions about specific graphics cards and how well they perform in various VR applications. This can help you gauge if your graphics card will provide a satisfactory VR experience.
7. Driver Updates: Keeping your graphics card drivers up to date is crucial for optimal VR performance. Regularly check for driver updates from the graphics card manufacturer’s website and install any available updates. Updated drivers often include optimizations and bug fixes, leading to improved compatibility and performance in VR applications.
8. Dual Graphics Card Setup: If you have a dual graphics card setup, ensure that both cards are compatible with the VR system and are configured correctly. VR applications may not benefit from multiple graphics cards unless explicitly supported by the software or game you are using.
Checking your graphics card’s compatibility with VR systems is vital to ensure a smooth and immersive virtual reality experience. By following these steps and verifying the necessary specifications, you can ensure that your PC’s graphics card is up to the task of delivering stunning visuals and optimal performance in VR applications.
Checking the Processor
The processor, also known as the central processing unit (CPU), is a key component in determining your PC’s performance and compatibility with virtual reality applications. To ensure a smooth VR experience, it’s important to check if your processor meets the necessary requirements. Here’s a step-by-step guide to help you check your processor’s compatibility with VR systems.
1. Minimum Specifications: Start by checking the minimum processor requirements specified by the VR system manufacturer. Commonly recommended processors for entry-level VR experiences include the Intel Core i5 or the AMD Ryzen 5. Make sure that your PC’s processor meets or exceeds these minimum requirements.
2. Recommended Specifications: For more demanding VR applications or higher-end headsets, consider checking the recommended processor specifications. VR systems like the HTC Vive Pro or the Oculus Rift S may require more powerful processors such as the Intel Core i7 or the AMD Ryzen 7 for optimal performance.
3. Number of Cores: Virtual reality applications can benefit from processors with multiple cores. Check how many cores your processor has and ensure that it meets the VR system’s requirements. More cores generally allow for better multitasking and smoother performance in VR applications.
4. Processor Speed: The speed of your processor, measured in gigahertz (GHz), also plays a role in determining VR performance. Higher clock speeds generally result in faster processing and better overall performance. Check the specifications of your processor to ensure that it meets the recommended clock speed for VR applications.
5. 64-bit Architecture: Most VR applications require a 64-bit operating system. Confirm if your processor supports 64-bit architecture, as this is critical for compatibility with VR systems. To check if your processor is 64-bit compatible, you can check the specifications on the manufacturer’s website or refer to your PC’s documentation.
6. Hyper-Threading and Virtualization Support: Hyper-Threading and virtualization are technologies that can improve the performance of virtual reality applications. Check if your processor supports Hyper-Threading or virtualization, as these features can enhance multitasking and increase VR performance.
7. Overclocking: Overclocking your processor can potentially boost its performance. However, it is important to note that not all processors can be overclocked, and doing so may void warranties or cause stability issues. Check if your processor is overclockable and ensure that you are familiar with the proper techniques and precautions before attempting to overclock.
8. CPU Compatibility with Motherboard: Ensure that your processor is compatible with your motherboard. Different processors use different socket designs, so verify that the socket on your motherboard matches the socket type required by your processor. Compatibility between your CPU and motherboard is crucial for proper functioning and compatibility with VR systems.
Checking your processor’s compatibility with virtual reality systems is crucial for ensuring a smooth and enjoyable VR experience. By following these steps and verifying the necessary specifications, you can determine if your PC’s processor is up to the task of handling VR applications effectively.
Checking the RAM
Random Access Memory (RAM) is an essential component of your PC that directly impacts its performance and ability to handle virtual reality applications. Sufficient RAM is crucial for smooth multitasking and running demanding VR experiences. Here’s a step-by-step guide to help you check if your PC’s RAM meets the necessary requirements for virtual reality.
1. Minimum RAM Requirements: Start by checking the minimum RAM requirements specified by the VR system manufacturer. Most VR applications recommend a minimum of 8GB of RAM. Make sure your PC meets or exceeds this requirement to ensure smooth performance.
2. Recommended RAM Size: VR experiences can be resource-intensive, so having more RAM than the minimum requirement is advantageous. Consider checking the recommended RAM size for the VR system you plan to use. In general, 16GB or more RAM is highly recommended for optimum VR performance.
3. RAM Type and Speed: Different RAM types and speeds can affect performance, so it’s important to ensure compatibility with your VR system. Check the specific RAM type (e.g., DDR4) and the speed recommended by the VR system manufacturer. Consider upgrading your RAM if it doesn’t meet the recommended specifications.
4. Available RAM Slots: Verify the number of available RAM slots on your motherboard. This information can help you determine if you need to add or replace RAM modules to meet the VR system’s requirements. Also, check if there are any restrictions or limitations on the maximum amount of RAM your motherboard can support.
5. Memory Configurations: If you already have RAM modules installed, ensure they are properly configured. Check if the modules are installed in recommended slots and configured according to your motherboard’s specifications (e.g., dual-channel or quad-channel configuration). Proper memory configurations can enhance VR performance.
6. System Resource Monitoring: Use system monitoring tools to check the RAM usage while running VR applications or performing multitasking. This allows you to determine if your current RAM capacity is sufficient or if there is a need for an upgrade.
7. Upgrading RAM: If your PC does not meet the minimum RAM requirements or if you experience performance issues, consider upgrading your RAM. Adding more RAM modules or replacing existing modules with higher-capacity ones can significantly improve your system’s ability to handle VR applications smoothly.
8. RAM Compatibility with Motherboard: Ensure that the RAM modules you plan to use are compatible with your motherboard. Check your motherboard’s documentation or manufacturer’s website for the list of compatible RAM modules. Choosing RAM that is specifically approved for your motherboard maximizes compatibility and avoids potential issues.
Checking your PC’s RAM for compatibility with VR systems is crucial to ensure a seamless and enjoyable virtual reality experience. By following these steps and verifying the necessary specifications, you can determine if your PC’s RAM meets the requirements and make any necessary upgrades to enhance VR performance.
Checking the USB Ports
USB ports play a crucial role in connecting peripherals and sensors for virtual reality experiences. It’s important to check if your PC has compatible USB ports that meet the requirements of your VR system. Here’s a step-by-step guide to help you check the USB ports on your PC for virtual reality compatibility.
1. USB 3.0 Ports: Most VR systems require USB 3.0 ports for optimal performance. USB 3.0 offers faster data transfer speeds, which minimize latency and provide a smoother VR experience. Check if your PC has USB 3.0 ports available and ensure that they are labeled as such.
2. Number of USB Ports: Consider the number of available USB ports on your PC. VR systems often require multiple USB connections to accommodate sensors, controllers, and other peripherals. Verify that your PC has enough available USB ports to meet the requirements of the VR system you plan to use.
3. USB Port Power: Some VR systems require USB ports with sufficient power output to ensure proper functionality. Ensure that the USB ports on your PC provide enough power to support the VR system and its peripherals. Low-power USB ports may lead to connectivity issues and poor performance.
4. USB Port Placement: Pay attention to the placement and accessibility of the USB ports on your PC. For a convenient and clutter-free VR setup, it’s beneficial to have USB ports located in accessible areas. Also, consider the distance between the USB ports and your VR play area to ensure the cables can reach comfortably.
5. USB Hub Considerations: If you find that the number of available USB ports is insufficient for your VR system, you may consider using a USB hub. However, not all USB hubs may be compatible with VR systems, and some may not provide adequate power or data transfer speeds. Verify that the USB hub you plan to use is VR compatible and meets the necessary specifications.
6. USB Port Drivers and Updates: Ensure that the USB ports on your PC have the latest drivers installed. Sometimes, updating the drivers can resolve compatibility issues or improve performance. Check the manufacturer’s website for any available USB port driver updates specific to your PC model.
7. USB Port Testing: Consider connecting your VR system’s peripherals (such as controllers or sensors) to the USB ports on your PC and verify their functionality. Check if the peripherals are detected properly and if there are any issues with connectivity or performance. Testing the USB ports helps ensure everything is working correctly before delving into VR experiences.
8. USB Port Recommendations: Refer to the VR system manufacturer’s specifications or documentation for any specific recommendations regarding USB ports. They may provide guidance on USB port requirements or suggest using specific USB ports or controllers to ensure optimal performance.
Checking the USB ports on your PC is essential to ensure proper connectivity and functionality with your chosen VR system. By following these steps and verifying the necessary specifications, you can confidently connect your VR peripherals and enjoy an immersive virtual reality experience.
Checking the Display and Resolution
The display and resolution of your PC play a critical role in delivering an immersive virtual reality experience. It’s important to ensure that your display meets the necessary requirements and can provide the desired visual quality. Here’s a step-by-step guide to help you check the display and resolution compatibility for virtual reality.
1. Display Resolution: VR systems typically require displays with specific resolutions to deliver a high-quality immersive experience. Check the recommended display resolution specified by the VR system manufacturer. Most VR headsets demand a resolution of 1080 x 1200 pixels per eye or higher. Ensure that your PC’s display can meet these requirements.
2. Display Size: Consider the size of your PC’s display. A larger display can enhance the VR experience by providing a wider field of view. However, it’s important to note that VR is primarily experienced through a VR headset rather than the PC’s display. While a larger display is beneficial, it’s not essential for VR compatibility.
3. Display Refresh Rate: The refresh rate of your display affects the fluidity and smoothness of VR content. VR systems commonly require displays with a high refresh rate of at least 90Hz or above. Check if your PC’s display can support the recommended refresh rate for the VR system you plan to use.
4. Display Technology (LCD vs. OLED): Different VR headsets may use different display technologies, such as LCD or OLED. Each technology has its own advantages and disadvantages concerning contrast, color accuracy, and black levels. Check the recommended display technology for your VR headset, if specified, to ensure the best visual experience.
5. Multiple Displays: If your PC has multiple displays, check if the VR system supports using one of the displays exclusively for VR content. This feature can enhance the VR experience by freeing up system resources and reducing potential performance issues caused by running multiple displays simultaneously.
6. Display Connection Type: Ensure that your PC’s display is connected using a compatible connection type for the VR system. Most VR headsets use HDMI or DisplayPort connections. Verify the connection options available on your PC’s graphics card and check the VR system’s requirements for connection compatibility.
7. Adjusting Display Settings: Once your VR system is set up, make sure to adjust the display settings for the VR headset. The VR system’s software or setup guides usually provide instructions on optimizing the display settings, including adjusting brightness, contrast, and IPD (interpupillary distance) settings for better visual comfort and clarity.
8. Supplementary Display Considerations: Some VR systems may recommend using additional displays or monitors alongside VR headsets for various purposes, such as mirroring the VR content for spectators or accessing additional tools. Check if your PC has the necessary display connections or adapters to accommodate these supplementary display requirements.
By checking the display and resolution compatibility for virtual reality, you can ensure an immersive visual experience that meets your expectations. Following these steps and verifying the necessary specifications will help you make the most of your VR system and enjoy the stunning visuals that virtual reality has to offer.
Checking the VR Headset Compatibility
Choosing a compatible VR headset is essential for a successful virtual reality experience. With various VR headset options available, it’s important to check their compatibility with your PC system. Here’s a step-by-step guide to help you ensure that your PC meets the necessary requirements for your chosen VR headset.
1. System Requirements: Start by checking the system requirements provided by the VR headset manufacturer. Pay attention to the minimum processor, RAM, graphics card, and operating system specifications. Verify that your PC meets or exceeds these requirements to ensure full compatibility.
2. Connection Type: Different VR headsets may use different connection types, such as HDMI, DisplayPort, or USB. Ensure that your PC has the necessary ports and connections to accommodate the VR headset’s requirements. Check the availability of compatible ports on your PC and compare them to the required connections of the VR headset.
3. USB Port Requirements: VR headsets often require USB connections for peripherals like controllers and tracking devices. Check the number and type of USB ports needed by the VR headset. Confirm that your PC has the required USB ports available and ensure that they meet the specified USB version (such as USB 3.0) for optimal performance.
4. Tracking Requirements: Some VR headsets employ external sensors or cameras for accurate tracking of position and movement. Check if the VR headset you plan to use requires external tracking devices and ensure that your PC has the necessary ports or adapters to support these devices.
5. Display Compatibility: Verify the display compatibility of the VR headset with your PC. Ensure that your PC’s graphics card and display meet the minimum resolution and refresh rate specifications of the VR headset. Consider factors like display size, resolution, and refresh rate to ensure an immersive and high-quality visual experience.
6. Space Requirements: Some VR headsets, especially those supporting room-scale VR experiences, have specific space requirements. Check the recommended play area dimensions and ensure that your room can accommodate the necessary space for a safe and enjoyable VR experience.
7. Software Compatibility: Ensure that the VR headset’s software is compatible with your PC’s operating system. Check if any additional software or drivers are required for the VR headset to function properly. Verify that your PC meets the software compatibility requirements for smooth installation and operation.
8. Health and Safety Considerations: Some VR headsets may have age restrictions or specific health and safety guidelines. Check the VR headset’s documentation for any recommendations or precautions regarding usage, including warnings for individuals with certain medical conditions or the recommended age for users.
Checking the VR headset compatibility with your PC system is essential to ensure a seamless and satisfying virtual reality experience. Following these steps and verifying the necessary specifications will help you select a compatible VR headset and ensure that your PC is capable of delivering the performance and functionality required for an immersive VR journey.
Checking the Internet Connection
An internet connection is often necessary for downloading VR content, updates, and accessing online multiplayer experiences. Checking the quality and stability of your internet connection is crucial for a seamless virtual reality experience. Here’s a step-by-step guide to help you check your internet connection for VR compatibility.
1. Internet Speed: Start by checking your internet speed. VR content can be large in size, so it’s important to have a fast and stable internet connection. Use an internet speed test tool to measure your download and upload speeds. Ensure that your internet speed meets or exceeds the recommendations provided by the VR system manufacturer.
2. Bandwidth: Consider the bandwidth capacity of your internet connection. VR experiences may require a significant amount of bandwidth, especially for online multiplayer VR games or streaming content. Make sure that your internet plan provides sufficient bandwidth to avoid lags, buffering, or other performance issues during VR usage.
3. Connection Type: Verify the type of internet connection you have. Different connection types, such as cable, DSL, fiber-optic, or wireless, may have varying speeds and stability. Check if your connection type is capable of handling the data transfer requirements of VR applications.
4. Router Placement and Signal Strength: The placement and signal strength of your router can impact the stability and quality of your internet connection. Ensure that your VR play area is within range of your router and has a strong Wi-Fi signal or a stable wired connection. Consider optimizing your router’s placement, using signal boosters, or upgrading to a more powerful router if signal strength is a concern.
5. Connection Stability: In addition to speed, the stability of your internet connection is crucial for a smooth VR experience. Check for any fluctuations or intermittent connectivity issues. Unstable connections can cause interruptions, latency, or sudden drops in performance, affecting the overall VR experience. Consider troubleshooting or contacting your internet service provider (ISP) for assistance if you encounter stability issues.
6. Data Caps or Usage Limitations: Some internet service providers impose data caps or usage limitations, which can impact your ability to download large VR content or engage in online VR activities. Check if your internet plan has any restrictions or limitations and ensure that it aligns with your VR usage requirements.
7. Network Congestion: Consider potential network congestion during peak usage hours. High network traffic can result in slower speeds and reduced performance. If possible, schedule your VR activities during off-peak hours to avoid network congestion and ensure a smoother experience.
8. Recommended Network Requirements: Check the VR system manufacturer’s recommendations for network requirements. They may provide specific guidelines for latency, packet loss, or other network-related parameters. Ensure that your internet connection meets or exceeds these recommendations for optimal VR performance.
By assessing your internet connection and addressing any potential issues, you can ensure a stable and fast connection for downloading VR content, accessing online features, and enjoying multiplayer VR experiences. Following these steps will help you determine if your current internet connection is suitable for virtual reality or if any upgrades or improvements are necessary.
Running the VR Compatibility Tool
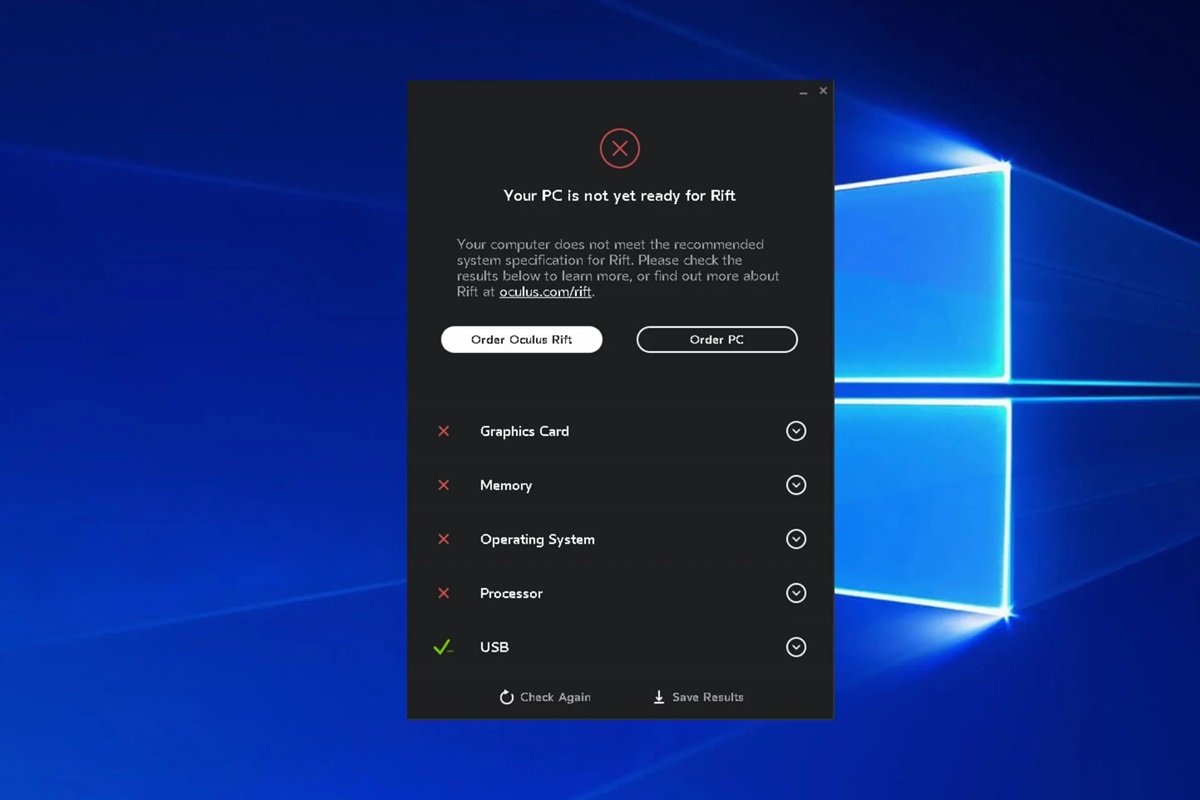
To simplify the process of checking your PC’s compatibility with virtual reality, many VR system manufacturers provide compatibility tools. These tools analyze your PC’s hardware and software specifications, providing detailed insights into its readiness for VR. Here’s a step-by-step guide to running the VR compatibility tool.
1. VR System Manufacturer’s Website: Visit the VR system manufacturer’s official website. Look for a section dedicated to support, downloads, or VR compatibility. The compatibility tool is often available for download directly from their website.
2. Download and Install: Locate and download the VR compatibility tool provided by the manufacturer. Follow the instructions provided to install the tool on your PC. The tool may have specific system requirements that your PC needs to meet in order to run it successfully.
3. Run the Compatibility Tool: Once installed, run the VR compatibility tool by clicking on the designated icon or through the start menu. The tool will initiate a comprehensive scan of your PC’s hardware and software components.
4. Analyze the Results: After the scan is complete, the compatibility tool will generate a detailed report outlining the compatibility of your PC with the VR system. Review the report carefully, paying close attention to any notifications or warnings related to hardware or software components that may impact VR performance.
5. Address Compatibility Issues: If the compatibility tool identifies any areas of concern, it may provide recommendations or suggestions for resolving them. Follow the tool’s instructions to address compatibility issues. This may involve updating drivers, upgrading hardware components, or adjusting software settings.
6. Seek Additional Support: If you encounter difficulties in interpreting the compatibility report or require further assistance, refer to the manufacturer’s support resources. Contact their customer support team or visit their online forums for guidance and expert advice on resolving compatibility issues.
7. Re-Run the Compatibility Tool: After addressing any compatibility issues, it is recommended to re-run the compatibility tool to ensure that all necessary changes have been successfully implemented. This will provide assurance that your PC is now compatible with the VR system.
8. Always Check for Updates: Remember to regularly check for updates to the VR compatibility tool itself. Manufacturers may release updates to enhance its functionality or address compatibility with new hardware and software developments. Keeping the tool up to date will ensure accurate and reliable results.
The VR compatibility tool provided by the manufacturer is a valuable resource to assess your PC’s readiness for virtual reality. By running the tool and taking appropriate action based on the results, you can help ensure that your hardware and software are optimized for a smooth and immersive VR experience.
Checking for Software Updates
Regularly updating your PC’s software is crucial for optimal performance and compatibility with virtual reality applications. Software updates often include bug fixes, security patches, and performance optimizations that can significantly impact the VR experience. Here’s a step-by-step guide to help you check for software updates on your PC.
1. Operating System Updates: Start by checking for updates to your PC’s operating system. In most cases, updates are automatically installed, but it’s important to manually check for any pending updates. On Windows, go to the “Settings” menu, select “Update & Security,” and click on “Check for Updates.” On macOS, click on the Apple menu and select “Software Update.”
2. Graphics Drivers: Graphics drivers are critical for optimal performance in virtual reality. Visit the website of your graphics card manufacturer (such as NVIDIA or AMD) and navigate to the driver downloads section. Search for the latest driver update for your specific graphics card model and download and install it according to the instructions provided.
3. VR Software and Applications: Check for updates to your VR software and applications. VR system manufacturers often release updates that improve compatibility, add new features, and enhance overall performance. Launch the VR software or application, if applicable, and look for options to check for updates within their settings or preferences menu.
4. VR System Firmware: Some VR systems have firmware that requires periodic updates. Refer to the VR system manufacturer’s website or documentation to determine if your VR system has firmware updates available. Follow the instructions provided to download and install the firmware updates to keep your VR system up to date.
5. Game and Application Updates: If you regularly play VR games or use VR applications, check for updates within those specific programs. Most games and applications have built-in update mechanisms or will prompt you to update when launching. Keeping your games and applications updated ensures you have access to the latest features, bug fixes, and performance enhancements.
6. Peripheral and Controller Software: If you use specialized peripherals or controllers with your VR system, they may have accompanying software or drivers that require updates. Refer to the manufacturer’s website for your peripherals or controllers to check for any available software or driver updates. Keeping this software up to date can enhance compatibility and functionality.
7. Automatic Updates: Enable automatic updates whenever possible. Both your operating system and VR software may have options to automatically install updates. Enabling automatic updates ensures that you stay up to date with the latest software improvements without the need for manual intervention.
8. Restart Your PC: After installing software updates, it’s a good practice to restart your PC. Restarting helps ensure that all updates are fully applied and that any necessary system changes are implemented correctly, improving overall stability and performance.
Regularly checking for and applying software updates is essential for virtual reality. By following these steps and keeping your PC’s software up to date, you can maximize compatibility, stability, and performance, enhancing your overall virtual reality experience.
Meeting the Additional Requirements
In addition to the hardware and software specifications, some virtual reality systems may have additional requirements that need to be met to ensure optimal performance and compatibility. These additional requirements can vary depending on the specific VR system you choose. Here’s a step-by-step guide to help you meet the additional requirements for your virtual reality setup.
1. USB Controller Cards: Some VR systems may require specific USB controller cards to ensure proper connectivity and power supply for the VR peripherals. Check the VR system manufacturer’s recommendations regarding USB controller cards and consider installing them if necessary. Ensure that the USB controller cards are compatible with your PC system.
2. Audio Devices: Virtual reality experiences can be enhanced with high-quality audio. Check if your VR system recommends specific audio devices, such as headphones or surround sound systems, to accompany your VR setup. Consider investing in recommended audio devices to fully immerse yourself in the virtual environment.
3. Room-Scale Setup: Some VR systems, such as those supporting room-scale experiences, may require additional considerations for setting up your play area. Measure the available space in your room and ensure it meets the recommended dimensions specified by the VR system. Clear any obstacles or hazards from the play area to prevent accidents and provide ample room for movement.
4. Power Supply: VR systems may require additional power supply considerations, especially if you have multiple peripherals or accessories connected. Ensure that your PC and VR system have sufficient power supply capacity to handle the increased power demands. Consider upgrading your power supply unit (PSU) if needed.
5. VR Controller Charging: If your VR system includes controllers that require charging, ensure that you have a suitable charging solution. Some controllers may come with their own charging dock or cable. Verify the charging method recommended by the manufacturer and set up the appropriate charging infrastructure to keep your controllers ready for use.
6. Specific Software or Tools: Some VR systems require specific software or tools for optimal functionality. Check the VR system manufacturer’s recommendations and installation guidelines to ensure that you have all the necessary software and tools installed. Follow the manufacturer’s instructions to configure and set up the software for a seamless VR experience.
7. Optimal PC Placement: Ensure that your PC is placed in an area with proper ventilation to prevent overheating. Virtual reality experiences can put a significant strain on your PC, causing it to generate more heat. Adequate airflow around your PC is crucial for maintaining optimal performance and preventing thermal throttling. Consider using additional cooling solutions if necessary.
8. Safety Considerations: VR experiences can be immersive, and it’s important to prioritize your safety. Read and follow the safety guidelines provided by the VR system manufacturer. Take breaks during extended VR sessions to prevent fatigue or discomfort. Create a safe environment by removing obstacles or hazards in the play area and ensuring proper lighting.
By meeting the additional requirements specific to your chosen virtual reality system, you can ensure a smooth, immersive, and safe VR experience. Following these steps and adhering to the manufacturer’s guidelines will provide a solid foundation for enjoying virtual reality to its fullest.