
Enable or Disable Auto-Capitalization
Auto-capitalization is a handy feature that automatically capitalizes the first letter of each sentence. It saves you the hassle of manually capitalizing each letter, ensuring that your text appears neat and professional. However, if you prefer more control over capitalization, or if you find the feature unnecessary, you can easily enable or disable it on your iPad. Here’s how:
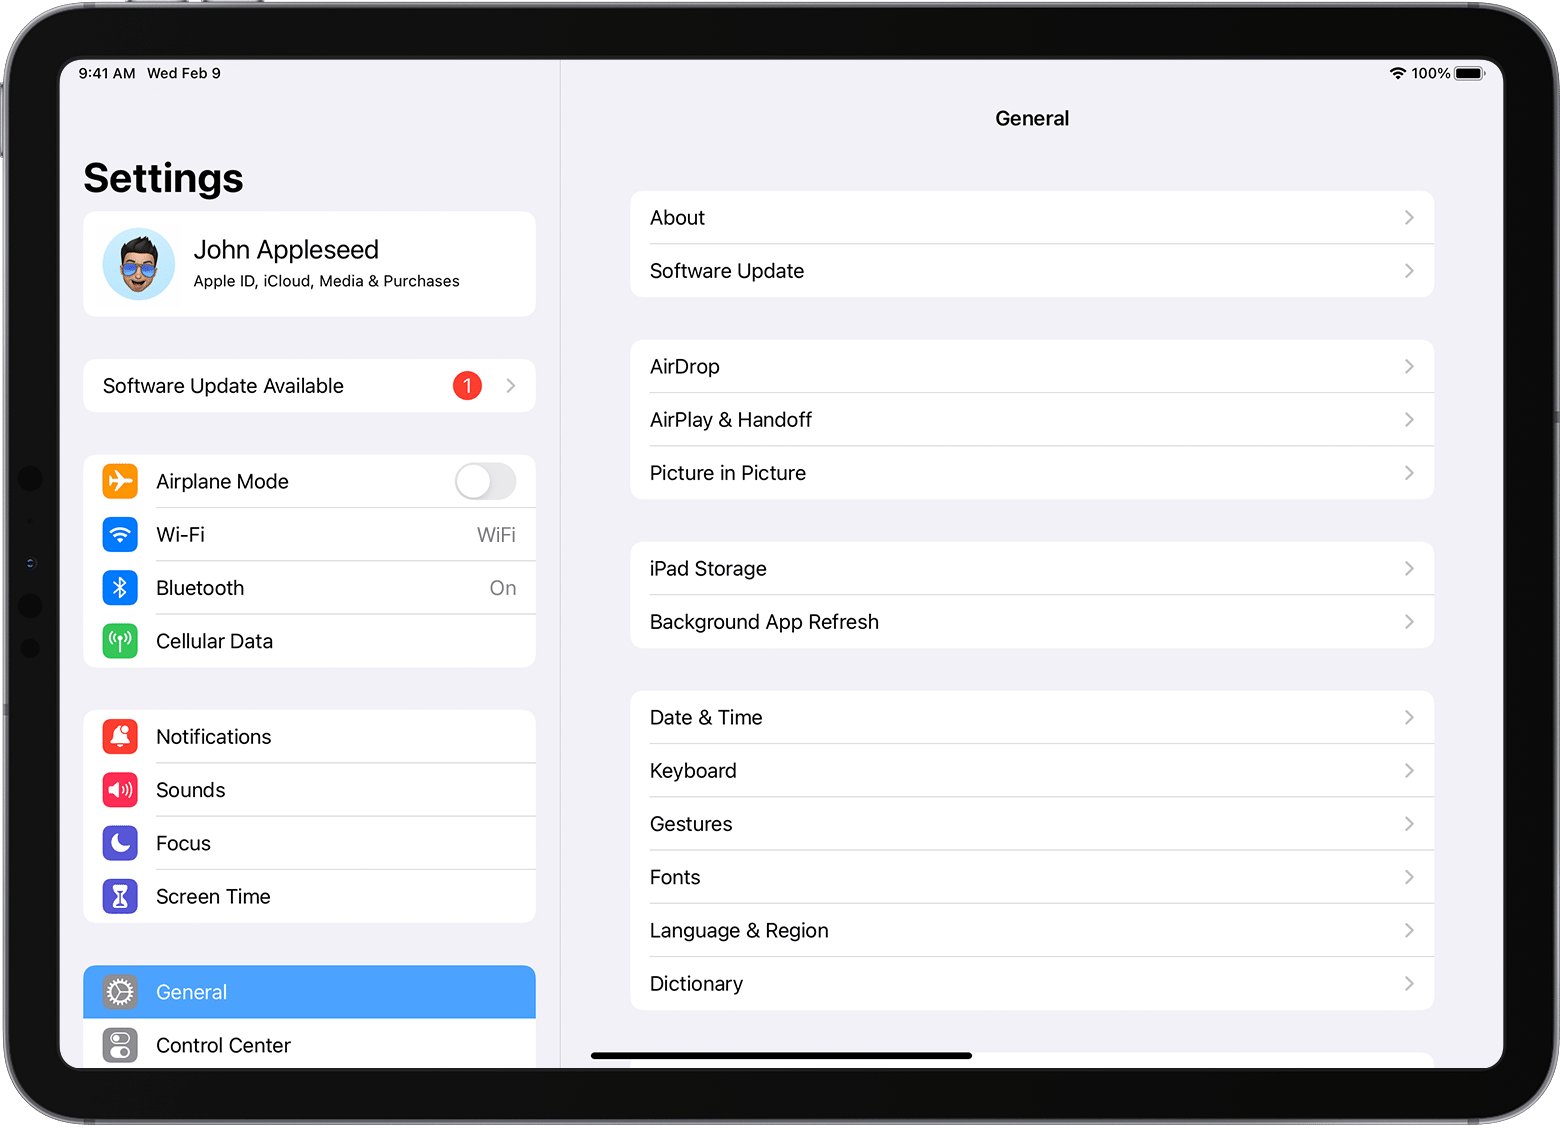
- Unlock your iPad and open the “Settings” app.
- Scroll down the left sidebar and tap on “General.”
- On the right side, find and tap on “Keyboard.”
- In the “Keyboard” settings, locate the “Auto-Capitalization” option.
- To enable auto-capitalization, make sure the toggle switch next to it is green or switched to the “on” position.
- If you want to disable auto-capitalization, simply tap on the toggle switch to turn it off.
Now, whenever you start a new sentence or hit the enter key, the first letter will be automatically capitalized if the auto-capitalization feature is enabled. Conversely, if you disable this feature, your iPad will no longer capitalize the first letter of each sentence.
Enabling or disabling auto-capitalization can be particularly useful for individuals who frequently write in languages or styles that do not require automatic capitalization. It allows you to personalize your typing experience and adapt it to your specific needs.
Experiment with this setting and see what works best for you. If you change your mind in the future, simply revisit the “Keyboard” settings and toggle the auto-capitalization option accordingly.
Turn on or off Auto-Correction
Auto-correction is a feature that helps correct misspelled words as you type on your iPad. While it can be a helpful tool for improving your overall typing accuracy, there may be situations where you prefer to have more control over your text or find the suggestions annoying. If that’s the case, you can easily turn off auto-correction or turn it back on. Here’s how:
- Unlock your iPad and navigate to the “Settings” app.
- Scroll down the left sidebar and tap on “General.”
- On the right side, find and tap on “Keyboard.”
- In the “Keyboard” settings, locate the “Auto-Correction” option.
- To enable auto-correction, make sure the toggle switch next to it is green or switched to the “on” position.
- If you want to disable auto-correction, simply tap on the toggle switch to turn it off.
When auto-correction is enabled, your iPad will automatically correct misspelled words as you type. It will replace the incorrectly spelled word with what it believes to be the correct one. On the other hand, if you disable auto-correction, your iPad will no longer attempt to correct your typing mistakes.
Keep in mind that disabling auto-correction can be helpful when you need to type specific words or terminology that might be frequently flagged as incorrect by the auto-correction feature. This can be useful for professionals in specialized fields or individuals writing in languages that are not adequately supported by the auto-correction dictionary.
Experiment with turning this feature on and off to see what works best for your typing style and preferences. If you ever change your mind, simply revisit the “Keyboard” settings and toggle the auto-correction option accordingly.
Adjust Keyboard Clicks and Character Feedback
Keyboard clicks and character feedback on your iPad can enhance your typing experience by providing audio and visual cues as you type. These feedback options ensure that you are aware of your keystrokes and can help improve typing accuracy. If you find the keyboard clicks or character feedback distracting or unnecessary, you have the ability to adjust or disable them. Here’s how:
- Unlock your iPad and open the “Settings” app.
- Scroll down the left sidebar and tap on “Sounds & Haptics.”
- On the right side, under the “Ringers and Alerts” section, find and tap on “Keyboard Clicks.”
- If you prefer to hear keyboard clicks while typing, ensure that the toggle switch next to “Keyboard Clicks” is green or switched to the “on” position.
- To turn off keyboard clicks, simply tap on the toggle switch to disable it.
- Return to the “Sounds & Haptics” settings and look for “Keyboard” under the “Haptic Feedback” section.
- To enable character feedback, make sure the toggle switch next to “Keyboard” is green or switched to the “on” position.
- If you want to disable character feedback, tap on the toggle switch to turn it off.
By adjusting the keyboard clicks, you can enjoy the satisfying sound of each keystroke as you type. On the other hand, disabling keyboard clicks can provide a quieter typing experience.
Character feedback, also known as key pop-ups, can visually confirm each character you type on the keyboard. This visual cue can be helpful to ensure that your typing is accurate. If you find the character feedback distracting or unnecessary, you have the option to disable it.
Take some time to experiment with these settings and find the combination that suits your preference. You have the flexibility to adjust or disable keyboard clicks and character feedback to create a personalized typing experience on your iPad.
Change the Keyboard’s Language and Layout
The ability to change the keyboard’s language and layout on your iPad can be incredibly useful, especially if you frequently communicate or type in multiple languages. Whether you need to switch between English, Spanish, French, or any other language, or if you prefer a different keyboard layout like QWERTY, AZERTY, or Dvorak, your iPad has you covered. Here’s how you can change the keyboard’s language and layout:
- Unlock your iPad and open the “Settings” app.
- Scroll down the left sidebar and tap on “General.”
- On the right side, find and tap on “Keyboard.”
- Under the “Keyboards” section, tap on “Keyboards” again.
- You will see a list of currently added keyboards. To add a new one, tap on “Add New Keyboard.”
- Select the language or keyboard layout you want to add from the list.
- If you want to remove a keyboard from the list, tap on the “Edit” button at the top right corner, then tap on the “-” button next to the keyboard you want to remove, and finally tap on the “Delete” button that appears.
Once you have added the desired keyboards, you can easily switch between them while typing. To switch between keyboards, simply tap on the “Globe” icon located at the bottom left corner of the keyboard until you reach the desired one. You can also press and hold the “Globe” icon to see a list of available keyboards and select the one you want.
Changing the keyboard’s language and layout allows you to seamlessly communicate in different languages and adapt to different typing preferences. It can greatly enhance your productivity and convenience when it comes to typing on your iPad.
Take advantage of this feature and explore the various languages and layouts available on your device. Experiment with different options to find the setup that best suits your needs and makes typing on your iPad a breeze.
Customize Text Replacement Shortcuts
Text Replacement shortcuts are a handy feature on your iPad that allows you to create custom abbreviations or shortcuts for frequently used phrases or words. Instead of typing out long chunks of text every time, you can simply type a designated shortcut, and your iPad will automatically replace it with the full text. This can save you time and effort, especially when sending repetitive messages or typing commonly used phrases. Here’s how you can customize text replacement shortcuts:
- Unlock your iPad and open the “Settings” app.
- Scroll down the left sidebar and tap on “General.”
- On the right side, find and tap on “Keyboard.”
- Under the “Keyboard” settings, tap on “Text Replacement.”
- To add a new shortcut, tap on the “+” button at the top right corner.
- In the “Phrase” field, enter the full text you want the shortcut to expand to.
- In the “Shortcut” field, enter the abbreviation or shortcut you want to type to trigger the expansion.
- Tap on “Save” to save your new text replacement shortcut.
Now, whenever you type the shortcut you created, your iPad will automatically replace it with the corresponding full text. This can be incredibly useful for frequently typed phrases, addresses, email signatures, or any other text you find yourself typing repeatedly.
Customizing text replacement shortcuts allows you to personalize your typing experience and maximize your productivity. It can significantly speed up your typing and reduce the need to type out lengthy phrases or sentences repeatedly.
Feel free to add as many shortcuts as you need to streamline your typing workflow. You can also edit or delete existing shortcuts by tapping on the “Edit” button at the top right corner of the “Text Replacement” settings screen.
Take the time to explore and experiment with this feature to find the text replacement shortcuts that work best for you. It’s a valuable tool that can save you time and effort when typing on your iPad.
Split or Dock the iPad Keyboard
The split and dock keyboard options on your iPad provide flexibility and convenience when it comes to typing, especially when using your device in different orientations or with limited screen space. Whether you prefer a larger keyboard for comfortable typing or need a compact keyboard for one-handed use, you can easily split or dock your iPad’s keyboard to suit your needs. Here’s how you can do it:
- Unlock your iPad and open any app that requires the keyboard.
- Tap on the text field to bring up the keyboard.
- To split the keyboard, use two fingers to pinch the keyboard apart. This will separate the keyboard into two halves, making it easier to use with your thumbs or when holding the iPad in both hands.
- If you want to dock the keyboard back together, use two fingers to pinch the halves towards the center of the screen until they merge back into a single keyboard.
- To dock the keyboard to either the left or right side of the screen, tap and hold the keyboard icon at the bottom right corner of the keyboard. Then, select either “Dock” or “Undock” from the menu that appears.
- If you choose to dock the keyboard, it will move to the side of the screen you selected, allowing you to type with one hand while still having access to the app or content on the main screen.
The split and dock options provide versatility when it comes to typing on your iPad. You can choose the option that best suits your typing preference, hand size, or the specific task you are working on.
Experiment and explore these options to find the configuration that feels most comfortable and efficient for you. Whether you prefer the convenience of a split keyboard or the simplicity of a docked keyboard, your iPad offers customizable solutions to enhance your typing experience.
Keep in mind that the ability to split or dock the keyboard may vary depending on the app you’re using and your iPad model. Not all apps or iPad models support these features.
Take advantage of these options to optimize your productivity and typing comfort on your iPad, regardless of the situation or typing style you prefer.
Enable or Disable the QuickType Keyboard
The QuickType keyboard, available on your iPad, is a smart and intuitive feature that predicts and suggests words as you type. It can significantly speed up your typing and save you time by offering relevant suggestions and corrections. However, if you find the QuickType suggestions distracting or prefer to type without assistance, you can easily enable or disable this feature. Here’s how:
- Unlock your iPad and open the “Settings” app.
- Scroll down the left sidebar and tap on “General.”
- On the right side, find and tap on “Keyboard.”
- In the “Keyboard” settings, locate the “Predictive” option.
- To enable the QuickType Keyboard, make sure the toggle switch next to “Predictive” is green or switched to the “on” position.
- If you want to disable the QuickType Keyboard, simply tap on the toggle switch to turn it off.
When the QuickType Keyboard is enabled, you will see word suggestions above the keyboard as you type. These suggestions are based on your typing patterns, previous conversations, and the context of your text.
If you find the QuickType suggestions helpful, they can save you time by accurately anticipating the words you intend to type. However, if you prefer a more traditional typing experience without suggestions or predictions, disabling the QuickType Keyboard can provide a distraction-free environment.
Feel free to experiment with this feature and determine whether it enhances your typing speed and accuracy. If you ever change your mind, simply revisit the “Keyboard” settings and toggle the QuickType Keyboard option accordingly.
Keep in mind that the availability of the QuickType Keyboard may vary depending on the app you’re using. Additionally, the suggestions may not always be accurate, so it’s always a good idea to review your text before sending or finalizing it.
Take control of your typing experience and customize it to suit your preferences by enabling or disabling the QuickType Keyboard on your iPad.
Change the Keyboard’s Key Repeat Settings
The key repeat feature on your iPad allows you to control how quickly a character is repeated when you hold down a key on the keyboard. By adjusting the key repeat settings, you can customize the typing experience to your liking, ensuring that characters repeat at a speed that feels comfortable and efficient. Here’s how you can change the keyboard’s key repeat settings:
- Unlock your iPad and open the “Settings” app.
- Scroll down the left sidebar and tap on “General”.
- On the right side, find and tap on “Keyboard”.
- Next, tap on “Key Repeat” to access the key repeat settings.
- You will see a slider that allows you to adjust the key repeat speed. Drag the slider to the left to decrease the speed or to the right to increase it.
- As you slide the key repeat speed, a preview of the key repeat rate will be shown to help you find the desired speed.
- Release the slider when you’re satisfied with the key repeat speed.
Adjusting the key repeat settings provides you with the flexibility to fine-tune your typing experience on the iPad. A faster key repeat speed allows you to type more quickly, while a slower speed may be useful for reducing errors or for individuals who prefer a slower typing pace.
Experiment with different key repeat settings to find the speed that feels most comfortable and allows you to type with accuracy and ease. Everyone has different preferences and typing styles, so it’s important to customize the settings to suit your needs.
Keep in mind that the key repeat settings affect all apps and text input fields on your iPad. If you find that the selected key repeat speed is not working well for a specific app, you may need to adjust the settings within the app’s own preferences or settings menu.
Take the time to find the perfect key repeat setting that enhances your typing experience and helps you achieve optimal productivity on your iPad.
Toggle Caps Lock on the iPad Keyboard
The Caps Lock key is a useful feature on the iPad keyboard that allows you to toggle between capital and lowercase letters without having to hold down the shift key. Enabling Caps Lock can be particularly helpful when you need to type a series of uppercase letters or when entering passwords or abbreviations with multiple capital letters. Here’s how you can toggle Caps Lock on the iPad keyboard:
- Unlock your iPad and open any app that requires the keyboard.
- Tap on the text field to bring up the keyboard.
- Double-tap the “Shift” key on the keyboard. The “Shift” key will turn blue, indicating that Caps Lock is enabled.
- Now, any letter you type will be in uppercase until you disable Caps Lock.
To disable Caps Lock, you can either tap the “Shift” key again, or simply tap any letter on the keyboard. The “Shift” key will return to its default white color, indicating that Caps Lock is disabled.
Enabling Caps Lock can be a time-saver, especially in situations where you need to type a lot of uppercase text. Instead of holding down the shift key for each letter, you can quickly toggle Caps Lock on and off, allowing for smoother and more efficient typing.
Keep in mind that Caps Lock is only applicable to letters on the keyboard and does not affect numbers, symbols, or other characters. Additionally, when you switch to a different app or close the keyboard, the Caps Lock setting will revert to its default state.
Take advantage of the Caps Lock feature on your iPad to streamline your typing and save time when entering uppercase text. Whether you’re typing a document, composing an email, or inputting a password, Caps Lock can provide a convenient way to enter multiple capital letters effortlessly.
Add or Remove Keyboards on Your iPad
Your iPad allows you to customize your typing experience by adding or removing keyboards for different languages or keyboard layouts. Whether you need to switch between English, Spanish, French, or any other language, or if you prefer a specific keyboard layout like QWERTY, AZERTY, or Dvorak, you can easily manage your keyboards on your iPad. Here’s how you can add or remove keyboards:
- Unlock your iPad and open the “Settings” app.
- Scroll down the left sidebar and tap on “General”.
- On the right side, find and tap on “Keyboard”.
- Under the “Keyboards” section, tap on “Keyboards” again.
- You will see a list of currently added keyboards.
- To add a new keyboard, tap on “Add New Keyboard” and select the language or keyboard layout you want to add from the list.
- The newly added keyboard will now appear in the list of keyboards.
- If you want to remove a keyboard, tap on the “Edit” button at the top right corner of the keyboard list.
- Tap on the “-” button next to the keyboard you want to remove.
- Finally, tap on the “Delete” button that appears to confirm the removal of the keyboard.
Adding keyboards allows you to seamlessly switch between languages or keyboard layouts while typing on your iPad. It enables you to communicate effectively in different languages or adapt the keyboard to your preferred layout.
Removing keyboards that you no longer use or need can help declutter the keyboard options and streamline your typing experience. It ensures that you have quick and easy access to the keyboards that matter most to you.
Remember that the availability of specific keyboard layouts or languages may vary depending on the language settings on your iPad and the writing system supported by the selected language.
Take the time to explore and configure the keyboards on your iPad to optimize your typing experience and meet your language or layout requirements.
Hide or Show the iPad Keyboard
The ability to hide or show the iPad keyboard provides you with flexibility when using your device. There may be instances when you want to focus on reading or viewing content on your iPad’s screen without the keyboard taking up space. Additionally, hiding the keyboard can be useful in apps where you primarily consume content rather than inputting text. On the other hand, you’ll want to show the keyboard when you need to type or enter text. Here’s how you can hide or show the iPad keyboard:
- Unlock your iPad and open any app that requires the keyboard.
- Tap on a text field or any other area that allows text input to bring up the keyboard.
- When the keyboard is visible, look for a button labeled “Hide” or a downward-facing arrow icon on the bottom right corner of the keyboard.
- To hide the keyboard, tap on the “Hide” button or the downward-facing arrow icon. The keyboard will disappear from the screen.
- In some apps, you can also swipe down from the top of the keyboard, starting from the spacebar, to hide it.
- To show the keyboard again, tap on a text field or any area that requires text input. The keyboard will reappear on the screen.
The ability to hide or show the iPad keyboard allows you to have a clutter-free view when you want to focus on content or need extra screen space. It’s particularly useful when consuming media, reading, or browsing through apps.
When you’re ready to type or enter text, simply show the keyboard again with a tap on a text field, making it readily available for input.
Remember that the method to hide or show the keyboard may vary slightly depending on the app or the text input field. Some apps may have additional features or gestures to manage the keyboard visibility.
Experiment with hiding or showing the keyboard and find the approach that works best for you in different scenarios on your iPad. It’s all about customizing your experience and maximizing your productivity while using your device.
Reset the Keyboard Dictionary on Your iPad
The keyboard dictionary on your iPad is a valuable resource that stores words you use and provides suggestions as you type. Over time, the dictionary may accumulate incorrect or outdated entries, leading to inaccurate suggestions or autocorrections. To address this, you can reset the keyboard dictionary on your iPad, clearing all learned words and starting fresh. Here’s how to reset the keyboard dictionary:
- Unlock your iPad and open the “Settings” app.
- Scroll down the left sidebar and tap on “General”.
- On the right side, find and tap on “Keyboard”.
- Scroll to the bottom of the “Keyboard” settings and tap on “Reset Keyboard Dictionary”.
- A confirmation window will appear. Tap on “Reset Dictionary” to proceed.
- You may be prompted to enter your device passcode or use Touch ID/Face ID for verification.
After resetting the keyboard dictionary, all personalized words and suggestions will be deleted. Your iPad will revert to the default dictionary and will learn new words and suggestions as you type.
Resetting the keyboard dictionary can be beneficial in situations where you notice incorrect autocorrections or if the dictionary has accumulated outdated and irrelevant words. It ensures that the keyboard operates with improved accuracy and provides more relevant suggestions as you type.
Keep in mind that resetting the keyboard dictionary will affect all apps on your iPad. Any personalized words you have added previously will be removed and need to be relearned. It may take some time for the dictionary to build up a new and accurate word bank based on your typing habits.
By resetting the keyboard dictionary, you have the opportunity to start anew and enhance your typing experience on the iPad. Don’t hesitate to perform this action if you experience persistent issues with autocorrect or unwanted suggestions.