
Why Change the Time on Android Phones?
Android phones, like any other electronic device with a clock, require accurate time settings to ensure smooth functioning and synchronization with various applications and networks. While Android devices usually update the time automatically, there are several reasons why you may need to manually change the time on your Android phone.
One common reason is when you travel to a different time zone. Changing the time on your Android phone enables you to stay on schedule and accurately track appointments and events in the local time of your destination. It can also help maintain consistency in communication with colleagues, friends, and family members in different time zones.
Another scenario where changing the time is necessary is when the automatic time setting feature malfunctions or is disabled. This can occur due to software glitches, network issues, or when using older Android versions that lack reliable automatic time updates. In such cases, you may need to manually set the time on your Android phone to ensure it reflects the correct current time.
Additionally, some users prefer to turn off the automatic time setting feature to have more control over their device’s time settings. By manually adjusting the time on their Android phones, they can customize it to meet their specific needs, such as adjusting for daylight saving time or aligning it with another timekeeping device they regularly use.
Moreover, changing the time on your Android phone can be useful for testing purposes. Developers and system administrators may modify the device’s time to troubleshoot time-sensitive applications, simulate different scenarios, or ensure that scheduled tasks are executed correctly.
Lastly, some users may change the time on their Android phones for privacy reasons. By altering the device’s time, they can manipulate the timestamps recorded by certain apps or services, providing an additional layer of anonymity.
Regardless of the reason, knowing how to change the time on your Android phone is a valuable skill that can help you stay organized, avoid confusion when traveling, and resolve any issues related to time synchronization.
Step 1: Accessing the Settings Menu
To change the time on your Android phone, you’ll first need to access the Settings menu. Here’s how you can do it:
- Unlock your Android phone and navigate to the home screen.
- Swipe down from the top of the screen to open the notification panel.
- Tap on the gear-shaped Settings icon. Alternatively, you can find the Settings app in your app drawer.
- Once you’re in the Settings menu, scroll down to find the “System” or “General Management” option and tap on it. The exact naming may vary depending on your Android phone model and operating system version.
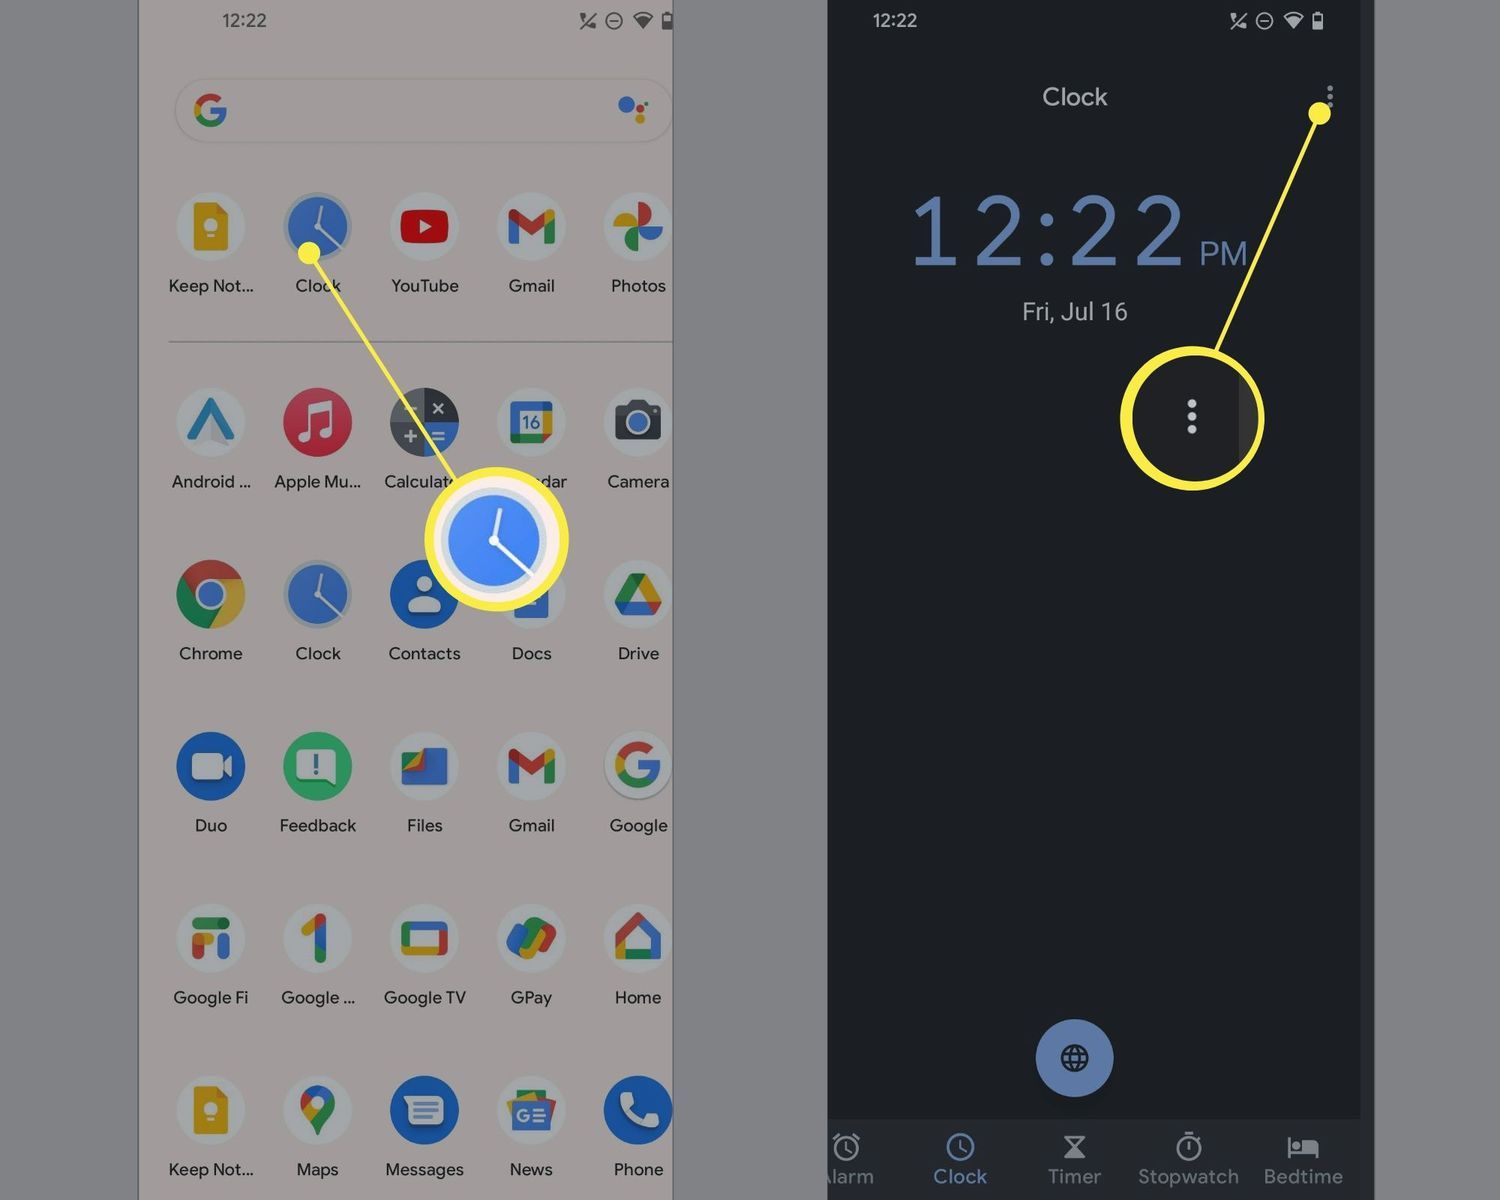
- In the System or General Management menu, locate and tap on the “Date & Time” option. It is usually represented by a clock icon.
By following these steps, you will successfully access the Settings menu and be one step closer to changing the time on your Android phone.
Please note that the menu names and icons may differ slightly depending on the Android phone manufacturer and the version of Android operating system you are using. However, you can generally find the Settings menu by looking for a gear-shaped icon or by searching for “Settings” in your app drawer.
Step 2: Selecting the “Date & Time” Option
After accessing the Settings menu on your Android phone, it’s time to select the “Date & Time” option. Here’s how you can do it:
- In the Settings menu, scroll down and look for the “Date & Time” option. Tap on it to proceed.
- On some Android devices, you may find the “Date & Time” setting directly under the System or General Management menu without any additional scrolling.
- Upon selecting the “Date & Time” option, you will be presented with various time-related settings and options.
- These options may include automatic time setting, time zone selection, date format, time format, and more.
By following these steps, you will successfully navigate to the “Date & Time” settings on your Android phone, where you can make the necessary changes to the time according to your preferences or requirements.
Keep in mind that the organization and layout of the settings menu may vary slightly depending on your specific Android phone model and the version of the operating system you are using. However, you can generally find the “Date & Time” option by scrolling down in the Settings menu or directly accessing it under the System or General Management category.
Step 3: Changing the Time Zone
Once you have accessed the “Date & Time” settings on your Android phone, it’s time to change the time zone. The time zone setting allows your device to adjust the time automatically based on your location. Here’s how you can change the time zone:
- In the “Date & Time” settings menu, look for the “Time Zone” option.
- Tap on the “Time Zone” option to open the list of available time zones.
- Scroll through the list of time zones to find the one that corresponds to your current location or the time zone you want to set.
- Tap on the desired time zone to select it. Your device will automatically update the time based on the selected time zone.
- If you don’t see your exact time zone in the list, you can try selecting a nearby city that is in the same time zone.
By following these steps, you can change the time zone on your Android phone and ensure that the device reflects the correct local time based on your location.
It’s important to note that some Android devices may have an option called “Automatic time zone” or “Use network-provided time zone.” If this option is enabled, your device will automatically update the time zone based on your network or GPS location. If you wish to use this feature, make sure it is enabled in the “Date & Time” settings.
Step 4: Manually Adjusting the Time
If you need to manually adjust the time on your Android phone, whether it’s correcting an incorrect time or changing it for a specific purpose, follow these steps:
- In the “Date & Time” settings menu, look for the option to set the time manually. This option may be called “Set time” or “Set time manually.”
- Tap on the manual time setting option to access the time adjustment interface.
- Adjust the hours, minutes, and seconds as needed using the provided interface. Some devices may have a slider or input fields to make the adjustments.
- Ensure that you select the correct AM or PM designation for the time.
After making the necessary adjustments, the time on your Android phone will reflect the changes you have applied. Make sure to double-check the time to ensure its accuracy.
It’s important to note that setting the time manually can be helpful in various situations, such as when your device’s automatic time update feature is not working or when you need to set a specific time for testing or personal purposes. However, it’s generally recommended to use the automatic time feature to ensure your device stays synchronized with the correct time.
Additionally, keep in mind that changing the time manually does not affect the time zone setting. If you need to adjust the time zone, refer back to the previous step.
Step 5: Enabling Automatic Time Setting
Enabling the automatic time setting feature ensures that your Android phone stays synchronized with the correct time without the need for manual adjustments. Here’s how you can enable automatic time setting:
- In the “Date & Time” settings menu, look for the option to enable automatic time. This option may be called “Automatic date & time” or “Use network-provided time.”
- Tap on the option to toggle it on. The switch or checkbox should move to the “on” position.
Once the automatic time setting is enabled, your Android phone will automatically adjust the time based on your network or GPS location. It will also take into account any changes in time zones when you travel.
By enabling this feature, you don’t have to worry about manually adjusting the time or dealing with time discrepancies. Your Android phone will keep track of the accurate time for you.
It’s worth noting that enabling the automatic time setting feature requires a stable internet or network connection. If your device is unable to access the network or if you are in an area with poor connectivity, the automatic time update may not be successful. In such cases, you can consider manually adjusting the time or utilizing other methods to ensure the correct time.
Step 6: Using Third-Party Apps
In addition to the built-in settings on your Android phone, you can also utilize third-party apps to change and manage the time on your device. These apps offer additional features and customization options that may be beneficial in certain scenarios. Here’s how you can use third-party apps to change the time:
- Open the Google Play Store on your Android phone.
- Search for time-related apps using keywords such as “time changer,” “time zone converter,” or “world clock.”
- Browse through the available apps and read user reviews and ratings to find a reliable and suitable app for your needs.
- Once you have selected an app, tap on the “Install” button to download and install it on your Android phone.
- Follow the instructions provided by the app to set the time and customize any additional settings according to your preferences.
Third-party apps can offer a wide range of features, such as the ability to set multiple time zones, convert time between different regions, display world clocks, and more. They can be particularly useful for frequent travelers, remote workers, or individuals who need to coordinate with people in different time zones.
However, it’s important to be cautious when downloading and using third-party apps. Ensure that you choose reputable apps from trusted developers to avoid potential security risks or compatibility issues with your Android phone.
Lastly, keep in mind that the availability and functionality of third-party time-related apps can vary. Some apps may require additional permissions or a paid subscription to unlock certain features. Therefore, carefully review the app’s description and terms before downloading and using it.
Step 7: Troubleshooting Common Issues
While changing the time on your Android phone is typically a straightforward process, you may encounter some common issues along the way. Here are a few troubleshooting tips to help you resolve those issues:
- Automatic Time Not Updating: If your Android phone is not updating the time automatically, try disabling and re-enabling the automatic time setting in the “Date & Time” settings. Additionally, ensure that your device has a stable internet or network connection.
- Inaccurate Time Zone: If your Android phone is displaying the wrong time zone, double-check your location settings and ensure that the correct time zone is selected in the “Date & Time” settings. You may also try toggling the automatic time zone setting off and then back on.
- Time Drifting: Sometimes, the time on your Android phone may start drifting, resulting in minor discrepancies. To correct this, try disabling and re-enabling the automatic time setting or manually adjusting the time to the correct value.
- App-Specific Time Settings: Certain apps may have their own time settings independent of the system time. If you notice time discrepancies in specific apps, check their individual settings to ensure the correct time is set.
- Device Software Update: If you continue to experience issues with time settings, consider checking for any available software updates for your Android phone. Software updates often address bugs and improve system performance and functionality.
If the above troubleshooting steps do not resolve your time-related issues, you may need to seek assistance from your Android phone manufacturer’s support resources or visit their official forums for further guidance.
Remember, accurate time settings are essential for proper functionality and synchronization on your Android phone, so it’s important to address any issues promptly to ensure a seamless user experience.