
Why Change Your Kindle Payment Method?
When it comes to managing your Kindle device and purchasing e-books, having a valid and up-to-date payment method is essential. However, there are several reasons why you may need to change your Kindle payment method. Let’s explore a few of the most common scenarios:
- Expired or Declined Payment: If your current payment method has expired or is no longer valid, you will need to update your information to continue making purchases on your Kindle.
- Security Concerns: If you suspect that your current payment method has been compromised or there has been unauthorized activity on your account, it’s crucial to change your payment method immediately to protect your financial information.
- Switching Accounts: If you have multiple Amazon accounts or want to change the account associated with your Kindle device, you will need to update the payment method accordingly.
- Preference Change: Sometimes, you may simply want to change your payment method to switch to a new credit card, debit card, or even a different payment option like PayPal.
- Expired Promotional Offer: If you previously used a promotional offer or gift card as your payment method, and it has expired, you will need to update your payment method to continue purchasing books on your Kindle.
Regardless of the reason, changing your Kindle payment method is a straightforward process that can be done easily through your Amazon account settings. In the following steps, we will guide you on how to change your Kindle payment method.
Step 1: Log In to Your Amazon Account
The first step to changing your Kindle payment method is to log in to your Amazon account. This is the same account you use to manage your Kindle device and make purchases. Follow these simple steps to ensure a smooth process:
- Open your preferred web browser and go to www.amazon.com.
- Click on the “Sign In” button, located at the top-right corner of the page.
- Enter your Amazon account email address or mobile number in the designated field.
- Provide your unique password in the corresponding field. If you have forgotten your password, click on the “Forgot your password?” link and follow the instructions to reset it.
- Once you have entered your login information, click on the “Sign In” button to proceed.
If you have successfully signed in to your Amazon account, you will be taken to your account dashboard, where you can manage various settings and preferences. Now that you are logged in, you can move on to the next step of changing your Kindle payment method.
Step 2: Go to Your Account Settings
After logging in to your Amazon account, the next step in changing your Kindle payment method is to navigate to your account settings. This is where you can access and make changes to your payment options. Follow these steps to find your account settings:
- On the Amazon homepage, locate the “Accounts & Lists” tab at the top-right corner of the page. Click on it to reveal a dropdown menu.
- In the dropdown menu, select “Your Account” to be redirected to your account settings page.
- Scroll down the page until you find the “Digital Content and Devices” section. Here, click on the “Content and Devices” link to access your Kindle settings.
- On the “Content and Devices” page, you will see a navigation menu on the left side of the screen. Click on the “Settings” tab to proceed.
- Under the “Settings” tab, you will find various options related to your Kindle device and account preferences. Look for the “Payment Options” section and click on it to manage your payment methods.
By following these steps, you will be able to easily navigate to your account settings and locate the section where you can change your Kindle payment method. Once you reach the “Payment Options” page, you can proceed to the next step of adding a new payment method.
Step 3: Manage Your Payment Options
With the account settings page open, you are now ready to manage your payment options. This step involves finding the section where you can add, remove, and edit your payment methods. Follow these instructions to easily navigate to the payment options section:
- After accessing your Amazon account settings, scroll down until you reach the “Payment Options” section.
- In this section, you will see a list of your current payment methods associated with your Kindle account. This may include credit cards, debit cards, or other payment options you have previously added.
- Each payment method will be displayed with its corresponding details, such as the credit card or bank account number, expiration date, and billing address.
- To make changes to your payment options, click on the desired method. This will open a dropdown menu with several options, including “Edit,” “Remove,” or “Make Default.”
- If you want to add a new payment method, look for the “Add a Payment Method” button. Clicking on this will allow you to enter the necessary information for your new payment option.
By following these instructions, you will be able to manage your payment methods effectively. Whether you want to edit an existing payment method, remove an outdated one, or add a new payment method, the “Payment Options” section provides you with the necessary tools to do so. Once you have added a new payment method or made the necessary changes, you can proceed to set the new payment method as the default for your Kindle account.
Step 4: Add a New Payment Method
If you need to add a new payment method to your Kindle account, follow these steps to ensure a seamless process:
- In the “Payment Options” section of your account settings, click on the “Add a Payment Method” button. This will prompt a dropdown menu with various payment options.
- Select the type of payment method you wish to add. This can include a credit card, debit card, bank account, or alternative payment methods like PayPal.
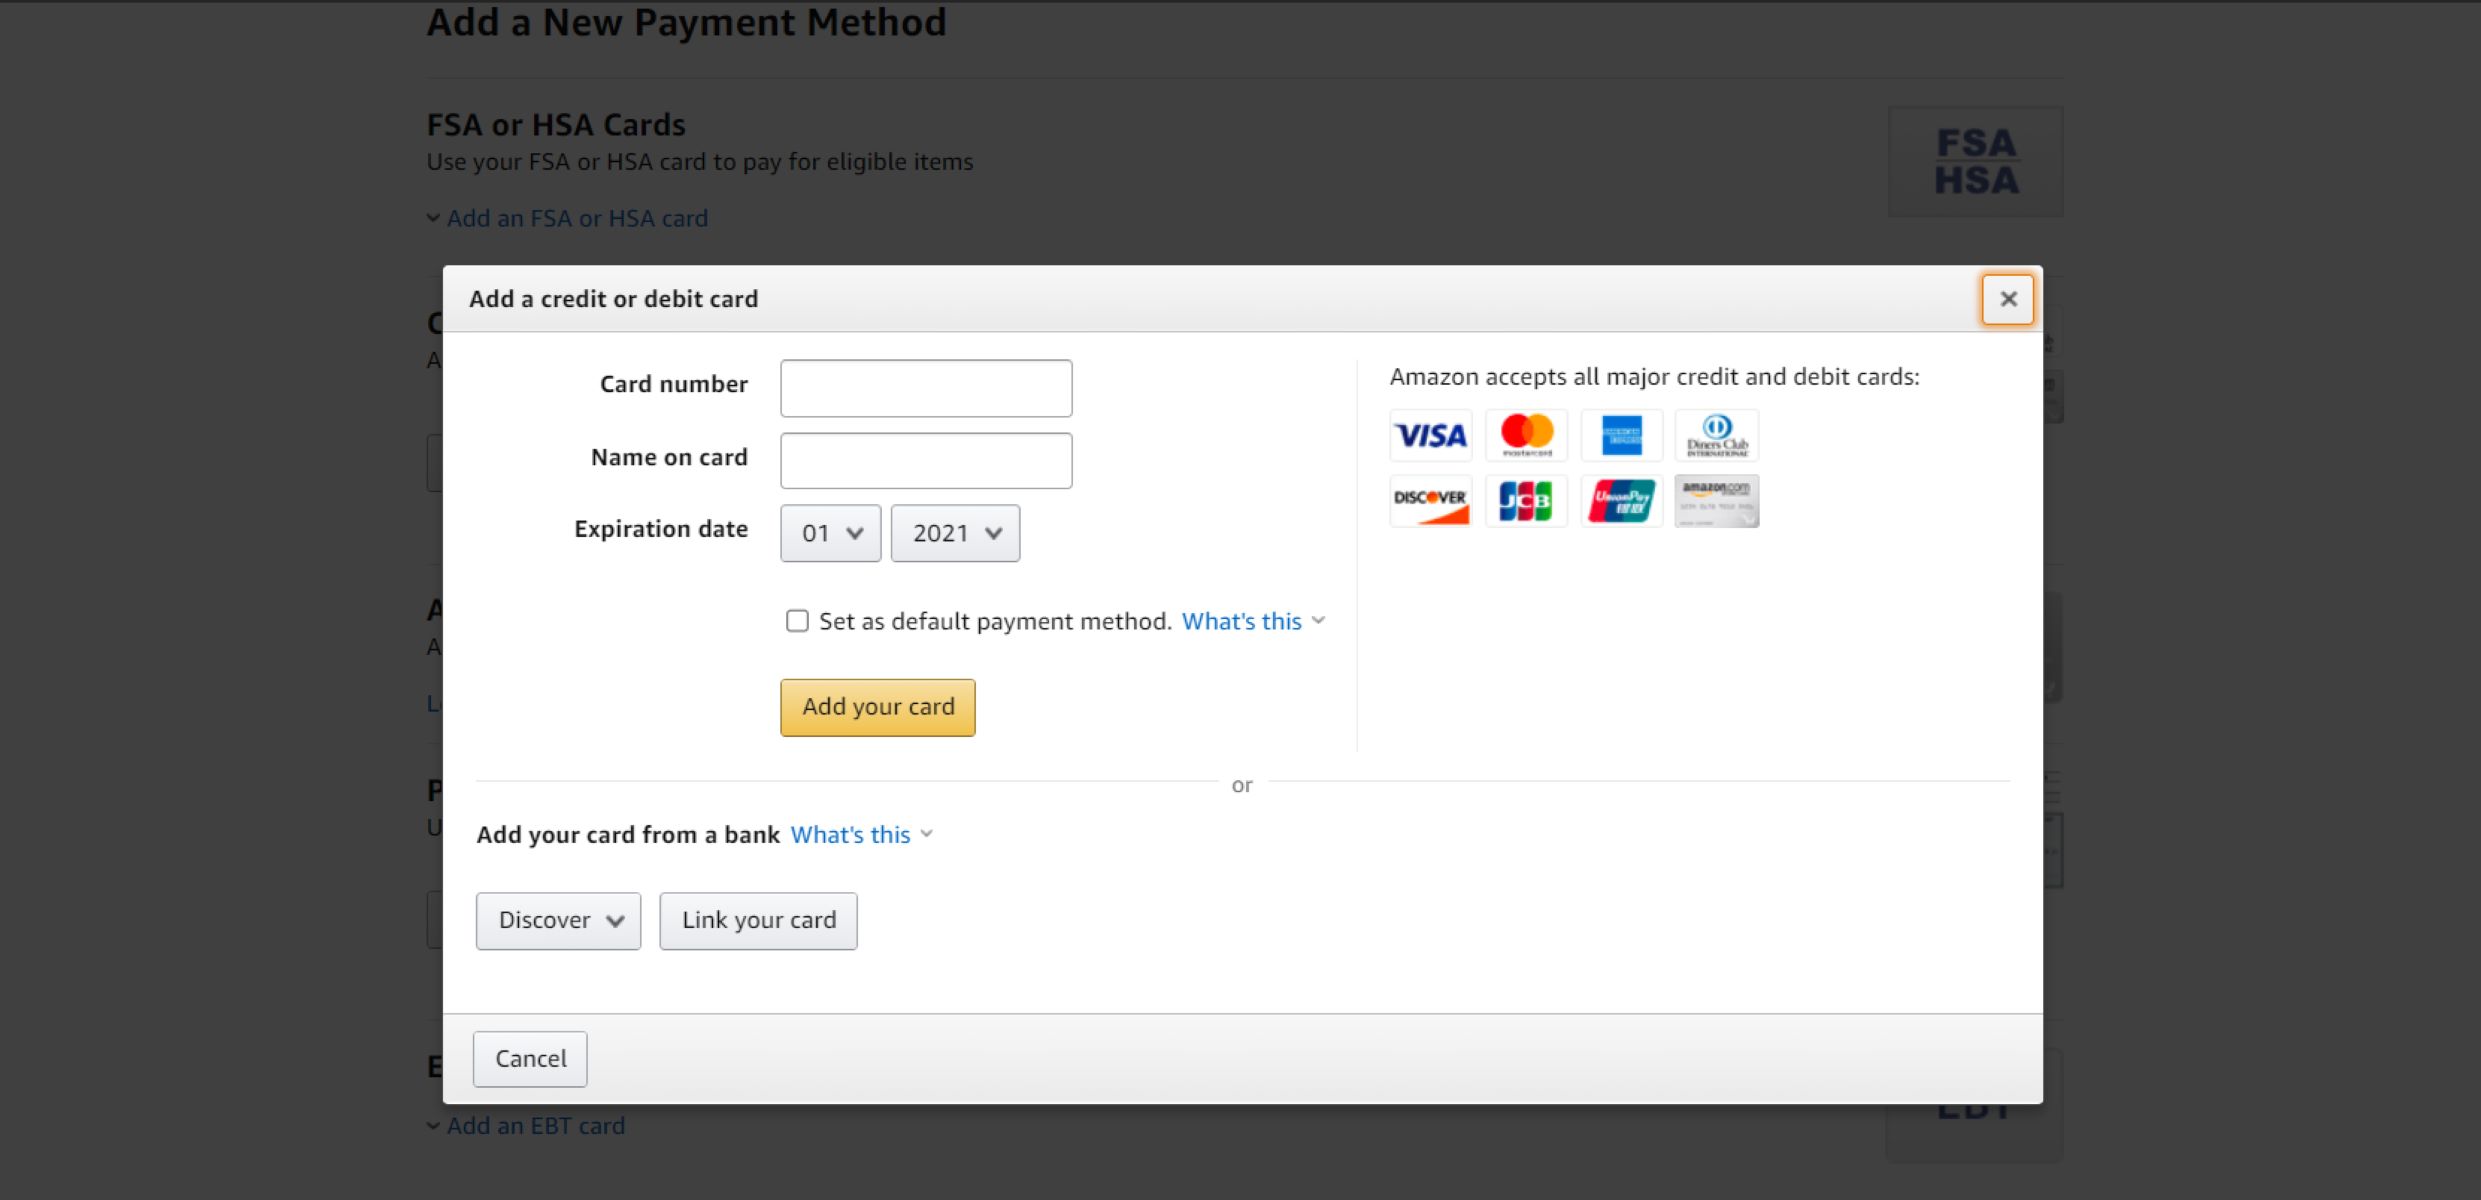
- Enter the required information for the new payment method. This typically includes the card number, expiration date, security code, and billing address.
- Double-check the accuracy of the entered information to ensure it is correct and up to date.
- Once you have filled in the necessary details, click on the “Add your card” or “Add your account” button to finalize the addition of the new payment method.
- Your new payment method should now be listed in the “Payment Options” section, alongside your existing methods. You can now proceed to set the new payment method as the default option for your Kindle account.
By following these steps, you can easily add a new payment method to your Kindle account. This allows you to make purchases and manage your billing preferences with ease. Remember to regularly update your payment methods to ensure uninterrupted access to your favorite e-books and other digital content on your Kindle device.
Step 5: Set the New Payment Method as Default
After adding a new payment method to your Kindle account, it is important to set it as the default option. This ensures that any future purchases or subscriptions will be charged to the newly added payment method. To set the new payment method as default, follow these simple steps:
- In the “Payment Options” section of your Amazon account settings, locate the new payment method you just added. It should be listed alongside your other existing payment methods.
- Click on the new payment method to open the dropdown menu with various options.
- From the dropdown menu, select the option that says “Make Default” or “Set as Default.” This will designate the newly added payment method as the primary option for your Kindle account.
- Once you have selected the “Make Default” option, the system will update your payment settings accordingly. Your new payment method should now be set as the default option for future purchases on your Kindle.
- It’s a good practice to double-check your payment settings to ensure that the correct payment method is set as default. You can do this by reviewing the “Payment Options” section and verifying that the newly added method is designated as the default payment option.
By following these steps, you can easily set your new payment method as the default option for your Kindle account. This ensures that any future purchases or subscriptions will be charged to the correct payment method. Remember to periodically check and update your payment settings as needed to ensure smooth transactions on your Kindle device.
Step 6: Remove the Old Payment Method
Once you have added a new payment method to your Kindle account and set it as the default option, it is important to remove any outdated or no longer desired payment methods. This allows for a streamlined and organized payment process. Follow these steps to remove an old payment method from your account:
- In the “Payment Options” section of your Amazon account settings, locate the old payment method you wish to remove. It should be listed alongside your other existing payment methods.
- Click on the old payment method to open the dropdown menu with various options.
- From the dropdown menu, select the option that says “Remove” or “Delete.” This will prompt a confirmation message asking if you are sure you want to remove the payment method.
- Review the confirmation message to ensure that you are removing the correct payment method. Be aware that removing a payment method means you will no longer be able to use it for future purchases on your Kindle.
- If you are certain that you want to remove the payment method, click on the confirmation button to proceed with the removal process.
- The old payment method should now be deleted from your account. To verify this, check the “Payment Options” section and ensure that the removed method is no longer listed.
By following these steps, you can easily remove an old payment method from your Kindle account. This helps maintain an organized account and ensures that only the desired payment methods are associated with your Kindle for future purchases. Remember to review and adjust your payment settings periodically to keep them up to date and in line with your preferences.
Step 7: Verify the Changes
After making changes to your Kindle payment method, it is essential to verify that the changes have been applied successfully. This step ensures that your updated payment method is reflected accurately in your account settings. Follow these steps to verify the changes you have made:
- Return to the “Payment Options” section of your Amazon account settings.
- Review the list of payment methods to ensure that the newly added payment method is listed as the default option. It should be marked with a label or icon indicating that it is the primary payment method.
- If you have removed an old payment method, confirm that it is no longer listed in your account settings. It should not appear alongside your current payment methods.
- Double-check your payment method details, such as the card number, expiration date, and billing address, to verify that everything is accurate and up to date.
- If everything looks correct, you can be confident that the changes you made to your Kindle payment method have been successfully applied.
By following these steps, you can ensure that the changes you made to your Kindle payment method are reflected correctly in your account settings. Verifying these changes provides peace of mind and ensures a seamless transaction process when purchasing e-books or other digital content on your Kindle device. If you encounter any issues or discrepancies, it is recommended to contact Amazon customer support for further assistance.
Tips for a Smooth Payment Method Change
Changing your Kindle payment method can be a simple and straightforward process if you follow these helpful tips:
- Keep your payment information up to date: Ensure that your payment details, such as credit card expiration dates and billing addresses, are accurate and current. This will help prevent any issues when making purchases on your Kindle.
- Check for promotional offers: Before changing your payment method, check if there are any promotional offers or gift cards associated with your current payment method. Consider utilizing these offers before updating your payment information.
- Have an alternate payment method: It’s a good idea to have a backup payment method on hand, such as a secondary credit card or PayPal account. This ensures that you can make purchases even if there are issues with your primary payment method.
- Review your billing history: Before changing your payment method, review your billing history to ensure all transactions are accounted for. This can help identify any suspicious activity or unauthorized charges.
- Update payment methods on other devices: If you have multiple devices linked to your Amazon account, such as a smartphone or tablet, make sure to update the payment methods on those devices as well. This ensures consistent payment experiences across all devices.
- Contact customer support if needed: If you encounter any issues or have questions during the payment method change process, don’t hesitate to reach out to Amazon customer support. They can provide guidance and assistance to help resolve any concerns.
By following these tips, you can ensure a smooth and hassle-free payment method change for your Kindle. Keeping your payment information up to date and being proactive in managing your payment options will ensure a seamless purchasing experience for all your e-books and digital content.