
Understanding Monitor Brightness
Monitor brightness refers to the level of light emitted by your computer screen. It plays a crucial role in determining the clarity and readability of the displayed content. Having the correct brightness setting is essential for a comfortable viewing experience, whether you’re working, gaming, or browsing the web.
Brightness is measured in nits, which represent the amount of light emitted per square meter of the screen’s surface. Most monitors have a maximum brightness of 250 to 350 nits, although high-end displays can reach up to 1000 nits. It’s worth noting that brighter doesn’t always mean better; the optimal brightness level depends on various factors such as ambient lighting conditions and personal preference.
By adjusting the monitor’s brightness, you can achieve the right balance between enhancing visibility and reducing eye strain. If your screen is too bright, it can cause discomfort and may even lead to headaches or eye fatigue. Conversely, if it’s too dim, you may strain to see the content properly, especially in well-lit environments.
Understanding the impact of monitor brightness on your overall computing experience is crucial. It not only affects the visual quality but also influences color accuracy and energy consumption. Therefore, finding the optimal brightness level is essential for users looking to maximize both comfort and efficiency.
Now that we’ve established the importance of monitor brightness, it’s time to explore the various methods you can use to adjust it. Whether you’re using a Windows PC or a Mac, you have several options at your disposal to fine-tune the brightness settings according to your needs and preferences.
Different Ways to Adjust Monitor Brightness
When it comes to adjusting the brightness of your monitor, you have several options available to you. Let’s explore some of the most common methods:
- Using the Monitor’s Built-in Controls: Most monitors come with built-in buttons or controls that allow you to adjust the brightness settings directly on the display. Look for buttons labeled with icons such as a sun or a light bulb. By pressing these buttons, you can navigate through the monitor’s menu and make adjustments to the brightness levels.
- Adjusting Brightness in Windows: If you’re using a Windows PC, you can adjust the monitor brightness through the operating system’s settings. Simply right-click on the desktop and select “Display settings.” From there, you can locate the brightness slider and move it to your desired level. Alternatively, some keyboards have dedicated brightness control buttons that you can use to adjust the brightness quickly and easily.
- Adjusting Brightness on a Mac: Mac users can also adjust the monitor brightness through the system preferences. Click on the Apple menu and select “System Preferences,” then choose “Displays.” In the Displays settings, you’ll find a brightness slider that you can use to increase or decrease the brightness levels. Mac laptops also have dedicated brightness control keys on the keyboard.
- Using Third-Party Software: There are various third-party software options available that allow you to adjust monitor brightness with additional customization features. These software programs often provide more precise control over brightness settings, including the ability to set different brightness levels for specific applications or time intervals. Some popular software options include f.lux, Dimmer, and ClickMonitorDDC.
These methods give you the flexibility to adjust the brightness of your monitor according to your preferences and the ambient lighting conditions. Experiment with different settings to find the ideal brightness level that provides optimal comfort and visibility for your specific needs.
Method 1: Using the Monitor’s Built-in Controls
One of the most straightforward ways to adjust the brightness of your monitor is by using its built-in controls. Most monitors have physical buttons located on the front or side panel that allow you to make quick adjustments to the brightness settings. Here’s how you can do it:
- Locate the control buttons on your monitor. They are typically labeled with icons or symbols that indicate their function, such as a sun or a light bulb.
- Press the brightness control button. This will bring up the monitor’s on-screen display (OSD) menu, allowing you to make adjustments to various settings, including brightness.
- Use the navigation buttons to navigate through the OSD menu and locate the brightness option. The navigation buttons are usually labeled with arrows or directional symbols.
- Once you’ve found the brightness option, use the increase or decrease button to adjust the brightness level. Some monitors also have an “Auto” option that automatically adjusts the brightness based on ambient lighting conditions.
- Make small adjustments and evaluate the changes on your screen in real-time. Keep adjusting until you find a comfortable brightness level.
- Once you’re satisfied with the brightness level, press the menu button or any designated exit button to save your settings and exit the OSD menu.
Using the monitor’s built-in controls is a convenient way to adjust brightness, especially if you prefer having physical buttons at your fingertips. It gives you direct control over the brightness settings and allows for quick adjustments without the need to navigate through operating system settings.
Keep in mind that the location and functionality of the monitor controls may vary depending on the brand and model. Refer to your monitor’s user manual for specific instructions on how to access and navigate the OSD menu.
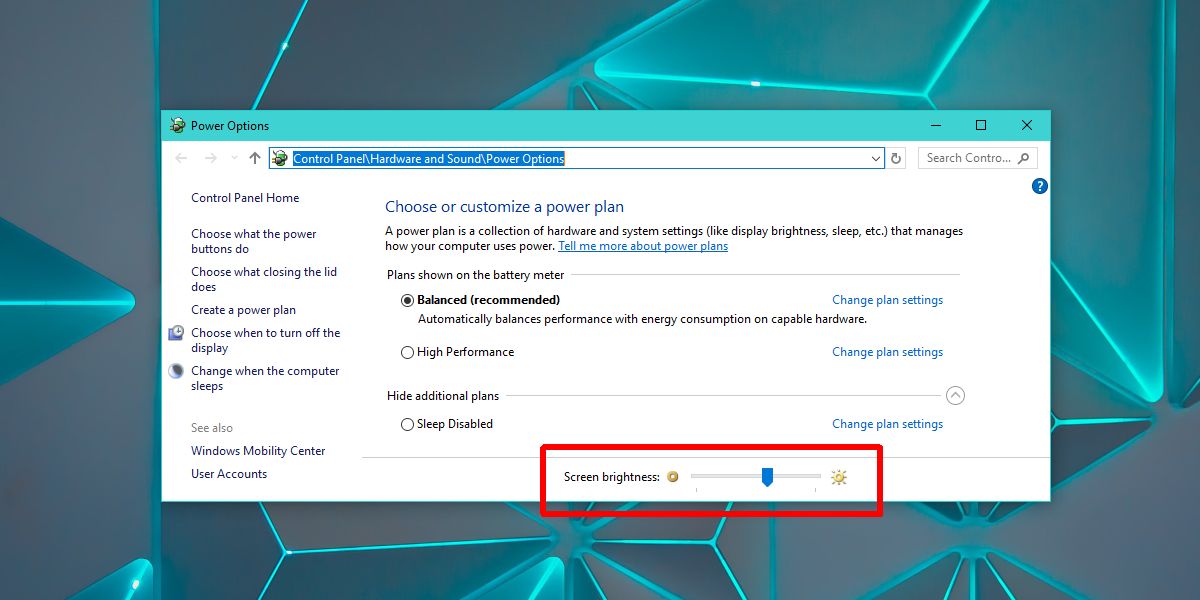
Method 2: Adjusting Brightness in Windows
If you’re using a Windows PC, you can easily adjust the brightness of your monitor through the operating system’s settings. Here’s how you can do it:
- Right-click on an empty area of your desktop and select “Display settings” from the context menu.
- In the Display settings window, locate the “Brightness and color” section.
- Adjust the brightness slider to increase or decrease the brightness level. As you move the slider, you will see the changes reflected in real-time on your monitor.
- Additionally, you can enable the “Change brightness automatically when lighting changes” option. This will allow Windows to adjust the brightness automatically based on the ambient lighting conditions.
- Click on the “Advanced display settings” link to access more advanced display settings, such as color calibration and color profiles.
- Once you’ve adjusted the brightness to your desired level, click on the “Apply” button to save the changes. If you’re satisfied with the changes, click on the “Keep changes” button to set the new brightness level as the default.
Windows also provides alternative methods to adjust brightness quickly and easily:
- If your keyboard has dedicated brightness control keys, you can use them to increase or decrease the brightness level directly.
- On laptops, you may have special function keys, usually denoted with icons of a sun or a light bulb, that allow you to adjust the brightness with a combination of the Fn key.
By adjusting the brightness in Windows, you can customize the visual experience to your liking and ensure optimal visibility and comfort while using your computer.
Method 3: Adjusting Brightness on a Mac
If you’re using a Mac, you can easily adjust the brightness of your monitor through the system preferences. Here’s how you can do it:
- Click on the Apple menu in the top-left corner of the screen and select “System Preferences” from the drop-down menu.
- In the System Preferences window, click on the “Displays” icon to access the display settings.
- In the Display settings, you’ll find a brightness slider labeled “Brightness.” Move the slider to the right to increase the brightness or to the left to decrease it.
- As you adjust the brightness slider, you will see the changes reflected on your monitor in real-time.
- If you want your Mac to automatically adjust the brightness based on ambient lighting conditions, make sure to check the “Automatically adjust brightness” option.
- Additionally, you can access more advanced display settings, such as color calibration and color profiles, by clicking on the “Color” tab.
- Once you’ve set the desired brightness level, close the System Preferences window. Your Mac will remember your settings and use them as the default brightness level.
Mac laptops also provide alternative methods to adjust brightness quickly:
- On Mac laptops, you can use dedicated brightness control keys on the keyboard. These keys are typically located on the top row and are labeled with sun icons.
- You can also use the “Control” key in combination with the brightness function keys to directly adjust the brightness level.
With these options, adjusting the brightness on a Mac allows you to find the optimal level for your needs, ensuring a comfortable and visually pleasing experience while using your Mac.
Method 4: Using Third-Party Software
In addition to the built-in options provided by your monitor or operating system, you can also utilize third-party software to adjust the brightness of your monitor. These software applications offer additional functionality and customization options. Here are a few popular options:
- f.lux: f.lux is a widely used software that adjusts the color temperature of your monitor based on the time of day. It can help reduce eye strain by reducing blue light emissions during the evening and night hours. In addition to color temperature adjustments, f.lux also allows you to fine-tune the brightness settings according to your preference.
- Dimmer: Dimmer is a lightweight utility that adds a brightness control slider to your Windows taskbar. With Dimmer, you can easily adjust the brightness of your monitor without having to dive into system settings. It offers a simple and intuitive interface and is suitable for users who prefer quick and easy brightness adjustments.
- ClickMonitorDDC: ClickMonitorDDC is a feature-rich software that provides advanced control over your monitor settings. It allows you to adjust various parameters, including brightness, contrast, color, and more, directly from your computer. ClickMonitorDDC supports multiple monitors and allows you to save and switch between different profiles for different use cases.
These are just a few examples of the many third-party software options available. When choosing a software application, consider factors such as user reviews, compatibility with your operating system, and the specific features and functionality that you require.
Using third-party software can provide you with more precise control over the brightness settings of your monitor, allowing you to customize the visual experience according to your preferences. It’s an excellent option for users who seek advanced customization options or have specific requirements for their work or entertainment purposes.
Tips for Adjusting Monitor Brightness
Adjusting the brightness of your monitor is not just a matter of personal preference; it can greatly impact your overall viewing experience. Here are some helpful tips to keep in mind when adjusting the brightness of your monitor:
- Consider the ambient lighting: The brightness level that works well in a dark room may be too bright in a well-lit environment. Be aware of the lighting conditions in your surroundings and adjust the brightness accordingly to avoid eye strain.
- Find the optimal brightness: Experiment with different brightness levels to find the one that provides optimal visibility and comfort for your specific needs. Avoid setting the brightness level too low, as it can make it difficult to read text and view details on the screen.
- Balance brightness and energy consumption: Higher brightness settings consume more power and can potentially shorten the lifespan of your monitor. Find a balance between a comfortable brightness level and energy efficiency to optimize both visual quality and power consumption.
- Consider color accuracy: Adjusting the brightness can affect color accuracy on your monitor. Keep this in mind, especially if you work with color-sensitive tasks such as graphic design or photo editing. Calibrate your monitor’s colors after adjusting the brightness to ensure accurate color representation.
- Take breaks and rest your eyes: Regardless of the brightness level, it’s essential to take regular breaks and rest your eyes to avoid eye fatigue. Follow the 20-20-20 rule; every 20 minutes, look at an object 20 feet away for 20 seconds to give your eyes a break from the screen.
- Avoid glare and reflections: Position your monitor in such a way that minimizes glare and reflections. Make sure there are no direct light sources or windows behind or in front of the screen, as this can cause eye strain and make it difficult to see the content clearly.
By following these tips, you can enhance your viewing experience and reduce eye strain while optimizing the brightness settings on your monitor. Remember, finding the ideal brightness level is a personal preference, so don’t hesitate to adjust it as needed to create a comfortable and visually pleasing environment.