
Check Compatibility of Your Philips Hue App
Before adding the Philips Hue LED Strip to your app, it’s important to ensure compatibility. Philips Hue offers a range of apps, so make sure you have the right one installed on your device. Here’s how to check:
- Step 1: Identify the app – There are different versions of the Philips Hue app available. The most commonly used ones are the Philips Hue mobile app for iOS and Android, and the Philips Hue Sync app for desktop.
- Step 2: App requirements – Check the minimum software or hardware requirements for your app. This information can usually be found in the app’s description or on the Philips Hue website.
- Step 3: Device compatibility – Ensure that your device is compatible with the app. Some older smartphones or tablets may not support certain features or the latest updates of the app.
- Step 4: Operating system – Verify that your device is running an operating system that is supported by the Philips Hue app. This information can also be found in the app’s description or on the website.
By following these simple steps, you can confirm whether your Philips Hue app is compatible with the LED Strip. Compatibility is crucial to ensure smooth integration and full functionality of the LED Strip with your app. If your app is not compatible, you may need to update your device or choose an alternative app that meets the requirements.
Buy and Install the Philips Hue LED Strip
The Philips Hue LED Strip is a versatile lighting solution that allows you to bring vibrant colors and dynamic lighting effects to your space. Here’s a step-by-step guide on how to buy and install the Philips Hue LED Strip:
- Step 1: Determine the length – Measure the area where you want to install the LED Strip to determine the appropriate length. Philips Hue offers LED Strips in various lengths, ranging from one meter to five meters.
- Step 2: Visit a retailer or shop online – Visit a reputable retailer or the official Philips Hue website to purchase the LED Strip. Ensure that you are buying the genuine product from an authorized seller to guarantee quality and compatibility.
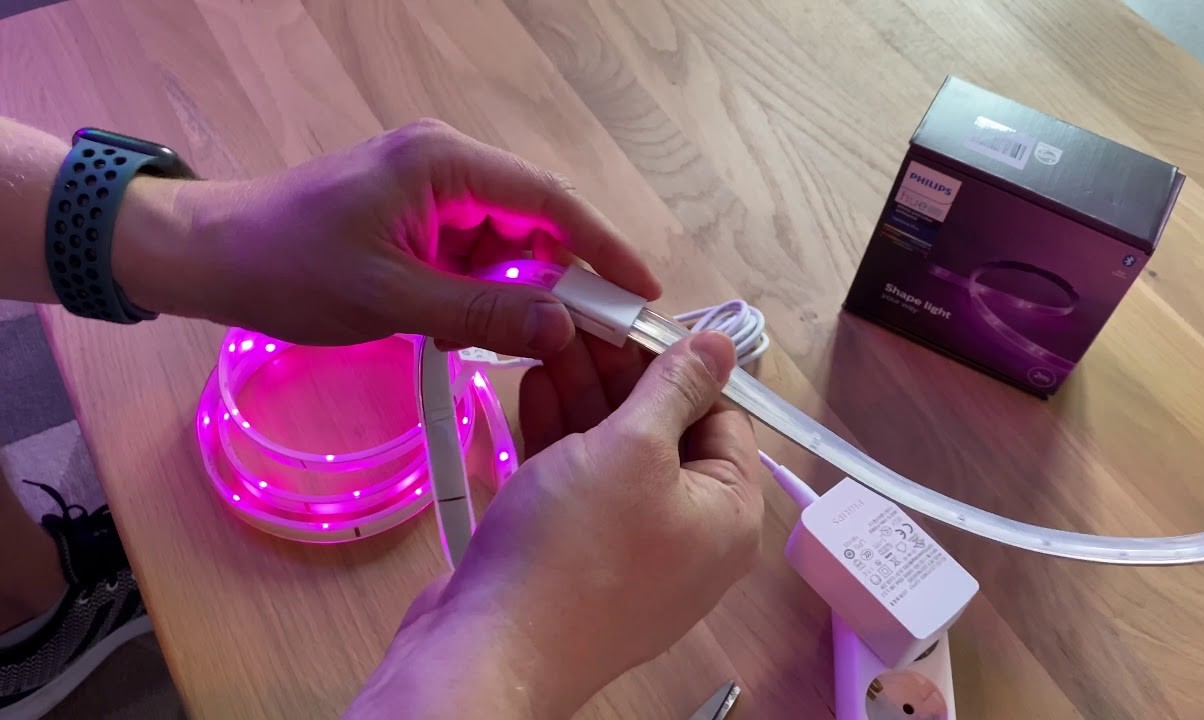
- Step 3: Unbox the LED Strip – Once you have received your LED Strip, carefully unbox it and ensure that all the necessary components are included, such as the LED Strip itself, the power adapter, and any connecting cables or extensions.
- Step 4: Clean and prepare the installation area – Before mounting the LED Strip, clean the surface where you will be placing it to ensure proper adhesion. Remove any dust, dirt, or debris that may interfere with the adhesive backing.
- Step 5: Attach the LED Strip – Peel off the protective backing from the LED Strip and firmly press it onto the cleaned surface. Make sure to align it properly and apply even pressure to ensure secure adhesion.
- Step 6: Connect the power adapter – Plug the power adapter into an electrical outlet and connect it to the LED Strip. Make sure the connection is secure and the LED Strip lights up to indicate that it is receiving power.
- Step 7: Test and adjust – Open the Philips Hue app on your phone and test the LED Strip to ensure it is functioning correctly. You can adjust the brightness, color, and effects through the app to create the desired lighting ambiance.
By following these simple steps, you can easily purchase and install the Philips Hue LED Strip in your home or workspace. Enjoy the vast array of lighting possibilities and transform your environment with personalized, dynamic lighting.
Connect the Philips Hue LED Strip to the Philips Hue Bridge
In order to control your Philips Hue LED Strip with the Philips Hue app, you need to connect it to the Philips Hue Bridge. The Hue Bridge acts as the central hub that allows you to control and manage all your Philips Hue lights. Here’s how to connect the LED Strip to the Hue Bridge:
- Step 1: Set up the Hue Bridge – If you haven’t already done so, connect the Hue Bridge to your home’s Wi-Fi network using the provided Ethernet cable. Plug it into a power outlet and wait for it to establish a connection.
- Step 2: Open the Philips Hue app – Launch the Philips Hue app on your phone and ensure that you are connected to the same Wi-Fi network as the Hue Bridge.
- Step 3: Tap on the “Settings” tab – Look for the gear icon or the “Settings” tab at the bottom of the app’s screen and tap on it to access the settings menu.
- Step 4: Select “Light Setup” – In the settings menu, select the “Light Setup” or “Add Light” option to begin the process of connecting a new light to the Hue Bridge.
- Step 5: Follow the on-screen instructions – The app will guide you through the process of connecting the LED Strip to the Hue Bridge. This usually involves pressing a button on the bridge and waiting for the app to detect the new light.
- Step 6: Confirm the connection – Once the LED Strip is detected, the app will prompt you to confirm the connection. Ensure that the LED Strip is functioning properly and responding to commands from the app.
- Step 7: Name and organize the LED Strip – Give your LED Strip a unique name or assign it to a specific room or zone in the app. This will make it easier to control and manage multiple lights in different areas of your home.
By following these steps, you can easily connect your Philips Hue LED Strip to the Philips Hue Bridge and start enjoying the full range of features and customization options available with the app. Create stunning lighting scenes, schedule automatic lighting changes, and personalize your LED Strip to suit your preferences and moods.
Open the Philips Hue App on Your Phone
The Philips Hue app is your gateway to controlling and customizing your Philips Hue LED Strip. Whether you want to adjust the brightness, change colors, set schedules, or create dynamic lighting effects, the app provides a user-friendly interface for managing your LED Strip. Here’s how to open the app and get started:
- Step 1: Unlock your phone – If your phone is locked, swipe up or press the home button to access the home screen.
- Step 2: Locate the Philips Hue app – Look for the Philips Hue app icon on your home screen or in your app drawer. It is usually a white icon with a yellow lightbulb in the center.
- Step 3: Tap on the app icon – Once you have located the app, simply tap on the icon to open it. The app will launch, and you will be greeted with the main screen.
- Step 4: Log in or sign up (if required) – Depending on your previous usage of the app, you may be prompted to log in with your Philips Hue account or create a new account. Follow the on-screen instructions to complete the login or sign-up process.
- Step 5: Allow necessary permissions – The app may request certain permissions to access features such as location services or notifications. Grant the necessary permissions for optimal functionality.
- Step 6: Connect to the Philips Hue Bridge – Ensure that your phone is connected to the same Wi-Fi network as the Philips Hue Bridge. The app will automatically search for and connect to the bridge, allowing you to control your LED Strip.
- Step 7: Explore the app – Once connected, you can navigate through the different sections of the app to customize your LED Strip to your liking. Adjust brightness, change colors, create scenes, set schedules, and explore additional features and settings.
By following these simple steps, you can easily open the Philips Hue app on your phone and begin managing your Philips Hue LED Strip. Enjoy the convenience, versatility, and endless possibilities that the app offers in creating the perfect lighting atmosphere for your space.
Tap on the “+” Button to Add a New Light
Adding a new light, such as the Philips Hue LED Strip, to the Philips Hue app is a simple process. The app allows you to control and manage multiple lights in your home or workspace, providing you with a seamless and personalized lighting experience. Here’s how to add a new light using the app:
- Step 1: Open the Philips Hue app – Launch the app on your phone, ensuring that you are connected to the same Wi-Fi network as the Philips Hue Bridge.
- Step 2: Navigate to the Lights section – On the app’s main screen, look for a section or tab labeled “Lights” or “Light Control.” Tap on it to access the lights management screen.
- Step 3: Look for the “+” button – In the lights management screen, search for a button that has a plus sign (+) symbol. This button is typically located in the corner or at the bottom of the screen.
- Step 4: Tap on the “+” button – Once you have located the “+” button, simply tap on it. This action will initiate the process of adding a new light to the app.
- Step 5: Choose the light type – The app will present you with a list of different light types or categories. Look for the option that corresponds to the Philips Hue LED Strip and tap on it.
- Step 6: Follow the on-screen instructions – The app will guide you through the process of adding the LED Strip to the app. This may involve scanning a QR code on the packaging or on the LED Strip itself, or manually entering the serial number or Hue Bridge ID.
- Step 7: Confirm the connection – Once the LED Strip is successfully added, the app will display a confirmation message. You can now control and manage the LED Strip through the app’s interface.
By following these steps, you can easily add a new light, such as the Philips Hue LED Strip, to the Philips Hue app. Enjoy the convenience and flexibility of managing and customizing your lighting right from your phone.
Select the Option to Add a Philips Hue LED Strip
Once you have opened the Philips Hue app on your phone and tapped on the “+” button, it is time to select the option to add a Philips Hue LED Strip. This will ensure that the app recognizes the type of light you are trying to connect and provides the appropriate settings and controls. Here’s how to select the option to add a Philips Hue LED Strip:
- Step 1: Open the Philips Hue app – Launch the app on your phone and ensure that you are connected to the same Wi-Fi network as the Philips Hue Bridge.
- Step 2: Navigate to the Lights section – Look for the section or tab labeled “Lights” or “Light Control” on the app’s main screen, and tap on it to access the lights management screen.
- Step 3: Tap on the “+” button – In the lights management screen, locate the button with a plus sign (+) symbol. This button is typically located in the corner or at the bottom of the screen. Tap on it to initiate the process of adding a new light.
- Step 4: Select the option to add a Philips Hue LED Strip – The app will present you with a list of different light types or categories. Look for the option specifically labeled “Philips Hue LED Strip” or something similar. Tap on this option to proceed.
- Step 5: Follow the on-screen instructions – The app will guide you through the process of adding the Philips Hue LED Strip to the app. This may involve scanning a QR code on the packaging or on the LED Strip itself, or manually entering the serial number or Hue Bridge ID.
- Step 6: Confirm the connection – Once the LED Strip is successfully added, the app will display a confirmation message. You can now control and manage the LED Strip through the app’s interface.
By following these steps, you can easily select the option to add a Philips Hue LED Strip to the Philips Hue app. This ensures that the app recognizes the specific type of light you are connecting, allowing you to access the appropriate settings and controls for optimal customization and management.
Follow the App’s Instructions to Connect the LED Strip to the App
Once you have selected the option to add a Philips Hue LED Strip in the Philips Hue app, the next step is to follow the app’s instructions to connect the LED Strip to the app. The app will provide step-by-step guidance to ensure a seamless and successful connection. Here’s how to proceed:
- Step 1: Open the Philips Hue app – Launch the app on your phone and make sure you are connected to the same Wi-Fi network as the Philips Hue Bridge.
- Step 2: Access the LED Strip settings – Navigate to the section in the app where you can manage and control your lights. This is typically labeled “Lights,” “Light Control,” or a similar term.
- Step 3: Follow the app’s instructions – The app will provide clear on-screen instructions to guide you through the process of connecting the LED Strip. This may involve actions such as pressing and holding a specific button on the Hue Bridge, scanning a QR code, or initiating a discovery process.
- Step 4: Wait for the app to detect the LED Strip – The app will search for nearby lights and detect the LED Strip. This may take a few moments, so be patient and ensure that the LED Strip is powered on and within range of the Hue Bridge.
- Step 5: Confirm the connection – Once the LED Strip is detected, the app will display a confirmation message. Double-check that the LED Strip is functioning correctly and responding to commands from the app.
- Step 6: Name and organize the LED Strip – To easily identify and manage the LED Strip, consider giving it a unique name or assigning it to a specific room or zone within the app. This way, you can control multiple lights and easily distinguish the LED Strip from other light sources.
By following the app’s instructions, you can easily connect the Philips Hue LED Strip to the app. The process may vary slightly depending on the app version and any updates, but the on-screen guidance will lead you through the necessary steps. Enjoy the ability to control and customize your LED Strip directly from your phone using the Philips Hue app.
Adjust the LED Strip Settings and Preferences in the App
Once you have successfully connected the Philips Hue LED Strip to the Philips Hue app, you can start adjusting its settings and preferences to create the perfect lighting ambiance. The app offers a range of customization options to suit your preferences and needs. Here’s how to adjust the LED Strip settings in the app:
- Step 1: Open the Philips Hue app – Launch the app on your phone and ensure that you are connected to the same Wi-Fi network as the Philips Hue Bridge.
- Step 2: Access the LED Strip settings – Navigate to the section in the app where you can manage and control your lights. Look for the specific LED Strip you want to adjust, either by its unique name or the room or zone it is assigned to.
- Step 3: Tap on the LED Strip – Tap on the LED Strip to access its individual settings and preferences. This will open up a screen with various options for customization.
- Step 4: Adjust brightness – Use the brightness slider or buttons to increase or decrease the brightness level of the LED Strip. Slide the bar to the right for a brighter light or to the left for a dimmer ambiance.
- Step 5: Select colors – If your LED Strip supports color-changing functionality, you can select different colors by tapping on the color wheel or using predefined color presets. Explore the full spectrum of colors and find the ones that create your desired atmosphere.
- Step 6: Create scenes and routines – Take advantage of the app’s scene and routine features to set specific lighting combinations and automate lighting changes throughout the day. Customize scenes for different activities or moods, and schedule routines to activate at specific times.
- Step 7: Explore additional settings – Dive into the app’s advanced settings to fine-tune the LED Strip’s behavior. This may include options such as color temperature adjustments, dynamic lighting effects, and integration with other smart home devices.
By adjusting the LED Strip settings and preferences in the Philips Hue app, you can personalize your lighting experience to suit your individual preferences and needs. Experiment with different colors, brightness levels, scenes, and routines until you achieve the perfect ambiance for any occasion or mood.
Explore Additional Features and Settings for Your LED Strip
The Philips Hue LED Strip offers more than just basic lighting control. The Philips Hue app provides a range of additional features and settings that allow you to fully unleash the potential of your LED Strip and enhance your lighting experience. Here’s a look at some of the exciting options to explore:
- Light scenes and effects: Create dynamic lighting scenes using the app’s pre-set options or customize your own. Play with color combinations, brightness levels, and transitions to set the perfect ambiance.
- Schedules and routines: Set schedules to automatically turn your LED Strip on or off at specific times. Create routines that gradually dim your lights in the evening or wake you up gently in the morning.
- Voice control: Connect your Philips Hue system to a compatible voice assistant, such as Amazon Alexa, Google Assistant, or Apple Siri, to control your LED Strip with voice commands. Adjust brightness, change colors, or turn your lights on and off using simple voice prompts.
- Geofencing: Take advantage of geofencing capabilities to automate your LED Strip based on your location. Set it to turn on when you’re approaching home or turn off when you leave, ensuring you always come back to a well-lit space or save energy when not needed.
- Integration with other smart home devices: Connect your Philips Hue LED Strip with other smart home devices, such as motion sensors or smart thermostats, to create a truly integrated and automated home environment. Trigger your lights to turn on when someone enters a room or sync them with your thermostat for enhanced comfort and energy efficiency.
- Explore third-party apps and services: Philips Hue has a vibrant ecosystem of third-party apps and services that offer additional functionalities and customization options for your LED Strip. Discover and try out apps that allow you to sync your lights with music, simulate a sunrise or sunset, or create immersive lighting experiences for movies and gaming.
By exploring these additional features and settings for your Philips Hue LED Strip, you can take your lighting control to the next level. Let your imagination run wild and transform your space with endless possibilities, creating a unique and personalized lighting experience.
Troubleshooting Common Issues with the Connection
While connecting the Philips Hue LED Strip to the Philips Hue app is generally a smooth process, you may encounter some common issues that can hinder the connection. Here are a few troubleshooting steps to help you address these issues and ensure a successful connection:
- Check the Wi-Fi connection: Make sure your phone and the Hue Bridge are connected to the same Wi-Fi network. If you’re experiencing connection problems, try rebooting your router or moving closer to the Wi-Fi signal source.
- Confirm power supply: Ensure that the LED Strip is properly connected to a power source and receiving power. Double-check all connections, including the power adapter and any extension cables, to ensure they are secure.
- Reset the LED Strip: If the connection is not being established, try resetting the LED Strip. Follow the instructions provided by Philips Hue to perform a factory reset, which will restore the LED Strip to its default settings.
- Restart the app and the Hue Bridge: Close the Philips Hue app and reopen it. In some cases, restarting the app can resolve minor connection issues. Additionally, try power cycling the Hue Bridge by disconnecting it from the power source for a few seconds and then plugging it back in.
- Check firmware updates: Ensure that you have the latest firmware updates for both the Philips Hue app and the Hue Bridge. Outdated firmware can cause compatibility issues and hinder the connection. Check for updates in the app’s settings or on the Philips Hue website.
- Re-link the Hue Bridge: If you have replaced your phone or made significant changes to your network setup, you may need to re-link the Hue Bridge to the app. Follow the instructions provided by Philips Hue to re-establish the connection between the bridge and the app.
- Contact Philips Hue support: If you have tried the above troubleshooting steps and are still experiencing issues with the connection, reach out to Philips Hue support. They can provide further assistance and guide you through more advanced troubleshooting methods.
By following these troubleshooting steps, you can address common connection issues and ensure a smooth and reliable connection between your Philips Hue LED Strip and the Philips Hue app. Enjoy seamless control and customization of your lighting, enhancing your space with the perfect ambiance.