
What you Will Need
To successfully add your Nest Thermostat to Google Home, you’ll need the following:
- A Nest Thermostat: Ensure that you have a compatible Nest Thermostat properly installed in your home. If you haven’t installed one yet, refer to the Nest Thermostat installation guide.
- A Google Home device: You’ll need a Google Home or Google Home Mini device set up on your home network. If you don’t have one yet, you can purchase it from the Google Store or other authorized retailers.
- A compatible smartphone or tablet: Use a device running Android 6.0 or higher, or iOS 12.0 or later, with the Google Home app installed. You’ll use this app to set up and control your Nest Thermostat through Google Assistant.
- A stable internet connection: Make sure that your Wi-Fi network is up and running, as both the Nest Thermostat and Google Home device rely on a stable internet connection to communicate with each other.
By having these items ready, you’ll be fully prepared to proceed with the setup process and seamlessly integrate your Nest Thermostat with the Google Home ecosystem.
Step 1: Set up your Nest Thermostat
Before adding your Nest Thermostat to Google Home, you’ll need to ensure that it’s properly set up and connected to your home’s HVAC system. If you haven’t done so already, follow these steps to set up your Nest Thermostat:
- Power off: Start by shutting off the power to your HVAC system at the circuit breaker. This will ensure your safety during the installation process.
- Remove your old thermostat: If you have an existing thermostat, carefully remove it from the wall. Take note of the wires connected to it, as you’ll need this information later on.
- Mount the Nest Thermostat: Using the included mounting plate and screws, attach the Nest Thermostat to the wall in the desired location. Make sure it’s level and securely fastened.
- Connect the wires: Gently insert the wires from your HVAC system into the corresponding terminals on the Nest Thermostat. Use the wiring diagram provided in the installation guide for reference. If you’re unsure about the wiring, consult a professional.
- Power on: Once the wires are connected, restore the power to your HVAC system at the circuit breaker.
- Follow on-screen instructions: The Nest Thermostat will guide you through the setup process on its display. Follow the on-screen instructions to connect the thermostat to your Wi-Fi network and complete the initial configuration.
After successfully setting up your Nest Thermostat, it should be functioning and controlling your HVAC system properly. You can now proceed to the next step to link it with your Google Home device.
Step 2: Set up your Google Home device
To proceed with adding your Nest Thermostat to Google Home, you’ll first need to ensure that your Google Home device is properly set up. Follow these steps to set up your Google Home:
- Find a suitable location: Choose a location for your Google Home device that is within range of your Wi-Fi network and easily accessible for voice commands.
- Connect the power cable: Plug the power cable into your Google Home device and connect it to a power outlet. Ensure that the device is receiving power.
- Download the Google Home app: On your compatible smartphone or tablet, download and install the Google Home app from the App Store (iOS) or Google Play Store (Android).
- Open the Google Home app: Launch the Google Home app on your device and sign in using your Google account. Make sure you’re connected to the same Wi-Fi network that you want to connect your Google Home device to.
- Add a device: Tap on the “+” icon in the top left corner of the app to add a device. Select “Set up device” and then choose “New devices” to start the setup process.
- Follow the on-screen instructions: The Google Home app will guide you through the setup process, including connecting your device to your Wi-Fi network and granting necessary permissions. Make sure to follow the prompts and provide the requested information.
- Choose a room: Assign your Google Home device to a specific room in your home for easier organization and control. This is optional but can be helpful when managing multiple devices.
Once you have completed the setup process for your Google Home device, you will be ready to enable the Nest Thermostat skill on Google Assistant and link your Nest account to Google Home in the next steps.
Step 3: Enable the Nest Thermostat skill on Google Assistant
Before you can control your Nest Thermostat with Google Home, you need to enable the Nest Thermostat skill on Google Assistant. Follow these steps to enable the skill:
- Open the Google Home app: Launch the Google Home app on your smartphone or tablet.
- Tap your profile icon: Located in the top right corner of the app, tap on your profile icon to access your account settings.
- Select Assistant settings: From the dropdown menu, choose “Assistant settings” to access the Google Assistant settings.
- Navigate to the “Home Control” section: Scroll down and tap on “Home control” under the “Assistant” section.
- Add new devices: Tap on the “+” icon at the bottom right corner of the screen to add new devices.
- Find and enable the Nest Thermostat skill: In the list of available devices and services, locate the Nest Thermostat skill and tap on it to enable it.
- Sign in to your Nest account: If prompted, sign in to your Nest account using your email address and password. Grant any necessary permissions to allow Google Assistant to access and control your Nest Thermostat.
Once you have successfully enabled the Nest Thermostat skill on Google Assistant, you will be ready to link your Nest account to Google Home in the next step.
Step 4: Link your Nest account to Google Home
After enabling the Nest Thermostat skill on Google Assistant, the next step is to link your Nest account to Google Home. Follow these steps to complete the account linking:
- Open the Google Home app: Launch the Google Home app on your smartphone or tablet.
- Tap your profile icon: Located in the top right corner of the app, tap on your profile icon to access your account settings.
- Select Assistant settings: From the dropdown menu, choose “Assistant settings” to access the Google Assistant settings.
- Navigate to the “Home Control” section: Scroll down and tap on “Home control” under the “Assistant” section.
- Add new devices: Tap on the “+” icon at the bottom right corner of the screen to add new devices.
- Link your Nest account: In the list of available devices and services, locate and tap on “Nest”. You will be redirected to the Nest login page.
- Sign in to your Nest account: Enter your Nest account email address and password to sign in. Authorize the connection to Google Home by following the prompts.
- Grant permissions: After successfully signing in, you may be prompted to grant certain permissions to allow Google Home to access and control your Nest Thermostat. Review and approve the requested permissions.
Once you have linked your Nest account to Google Home, you are now ready to add your Nest Thermostat to Google Home in the next step.
Step 5: Add your Nest Thermostat to Google Home
Now that you have linked your Nest account to Google Home, it’s time to add your Nest Thermostat to the Google Home app. Follow these steps to successfully add your thermostat:
- Open the Google Home app: Launch the Google Home app on your smartphone or tablet.
- Tap the “+” icon: Located at the top left corner of the app, tap on the “+” icon to add a device.
- Select “Set up device”: Choose the “Set up device” option to proceed with adding your Nest Thermostat.
- Choose “Have something already set up?”: From the list of available setup options, select “Have something already set up?” to indicate that you have an existing device.
- Find and select “Nest”: Scroll through the list of compatible device types and select “Nest” to proceed with the setup process for your Nest Thermostat.
- Sign in to your Nest account: If prompted, sign in to your Nest account using your email address and password.
- Choose the desired thermostat: If you have multiple Nest Thermostats associated with your account, choose the specific thermostat you want to add to Google Home.
- Follow the on-screen prompts: The Google Home app will guide you through the remaining setup process. Follow the on-screen instructions to complete the setup and add your Nest Thermostat to Google Home.
Once you have successfully added your Nest Thermostat to Google Home, you can start controlling it using voice commands through your Google Home device or through the Google Home app on your smartphone or tablet.
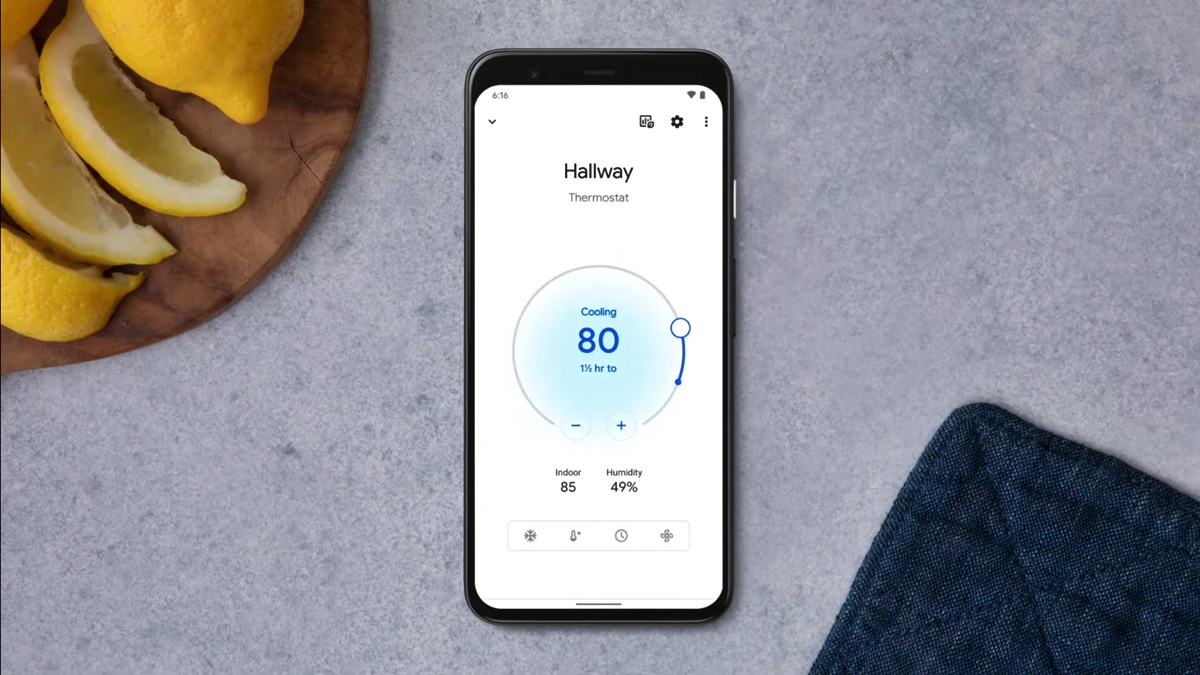
Step 6: Control your Nest Thermostat with Google Home
With your Nest Thermostat successfully added to Google Home, you can now enjoy the convenience of controlling your thermostat using voice commands or through the Google Home app. Here’s how to control your Nest Thermostat with Google Home:
- Voice commands: Simply say “Hey Google” followed by your command. For example, you can say “Hey Google, set the temperature to 72 degrees” or “Hey Google, increase the temperature by 2 degrees.”
- Google Home app: Open the Google Home app on your smartphone or tablet. Tap on the corresponding thermostat icon to access the controls. From there, you can adjust the temperature, set schedules, and access other settings.
- Create routines: Use the Google Home app to create custom routines that include thermostat commands. For example, you can set up a routine to adjust the temperature and turn on the fan when you say “Good morning” to Google Home.
- Access from other devices: You can also control your Nest Thermostat through Google Assistant on other devices like smart speakers, smart displays, or even your Android or iOS device with the Google Assistant app.
With Google Home, you have the flexibility and convenience to control your Nest Thermostat with ease. Enjoy the comfort and energy savings that come with the seamless integration of these smart devices in your home.
Troubleshooting Tips
If you encounter any issues during the setup process or while controlling your Nest Thermostat with Google Home, try these troubleshooting tips to resolve common problems:
- Check your Wi-Fi connection: Ensure that your Google Home device, Nest Thermostat, and smartphone or tablet are connected to the same Wi-Fi network. A stable internet connection is necessary for proper communication between the devices.
- Restart devices: Sometimes, a simple restart can solve connectivity issues. Try power cycling your Google Home device, Nest Thermostat, and router by unplugging them, waiting for a few seconds, and plugging them back in.
- Ensure firmware is up to date: Check for any available firmware updates for your Nest Thermostat and Google Home device. Keeping the firmware up to date can resolve compatibility issues and improve performance.
- Verify account linking: Double-check that you have correctly linked your Nest account to Google Home. Ensure that you are using the same credentials and that the account linking process was completed successfully.
- Confirm device compatibility: Ensure that your Nest Thermostat model is compatible with Google Home. Refer to the official compatibility documentation or contact customer support for further assistance.
- Reset device and start over: If all else fails, you can try resetting your Nest Thermostat and Google Home device and starting the setup process from scratch. Refer to the device manuals or online documentation for instructions on how to reset each device.
- Contact customer support: If you’re still experiencing issues, reach out to the customer support teams of both Google Home and Nest. They can provide personalized assistance and guide you through any specific problems you may be encountering.
By following these troubleshooting tips, you can overcome common challenges and ensure a smooth experience while using Google Home to control your Nest Thermostat.