
Overview of iTero Scanners
iTero scanners have revolutionized the field of dentistry by providing accurate and efficient digital impressions of patients’ teeth. These state-of-the-art scanning devices eliminate the need for messy traditional impressions, offering a more comfortable experience for both the dentist and the patient. If you are a dental professional considering integrating a lab into your iTero scanner workflow, it is important to understand the benefits and processes involved.
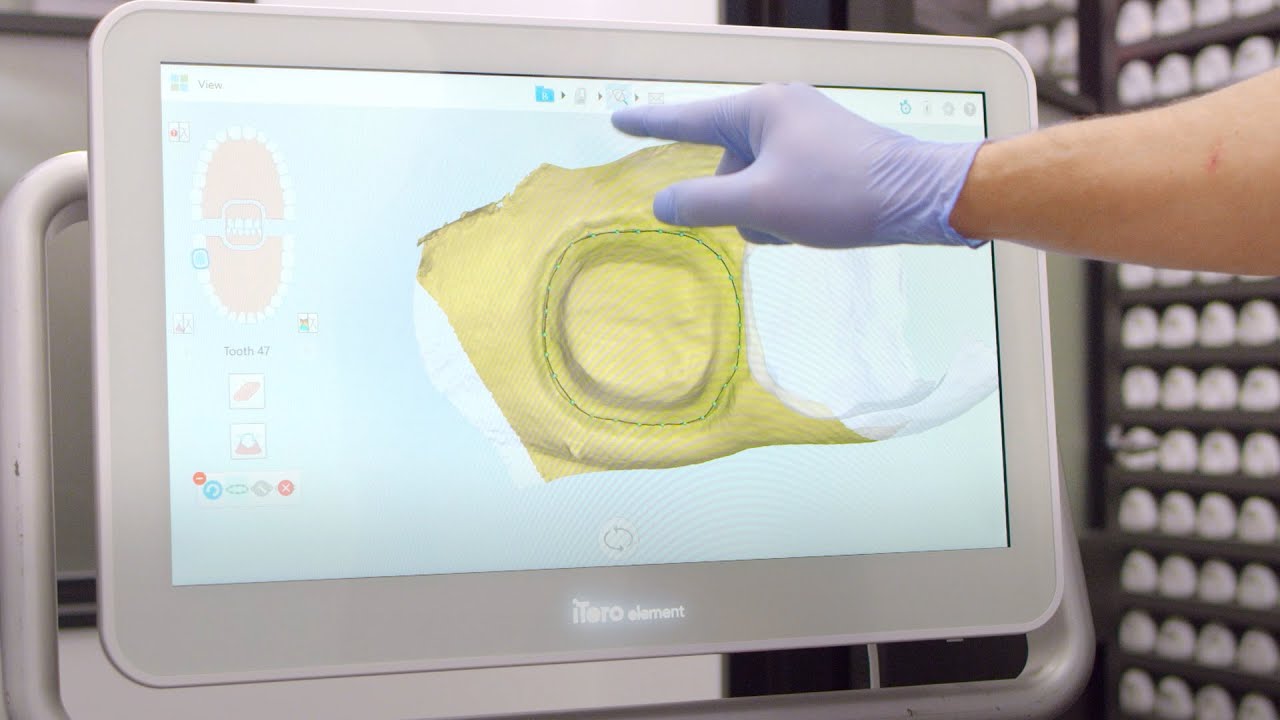
iTero scanners utilize advanced technology to capture detailed 3D images of the patient’s teeth and soft tissues. The scanner employs an optical wand that is gently moved over the patient’s mouth, capturing thousands of images per second. These images are then seamlessly stitched together to generate a digital impression, providing an accurate representation of the patient’s oral anatomy.
By adding a lab to your iTero scanner, you gain access to a host of additional services that can enhance your practice. Whether you need assistance with orthodontic aligners, dental prosthetics, or other customized appliances, working with a lab can streamline your workflow and improve the precision of your treatment plans.
Furthermore, integrating a lab into your iTero scanner workflow allows for efficient communication and collaboration between you and the lab technicians. The digital impression file can be securely shared with the lab, minimizing the chances of errors and reducing turnaround time for the fabrication of dental restorations.
To get started with adding a lab to your iTero scanner, it is important to find a compatible lab that works with iTero scanners. In the next section, we will explore the process of finding a lab and the factors to consider when making your selection.
Benefits of Adding a Lab to an iTero Scanner
Integrating a lab into your iTero scanner workflow offers a range of benefits that can significantly enhance the quality of your dental practice. Here are some key advantages to consider:
- Streamlined Workflow: By adding a lab to your iTero scanner, you can streamline your workflow and improve efficiency. Digital impressions can be securely shared with the lab, eliminating the need for physical transportation of traditional impressions. This reduces the chances of errors, saves time, and allows for faster turnaround times on dental restorations.
- Enhanced Precision: iTero scanners provide highly accurate 3D images of the patient’s oral structures. By working with a lab, you can leverage their expertise to ensure precise fabrication of dental restorations. The lab technicians can use the digital impressions to create custom-made appliances that perfectly fit the patient’s unique dental anatomy.
- Expanded Treatment Options: Adding a lab to your iTero scanner opens up a world of new treatment options for your patients. Whether you need orthodontic aligners, dental prosthetics, or other specialized appliances, the lab can provide the necessary expertise to fabricate these customized solutions. This enables you to offer a comprehensive range of services and cater to the individual needs of your patients.
- Improved Communication: Collaborating with a lab fosters seamless communication between you and the technicians. The digital impression file can be easily shared with the lab, allowing for clearer instructions and feedback. This ensures that the lab technicians have all the information they need to create precise and high-quality restorations.
- Access to Lab Expertise: Labs that work with iTero scanners often have a wealth of experience and specialized knowledge. When you add a lab to your iTero scanner, you gain access to their expertise and guidance. This can be invaluable in cases where you require advice on treatment planning or need help troubleshooting complex cases.
Adding a lab to your iTero scanner can optimize your dental practice by improving efficiency, precision, and treatment options. In the next section, we will explore the process of finding a compatible lab that seamlessly integrates with your iTero scanner.
Finding a Compatible Lab
When considering adding a lab to your iTero scanner workflow, it is crucial to find a lab that is compatible with the technology and software of your scanner. Here are some key steps to help you find a compatible lab:
- Research and Referrals: Start by conducting thorough research and seeking recommendations from fellow dental professionals. Look for labs that specialize in digital dentistry and have experience working with iTero scanners. Online forums and professional networks can be excellent sources for gathering information and feedback about different labs.
- IoTero Compatible Labs: Consult the iTero website and explore their list of IoTero compatible labs. This list provides information about labs that are known to work seamlessly with iTero scanners. It is always preferable to choose a lab from this list, as they have been tested and approved for compatibility.
- Visit the Lab: If possible, arrange a visit to the lab you are considering. This will give you an opportunity to observe their workflow, quality control measures, and the technology they use. It is important to assess their capabilities and ensure that they have the necessary equipment and expertise to deliver high-quality dental restorations.
- Discuss Integration and Communication: Communication is key when working with a lab. Discuss how the lab integrates with the iTero scanner software and how the digital impression files will be securely exchanged. Ensure that the lab has a system in place for providing feedback, asking questions, and addressing any concerns you may have during the fabrication process.
- Check References and Reviews: Reach out to other dental professionals who have worked with the lab you are considering. Ask for references and read online reviews to get a sense of their reputation and customer satisfaction. This will give you confidence in their ability to deliver accurate and high-quality restorations.
- Consider Location and Turnaround Time: Take into account the lab’s location and the expected turnaround time for cases. Choosing a lab that is geographically closer to your practice may result in faster delivery of restorations. However, ensure that the lab’s proximity does not compromise the quality of their work.
Finding a compatible lab is a crucial step in integrating lab services into your iTero scanner workflow. Taking the time to research, visit, and evaluate labs will ensure that you find a reliable and compatible partner. In the next section, we will delve into the process of communicating with the lab and sharing digital impressions.
Communicating with the Lab
Clear and effective communication with the lab is essential for a successful integration of lab services into your iTero scanner workflow. Here are key factors to consider when communicating with the lab:
- Secure Digital Impression Sharing: Establish a secure method for sharing the digital impression files with the lab. Most labs have a preferred file transfer system, such as a secure online portal or encrypted email. Ensure that both you and the lab understand the process and have the necessary access and login credentials.
- Provide Detailed Instructions: When sending the digital impression, it is crucial to provide clear and detailed instructions to the lab. Include information such as the patient’s name, the desired restoration type, material preferences, and any specific instructions regarding shading, occlusion, or margin preferences. The more information you provide, the better the lab can meet your expectations.
- Image Annotation and Case Notes: Utilize the iTero scanner software to annotate the digital impression images and add case notes. This can help the lab technicians understand specific areas of concern, additional instructions, or any unique considerations for the case. Clear and concise case notes ensure that both you and the lab are on the same page with regards to the treatment plan.
- Response and Feedback: Maintain an open line of communication with the lab throughout the fabrication process. Promptly respond to their queries or requests for clarifications. This helps avoid delays and ensures that any issues or concerns are addressed in a timely manner. Providing feedback to the lab regarding the quality and fit of the restorations is crucial for continuous improvement.
- Follow-Up and Case Tracking: Implement a system to track and manage the progress of cases with the lab. The iTero scanner software often includes features for case management, allowing you to easily track which cases have been sent to the lab, their status, and expected delivery dates. Regularly follow up with the lab to ensure that cases are progressing as planned.
- Professional Etiquette: Maintain a professional and respectful relationship with the lab. Treat them as valued partners in your dental practice. Respond to their inquiries promptly and be courteous in your interactions. Building a strong professional relationship with the lab can foster trust and collaboration, ultimately benefiting your patients.
Effective communication with the lab is vital for seamless integration of their services into your iTero scanner workflow. Clear instructions, prompt responses, and professional etiquette contribute to a productive partnership. In the next section, we will explore how lab services are integrated into the iTero scanner software.
Integrating Lab Services into the iTero Scanner Software
The integration of lab services into the iTero scanner software is crucial for a seamless workflow and efficient collaboration between your dental practice and the lab. Here are the key steps involved in integrating lab services:
- Software Compatibility: Ensure that the lab you have chosen is compatible with the iTero scanner software. The lab should have the necessary interfaces and protocols to receive and process the digital impression files generated by the scanner. This compatibility allows for smooth transfer of data and reduces the chances of any technical issues.
- Lab Connection Setup: Work with the lab and follow the instructions provided to set up the connection between your iTero scanner software and the lab’s system. This typically involves configuring the software settings and establishing a secure connection for data transfer. The lab should provide guidance and support throughout this process.
- Lab Configurations: Configure the lab settings within the iTero scanner software. This includes inputting the lab’s contact information, preferred communication methods, and any specific requirements they have for case submissions. Ensure that these configurations are accurate and up to date to facilitate efficient communication between your practice and the lab.
- Case Submission: Once the connection and configurations are set up, you can submit cases to the lab directly from the iTero scanner software. The software typically provides a simple and intuitive process for selecting the desired lab, choosing the type of case, and attaching the digital impression file. Double-check all the information before submitting to avoid any errors.
- Case Tracking: Utilize the case tracking features within your iTero scanner software to keep track of the progress of each case sent to the lab. This allows you to monitor the status of the case, including when it was received by the lab, when it is in progress, and when it is completed. Having this information readily available helps you manage patient expectations and plan treatment accordingly.
- Lab Communication: Leverage the lab communication features within the iTero scanner software to communicate with the lab regarding specific cases. This may include asking questions, providing additional information or instructions, or discussing any challenges or concerns. Timely and clear communication ensures that both your practice and the lab are aligned throughout the fabrication process.
Integrating lab services into the iTero scanner software streamlines the workflow and enables seamless communication with the lab. Following the necessary setup and configuration steps, you can efficiently submit cases and track their progress. In the next section, we will explore the process of sending scans to the lab using your iTero scanner.
Sending Scans to the Lab
Once you have integrated lab services into your iTero scanner software, sending scans to the lab becomes a straightforward process. Here’s how you can efficiently send scans to the lab using your iTero scanner:
- Capture and Review the Scan: Begin by capturing the digital impression of your patient’s teeth using the iTero scanner. Ensure that you follow the scanning protocol and capture all necessary areas for the specific case. Once the scan is complete, review the images to ensure their quality and accuracy before proceeding.
- Select the Lab: Access the lab selection menu within your iTero scanner software. Choose the lab to which you want to send the scan. If you have multiple labs configured, ensure that you select the appropriate lab for the specific case. If needed, you can also indicate any specific instructions or preferences for the lab regarding the case.
- Attach the Scan: Attach the digital impression file to the case within the iTero scanner software. This can usually be done by selecting the desired scan from your system’s scan database and linking it to the respective case. Confirm that the attachment is successful and that the correct scan is attached before proceeding to the next step.
- Submit the Case: Once the scan is attached, review all the case details and double-check for accuracy. This includes verifying the patient’s information, the scan attachments, and any additional instructions or notes. When everything is in order, submit the case to the lab through the iTero scanner software for processing.
- Confirm Delivery: After successfully submitting the case, ensure that you receive a confirmation or acknowledgement from the lab. This serves as a verification that the scan has been received and is being processed. If you do not receive confirmation within a reasonable timeframe, follow up with the lab to ensure the case is not delayed or overlooked.
- Track the Progress: Utilize the case tracking features within your iTero scanner software to monitor the progress of the case at the lab. This allows you to stay informed about the status and estimated completion date. Regularly check the tracking updates to plan your patient’s subsequent appointments or treatments accordingly.
By following these steps, you can efficiently and securely send scans to the lab using your iTero scanner software. This streamlined process ensures that the lab receives accurate and timely digital impressions, allowing them to begin the fabrication process promptly. In the next section, we will discuss the importance of tracking and managing cases with the lab.
Tracking and Managing Cases with the Lab
Tracking and managing cases with the lab is crucial to ensure effective communication, meet deadlines, and deliver high-quality dental restorations. Here are key steps to help you track and manage cases with the lab:
- Record and Organize: Keep a comprehensive record of all cases sent to the lab. This can be done within the iTero scanner software or in a separate system. Include relevant details such as patient information, case type, submission date, expected completion date, and any specific instructions. Organize this information in a way that is easy to access and review.
- Case Tracking Features: Utilize the case tracking features provided by your iTero scanner software to monitor the progress of each case. Regularly check the status updates, including when the case is received by the lab, when it is in progress, and when it is completed. This helps you stay informed and plan patient appointments accordingly.
- Effective Communication: Maintain open and proactive communication with the lab throughout the fabrication process. Promptly respond to their inquiries or requests for additional information. Address any concerns or issues promptly to avoid delays or complications. Building a strong communication channel with the lab fosters collaboration and ensures smooth workflow.
- Follow-Up: Follow up with the lab if a case is taking longer than expected or if there are any concerns regarding the quality or fit of the restorations. Regularly check the status of cases and make necessary adjustments to patient schedules if there are any delays in the fabrication process. Prompt follow-up ensures timely resolution of any issues.
- Document Quality and Fit: Evaluate the quality and fit of the restorations received from the lab. Document any feedback or observations regarding the restorations to provide constructive input to the lab. This helps maintain a standard of excellence and ensures continuous improvement in the outcomes of the cases sent to the lab.
- Learn from Experience: Reflect on previous cases and experiences with the lab to identify areas for improvement. Assess the efficiency of the workflow, the accuracy of the communication, and the overall satisfaction of the patients. Seek feedback from both your team and the lab to identify opportunities for enhancement and refine your process.
Tracking and managing cases with the lab is essential to maintain effective collaboration and ensure timely delivery of high-quality dental restorations. By staying organized, utilizing case tracking features, and fostering open communication, you can streamline the process and provide the best possible outcomes for your patients. In the next section, we will address common troubleshooting issues that may arise when working with a lab.
Troubleshooting Common Issues
Working with a lab to integrate their services into your iTero scanner workflow can sometimes come with its share of challenges. Here are some common issues that may arise and tips for troubleshooting them:
- Technical Compatibility: Ensure that your lab is compatible with your iTero scanner software. If you encounter technical issues, such as trouble connecting to the lab or transferring files, check that both your software and the lab’s systems are up to date. Contact the lab’s technical support for assistance, and they can guide you through any necessary troubleshooting steps.
- Communication Breakdown: Miscommunication or lack of clarity can lead to delays or errors in case submissions. Ensure that you provide detailed instructions and preferences when submitting cases to the lab. Maintain open and responsive communication channels, promptly addressing any questions or concerns from the lab. Clear and concise communication helps to avoid misunderstandings and ensures the smooth progress of each case.
- Quality Control: If you receive restorations from the lab that do not meet your expectations in terms of quality or fit, it is vital to address the issue promptly. Provide specific and constructive feedback to the lab, highlighting the areas that need improvement or adjustment. Collaborate with the lab to resolve the issue and reach a satisfactory outcome for both you and your patient.
- Delays in Turnaround Time: Sometimes, there may be unforeseen delays in the fabrication process that can disrupt your treatment plans. If you anticipate a delay or encounter an unexpected delay, communicate with the lab to understand the reason behind it and determine a revised timeline. Inform your patient about the delay and make necessary adjustments to their appointments to minimize inconvenience.
- Case Tracking and Management: Inaccurate or incomplete case tracking can lead to confusion and misunderstandings. Ensure that you diligently track each case as it progresses through the lab, updating the status and noting any pertinent details or changes. Regularly review the status of cases to ensure they are moving forward according to the expected timeline. If you notice any discrepancies or inconsistencies, communicate with the lab to seek clarification and resolve the issue promptly.
- Continuous Improvement: If you encounter persistent issues or challenges when working with the lab, it may be beneficial to reassess the partnership and explore alternatives. Keep an open mind and seek feedback from both your team and the lab to identify areas for improvement. Engage in open communication and work together to refine your processes and address any recurring issues. Continuous improvement is key to enhancing the integration of lab services into your iTero scanner workflow.
By troubleshooting common issues that may arise when working with a lab, you can overcome obstacles, maintain efficient workflows, and deliver high-quality restorations to your patients. Remember to maintain strong communication, provide constructive feedback, and continuously strive for improvement to ensure a successful partnership with the lab.