
Why Do You Need Additional Drives?
Adding additional drives to your media storage setup can bring numerous benefits and address a range of practical needs. Here are a few reasons why you might consider expanding your storage capacity:
- Increase Storage Space: As your media collection continues to grow, you may find that your existing storage capacity is no longer sufficient. Additional drives provide the extra space needed to accommodate your expanding collection of photos, videos, music, and other media files.
- Improve Performance: Having multiple drives allows you to distribute the workload and reduce the strain on a single drive. This can result in faster access times and smoother performance, particularly when accessing and transferring large files.
- Enhanced Data Security: By utilizing additional drives, you can implement various data redundancy strategies, such as RAID configurations. Redundancy ensures that even if one drive fails, your data remains safely stored on the other drives, minimizing the risk of data loss.
- Organizational Flexibility: With more drives at your disposal, you can organize your media files more effectively. For example, you can allocate separate drives for different types of media or create dedicated storage spaces for specific projects or purposes.
- Backup and Archiving: Additional drives can be used for regular backups of your media collection or as an archive for storing older files that you don’t frequently access but still want to keep. This helps in safeguarding your data and ensures that it is easily retrievable in case of accidental deletion or system failure.
Whether you are a professional photographer, a videographer, or simply a media enthusiast, the need for additional drives is often a practical necessity. By expanding your storage capacity, you can enjoy improved performance, enhanced data security, and the peace of mind that comes with knowing your media collection is well-organized and safely stored.
Choosing the Right Drives for Your Media Storage
Selecting the right drives for your media storage setup is crucial to ensure optimal performance and reliability. Here are some factors to consider when making your decision:
- Storage Capacity: Determine the amount of storage capacity you require based on the size of your media collection and future growth. It’s recommended to choose drives with larger capacities to accommodate your expanding needs.
- Drive Type: There are various drive types available, including traditional Hard Disk Drives (HDD) and Solid State Drives (SSD). HDDs offer larger capacities at a lower cost, while SSDs provide faster read and write speeds, making them ideal for applications requiring quick data access.
- Interface: Consider the interface supported by your media storage device and choose drives with compatible interfaces. Common options include SATA, USB, and Thunderbolt.
- Reliability: Look for drives with a proven track record of reliability and durability. Consider reputable brands known for their high-quality products and choose drives designed for 24/7 usage if you require continuous access to your media collection.
- Performance: If you require fast data transfer rates for tasks such as video editing or streaming, consider drives with higher rotational speeds (RPM) for HDDs or faster read and write speeds for SSDs.
- Price: Determine your budget and balance it with your storage requirements. Compare prices from different manufacturers and choose drives that offer the best value for your money.
It’s worth noting that you may choose to use a combination of drive types or implement a RAID configuration for improved performance or data redundancy. Consider consulting with an expert or researching online forums to get insights into the best drive options for your specific needs.
By carefully evaluating factors like storage capacity, drive type, interface, reliability, performance, and price, you can make an informed decision and choose drives that will effectively meet your media storage requirements.
Preparing the Drives
Before installing the additional drives into your media storage device, it’s important to properly prepare them to ensure seamless integration and compatibility. Here are the steps to follow:
- Inspect the Drives: Carefully examine the new drives for any physical damage or defects. Look for any signs of dents, scratches, or loose connections. If you notice any issues, contact the manufacturer for assistance.
- Check Compatibility: Ensure that the drives are compatible with your media storage device and the interface you will be using. Refer to your device’s documentation or consult the manufacturer’s website for information on supported drive models and specifications.
- Prepare Drive Enclosures: If you are using external drive enclosures, assemble them according to the manufacturer’s instructions. Make sure to securely mount the drives inside the enclosures.
- Obtain Necessary Cables and Adapters: Ensure that you have the required cables and adapters to connect the drives to your media storage device. Consider factors such as length, speed rating, and connector types (e.g., SATA, USB, Thunderbolt) when selecting the appropriate cables.
- Update Firmware (Optional): Check if there are any firmware updates available for the drives. Updating the firmware can help improve performance, compatibility, and stability. Visit the manufacturer’s website to download the latest firmware and follow their instructions for updating.
- Backup Existing Data: If you are adding drives to an existing media storage setup, it is essential to back up your current data. This step acts as a safety precaution to prevent any data loss during the drive preparation and installation process.
By thoroughly inspecting the drives, ensuring compatibility, preparing drive enclosures, obtaining necessary cables and adapters, updating firmware (if applicable), and backing up your data, you can ensure a smooth and hassle-free installation of the additional drives into your media storage device.
Installing the Drives
Once you have prepared the additional drives for installation, it’s time to physically add them to your media storage device. Follow these steps to properly install the drives:
- Power Down the Device: Before handling any hardware, make sure to power off your media storage device and disconnect it from the power source. This step is crucial to prevent any electrical mishaps or damage to the drives.
- Open the Enclosure: If you are using an external drive enclosure, carefully remove any screws or latches to open the enclosure. If you have an internal storage device, consult the manufacturer’s instructions to access the drive bays.
- Insert the Drives: Gently insert the drives into the appropriate drive bays or slots. Ensure that the connectors on the drives align with the corresponding ports in the enclosure or device. Apply gentle pressure until the drives are firmly and securely in place.
- Secure the Drives: If required, use screws, latches, or any other provided mechanisms to secure the drives in the enclosure or device. This step helps prevent any movement or dislodgement of the drives during operation.
- Close the Enclosure: If you are using an external enclosure, close it securely using the provided screws or latches. For internal storage devices, refer to the manufacturer’s instructions to close and secure the device.
- Connect Power and Data Cables: Connect the power cables and data cables to the respective ports on the drives and your media storage device. Ensure that the connections are secure and firmly seated.
- Double-Check Connections: Verify that all the cables are properly connected and in the correct orientation. This step is critical as loose or incorrect connections can lead to drive recognition issues or data transfer failures.
Once you have completed the installation process, you can proceed to the next steps of connecting the drives to your media storage device, configuring them for use, and preparing them for data storage.
Connecting the Drives to Your Media Storage Device
After installing the additional drives into your media storage device, the next step is to establish the necessary connections. Follow these steps to connect the drives to your media storage device:
- Power off Your Media Storage Device: Ensure that your media storage device is powered off and disconnected from the power source before proceeding with the connection process. This precautionary step helps avoid any electrical accidents or damage to the drives.
- Locate the Drive Ports: Identify the appropriate drive ports on your media storage device where the additional drives will be connected. Refer to the device’s documentation or consult the manufacturer’s website for specific instructions on locating these ports.
- Connect Data Cables: Attach one end of the data cable to the data port on the additional drive and the other end to the corresponding drive port on your media storage device. Make sure the connections are secure and aligned properly.
- Connect Power Cables: Connect the power cables to the power ports on the additional drives. Most drives require a separate power connection in addition to the data connection. Ensure that the power cables are properly aligned and securely connected.
- Repeat for Multiple Drives (if applicable): If you have installed multiple drives, repeat the above steps for each drive. Connect each drive to the appropriate ports on your media storage device, ensuring correct alignment and secure connections.
- Double-Check Connections: Once all the drives are connected, double-check all the connections to ensure they are properly seated and secure. Loose connections can lead to data transfer issues or drive recognition problems.
- Power On Your Media Storage Device: After confirming all the connections, you can now power on your media storage device. Depending on the device, you may need to follow specific startup procedures, such as accessing the system’s BIOS or performing a firmware update.
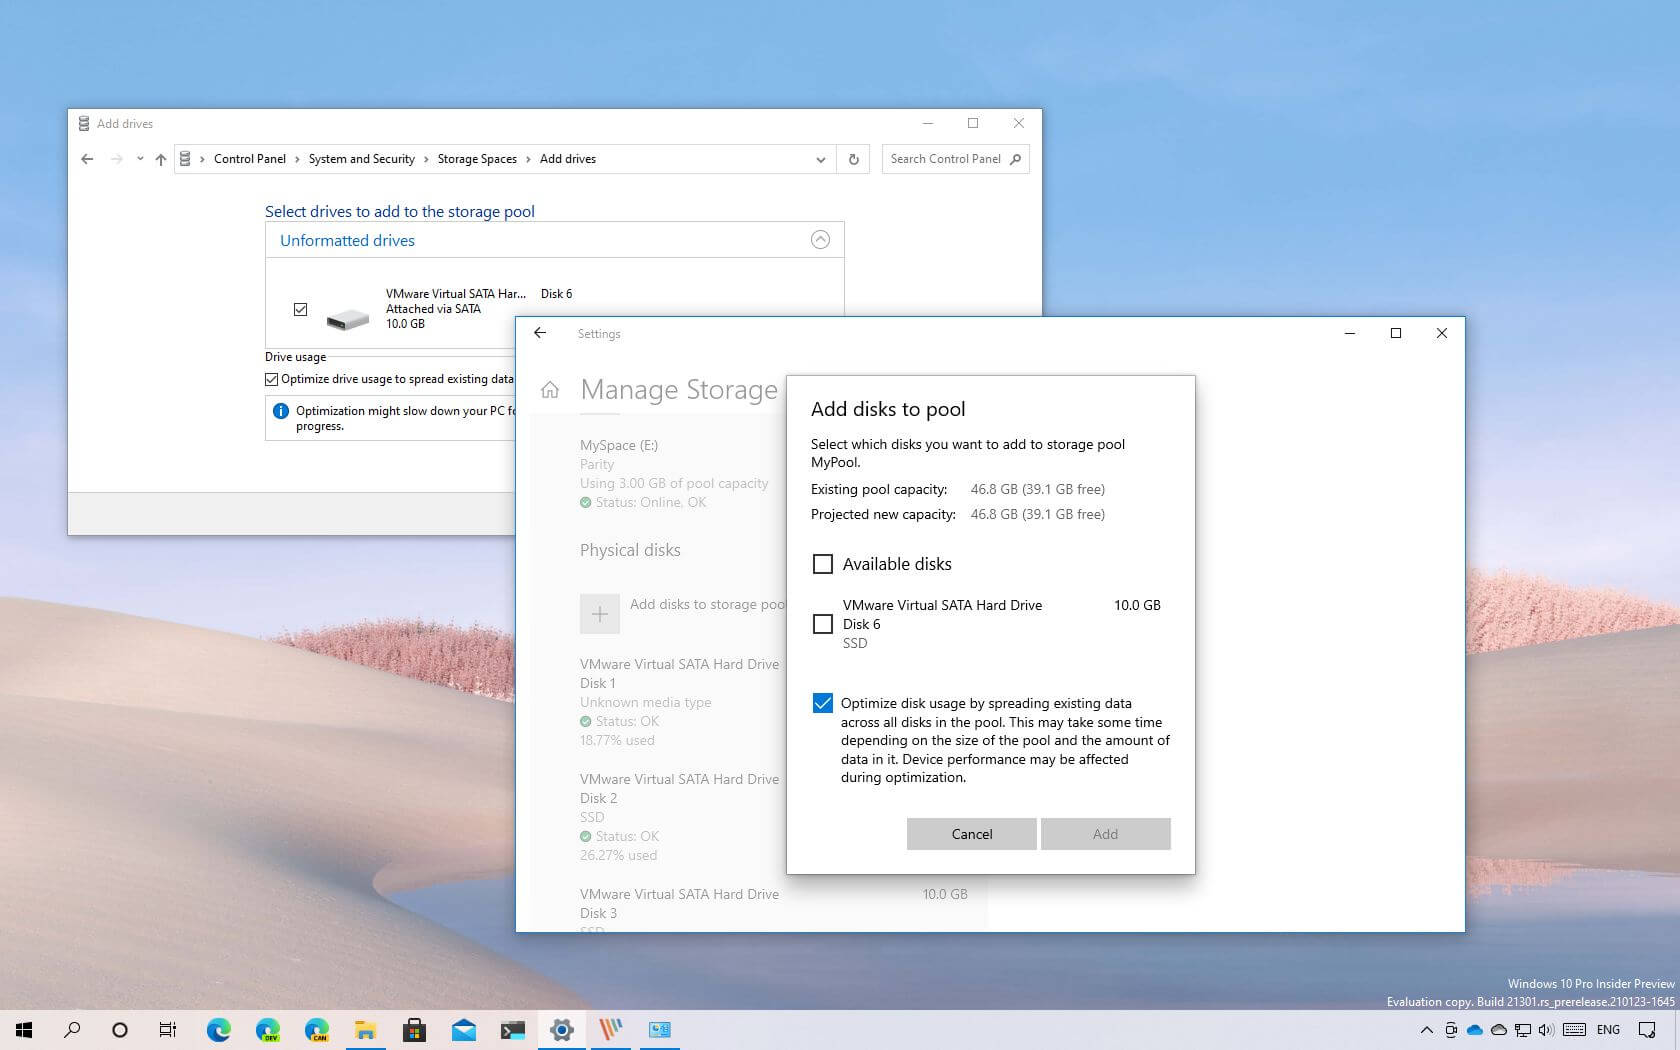
Once the drives are connected to your media storage device, they should be recognized by the system. You can proceed to the next steps of configuring the drives for use, formatting them, creating partitions, and setting up any required RAID arrays.
Configuring the Drives for Use
After connecting the additional drives to your media storage device, the next step is to configure them for use. This involves setting up the drives and preparing them to store and access data. Here are the steps to configure your drives:
- Access the Device’s Operating System: Start by accessing the operating system of your media storage device. This could be a computer’s operating system, a network-attached storage (NAS) interface, or the firmware of the media storage device itself.
- Identify the New Drives: Once you have accessed the operating system, navigate to the storage settings or management section to identify the newly installed drives. The system should recognize the drives and display them as available storage options.
- Format the Drives: If the drives are new or have never been used, you will need to format them. Formatting prepares the drives for data storage by creating a file system structure. Follow the available format options and choose the appropriate file system (e.g., NTFS, exFAT, HFS+, etc.) based on your needs.
- Create Partitions (Optional): Depending on your requirements, you may choose to create partitions on the drives. Partitions allow you to divide the available space into separate sections, each with its own drive letter or mount point. This is helpful for organizing data or allocating storage space for specific purposes.
- Set Drive Permissions and Security: Consider configuring drive permissions and security settings to control access to the drives and files stored on them. This can include setting user permissions, encrypting drives for added security, or implementing access control policies.
- Configure RAID Arrays (if applicable): If you are using multiple drives and wish to implement data redundancy or improved performance through RAID configurations, access the RAID settings and follow the instructions provided. Choose the desired RAID level (e.g., RAID 0, RAID 1, RAID 5, etc.) based on your needs.
- Test the Drives: Once the drives are configured, perform a test to ensure they are functioning correctly. Copy some files onto the drives, access them, and perform read/write tests. This will help identify any potential issues with the drives or the configuration settings.
- Troubleshoot Any Issues: If you encounter any problems during the configuration process or face difficulties accessing the drives, consult the device’s documentation or reach out to the manufacturer’s support for troubleshooting assistance.
By following these steps, you can successfully configure the newly installed drives for use in your media storage device. This will allow you to start storing and accessing your media files, ensuring a smooth and efficient data management experience.
Formatting the Drives
Once the additional drives have been installed and connected to your media storage device, the next step is to format them. Formatting prepares the drives for data storage by creating a file system and organizing the disk space. Here are the steps to format the drives:
- Access the Operating System: Start by accessing the operating system on your media storage device. This could be the operating system on your computer, the interface of a network-attached storage (NAS), or the firmware of the media storage device.
- Identify the Drives: Navigate to the storage settings or management section to identify the newly installed drives. They should be listed as available storage options.
- Select the Drive: Choose the drive or drives that you want to format. Ensure that you select the correct drives to avoid accidental formatting or data loss.
- Start the Formatting Process: Depending on the operating system or storage management interface, there should be an option to format the selected drive(s). Select this option to begin the formatting process.
- Choose the File System: During the formatting process, you will be prompted to choose the file system for the drive. Common file systems include NTFS (Windows), exFAT (compatible with both Windows and macOS), and HFS+ (macOS). Consider the compatibility requirements of your media storage setup when selecting the file system.
- Specify the Allocation Unit Size: The formatting process may also give you the option to specify the allocation unit size, also known as the cluster size. This determines the smallest unit of storage on the drive. It is usually recommended to use the default allocation unit size unless you have specific requirements.
- Confirm the Format: Before proceeding, carefully review the formatting parameters and verify that the selected drive(s) and file system are correct. Confirm your selection to proceed with the formatting process.
- Wait for the Formatting to Complete: The formatting process may take some time depending on the size and speed of the drive(s). Allow the process to complete without interruption. Do not disconnect the drives during formatting.
- Verify the Formatted Drives: Once the formatting process is complete, the drives should be ready for use. Verify that the drives are correctly formatted by checking their status in the storage settings or management section.
Formatting the drives prepares them for storing and accessing data in an organized manner. It is essential to choose the appropriate file system and follow the formatting process correctly to ensure compatibility and optimal performance in your media storage setup.
Partitioning the Drives
In addition to formatting the drives, partitioning allows you to divide the available space on the drives into separate sections, each with its own drive letter or mount point. This can be beneficial for organizing data, allocating storage space for specific purposes, or improving system performance. Here are the steps to partition the drives:
- Access the Operating System: Start by accessing the operating system or storage management interface on your media storage device. This could be the operating system on your computer, the interface of a network-attached storage (NAS), or the firmware of the media storage device.
- Identify the Formatted Drives: Confirm that the drives you want to partition have been correctly formatted and are recognized by the operating system or interface. They should be listed as available storage options.
- Select the Drive: Choose the drive that you want to partition. Ensure that you select the correct drive to avoid accidentally partitioning the wrong drive or losing data. Multiple drives can be partitioned individually.
- Start the Partitioning Process: Depending on the operating system or storage management interface, there should be an option to start the partitioning process for the selected drive. Select this option to proceed.
- Determine the Partition Configuration: Decide on the number and size of partitions you want to create on the drive. Consider the specific needs of your media storage setup, such as organizing files by category, separating system files from user data, or allocating storage space for different applications.
- Create the Partitions: Follow the instructions provided by the operating system or interface to create the desired partitions. Specify the size for each partition, as well as the file system type to be used on each partition if prompted.
- Name the Partitions: Assign meaningful names to each partition to help you identify their purpose or contents. This can be done during the partitioning process or after the partitions have been created.
- Verify the Partitions: Once the partitioning process is complete, verify that the partitions are correctly set up by checking their status in the storage settings or management section. Each partition should be listed separately with its assigned drive letter or mount point.
- Manage and Customize Partitions (Optional): Depending on your needs, you can further manage and customize the partitions. This can include resizing, merging, or removing partitions, as well as setting access permissions or applying encryption to individual partitions.
Partitioning the drives allows you to effectively organize and allocate storage space according to your media storage requirements. By following these steps, you can create partitions that suit your needs and enhance the overall efficiency of your media storage setup.
Creating a RAID Array (if applicable)
If you have multiple drives installed in your media storage device and want to enhance data redundancy or performance, you can create a RAID (Redundant Array of Independent Disks) array. RAID arrays combine multiple drives into a single logical unit, offering improved data protection or increased read/write speeds. Here’s how to create a RAID array:
- Access the RAID Configuration: Start by accessing the RAID configuration interface or utility provided by your media storage device. This can be accessed through the device’s firmware or a dedicated RAID controller.
- Select the Drives: Choose the drives that you want to include in the RAID array. Ensure that the selected drives have been properly installed and recognized by the system.
- Choose the RAID Level: Select the desired RAID level based on your specific needs. Common RAID levels include RAID 0, RAID 1, RAID 5, and RAID 10. Each RAID level offers different benefits such as data striping, mirroring, or parity for enhanced performance or data protection.
- Configure RAID Settings: Adjust any additional settings specific to the chosen RAID level. This may include setting the stripe size, selecting the RAID controller mode, or enabling features like hot-swapping or automatic data rebuilding.
- Initialize the RAID Array: Once the configuration settings are finalized, initialize the RAID array. This process initializes the array and prepares it for use. Initialization may take time, especially for larger arrays.
- Format and Partition the RAID Array: After the RAID array has been initialized, format and partition it as you would a single drive. Follow the same steps as mentioned earlier in the formatting and partitioning sections.
- Verify the RAID Status: After the formatting and partitioning process is complete, verify the status of the RAID array. The RAID configuration interface should display the array information and indicate if it is operating correctly.
- Monitor and Maintain the RAID Array: Regularly monitor the RAID array for any errors or issues. Ensure that drives are functioning properly, and implement any recommended maintenance procedures, such as periodically checking for firmware updates.
Creating a RAID array provides added data protection or performance benefits, depending on the RAID level chosen. By following these steps and properly configuring and maintaining the RAID array, you can enjoy the advantages of improved reliability or accelerated data access in your media storage setup.
Mounting the Drives
After installing and configuring the additional drives in your media storage device, the next step is to mount them to make them accessible for storage and retrieval of data. Mounting refers to the process of associating a drive with a specific directory or mount point within the file system. Here’s how to mount the drives:
- Access the Operating System: Start by accessing the operating system or storage management interface on your media storage device. This could be the operating system on your computer, the interface of a network-attached storage (NAS) device, or the firmware of the media storage device itself.
- Identify the Drives: In the storage settings or management section, locate the newly installed and formatted drives that are ready to be mounted. They should be listed as available drives.
- Create a Mount Point: Choose a suitable directory or location within the file system where you want to mount the drives. This can be an existing folder or a new directory that you create.
- Mount the Drives: Use the operating system’s mount command or interface to associate the drives with the chosen mount points. This action makes the drives accessible through the specified directories.
- Verify the Mount: Check the status of the mounted drives in the storage management section or by using the mount command. The drives should be listed as mounted, and their associated mount points should be displayed.
- Configure Automatic Mounting (Optional): If you want the drives to be automatically mounted every time the media storage device starts up, you can configure the operating system or storage management interface to do so. This ensures that the drives are always ready for use.
- Test Accessibility: Open the mount points or directories associated with the drives and verify that you can read from and write to the drives. This confirms that the mounting process was successful and that the drives are functioning as expected.
By following these steps, you can successfully mount the drives and make them accessible for storing, accessing, and managing your media files. Mounting the drives correctly ensures that they are integrated into the file system and seamlessly work with your media storage device.
Testing the Drives and Troubleshooting Common Issues
Once you have installed, configured, and mounted the additional drives in your media storage device, it’s important to thoroughly test them to ensure they are functioning properly. Testing helps identify any potential issues and allows you to troubleshoot and resolve them. Here are the steps for testing the drives and troubleshooting common issues:
- Perform Read/Write Tests: Copy a variety of files onto the drives and verify that you can read from and write to them without any errors. Test with different file sizes and formats to ensure the drives handle different types of data effectively.
- Check Drive Health: Monitor the health of the drives by using disk monitoring tools or drive diagnostics utilities provided by the drive manufacturer. These tools can help identify any potential issues with the drive’s performance or health status.
- Monitor Drive Temperature: Keep an eye on the drive’s temperature to ensure it stays within recommended operating ranges. Overheating can lead to drive failure or performance degradation. Consider adequate cooling solutions if temperatures are consistently high.
- Monitor Drive SMART Data: Use SMART (Self-Monitoring, Analysis, and Reporting Technology) data to assess the performance and health of the drives. SMART data provides information on various drive attributes and can help detect early signs of failure.
- Monitor Drive Performance: Keep track of the drive’s performance, such as read and write speeds, to ensure it meets your expectations. If the performance seems significantly slower than expected, investigate potential causes such as improper configurations or driver issues.
- Address Drive Recognition Issues: If a drive is not being recognized by the operating system or storage management interface, verify that the connections are secure and properly seated. Check for any driver updates or compatibility issues and troubleshoot accordingly.
- Troubleshoot Data Transfer Issues: If you encounter slow data transfer speeds or issues with file access, ensure that the cables and ports are in good condition and operating at the correct speed. Update drivers, check for firmware updates, and consider adjusting drive settings if necessary.
- Refer to Documentation and Support: If you encounter persistent issues or are unsure how to address a specific problem, consult the device’s documentation or reach out to the manufacturer’s support for guidance and assistance.
- Regularly Monitor and Maintain: Continuously monitor the drives for any signs of degradation or issues. Regularly update firmware and drivers, perform regular backups, and keep backups of critical data to minimize the impact of any unforeseen problems.
By testing the drives thoroughly and troubleshooting common issues, you can ensure that your media storage setup operates smoothly and reliably. Identifying and addressing potential problems early on contributes to the overall performance and longevity of your media storage system.