
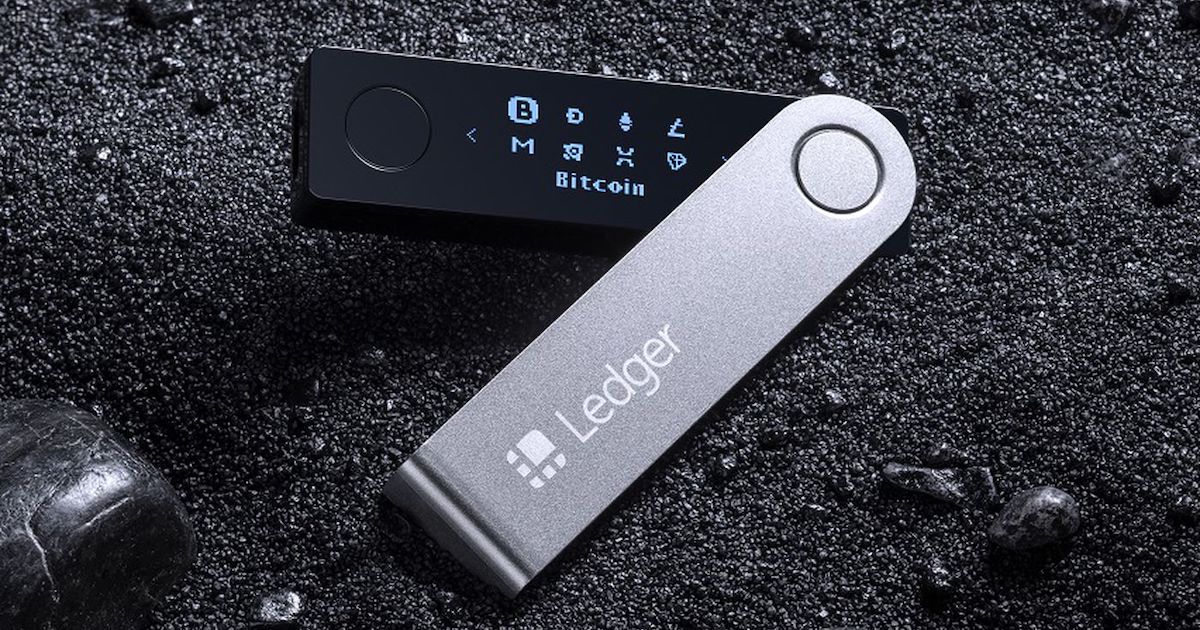
Setting Up Your Ledger Nano S Wallet
Setting up your Ledger Nano S wallet is the first step towards securely storing your Bitcoin. The Ledger Nano S is a hardware wallet, which means it provides an extra layer of protection by keeping your private keys offline.
To get started, follow these steps:
- Unbox your Ledger Nano S and connect it to your computer using the provided USB cable.
- Press the two buttons on the device simultaneously to power it on.
- Use the buttons to navigate and select “Initialize new device” on the Ledger Nano S screen.
- Choose a PIN code for your wallet. Make sure it’s unique and secure, as it will protect your funds.
- Note down your recovery phrase. This phrase is crucial for restoring your wallet in case your Ledger Nano S is lost, stolen, or damaged.
- Confirm your recovery phrase by entering the words in the correct order.
- Once your device is set up, install the Ledger Live software on your computer. This software will be used to manage your Bitcoin wallet.
- Open Ledger Live and follow the on-screen instructions to set up your account and connect your Ledger Nano S.
By following these steps, you have successfully set up your Ledger Nano S wallet and are ready to start using it to securely store your Bitcoin.
Installing the Bitcoin App on Your Ledger Nano S
After setting up your Ledger Nano S wallet, the next step is to install the Bitcoin app on your device. The Bitcoin app allows you to manage your Bitcoin transactions and securely store your digital currency.
To install the Bitcoin app, follow these simple steps:
- Open the Ledger Live software on your computer and connect your Ledger Nano S using the USB cable.
- In the Ledger Live dashboard, click on the “Manager” tab located on the left-hand side menu.
- On the Manager page, you will see a list of available apps. In the search bar, type “Bitcoin” and look for the Bitcoin app.
- Click the “Install” button next to the Bitcoin app to start the installation process.
- Follow the on-screen prompts on your computer and on the Ledger Nano S device to confirm the installation.
- Once the installation is complete, you will see the Bitcoin app on the home screen of your Ledger Nano S.
With the Bitcoin app installed on your Ledger Nano S, you can now securely manage your Bitcoin transactions and keep your digital currency safe. It is important to note that you may need to uninstall other apps from your Ledger Nano S to make space for the Bitcoin app. However, you can always reinstall the apps later if needed.
Creating a Bitcoin Wallet on Your Ledger Nano S
Now that you have installed the Bitcoin app on your Ledger Nano S, it’s time to create a Bitcoin wallet. Your wallet will contain your Bitcoin addresses and private keys, allowing you to send, receive, and store your digital currency securely.
Follow these steps to create a Bitcoin wallet on your Ledger Nano S:
- Connect your Ledger Nano S to your computer using the USB cable, and enter your PIN code to unlock it.
- On the device, navigate to the Bitcoin app by using the buttons, and press the right button to select it.
- In the Ledger Live software on your computer, click on the “Accounts” tab located on the left-hand side menu.
- Click the “Add Account” button to create a new Bitcoin account on your Ledger Nano S.
- On the device, you will be prompted to confirm the creation of the account. Press the right button to confirm.
- Once the account is created, you will see a Bitcoin address associated with it in the Ledger Live software.
It is important to note that your Ledger Nano S can store multiple Bitcoin accounts, each with its own unique Bitcoin addresses. This allows for better organization and privacy of your transactions.
With your Bitcoin wallet created on your Ledger Nano S, you can now receive funds by sharing your Bitcoin address and securely manage your Bitcoin transactions using the Ledger Live software.
Generating a New Receiving Address
When receiving Bitcoin, it is recommended to generate a new receiving address for each transaction. This practice enhances your privacy and security by preventing others from easily tracing your transactions and balances.
To generate a new receiving address on your Ledger Nano S, follow these steps:
- Connect your Ledger Nano S to your computer using the USB cable, and enter your PIN code to unlock it.
- Open the Bitcoin app on your Ledger Nano S by navigating to it using the device’s buttons and pressing the right button to select it.
- In the Ledger Live software on your computer, click on the “Receive” tab located on the left-hand side menu.
- Choose the Bitcoin account for which you want to generate a new receiving address, if you have multiple accounts.
- Click the “Generate new address” button in the Ledger Live software.
- The Ledger Live software will display a newly generated Bitcoin address associated with your selected account.
- To share the newly generated receiving address, you can click the “Copy” button to copy it to your clipboard, or click the “Show QR code” button to display a QR code that others can scan.
Remember to always provide the correct Bitcoin address to the sender when receiving funds. Double-check the address to ensure accuracy, as any funds sent to an incorrect or outdated address may be lost permanently.
By generating a new receiving address for each transaction, you can enhance the privacy and security of your Bitcoin transactions and better protect your digital assets.
Sending Bitcoin to Your Ledger Nano S Wallet
Once you have set up your Ledger Nano S wallet and generated a receiving address, you can start sending Bitcoin to your wallet. Sending Bitcoin to your Ledger Nano S is a straightforward process that ensures your funds are securely stored.
Follow these steps to send Bitcoin to your Ledger Nano S wallet:
- Open the Bitcoin app on your Ledger Nano S by connecting it to your computer and entering your PIN code.
- In the Ledger Live software on your computer, click on the “Send” tab located on the left-hand side menu.
- Enter the recipient’s Bitcoin address in the designated field. Double-check the address to ensure accuracy.
- Specify the amount of Bitcoin you want to send, either by manually entering the amount or using the available options.
- Review the transaction details, including the recipient’s address, the amount to be sent, and any associated fees.
- Confirm the transaction on your Ledger Nano S device by verifying the details displayed.
- Once confirmed, the transaction will be broadcasted to the Bitcoin network for processing.
It’s important to note that Bitcoin transactions require network confirmations before they are considered fully processed. The number of confirmations needed may vary, but typically around 6 confirmations are recommended for a secure transaction.
By following these steps, you can confidently send Bitcoin to your Ledger Nano S wallet, knowing that your funds are securely stored and protected using the device’s robust security features.
Verifying Your Bitcoin Transaction on the Ledger Nano S
After sending a Bitcoin transaction from your Ledger Nano S wallet, it is essential to verify and confirm the transaction details to ensure its accuracy and security. Verifying your transaction on the Ledger Nano S provides you with peace of mind that your funds are being sent to the intended recipient.
To verify your Bitcoin transaction on the Ledger Nano S, follow these steps:
- Connect your Ledger Nano S to your computer using the USB cable and enter your PIN code to unlock it.
- Open the Bitcoin app on your Ledger Nano S by navigating to it and pressing the right button to select it.
- In the Ledger Live software on your computer, click on the “Accounts” tab located on the left-hand side menu.
- Select the Bitcoin account associated with the transaction you want to verify.
- Look for the transaction in the transaction history of the selected account. The transaction should appear with the corresponding details, such as the recipient’s address and transaction amount.
- Verify the transaction details, ensuring that the recipient address and amount are correct and match the intended transaction.
If the transaction details displayed on your Ledger Nano S match what you intended, then you can be confident that your Bitcoin transaction was successfully executed. However, if you notice any discrepancies or suspect any unauthorized activity, it is crucial to take immediate action to secure your funds and contact Ledger support if necessary.
Verifying your Bitcoin transactions on the Ledger Nano S adds an extra layer of security and helps ensure the integrity of your transactions. By regularly checking and confirming the details, you can have peace of mind knowing that your funds are being sent securely.
Restoring Your Bitcoin Wallet on a New Ledger Nano S Device
In the event that your Ledger Nano S device is lost, stolen, or damaged, it is possible to restore your Bitcoin wallet and funds on a new Ledger Nano S device. The restoration process ensures that your digital assets can be accessed and managed securely, even if your original device is no longer available.
To restore your Bitcoin wallet on a new Ledger Nano S device, follow these steps:
- Obtain a new Ledger Nano S device and connect it to your computer using the provided USB cable.
- Power on the new Ledger Nano S by pressing the two buttons simultaneously.
- Follow the on-screen instructions on the new device until you are prompted to choose the option to restore a wallet.
- Enter your recovery phrase by using the buttons on the new device. Make sure to enter the words in the correct order.
- Once your recovery phrase is entered correctly, the new Ledger Nano S will restore your Bitcoin wallet along with all your previous account information.
- Verify that your Bitcoin funds and previous transaction history are displayed correctly on the new device.
It is crucial to keep your recovery phrase secure and confidential. Never share it with anyone and ensure that it is stored in a safe place. Anyone with access to your recovery phrase can potentially gain control of your Bitcoin funds.
By following these steps, you can restore your Bitcoin wallet on a new Ledger Nano S device and regain access to your digital assets. It is advisable to regularly back up and test your recovery phrase to ensure that you can restore your wallet successfully if needed.
Managing Your Bitcoin Wallet on the Ledger Live Software
The Ledger Live software is a user-friendly interface that allows you to manage your Bitcoin wallet and perform various operations directly from your computer. With Ledger Live, you can conveniently check your account balance, view transaction history, send and receive Bitcoin, and manage your portfolio.
To manage your Bitcoin wallet on the Ledger Live software, follow these steps:
- Ensure that your Ledger Nano S is connected to your computer via the USB cable.
- Open the Ledger Live software on your computer and enter your PIN code on the connected Ledger Nano S to unlock it.
- On the Ledger Live dashboard, you will find an overview of your Bitcoin accounts and portfolio performance.
- To view detailed information about a specific Bitcoin account, click on the account name. This will display the account balance, transaction history, and a list of available operations.
- To send Bitcoin from your Ledger Nano S, click on the “Send” tab and enter the recipient’s Bitcoin address, the amount to be sent, and any optional notes.
- For receiving Bitcoin, click on the “Receive” tab to generate a new receiving address. You can copy the address or display a QR code for others to use when sending Bitcoin to your wallet.
- Additionally, you can explore the various features available on Ledger Live, such as portfolio tracking, enabling/disabling account synchronization, and managing multiple Bitcoin accounts.
The Ledger Live software provides a seamless and secure way to manage your Bitcoin wallet. It simplifies the process of sending, receiving, and monitoring your Bitcoin transactions, giving you full control over your digital assets.
Keep in mind that it’s essential to keep your Ledger Live software and Ledger Nano S firmware up to date by regularly checking for and installing any available updates. Doing so ensures that you benefit from the latest security enhancements and features.
By utilizing the Ledger Live software, you can efficiently manage your Bitcoin wallet and stay on top of your digital asset portfolio with ease and convenience.
Additional Security Measures for Your Bitcoin Wallet
While the Ledger Nano S provides a high level of security for your Bitcoin wallet, there are additional steps you can take to further enhance the protection of your digital assets. Implementing these security measures can help safeguard your funds from potential threats and ensure the longevity of your Bitcoin holdings.
Here are some additional security measures to consider for your Bitcoin wallet:
- Enable Two-Factor Authentication (2FA): Activate two-factor authentication for your Ledger Live account to add an extra layer of protection. This involves using a separate device or application, such as Google Authenticator, to generate a code that you need to enter along with your password when logging in.
- Use a Strong and Unique Password: Create a strong and unique password for your Ledger Live account. Avoid using common passwords and consider using a password manager to securely store your login credentials.
- Keep Your Wallet Software Up to Date: Regularly check for and install updates for both your Ledger Live software and Ledger Nano S firmware. Software updates often include security patches that address vulnerabilities and enhance the overall security of your wallet.
- Backup Your Recovery Phrase: Safely store a backup of your Ledger Nano S recovery phrase in a secure location. Consider using a fireproof and waterproof storage device, such as a metal backup sheet, and keep it separate from your physical wallet in case of loss or damage.
- Be Mindful of Phishing Attempts: Be cautious of phishing attempts that aim to trick you into divulging your sensitive information. Always verify the legitimacy of any emails, websites, or messages that appear to be from Ledger or Ledger Live. Ledger will never ask you for your recovery phrase or sensitive information.
- Use a Hardware Wallet for Transactions: Whenever possible, use your Ledger Nano S hardware wallet to sign transactions rather than entering your private keys or recovery phrase on your computer. This protects your sensitive information from potential malware or keyloggers on your computer.
- Keep Your Device and PIN Secure: Make sure to keep your Ledger Nano S device in a safe and secure location, preferably protected by a sturdy pin or lock. Never share your PIN or recovery phrase with anyone, and avoid connecting your device to untrusted computers.
By implementing these additional security measures, you can greatly reduce the risk of unauthorized access to your Bitcoin wallet and enhance the overall protection of your digital assets. Remember, security should always be a top priority when dealing with cryptocurrencies.
Troubleshooting Common Issues with the Ledger Nano S and Bitcoin
While the Ledger Nano S is a reliable device for securely managing your Bitcoin, you may encounter some common issues along the way. Understanding how to troubleshoot these issues can save you time and ensure a smooth experience with your Bitcoin wallet.
Here are some common issues and their troubleshooting steps:
- Device Not Recognized: If your Ledger Nano S is not being recognized by your computer or Ledger Live software, try using a different USB cable or port. Additionally, ensure that you have the latest version of the Ledger Live software installed.
- App Installation Issues: If you encounter difficulties installing or updating the Bitcoin app on your Ledger Nano S, try uninstalling and reinstalling the Ledger Live software. Make sure to follow the on-screen instructions and keep your device connected throughout the process.
- Transaction Delays: Bitcoin transactions can sometimes experience delays due to network congestion. If your transaction is taking longer than expected, you can check the transaction status on a blockchain explorer or adjust the transaction fee to increase its priority.
- Incorrect Balance Displayed: In some cases, the Ledger Live software may display an incorrect balance for your Bitcoin wallet. Try refreshing the software or connecting your Ledger Nano S to a different computer to see if the issue persists.
- Forgotten PIN or Lost Recovery Phrase: If you forget your PIN or misplace your recovery phrase, there is no way to recover your funds. It is crucial to store your recovery phrase securely and remember your PIN. Ledger cannot assist in recovering lost or forgotten PINs or recovery phrases for security reasons.
- Unconfirmed Transactions: If your Bitcoin transaction is stuck as unconfirmed for an extended period, you can try using a transaction accelerator service or contacting the recipient to see if they can assist in expediting the confirmation process.
- Unsupported Bitcoin Derivatives: Some Bitcoin derivatives, such as Bitcoin Cash (BCH) or Bitcoin SV (BSV), require separate apps and may not be directly supported by the Bitcoin app. Ensure you have the necessary apps installed on your Ledger Nano S to manage these derivatives.
If you continue to experience issues or encounter a problem not listed here, it is recommended to consult the Ledger support resources or contact their customer support for assistance. They can provide further guidance and help you resolve any technical or usability issues you may be facing.
By familiarizing yourself with these troubleshooting steps, you can overcome common issues and make the most of your Ledger Nano S and Bitcoin wallet experience.