
Connect Your Phone to Your Car
As technology continues to evolve, integrating your smartphone with your car has become more accessible and convenient. Android Auto allows you to seamlessly connect your Android device to your car’s infotainment system, giving you access to a variety of apps and features.
The first step in adding apps to Android Auto is to connect your phone to your car. To do this, make sure that your car is compatible with Android Auto. Many newer car models come equipped with Android Auto support, but if you have an older car, you may need to upgrade your infotainment system or use an aftermarket Android Auto head unit.
Once you have confirmed your car’s compatibility, you will need to connect your phone to your car via a USB cable. Plug one end of the USB cable into the appropriate port on your car’s infotainment system, and the other end into your Android device. Ensure that your phone is unlocked, as it may require permission to establish the connection.
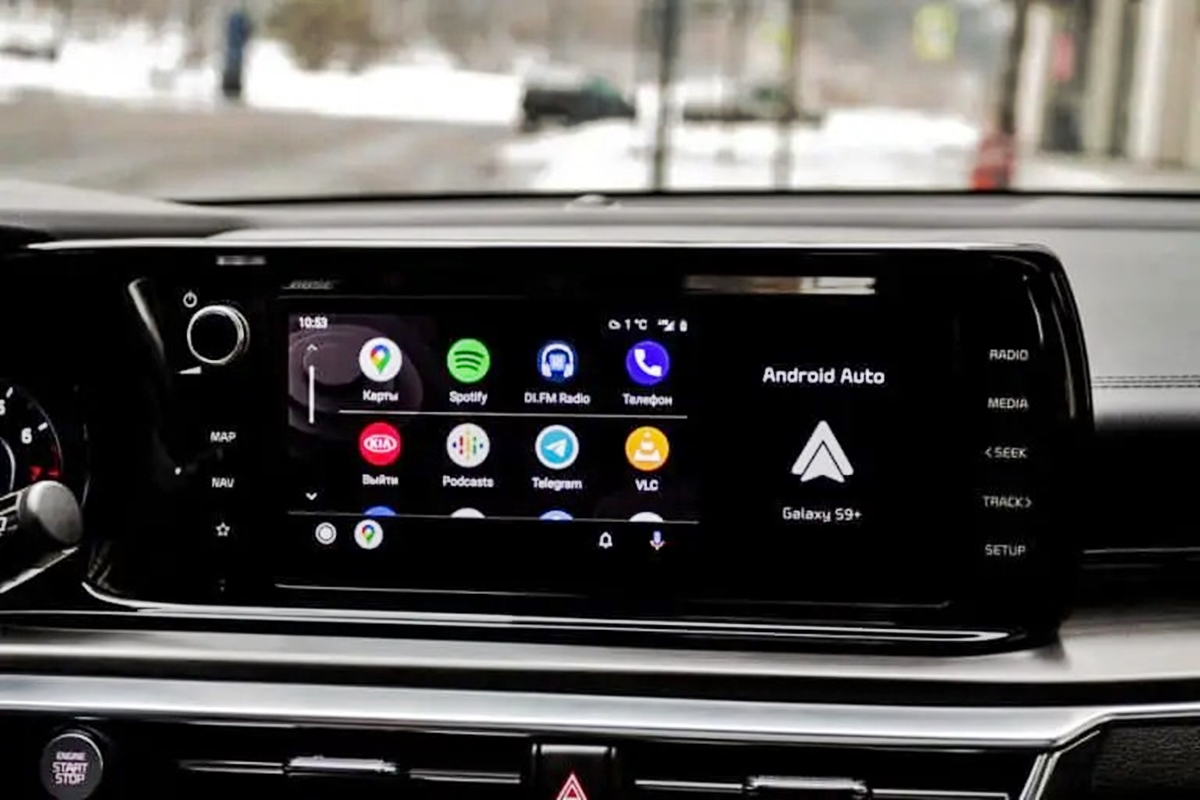
After connecting your phone to your car, you should see the Android Auto interface appear on your car’s display. If this is your first time connecting, you may need to go through a brief setup process to enable Android Auto on your device.
It’s worth mentioning that some car manufacturers offer wireless Android Auto connectivity, eliminating the need for a USB cable. However, this feature is limited to select car models and Android devices, so make sure to check if your car and phone support wireless Android Auto.
Once you have successfully connected your phone to your car, you’re ready to start adding apps to Android Auto. This process involves installing the Android Auto app on your device, accessing the Play Store within the Android Auto interface, and installing the apps you want to use on the road.
In the next section, we will guide you through the installation process of the Android Auto app and how to access the Play Store in Android Auto to add your favorite apps.
Install Android Auto App
In order to use Android Auto and add apps to your car’s infotainment system, you need to install the Android Auto app on your Android device. Follow these steps to get started:
1. Open the Google Play Store on your Android device.
2. In the search bar at the top of the screen, type “Android Auto” and tap the search icon.
3. From the search results, locate the official Android Auto app and tap on it.
4. On the app’s page, tap the “Install” button to begin the installation process.
5. Give the necessary permissions to the app when prompted, such as accessing your location, contacts, and notifications. These permissions enable Android Auto to function optimally and provide a seamless experience.
6. Wait for the app to download and install on your device. The duration may vary depending on your internet connection speed.
7. Once the installation is complete, you will find the Android Auto app icon on your device’s home screen or app drawer. Tap on the icon to launch the app.
8. Follow the on-screen setup instructions to complete the initial configuration of Android Auto. This typically involves accepting the terms of service and connecting your Google account to the app.
Note: If you’re unable to find the Android Auto app in the Google Play Store, it’s possible that your device is not compatible, or the app may not be available in your region. Ensure that your device meets the minimum requirements specified by Android Auto.
That’s it! You have now successfully installed the Android Auto app on your Android device. The next step is to connect your phone to Android Auto and start adding your favorite apps to enhance your driving experience.
Connect Your Phone to Android Auto
Now that you have installed the Android Auto app on your Android device, you can connect your phone to Android Auto and begin using it in your car. Follow these steps to establish the connection:
1. Start your car and ensure that the infotainment system is powered on.
2. Connect your Android device to your car’s infotainment system using a USB cable. Plug one end of the cable into the appropriate port on your car’s infotainment system, and the other end into your Android device.
3. If prompted, unlock your phone and grant any necessary permissions to allow the connection between your phone and the car’s infotainment system.
4. Once connected, the Android Auto interface should automatically appear on your car’s display. If it doesn’t appear automatically, navigate to the menu or settings on your infotainment system and select the option for Android Auto.
5. Follow any additional setup prompts or instructions on your car’s infotainment system and Android Auto app. This may include agreeing to the terms of service, enabling certain features, or choosing your preferred language.
6. Depending on your car and phone models, you may have the option to enable wireless Android Auto connectivity. If this is available, you can establish a wireless connection between your phone and the car without the need for a USB cable. Simply ensure that both devices are connected to the same Wi-Fi network, and follow the on-screen instructions to establish the connection.
7. Once the connection is established, you can access and control various features and apps on your Android device through the Android Auto interface on your car’s display.
Remember to keep your Android device connected to the infotainment system using the USB cable or via a stable wireless connection for Android Auto to function properly.
Now that your phone is connected to Android Auto, you can access the Play Store within Android Auto and start adding apps to enhance your driving experience. We’ll cover this in the next section.
Access the Play Store in Android Auto
One of the key features of Android Auto is the ability to access and download apps directly from the Play Store. By adding new apps, you can customize your Android Auto experience and access a wider range of features while on the road. Here’s how you can access the Play Store in Android Auto:
1. Ensure that your phone is connected to Android Auto in your car. Refer to the previous section on how to connect your phone to Android Auto if you haven’t done so already.
2. Once your phone is connected, the Android Auto interface should be displayed on your car’s infotainment system. Navigate through the options and look for the “Apps” icon. It is generally represented by a square grid of smaller squares.
3. Select the “Apps” icon to access the available apps on Android Auto.
4. You will be taken to the Play Store within the Android Auto interface. Here, you can explore different categories of apps, including Music, Messaging, Navigation, and more.
5. Use the search bar at the top of the screen to look for specific apps or browse through the featured and recommended apps.
6. When you find an app you want to install, select it to view more details about the app, such as the description, reviews, and screenshots.
7. Tap the “Install” button to download and install the app to your Android device. If you have previously installed the app on your phone, it will automatically be added to Android Auto.
8. Once the app is installed, you can access it directly from the Android Auto interface in your car. The app’s icon will appear on the main screen of Android Auto, allowing you to open and use it while driving.
By accessing the Play Store in Android Auto, you have a wide selection of apps to choose from, offering different functionalities and features to enhance your driving experience. From music streaming services to navigation apps and messaging platforms, the Play Store has a variety of options to cater to your preferences and needs.
In the next section, we will cover how to install apps on Android Auto and arrange them according to your preference.
Search for Apps in the Play Store
Searching for apps in the Play Store is a straightforward process that allows you to find and explore a wide range of options compatible with Android Auto. Whether you’re looking for music streaming apps, navigation tools, or messaging platforms, here’s how you can search for apps directly in the Play Store within Android Auto:
1. Ensure that your phone is connected to Android Auto in your car. If you haven’t connected your phone yet, refer to the previous sections for instructions on how to do so.
2. Once your phone is connected to Android Auto, access the Play Store within the Android Auto interface. You can typically find the Play Store by navigating through the options or selecting the “Apps” icon on the main screen.
3. Once you’re in the Play Store, tap on the search bar at the top of the screen.
4. Using the on-screen keyboard or voice input, enter the name or keywords related to the app you’re looking for. For example, if you’re searching for a music streaming app, you can type “music streaming” or “Spotify” into the search bar.
5. As you start typing, the Play Store will display suggestions based on your input. You can select one of these suggestions or continue typing to refine your search further.
6. Once you have entered your search query, tap the search icon or press “Enter” on the on-screen keyboard to initiate the search.
7. The Play Store will display the search results, listing the apps that match your query. Browse through the results to find the app you want to install.
8. Tap on the app’s listing to view more details about the app, including the description, reviews, screenshots, and additional information.
9. If the app meets your criteria, tap the “Install” button to download and install it on your Android device. If you have previously installed the app, it will automatically be added to Android Auto.
10. Once the installation is complete, you can access the app directly from the Android Auto interface. The app’s icon will appear on the main screen, allowing you to open and use it while driving.
By searching for apps in the Play Store within Android Auto, you can easily find and install the apps that suit your preferences and needs. Take advantage of the search functionality to discover a wealth of options that can enhance your driving experience.
In the next section, we will discuss how to install apps on Android Auto and customize their arrangement on the main screen.
Install Apps on Android Auto
Installing apps on Android Auto allows you to personalize your driving experience by adding the features and functionality that matter most to you. By following these simple steps, you can easily install apps on Android Auto:
1. Connect your Android device to your car’s infotainment system using a USB cable or by establishing a wireless connection, if supported.
2. Once your phone is connected, access the Android Auto interface on your car’s infotainment system.
3. Locate the Play Store icon within the Android Auto interface. This is typically represented by the familiar shopping bag logo with a play button.
4. Tap on the Play Store icon to open the Play Store within Android Auto.
5. Once inside the Play Store, you can browse through various categories or use the search bar to find specific apps.
6. When you find an app that you want to install, select it to view more details about the app, such as the description, reviews, and screenshots.
7. If the app meets your requirements, tap the “Install” button to start the installation process.
8. Wait for the app to download and install on your Android device. The duration may vary depending on the size of the app and your internet connection speed.
9. Once the installation is complete, the app will be added to the main screen of Android Auto, and its icon will be accessible for you to open and use while driving.
10. Repeat the process for any other apps you want to install on Android Auto.
It’s important to note that while many popular apps are available in the Play Store for Android Auto, not all apps will be compatible or optimized for use in the car. Make sure to verify the app’s compatibility with Android Auto before installing it to ensure a seamless and safe experience while driving.
With the ability to install apps on Android Auto, you can customize your driving experience by adding features such as music streaming, messaging, navigation, and more. Explore the Play Store within Android Auto to discover a wide range of apps that can enhance your time on the road.
In the next section, we will discuss how to arrange and customize the placement of apps on the main screen of Android Auto.
Arrange and Customize Apps on Android Auto
Android Auto gives you the flexibility to arrange and customize the placement of apps on its main screen. This allows you to prioritize the apps you use most frequently and create a personalized layout for your driving needs. Here’s how you can arrange and customize apps on Android Auto:
1. Connect your Android device to your car’s infotainment system and launch the Android Auto interface.
2. On the main screen of Android Auto, you will see a grid of app icons representing the installed apps.
3. To rearrange the apps, tap and hold the app icon you want to move. You will see the icon lift up and become draggable.
4. Drag the app icon to the desired position. As you move the app icon, you will see other icons rearranging to make space for the placement.
5. Release your finger from the screen to drop the app icon in the new position.
6. Repeat the process to rearrange other app icons as per your preference.
7. You can also remove apps from the main screen by tapping and holding the app icon and dragging it to the designated “Remove” or “Delete” area that appears on the screen.
8. To add new apps to the main screen, access the Play Store within Android Auto and install the desired apps following the steps in the previous section.
9. Once the app is installed, its icon will automatically appear on the main screen. Use the steps mentioned above to rearrange the newly added app icon to your preferred location.
By arranging and customizing the placement of apps on Android Auto, you can create a layout that matches your usage patterns and preferences. This not only makes it easier to access the apps you regularly use but also enhances the overall user experience while driving.
Remember that the number of apps you can have on the main screen is limited, so prioritize the most essential apps that you frequently use. Additionally, ensure that the arrangement of the apps does not interfere with your ability to navigate the interface safely while on the road.
Take the time to explore different app arrangements and find the setup that works best for you. The ability to customize the app layout on Android Auto adds a personal touch to your driving experience.
In the next section, we will discuss how to update apps on Android Auto to ensure you have the latest features and bug fixes.
Update Apps on Android Auto
Updating apps on Android Auto is essential to ensure you have access to the latest features, improvements, and bug fixes. Keeping your apps up to date helps enhance your driving experience and ensures optimal functionality. Here’s how you can update apps on Android Auto:
1. Connect your Android device to your car’s infotainment system and launch the Android Auto interface.
2. On the main screen of Android Auto, locate the app icons for the installed apps that have available updates.
3. Tap on the app icon that you want to update. This will open the app.
4. Once inside the app, look for the app’s settings or menu options. The specific location may vary based on the app you’re updating.
5. Within the app’s settings or menu, look for an option like “Check for updates” or “Update app.” Tap on this option to initiate the update process.
6. The app will then connect to the respective app store (such as the Play Store) and check for any available updates. If an update is available, you will see an option to download and install it.
7. Tap on the update button to begin the download and installation process.
8. Wait for the update to complete. The duration may vary depending on the size of the update and your internet connection speed.
9. Once the update is finished, the app will be up to date with the latest version, offering enhanced features and bug fixes.
10. Repeat the process for other apps that have available updates.
It’s important to note that app updates may be automatic or require manual intervention, depending on your device’s app settings. You can check your phone’s app settings to enable automatic updates to ensure that your apps stay up to date without manual intervention.
Regularly updating the apps on Android Auto ensures that you have access to the most recent features, performance improvements, and security patches. It’s advisable to keep your apps updated to maintain a smooth and reliable experience while using Android Auto.
In the next section, we will discuss how to remove apps from Android Auto if you no longer need or want to use them.
Remove Apps from Android Auto
Removing apps from Android Auto can help declutter the main screen and free up space for the apps you use frequently. If you no longer want or need a particular app on Android Auto, you can easily remove it. Here’s how you can remove apps from Android Auto:
1. Connect your Android device to your car’s infotainment system and launch the Android Auto interface.
2. On the main screen of Android Auto, locate the app icon that you want to remove.
3. Tap and hold the app icon. You will see the icon lift up and become draggable.
4. Drag the app icon to the designated “Remove” or “Delete” area that appears on the screen. This area is usually located at the top or bottom of the screen.
5. Release your finger from the screen to drop the app icon into the “Remove” area.
6. Android Auto will prompt you to confirm your action. Select “Remove” or “Delete” to confirm the removal of the app.
7. The app icon will be removed from the main screen of Android Auto, freeing up space for other app icons.
8. Repeat the process for any other apps you want to remove from Android Auto.
It’s important to note that removing an app from Android Auto does not uninstall the app from your Android device. It only removes the app’s visibility and access from the Android Auto interface. The app will still be installed on your device, and you can use it independently outside of Android Auto.
If you change your mind and want to add a previously removed app back to the main screen of Android Auto, you can re-install the app from the Play Store within Android Auto, following the steps outlined in the previous sections.
Removing apps that you no longer use or need allows you to maintain a clean and organized interface on Android Auto. By prioritizing the apps most relevant to your driving experience, you can enhance efficiency and easily access the functions you frequently use.
In the next section, we will discuss troubleshooting steps if you encounter issues with apps not showing up in Android Auto.
Troubleshooting: Apps Not Showing up in Android Auto
If you’re experiencing issues with apps not appearing in Android Auto, there are a few troubleshooting steps you can take to resolve the problem. Here are some possible solutions to consider:
1. Ensure App Compatibility: Not all apps are compatible with Android Auto. Verify that the app you’re trying to use is specifically designed to work with Android Auto. Check the app’s documentation or support page to confirm its compatibility.
2. Grant App Permissions: Some apps require specific permissions to appear and function correctly in Android Auto. Make sure that you have granted the necessary permissions to the app on your Android device. Go to your device’s Settings, find the app, and ensure that it has the required permissions enabled.
3. Check App Updates: Ensure that the app you’re trying to use is up to date. Open the Play Store on your Android device and check if there are any pending updates for the app. Update the app to the latest version and try launching it in Android Auto again.
4. Restart the Phone and Infotainment System: Sometimes, a simple restart can resolve connectivity issues. Restart your Android device and the car’s infotainment system to refresh the connection and ensure smooth communication between the two.
5. Disconnect and Reconnect the Phone: Unplug your Android device from the car’s infotainment system and then reconnect it. Ensure that you are using a compatible USB cable and that it is securely connected. If your car supports wireless Android Auto, disconnect and reconnect the wireless connection instead.
6. Clear Android Auto Cache and Data: If the app still doesn’t appear in Android Auto, clearing the cache and data of the Android Auto app can help resolve the issue. Go to your device’s Settings, find the Android Auto app, and select the options to clear its cache and data. Remember that this action will reset any custom settings in Android Auto.
7. Verify App Availability in Your Region: Some apps may have geo-restrictions and may not be available in certain regions. Check if the app you’re trying to use is officially supported and available in your region. You can check the app’s Play Store listing or official website for more information.
8. Contact App Developer or Support: If none of the above solutions work, reaching out to the app’s developer or support team can provide further assistance. They may have specific troubleshooting steps or insights to help resolve the issue.
By going through these troubleshooting steps, you can identify and resolve the issue of apps not showing up in Android Auto. Remember to ensure app compatibility, grant necessary permissions, check for updates, restart devices, and try clearing cache and data. If the issue persists, contacting the app developer or support team is recommended for further assistance.