
Register a New User Account
Adding a new user to your Chromebook allows multiple individuals to have their personalized settings, apps, and browsing history on the same device. Whether you’re setting up an account for a family member, a friend, or a colleague, the process is quick and straightforward. Here’s how you can register a new user account on a Chromebook:
1. Start by unlocking your Chromebook and accessing the desktop or login screen.
2. Locate the system tray, usually located in the bottom-right corner of the screen, and click on the time and date display.
3. In the drop-down menu, click on the gear icon to open the “Settings” menu.
4. Once in the “Settings” menu, scroll down until you find the “People” section and click on it.
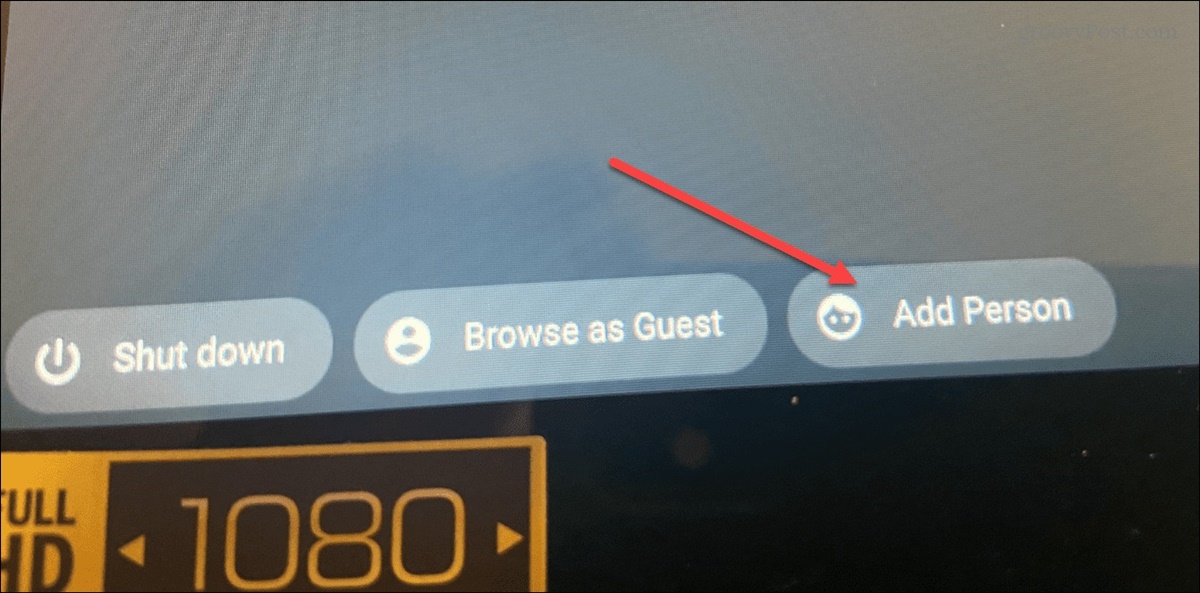
5. In the “People” section, you’ll see a list of all the users currently registered on the Chromebook. To add a new user, click on the “Add person” button.
6. A dialog box will appear, prompting you to enter the user’s name. Type in the desired name and click “Next”.
7. Now, you have the option to choose a photo for the new user account. You can either upload an image from your Chromebook’s files or quickly take a photo using the device’s webcam. Once you’ve selected or taken a photo, click “Next”.
8. The next step is to select an account type for the new user. You can choose between a “Standard” user, which has limited access to certain settings, or an “Administrator” user, who has full control over the Chromebook. Select the appropriate account type and click “Next”.
9. You will now be asked if you want to set up sync for the new user. Enabling sync allows the user to access their Chromebook settings, apps, and bookmarks on any other device where they sign in using the same Google account. Toggle the switch to the desired setting and click “Next”.
10. Finally, you will be prompted to complete the login process for the new user. Enter the user’s Google account credentials or create a new account if they don’t have one. Follow the on-screen instructions to finish setting up the new user account.
Once the registration process is complete, the new user can personalize their Chromebook settings, install apps and extensions, and browse the web with their own preferences. This method allows for a seamless and personalized user experience for everyone sharing a Chromebook device.
Navigate to Settings
Accessing the settings menu on your Chromebook is the first step towards adding a new user account. By navigating to the settings, you can customize various system preferences, manage users, and make other important configurations. Here’s how you can easily find the settings menu on your Chromebook:
1. Begin by turning on your Chromebook and reaching the desktop or login screen.
2. Look for the system tray, located in the bottom-right corner of the screen. It displays the time, date, and other system information.
3. Click on the time and date display in the system tray.
4. A drop-down menu will appear, showing a brief overview of useful features and shortcuts. At the bottom of this menu, you will see a gear-shaped icon. Click on it to access the “Settings” menu.
5. The “Settings” menu will open in a new tab. Here, you can adjust various aspects of your Chromebook’s functionality, such as display settings, sound preferences, network connections, and more.
6. To navigate within the settings menu, use the sidebar on the left side of the page. It contains different categories, including “Google Account,” “Device,” “Apps,” “Search and Assistant,” and more. Click on a specific category to explore its related settings.
7. The main section of the settings menu displays the detailed options and configurations for the selected category on the left sidebar. Scroll through this section to see all available settings and features.
8. To go back to the previous page or category, click the back arrow icon in the top-left corner of the settings window.
9. If you are looking for a specific setting or feature, you can utilize the search bar at the top of the settings menu. Simply type in a keyword or phrase, and relevant options will be displayed.
10. Once you have finished making changes or exploring the settings, you can close the settings menu by clicking the “X” button located in the top-right corner of the window. Alternatively, you can press the “ESC” key on your Chromebook’s keyboard.
Navigating to the settings menu is an essential skill for managing your Chromebook and performing various system-related tasks. By familiarizing yourself with the menu’s layout and navigation options, you can easily access the settings you need and customize your device to suit your preferences.
Select “People”
The “People” section in the Chromebook settings allows you to manage user accounts and preferences on your device. By selecting “People,” you can add, remove, and customize user profiles, facilitating personalized experiences for individuals sharing the Chromebook. Here’s how you can access and utilize the “People” section:
1. After opening the settings menu on your Chromebook, navigate to the left sidebar and locate the “People” category.
2. Click on “People” to access the related settings and options.
3. On the main section, you will see a list of all the user accounts currently registered on your Chromebook. Each account is represented by a profile picture or an assigned avatar and the user’s name.
4. To add a new user, click on the “Add person” button. This will prompt a dialog box to appear, allowing you to create a new user account.
5. In the dialog box, enter the desired name for the new user account. You can use the person’s real name or a nickname.
6. Next, you have the option to choose a photo for the user account. You can select a pre-existing image from your Chromebook’s files or take a new photo using the device’s webcam.
7. After selecting or capturing a photo, click on “Next” to proceed.
8. Now, you will be asked to choose an account type for the new user. The available options are “Standard” or “Administrator.” The “Standard” user has limited access to certain settings, while the “Administrator” user has full control over the Chromebook.
9. Once you have selected the appropriate account type, click on “Next” to continue.
10. You will now have the option to enable sync for the new user. Sync allows the user to access their Chromebook settings, apps, and bookmarks on any other device where they sign in using the same Google account.
11. Toggle the sync switch to the desired setting and click on “Next”.
12. Finally, you will be prompted to complete the login process for the new user. Enter the user’s Google account credentials or create a new account if they don’t have one.
13. Follow the on-screen instructions to finish setting up the new user account.
By selecting “People” in the Chromebook settings, you can easily manage user accounts and create personalized profiles for individuals using the device. This feature promotes a seamless and customized user experience for everyone sharing the Chromebook.
Click “Add person”
Adding a new person to your Chromebook allows them to have their own user account, personalized settings, and browsing history. To create a new user account, follow these steps:
1. Open the “People” section in the Chromebook settings as mentioned in the previous section.
2. On the main section, you will see a list of existing user accounts.
3. To add a new person, click on the “Add person” button. This will open a dialog box where you can enter the details for the new user.
4. In the dialog box, you will be prompted to enter the name of the new user account. Type in the desired name, whether it’s a full name or a nickname.
5. After entering the name, click on the “Next” button to proceed.
6. You will now have the option to choose a photo for the new user account. Click on the “Choose a photo” button to select an image from your Chromebook’s files.
7. Alternatively, you can capture a new photo by clicking on the webcam icon and following the on-screen instructions to take a picture.
8. Once you have chosen or captured a photo, click on the “Next” button to continue.
9. Next, you will be asked to select an account type for the new user. You can choose between “Standard” and “Administrator”.
10. A “Standard” user has limited access to certain settings, while an “Administrator” user has full control over the Chromebook.
11. Click on the desired account type and then click “Next”.
12. You will have the option to enable sync for the new user. Sync allows the user to access their Chromebook settings, apps, and bookmarks on any other device where they sign in using the same Google account.
13. Toggle the sync switch to the desired setting, and then click on “Next”.
14. Finally, you will be prompted to complete the login process for the new user. Enter the user’s Google account credentials if they have an existing account, or create a new account by following the on-screen instructions.
15. Once the login process is complete, the new user account will be added to the Chromebook, and the person can now access their personalized settings and preferences.
Clicking “Add person” in the Chromebook settings is the crucial step in creating a new user account, allowing individuals to have their own customized experience on the device. This feature makes sharing a Chromebook convenient and personalized for multiple users.
Enter the User’s Name
When adding a new user account to your Chromebook, one of the first steps is to enter the name of the person for whom you are creating the account. By entering the user’s name, you can easily identify the account and personalize the user experience. Here’s how you can enter the user’s name:
1. After clicking on the “Add person” button in the “People” section of the Chromebook settings, a dialog box will appear.
2. In the dialog box, you will see a field where you can enter the user’s name.
3. Type in the desired name for the new user account. It could be the person’s full name or a nickname.
4. As you enter the name, you will see it appearing in real-time in the dialog box, allowing you to preview how it will be displayed as the user’s name.
5. Double-check the name to ensure accuracy and make any necessary corrections before proceeding.
6. Once you are satisfied with the entered name, click on the “Next” button to continue.
It’s worth noting that the user’s name will be displayed in certain areas of the Chromebook’s interface, such as the login screen and the “People” section of the settings. It’s advisable to use a name that is easily recognizable and distinguishable from other user accounts on the device.
By entering the user’s name, you are personalizing the new user account and making it easier to manage and differentiate multiple accounts on the Chromebook. This step sets the stage for further customization and configuration of the user’s preferences and settings.
Choose a Photo for the User
Adding a photo to a user account on your Chromebook helps personalize the experience and makes it easy to identify the user visually. By choosing a photo for the user, you can provide a unique visual representation of their account. Here’s how you can select a photo for the user:
1. After entering the user’s name in the dialog box during the account creation process, the next step is to select a photo.
2. In the dialog box, you will see an option to “Choose a photo” or “Take a photo”. Click on the “Choose a photo” button to proceed.
3. A file explorer window will appear, allowing you to browse through the files on your Chromebook.
4. Navigate to the location where the desired photo is stored. You can choose from existing pictures, such as personal photos or pre-selected avatars.
5. Select the desired photo by clicking on it. You will likely see a preview of the selected photo in the dialog box.
6. Once you have chosen the photo, click on the “Next” button to continue.
If you prefer to take a new photo for the user instead of selecting one from existing files, you can click on the “Take a photo” option. This will activate your Chromebook’s built-in webcam, allowing you to capture a new picture of the user. Follow the on-screen instructions to take the photo and proceed to the next step.
It’s important to note that the selected or captured photo should be appropriate and represent the user in a respectful manner. Choose a photo that is clear, easy to recognize, and accurately represents the user’s identity.
By choosing a photo for the user, you add a personal touch to their account and make it visually distinguishable. This helps create a more engaging and personalized experience on the Chromebook for each individual user.
Select an Account Type
When adding a new user account to your Chromebook, you have the option to select an account type that determines the level of access and control the user will have. Choosing the appropriate account type is important for managing user privileges and maintaining security. Here’s how you can select an account type for the new user:
1. After selecting a photo for the user and proceeding to the next step, you will see the option to choose an account type in the account creation dialog box.
2. In the dialog box, you will typically see two options: “Standard” and “Administrator”. These represent the different levels of access and permissions available.
3. The “Standard” account type is suitable for most users. It provides access to basic features and functionality while limiting access to certain system settings and administrative controls.
4. On the other hand, the “Administrator” account type grants full control and access to all Chromebook settings and administrative privileges. This is typically reserved for the owner or primary user of the device.
5. Consider the user’s role and responsibilities on the Chromebook when selecting the account type. If they are the primary user or need full control over the device, choose the “Administrator” account type. If they are a secondary user or need limited access, choose the “Standard” account type.
6. Once you have made your selection, click on the “Next” button to proceed with creating the user account.
It’s important to note that each user account on the Chromebook is independent and has its own settings, apps, and browsing history. By selecting the appropriate account type, you can ensure the privacy and security of the device while providing individuals with the necessary access and permissions.
Additionally, keep in mind that only users with “Administrator” account types have the ability to add or remove other user accounts and modify system-wide settings. Therefore, exercise caution when assigning account types to avoid any unintended changes or potential security risks.
By selecting an account type, you can tailor the user experience on the Chromebook and determine the level of access and control each individual has over the device.
Set Up Sync Preferences
Syncing your Chromebook allows you to access your personalized settings, apps, extensions, bookmarks, and browsing history across multiple devices. When adding a new user account, you have the option to enable or disable sync for that user. Here’s how you can set up sync preferences for the new user:
1. After selecting the account type and proceeding to the next step, you will see the option to set up sync preferences in the account creation dialog box.
2. In the dialog box, you will typically find a toggle switch or an option to enable or disable sync for the user account.
3. Enabling sync allows the user to have their personalized Chromebook settings, apps, extensions, bookmarks, and browsing history available on other devices where they sign in using the same Google account.
4. If you want the new user to have access to their preferences and data from other devices, toggle the switch or select the option to enable sync.
5. If you want to restrict sync and keep the user’s Chromebook preferences separate from their other devices, leave sync disabled.
6. Once you have made your selection, click on the “Next” button to continue with the user account creation.
It’s important to note that enabling sync requires the user to sign in to their Google account on the Chromebook. If the user doesn’t have an existing Google account, they will need to create one during the login process.
Syncing preferences allows users to have a seamless and consistent experience across multiple devices. They can access their favorite websites, saved passwords, and Chromebook settings without the need for manual configuration on each device. It enhances productivity and convenience for users who work or browse on various platforms.
However, if privacy is a concern or if the user prefers to keep their Chromebook preferences separate, disabling sync ensures that their data remains localized to that specific device.
By setting up sync preferences, you can tailor the user experience on the Chromebook, striking a balance between convenience and privacy based on the user’s preferences and requirements.
Complete the Login Process
After setting up the sync preferences for the new user account on your Chromebook, you will need to complete the login process. This step involves entering the user’s Google account credentials or creating a new account if they don’t have one. Here’s how you can complete the login process for the new user:
1. Once you have set up the sync preferences, click on the “Next” button in the account creation dialog box.
2. If the user already has a Google account, they can enter their existing email address or username in the provided field. Then, click on the “Next” button.
3. On the following page, enter the user’s account password and click on the “Next” button again.
4. If the entered credentials are correct, the Chromebook will verify the information and proceed to complete the login process.
5. If the user doesn’t have a Google account, they can click on the “Create account” link located below the login form.
6. This will open a new page where the user can start the process of creating a new Google account by entering their personal information, including their desired email address and password.
7. Follow the on-screen instructions to provide the necessary details and complete the account creation process for the new user.
8. Once the Google account has been set up, the Chromebook will link the new account to the device, and the login process will be completed.
9. The user will then be able to access their personalized Chromebook settings, apps, extensions, bookmarks, and browsing history associated with their Google account.
It’s important to note that the login credentials provided during this process should be kept confidential to ensure the security and privacy of the user’s account and data.
By completing the login process, the new user account is fully activated on the Chromebook, allowing the individual to enjoy a customized and personalized user experience.
Customize the New User’s Settings and Preferences
After successfully creating and logging into a new user account on your Chromebook, you have the flexibility to customize the settings and preferences according to the user’s preferences. This allows for a tailored experience on the device. Here are the steps to customize the new user’s settings and preferences:
1. Once logged in, click on the user profile picture or avatar located in the bottom-right corner of the screen in the system tray.
2. A dropdown menu will appear, displaying the user’s account name and picture. Select “Settings” from the menu to open the Chromebook settings.
3. In the left sidebar of the settings menu, you will see various categories such as “Google Account,” “Device,” “Apps,” and more. Click on the desired category to customize specific settings.
4. In the selected category, you will find a range of options and preferences that can be adjusted. For example, in the “Google Account” category, you can manage account information, privacy settings, and synced data.
5. Explore each category and its sub-settings to customize various aspects of the user’s experience. You can modify display settings, keyboard preferences, sound options, and more in the “Device” category.
6. Additionally, in the “Apps” category, you can manage and organize installed applications and extensions.
7. Take advantage of the search bar at the top of the settings menu to quickly find specific settings or preferences by typing keywords.
8. Make changes according to the user’s preferences, adjusting settings as desired. For example, personalize the wallpaper, manage notifications, set up Wi-Fi connections, customize the browser toolbar, and fine-tune privacy settings.
9. As you make changes, the settings will be applied immediately, allowing you to see the impact of your customization.
10. Once you have finished customizing the various settings and preferences throughout the different categories, you can close the settings menu by clicking the “X” button in the top-right corner of the window or by pressing the “ESC” key on the keyboard.
By customizing the new user’s settings and preferences, you can create a personalized environment that suits their needs and preferences. This level of customization ensures that the user can optimize their productivity, comfort, and enjoyment while using the Chromebook.