
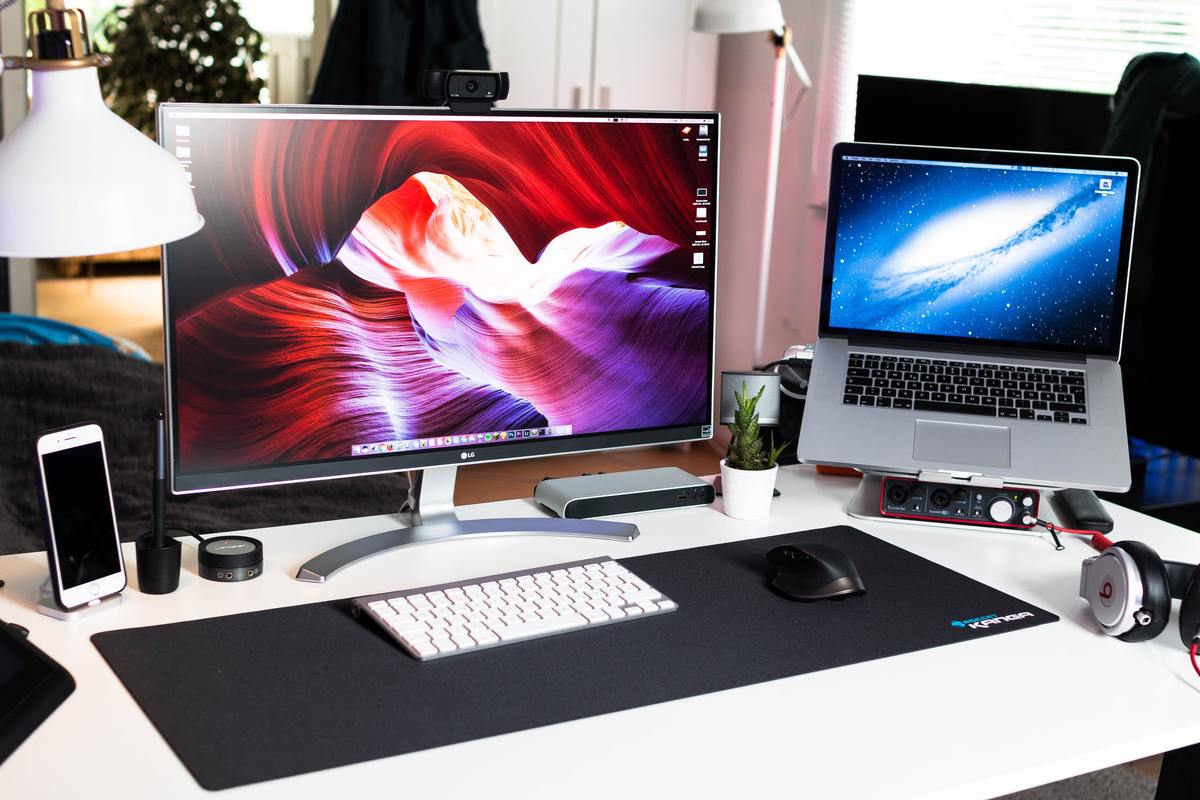
Benefits of using a second monitor with a laptop
Adding a second monitor to your laptop can significantly enhance your productivity and improve your overall computing experience. This setup offers numerous benefits that can make tasks easier and more efficient. Here are some key advantages of using a second monitor:
- Increased screen real estate: One of the main advantages of having a second monitor is the additional screen space it provides. This means you can have multiple applications or documents open side by side, eliminating the need to constantly switch between windows. Whether you’re working on a project, researching, or even gaming, having extra screen real estate allows for better multitasking and smoother workflow.
- Improved multitasking: With a second monitor, you can dedicate one screen for your primary tasks while using the other for secondary tasks or reference materials. For example, you can have your main work window on one screen and your email or messaging app open on the other. This setup enables you to prioritize your workflow without minimizing or resizing windows constantly.
- Enhanced collaboration: If you frequently collaborate with colleagues or clients, a second monitor can be invaluable. You can use one screen for video conferencing, online meetings, or shared documents, while keeping your main work on the other screen. This allows for smoother communication and more efficient collaboration, especially when working on complex projects or presentations.
- Better organization and reference: Having a second monitor makes it easier to keep important information visible and accessible. You can have reference materials, research papers, or data charts open on one screen while working on a document or spreadsheet on the other. This eliminates the need to constantly switch tabs or minimize windows, enhancing your workflow and saving valuable time.
- Increased gaming and entertainment experience: Gamers can greatly benefit from a second monitor setup. You can have the game running on one screen while having access to walkthroughs, character stats, or chat windows on the other screen. This allows for a more immersive gaming experience and easy access to important game-related information. For entertainment purposes, you can watch a movie or stream content on one screen while browsing the web or chatting on the other screen.
- Reduced eye strain: Using a second monitor can also contribute to reducing eye strain, especially when working on intensive tasks for extended periods. By spreading out your workload across two screens, you can adjust your viewing angles and minimize the need for constant scrolling or zooming. This promotes better ergonomics and lessens eye fatigue, ultimately contributing to improved comfort and productivity.
With all these benefits in mind, it’s clear that adding a second monitor to your laptop can greatly enhance your productivity and overall computing experience. Now that you know the advantages, let’s move on to the things you need to consider before adding a second monitor.
Things to consider before adding a second monitor
Before you add a second monitor to your laptop, there are a few important factors to consider. These considerations will ensure you make the most out of your dual monitor setup and avoid any potential issues. Here are some key things to keep in mind:
- Compatibility: Check if your laptop has the necessary ports and capabilities to support a second monitor. Most laptops come with HDMI, DisplayPort, or VGA ports, but it’s crucial to verify which type of connection your laptop supports. Additionally, make sure your laptop’s graphics card can handle multiple displays.
- Screen size and resolution: Consider the size and resolution of your laptop’s screen and how it will align with the second monitor. Match the resolution of the second monitor with your laptop’s screen resolution for a seamless visual experience. Also, take into account the physical space available for both monitors on your desk.
- Power and resource requirements: Adding a second monitor will consume additional power and resources from your laptop. Ensure that your laptop’s battery and power supply can support the increased workload. If you plan on using resource-intensive applications or gaming, make sure your laptop’s processing power and RAM are sufficient.
- Operating system support: Different operating systems have varying levels of support for multiple monitors. Ensure that your laptop’s operating system supports dual monitors and offers the necessary display settings and customization options.
- Workspace setup: Evaluate your workspace and desk layout to determine the optimal positioning of the second monitor. Consider factors such as the distance between your eyes and the screens, ergonomic setup, and any possible obstructions or reflections that could affect visibility.
- Cable management: Adding a second monitor means dealing with additional cables. Plan ahead and ensure you have the necessary cables and adapters to connect the second monitor to your laptop. Consider cable management solutions to keep your workspace tidy and prevent any potential cable clutter.
By taking these factors into account, you can avoid compatibility issues, optimize your workspace, and ensure a smooth setup process. Once you have considered these aspects, it’s time to move on to understanding the different types of connections used for connecting a second monitor to your laptop.
Understanding the different types of connections
When it comes to connecting a second monitor to your laptop, it’s crucial to understand the different types of connections available. The type of connection will depend on your laptop’s ports and the ports available on the second monitor. Here are the most common types of connections:
- HDMI (High-Definition Multimedia Interface): HDMI is the most widely used connection for audio and video transmission. Most modern laptops and monitors come equipped with HDMI ports, making it a popular choice. HDMI cables offer excellent digital quality and support high-resolution displays. Ensure that your laptop and second monitor have HDMI ports, and use an HDMI cable to connect them.
- DisplayPort: DisplayPort is another popular digital connection option. It offers similar benefits to HDMI, such as high-resolution display support and audio transmission. Some laptops and monitors have DisplayPort ports, but if your laptop lacks a DisplayPort, you can consider using a DisplayPort to HDMI adapter cable for compatibility.
- VGA (Video Graphics Array): VGA is an older analog connection that is still found in some laptops and monitors. While VGA cables can transmit video signals, they don’t transmit audio. VGA is gradually being replaced by digital connections, but if your laptop and second monitor both have VGA ports, you can use a VGA cable to connect them. Keep in mind that VGA does not support high-resolution displays as well as HDMI or DisplayPort.
- DVI (Digital Visual Interface): DVI is a digital connection option that is being phased out in favor of HDMI and DisplayPort. Some older laptops and monitors may have DVI ports. If your laptop has a DVI port and your second monitor also has a DVI port, you can use a DVI cable to connect them. Like VGA, DVI does not support audio transmission.
- USB-C (Universal Serial Bus Type-C): USB-C is a versatile connection that combines power, data transfer, and display capabilities into a single port. If your laptop has a USB-C port with DisplayPort alternate mode support, you can use a USB-C to HDMI or USB-C to DisplayPort cable to connect your second monitor.
It’s essential to check the available ports on your laptop and second monitor to determine the appropriate connection type. Consider factors such as the resolution and audio requirements when choosing the connection option. Additionally, be sure to have the necessary cables or adapters handy to ensure a proper and seamless connection between your laptop and second monitor.
Gathering the necessary equipment
Before you can start setting up a second monitor with your laptop, it’s important to gather the necessary equipment. Having the right tools and cables will ensure a smooth and hassle-free setup process. Here are the essential items you’ll need:
- Second monitor: Select a suitable monitor that meets your needs and preferences. Consider factors such as screen size, resolution, and connectivity options. Choose a monitor that complements your laptop and provides the desired level of functionality.
- Cables and adapters: Depending on the available ports on your laptop and second monitor, you’ll need the appropriate cables and adapters to connect them. Ensure you have the necessary HDMI, DisplayPort, VGA, or DVI cables, and any required adapters or converters to bridge different connection types.
- Power supply and surge protector: Make sure you have an adequate power supply to support the additional load of a second monitor. Check the power requirements of both your laptop and the second monitor and ensure you have sufficient power outlets. Consider using a surge protector to protect your devices from power fluctuations.
- Workspace setup: Evaluate your desk setup and determine if you need additional accessories. Consider items such as a monitor stand, adjustable arm, or cable management solutions to optimize your workspace and ensure a comfortable setup.
- Software and drivers: Some dual monitor setups may require specific software or drivers to enable all functionalities. Check the manufacturer’s website for your second monitor and laptop to ensure you have the latest drivers and any necessary software installed.
- Optional accessories: Depending on your preferences and specific needs, you may consider additional accessories such as a webcam for video conferences, external speakers for better audio quality, or a keyboard and mouse for a more comfortable setup.
By gathering these necessary items and ensuring you have the right cables and equipment, you’ll be well-prepared to set up a second monitor with your laptop. Having everything ready beforehand will save you time, frustration, and potential compatibility issues during the setup process.
Setting up the second monitor physically
Once you have gathered all the necessary equipment, it’s time to physically set up the second monitor with your laptop. Follow these steps to ensure a successful setup:
- Choose the right location: Select a suitable spot for your second monitor on your desk. Consider factors such as ergonomics, lighting conditions, and visibility. Ensure there is enough space for both the laptop and the second monitor.
- Unpack and assemble the monitor: Take the second monitor out of its packaging and assemble it according to the manufacturer’s instructions. This usually involves attaching the stand or mounting bracket to the monitor.
- Connect the power: Plug in the power cable of the second monitor and connect it to a power outlet or surge protector. Make sure the monitor is receiving power.
- Position the monitor: Adjust the monitor’s position and angle to your desired viewing preference. You can tilt the monitor, change its height, or swivel it to achieve the optimal viewing angle.
- Connect the cables: Take the appropriate cable (HDMI, DisplayPort, VGA, or DVI) and connect one end to the corresponding port on the second monitor. Connect the other end of the cable to the corresponding port on your laptop.
- Secure the cables: Ensure that the cables are securely connected to both the laptop and the second monitor. Use cable ties or clips to keep the cables organized and prevent them from getting tangled.
- Power on the second monitor: Press the power button on the second monitor to turn it on. Make sure it is receiving a signal from your laptop.
- Adjust the display settings: Depending on your operating system, you may need to adjust the display settings to properly configure the second monitor. This usually involves selecting the correct display mode (extended display or duplicate display) and aligning the position of the monitors to match their physical arrangement.
- Test the setup: Once the physical setup is complete, test the dual monitor setup to ensure everything is working as expected. Open different applications on both screens, drag windows between monitors, and verify that the display is functioning correctly.
By following these steps, you can physically set up the second monitor and ensure that it is ready for use with your laptop. Once the physical setup is complete, you can proceed to the next step: connecting the second monitor to your laptop.
Connecting the second monitor to the laptop
After setting up the second monitor physically, the next step is to connect it to your laptop. Follow these steps to establish the connection:
- Identify the correct port: Examine your laptop and identify the appropriate port to connect the second monitor. Commonly used ports include HDMI, DisplayPort, VGA, or DVI. Refer to your laptop’s user manual or specifications to determine which port to use.
- Connect the cable: Take the cable that corresponds to the port on your laptop and the second monitor. Insert one end of the cable into the respective port on the laptop. Ensure a secure connection by pushing the connector gently into the port until it is firmly in place.
- Connect the other end of the cable: Insert the other end of the cable into the corresponding port on the second monitor. Again, ensure a secure connection by pushing the connector gently until it is firmly in place.
- Power on the second monitor: If the second monitor has a separate power button, press it to turn on the monitor. Make sure the monitor is receiving power and displaying an active signal.
- Configure display settings: Depending on your operating system, you may need to adjust the display settings to enable and configure the second monitor. Open the display settings on your laptop and select the option to detect displays. Your laptop should recognize the second monitor and provide options for display mode, resolution, and orientation.
- Adjust the display arrangement: If needed, modify the position and arrangement of the two displays in the display settings. You can align the displays horizontally or vertically based on your preference. This ensures that your cursor moves smoothly between the two screens.
- Test the connection: Verify that the second monitor is functioning properly by testing its display. Open applications and drag them across both screens to confirm that the extended display or clone display mode is working as intended.
- Make additional adjustments: Adjust the brightness, contrast, and other display settings on the second monitor to suit your preferences. Additionally, you may need to adjust the position, tilt, or height of the second monitor to achieve the most comfortable viewing experience.
By following these steps, you can successfully connect the second monitor to your laptop. Remember to check your laptop’s user manual or support resources if you encounter any difficulties during the connection process. Once the second monitor is properly connected, you can proceed to adjust the display settings on both the laptop and the second monitor.
Adjusting display settings on the laptop
Once you have connected the second monitor to your laptop, it’s important to adjust the display settings to ensure optimal performance and usability. Follow these steps to adjust the display settings on your laptop:
- Open the display settings: Depending on your operating system, right-click on the desktop and select “Display settings” or navigate to the display settings through the control panel or system preferences.
- Detect the second monitor: In the display settings, select the option to detect displays. This will prompt your laptop to recognize the newly connected second monitor.
- Select the display mode: Choose the desired display mode for your dual monitor setup. The most common options are “Extended display” and “Duplicate display”. In extended display mode, you can use each monitor as a separate workspace, while duplicate display mode mirrors the same content on both monitors.
- Adjust resolution and orientation: Configure the resolution of the second monitor to match its native or desired resolution. You can also adjust the orientation of the second monitor (landscape or portrait) to match your preference.
- Position the displays: Arrange the position of the displays in the settings to match their physical placement. You can drag and drop the monitor icons in the settings interface to align them according to their position on your desk.
- Set the primary display: Determine which monitor will be the primary display. This is the default monitor where new windows will open and the taskbar will appear. Select the desired monitor as the primary display in the settings.
- Adjust other settings: Explore other display settings, such as brightness, contrast, and color calibration, to fine-tune the visual experience on both monitors. These settings may vary depending on your laptop’s graphics card and operating system.
- Apply and test the settings: Once you have made the necessary adjustments, apply the new settings. Test the dual monitor setup by opening applications and dragging them between the screens to ensure smooth transitions and optimal usability.
- Make further tweaks if needed: If you encounter any issues or prefer different settings, return to the display settings and make further tweaks as necessary. You can experiment with different resolutions, display modes, and positioning until you find the setup that suits your preferences.
By adjusting the display settings on your laptop, you can optimize the dual monitor setup and enhance your productivity and visual experience. Take the time to explore the settings and make any necessary adjustments until you are satisfied with the display configuration. Once the display settings on your laptop are properly adjusted, you can proceed to configure the display settings on the second monitor itself.
Configuring display settings on the second monitor
After adjusting the display settings on your laptop, it’s important to configure the display settings on the second monitor to ensure a seamless dual monitor setup. Follow these steps to configure the display settings on the second monitor:
- Access the on-screen display (OSD) menu: Most modern monitors have an on-screen display menu accessible through buttons or a joystick located on the monitor’s bezel. Press the corresponding button to access the OSD menu.
- Adjust brightness, contrast, and color settings: Navigate through the OSD menu to find options for brightness, contrast, and color calibration. Use these settings to adjust the visual display to your desired preferences. You can refer to the monitor’s user manual for specific instructions on navigating the OSD menu.
- Configure input source: If your second monitor has multiple input ports (e.g., HDMI, DisplayPort, VGA), ensure that the correct input source is selected. Use the OSD menu to switch between input sources until you see the correct display from your laptop.
- Align monitor settings with laptop settings: If your laptop’s resolution or display settings differ from the native settings of the second monitor, adjust the monitor’s settings accordingly to match the laptop’s configuration. This will ensure that both monitors display content consistently.
- Save and apply changes: Once you have made the necessary adjustments in the OSD menu, save and apply the changes. This ensures that the monitor retains the configured settings even if it is powered off and then turned on again.
- Test the configuration: Verify that the monitor is displaying the content from your laptop correctly. Open different applications, move windows between the screens, and evaluate the overall visual experience to ensure that the second monitor is functioning as intended.
- Make additional adjustments if needed: If you encounter any issues or prefer different settings, revisit the OSD menu and make further tweaks as necessary. Each monitor may have unique settings and customization options, so explore the OSD menu to utilize all available features.
By configuring the display settings on the second monitor, you can ensure that it matches your laptop’s settings and offers a consistent visual experience. Take the time to explore the OSD menu and adjust settings according to your preferences. Once you have configured the display settings on the second monitor, you’re ready to enjoy the benefits of a dual monitor setup.
Troubleshooting common issues
While setting up a second monitor with your laptop, you may encounter some common issues that can disrupt the smooth operation of the dual monitor setup. However, most of these issues can be resolved with some troubleshooting. Here are some common issues and their potential solutions:
- No signal or display: If the second monitor is not displaying any signal or shows a “no signal” message, check that all cables are securely connected to both the laptop and the monitor. Try using a different cable or port combination to rule out any cable or port issues. Additionally, confirm that the second monitor is powered on and set to the correct input source.
- Display resolution issues: If the resolution on the second monitor appears blurry or stretched, ensure that the second monitor is set to its native resolution in both the laptop’s display settings and the monitor’s own OSD menu. Adjust the resolution until the display is clear and matches the laptop’s screen.
- Screen flickering or artifacts: If you notice screen flickering, artifacts, or an unstable display, it could be due to incompatible or outdated graphics drivers. Update your laptop’s graphics drivers to the latest version from the manufacturer’s website. If the issue persists, try adjusting the refresh rate in the display settings or consult with technical support for further assistance.
- Mouse cursor issues: If the mouse cursor is not smoothly transitioning between monitors or disappears from one screen, check that both monitors are aligned properly in the display settings. Ensure that the second monitor is positioned correctly relative to the laptop screen. Adjust the position or orientation settings until the mouse cursor moves seamlessly between both monitors.
- Audio not working: If you’re not getting audio from the second monitor, ensure that the audio output is set to the correct device in the sound settings of your laptop. Some monitors require a separate audio cable connection, so make sure it is properly connected, if applicable. Additionally, check the volume settings on both the laptop and the monitor to ensure they are not muted or set too low.
- Color and brightness inconsistencies: If you notice color or brightness differences between the laptop screen and the second monitor, use the monitor’s OSD menu to adjust the color temperature, brightness, and contrast settings. Also, ensure that both displays are using the same color profile in the laptop’s display settings.
- Interference or black borders: If you encounter interference or black borders around the edge of the second monitor, it may indicate an issue with the display scaling or overscan settings. Adjust the scaling options in the display settings to eliminate any unwanted borders or interference on the second monitor.
By troubleshooting these common issues, you can resolve any disruptions to your dual monitor setup and ensure a smooth and functional experience. If you encounter persistent or complex issues, consult with technical support or refer to the documentation for your laptop and monitor for further guidance.
Tips for maximizing productivity with a second monitor
Adding a second monitor to your laptop can significantly enhance your productivity and efficiency. Here are some tips to help you make the most out of your dual monitor setup:
- Organize your workspace: Take advantage of the extra screen real estate by organizing your windows and applications across the two monitors. Keep your primary work on one screen and use the second screen for reference materials, communication tools, or secondary tasks.
- Use multitasking features: Operating systems offer various multitasking features that can be particularly useful with dual monitors. Take advantage of features like snap assist or virtual desktops to easily manage and switch between multiple applications across the two screens.
- Customize your monitor layout: Experiment with different monitor layouts to find the setup that suits your preferences and workflow. Consider whether a horizontal or vertical arrangement works best for your tasks and adjust the monitor positioning accordingly.
- Assign specific tasks to each monitor: Assign specific tasks or applications to each monitor to create dedicated workspaces. For example, use one screen for your main project, one for real-time data monitoring, and another for communication and collaboration tools.
- Utilize virtual desktops: If your operating system supports virtual desktops, create separate desktops for different projects or work modes. This allows you to switch between different desktops and utilize different application setups without cluttering your dual monitor setup.
- Maximize window utilization: Resize and position windows on each monitor to fully utilize the available space. For example, split your screen vertically or horizontally to display two or more windows side by side, allowing for easy multitasking and information comparison.
- Take advantage of shortcuts: Learn and utilize keyboard shortcuts to maximize efficiency when working with dual monitors. Shortcuts for moving windows between monitors, switching between applications, or activating virtual desktops can greatly streamline your workflow.
- Customize display settings: Adjust display settings to maintain a consistent visual experience between the laptop screen and the second monitor. Calibrate color profiles, adjust brightness, and ensure that text, icons, and windows are easily legible across both displays.
- Keep communication tools accessible: Reserve one monitor for communication tools like chat applications or email clients. This way, you can stay connected and respond quickly to messages without interrupting your main work on the other monitor.
- Minimize distractions: Use the second monitor to reduce distractions by separating your work-related tasks from personal or non-work-related activities. Reserve one monitor exclusively for work-related applications, while using the other for personal tasks or entertainment during breaks.
By implementing these tips, you can optimize your productivity and take full advantage of the benefits offered by a dual monitor setup. Experiment with different techniques and configurations to find the setup that works best for you and boosts your efficiency.