
Lighting
When setting up your room for the Oculus Rift, one important aspect to consider is the lighting. The right lighting can significantly enhance your virtual reality experience, while improper lighting can introduce glare and reflections that can be distracting and reduce the overall immersion.
Here are some guidelines to help you set up the optimal lighting for your Oculus Rift:
- Avoid direct sunlight: Sunlight can create strong reflections on the Oculus Rift lenses, which may affect your visibility within the virtual environment. It is best to choose a room with curtains or blinds that can block out sunlight during your VR sessions.
- Use soft, diffused lighting: Harsh, direct lighting can create harsh shadows and unwanted glare. It is recommended to use soft, diffused lighting sources such as lamps or overhead lights with translucent shades to create an even distribution of light in your room.
- Avoid lighting directly behind you: If there is a bright light source behind you, it may cast unwanted shadows on the VR headset or create a silhouette effect. Try to position your lighting so that it is in front or to the sides of you rather than directly behind.
- Experiment with colored lighting: While not necessary, some users find that colored lighting can enhance the immersive experience. You can experiment with colored LED bulbs or smart lighting systems to add a touch of ambiance to your VR setup.
- Consider adjustable lighting: If possible, having the option to adjust the brightness and color temperature of your lighting will allow you to customize the ambiance according to the content you are experiencing. This can help create a more immersive and comfortable environment.
By following these lighting guidelines, you can ensure that your room is well-lit and free from distracting reflections or glare, allowing you to fully immerse yourself in the virtual worlds of the Oculus Rift.
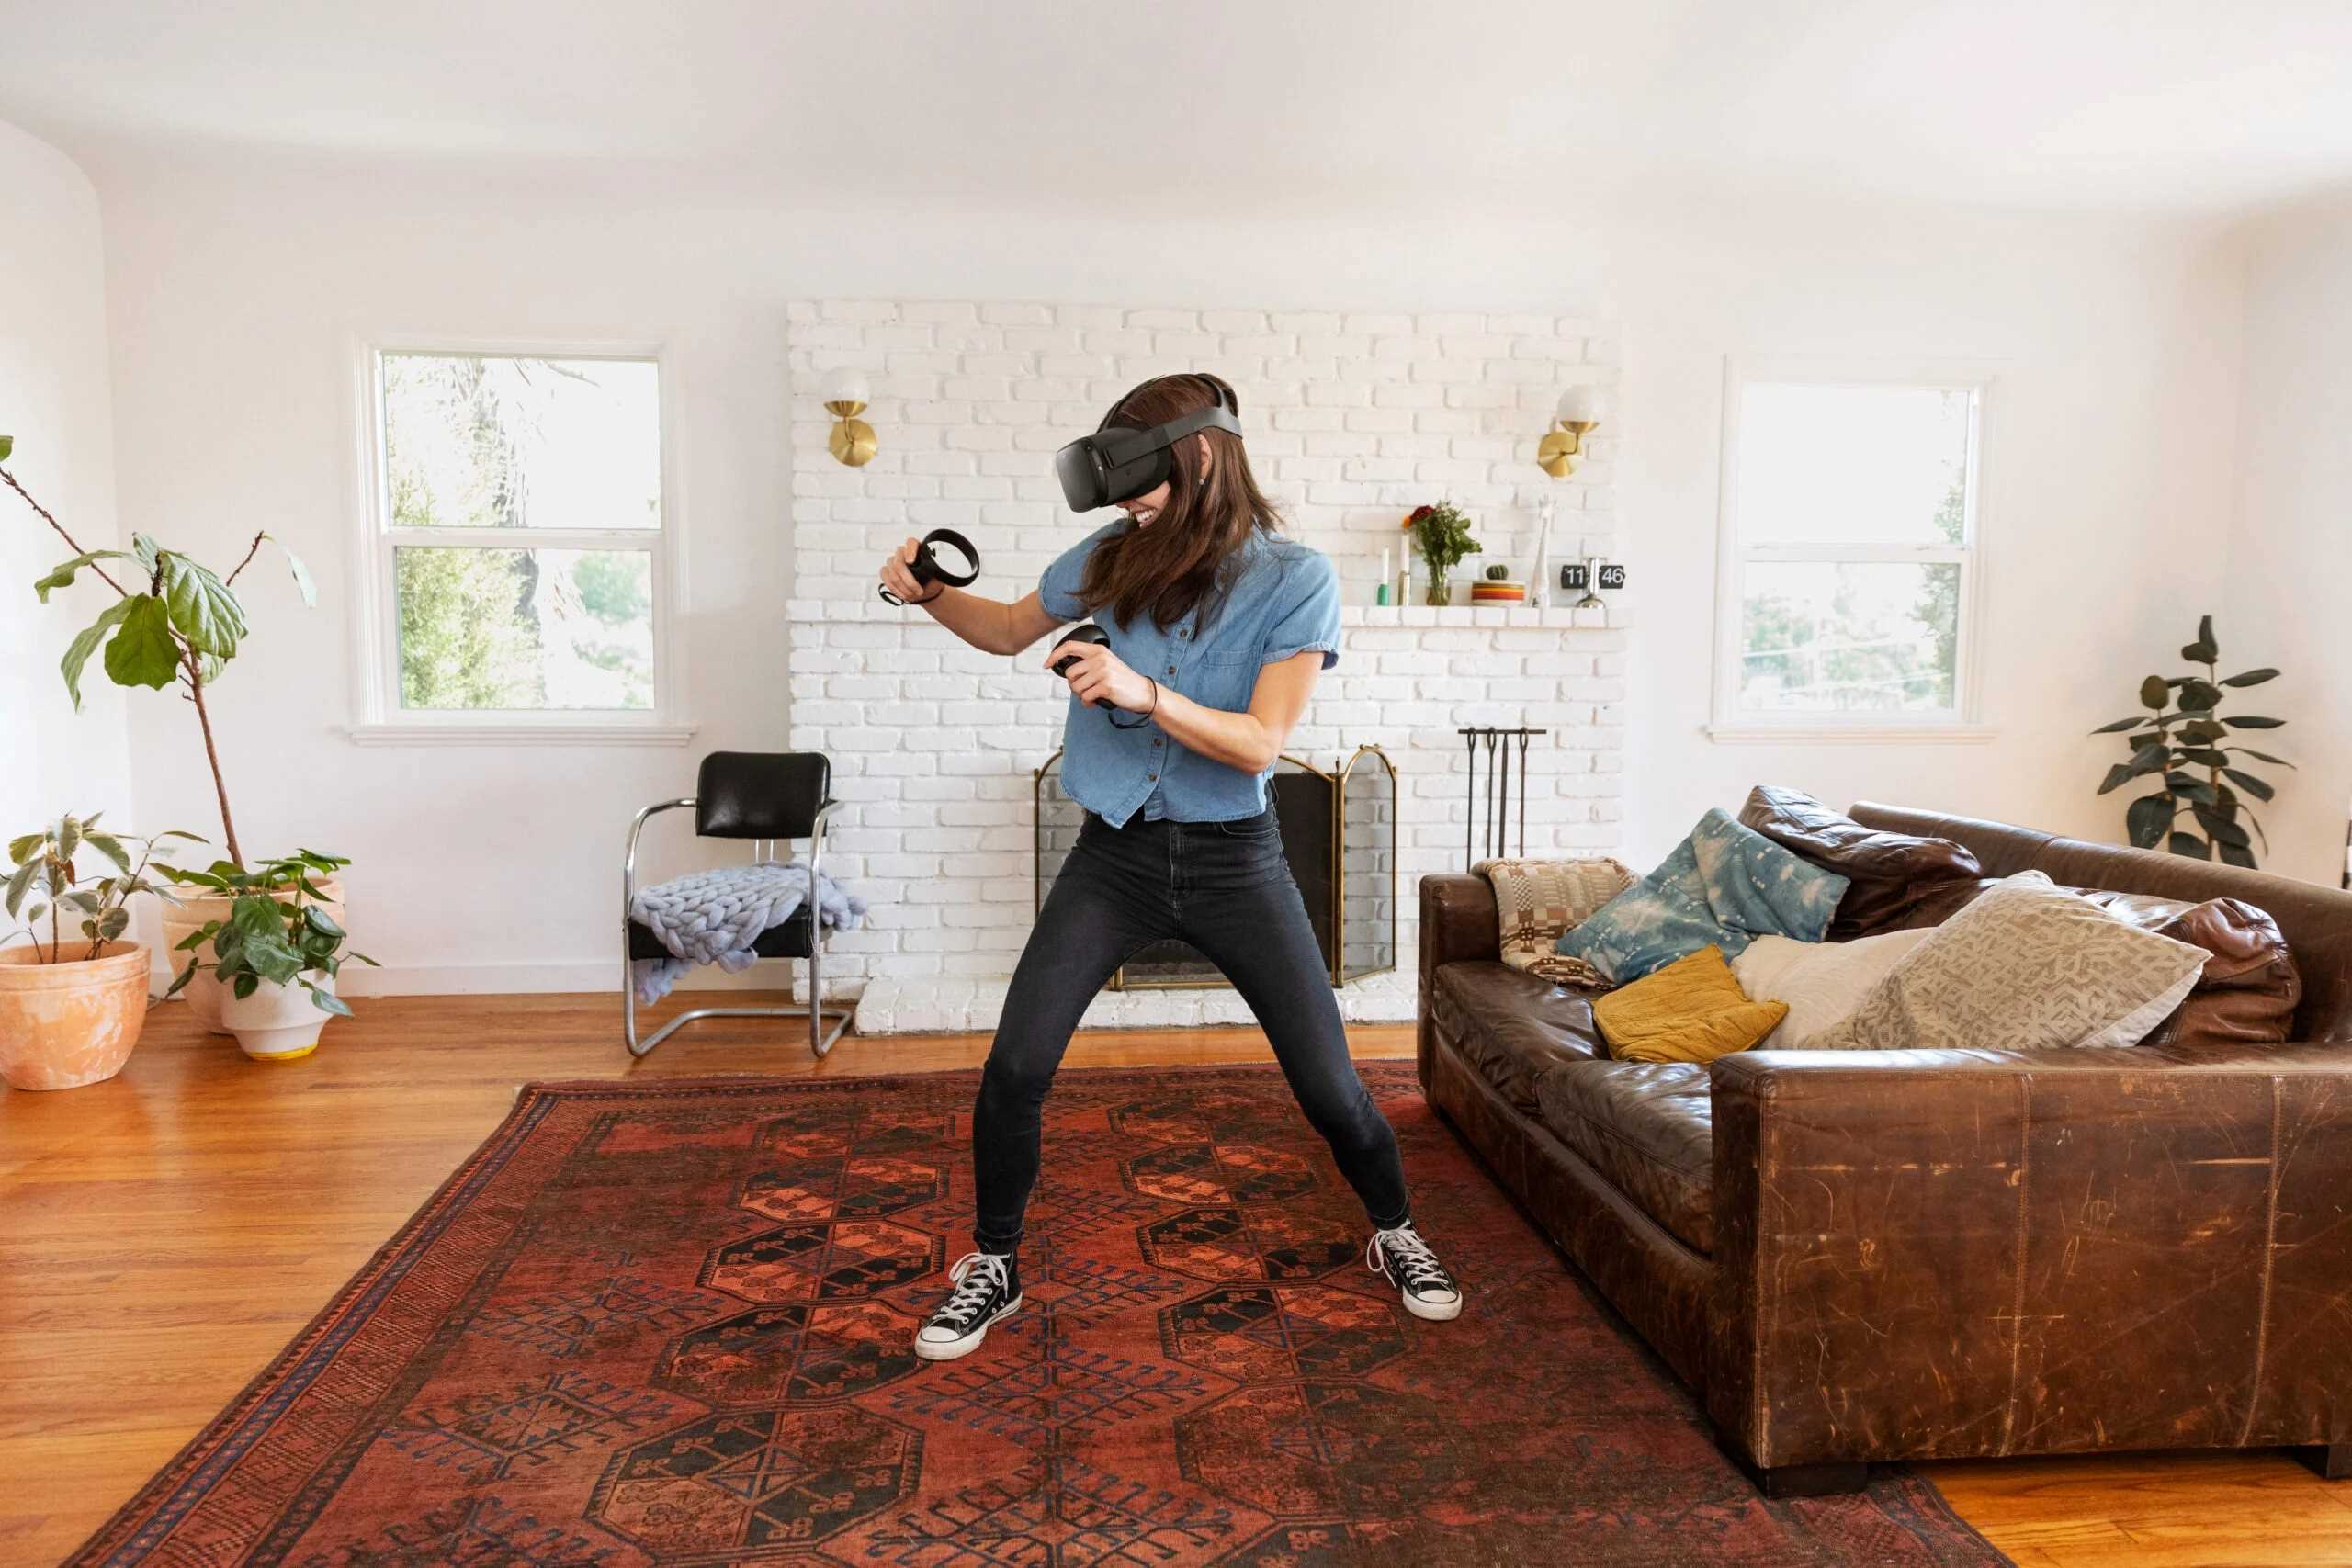
Clearing the Space
One of the key steps in setting up your room for the Oculus Rift is clearing the space to ensure a safe and unobstructed VR experience. Clearing the space not only prevents accidents but also allows for a more immersive gaming experience. Here are some tips to help you clear the space effectively:
- Remove obstacles: Take a thorough look around the room and identify any furniture, objects, or clutter that may hinder your movement while wearing the Oculus Rift. Remove any items that could potentially be in your way or cause you to trip or collide with them while in a virtual environment.
- Secure loose cables: Ensure that cables, such as power cords or audio cables, are organized and secured to prevent tripping hazards. Consider using cable management solutions like zip ties or cable clips to keep the cables out of the way and prevent them from tangling.
- Clear a play area: Mark out a designated play area in which you can move freely without any obstacles. Ideally, this area should be at least 6.5 feet by 6.5 feet (2m by 2m), but it’s recommended to have a larger space if possible. Make sure the play area is clear of furniture, sharp corners, and fragile objects.
- Consider room-scale VR: If you have enough space available, consider setting up your Oculus Rift for room-scale VR experiences. This allows for more physical movement and interaction within the virtual world. If opting for room-scale VR, ensure that the play area is even more spacious and that you have enough room to move around comfortably.
- Secure rugs or loose mats: If your room has rugs or loose mats, ensure they are properly secured to the floor to prevent slipping or tripping hazards. Use rug grippers or double-sided tape to keep them in place during your VR sessions.
By clearing the space in your room and removing any potential obstacles or hazards, you can create a safe and spacious environment for your Oculus Rift setup. This will allow you to fully immerse yourself in the virtual reality experience without any interruptions or risks.
Furniture Placement
Proper furniture placement is crucial when setting up your room for the Oculus Rift. It not only impacts the usability of the VR system but also ensures your comfort during extended gaming sessions. Consider the following tips for arranging your furniture:
- Create an open space: Arrange your furniture in such a way that it maximizes the available space and creates an open area for you to move around comfortably. This is especially important if you plan to engage in room-scale VR experiences that require physical movement.
- Avoid placing furniture near the play area: Make sure that no furniture is placed close to the designated play area to prevent any accidental collisions or obstructions while wearing the Oculus Rift. Move any nearby chairs, tables, or other objects away from the play area to ensure a clear and safe space.
- Consider adjustable furniture: If possible, opt for furniture that can be easily adjusted or moved to accommodate your VR setup. This includes adjustable chairs, tables, and monitor stands. Being able to modify the height or position of your furniture can contribute to a more comfortable and immersive experience.
- Ensure a comfortable seating position: If you plan to use the Oculus Rift for seated experiences, make sure you have a comfortable and supportive chair. Consider using an ergonomic chair that provides proper back and arm support to prevent fatigue and discomfort during extended gaming sessions.
- Organize storage for VR accessories: Allocate space or storage specifically for your Oculus Rift accessories, such as controllers, charging stations, and extra cables. This will help keep your setup organized and ensure that everything is easily accessible when you need it.
By strategically arranging your furniture, you can create an optimal space for your Oculus Rift setup. This not only enhances your overall VR experience but also promotes a comfortable and safe environment for extended gaming sessions. Take the time to plan and arrange your furniture in a way that suits your gaming needs and preferences.
Mounting Sensors
Properly mounting the sensors is an essential step in setting up your room for the Oculus Rift. The sensors track your movement in the virtual environment, so their placement and positioning are crucial for accurate tracking. Follow these guidelines to mount the sensors effectively:
- Optimal positioning: The ideal placement for the sensors is in the upper corners of the room, diagonally opposite each other. This setup provides the best coverage and tracking accuracy. Mount the sensors securely using brackets or wall mounts to ensure they remain stable during gameplay.
- Adjust the angle: Angle the sensors slightly downwards to cover the play area effectively. This helps the sensors track your movements from different angles and provides a more immersive experience. Experiment with the sensor angles and fine-tune them to achieve the best tracking results.
- Keep the line of sight clear: Ensure that there are no obstructions or objects blocking the sensors’ line of sight. This includes furniture, decorations, or anything that could interfere with the sensors’ tracking capabilities. Clear any potential obstacles to ensure uninterrupted tracking.
- Consider using stands: If wall mounting is not feasible, you can use adjustable stands to position the sensors at the desired height and angle. Stands provide flexibility and easy repositioning if needed, making them a convenient alternative to wall mounts.
- Use cable management: To avoid tangled cables and tripping hazards, use cable management solutions to neatly route the sensor cables along the walls or corners of the room. This not only keeps the setup organized but also prevents accidental disconnection or damage to the cables.
By properly mounting the sensors, you ensure optimal tracking accuracy and a smooth VR experience with the Oculus Rift. Take the time to position the sensors correctly, adjust the angles, and keep the line of sight clear to maximize the tracking capabilities of your VR system.
Cable Management
Effective cable management is essential for a clean and organized setup when preparing your room for the Oculus Rift. Properly managing the cables not only improves the aesthetics of your gaming area but also prevents tripping hazards and ensures smooth gameplay. Here are some tips for efficient cable management:
- Plan your cable routes: Before setting up your VR system, plan the routes for your cables. Consider the location of your PC or gaming console, the position of the sensors, and the path you’ll be moving through during VR experiences. This will help determine the most practical and organized cable routes.
- Use cable clips or ties: Secure your cables using cable clips or ties to keep them neatly bundled together. Attach the clips or ties to the edges of furniture, along the walls, or any other suitable surfaces to keep the cables organized and prevent them from tangling or becoming a tripping hazard.
- Utilize cable sleeves or covers: Cable sleeves or covers are a great way to conceal and protect your cables. These sleeves can be found in various lengths and sizes, allowing you to bundle multiple cables together and create a clean and streamlined look for your setup.
- Consider wireless options: If available and feasible, opt for wireless accessories such as a wireless adapter for your Oculus Rift or wireless controllers. This minimizes the number of cables required and reduces cable management needs, creating a more streamlined and hassle-free setup.
- Use cable clips for VR headset cables: VR headset cables can sometimes become tangled or get in the way during gameplay. To prevent this, attach cable clips to the side of your desk or other suitable surfaces to keep the headset cable secured and out of your way while you’re immersed in the virtual environment.
By implementing effective cable management techniques, you can create a clean and organized gaming space for your Oculus Rift. Not only does this enhance the visual appeal of your setup, but it also ensures a safe and hassle-free VR experience without any cable-related distractions or hazards.
Adjusting the IPD
One of the essential steps in setting up your room for the Oculus Rift is adjusting the interpupillary distance (IPD). IPD refers to the distance between the centers of your pupils and plays a crucial role in achieving a clear and comfortable VR experience. Here’s how you can properly adjust the IPD:
- Locate the IPD adjustment slider: The Oculus Rift headset is equipped with an IPD adjustment slider. This slider is usually located underneath the front of the headset, near the lenses. Locate the slider and familiarize yourself with its operation.
- Measure your IPD: To determine your IPD, you can use a ruler or an IPD measurement tool. With the ruler or tool held up to your face, align the zero mark with the center of one pupil and record the measurement at the center of the other pupil. This measurement is your IPD.
- Adjust the IPD slider: With the Oculus Rift headset on, look through the lenses and find a point of reference, such as text or an object. Adjust the IPD slider to match your measured IPD. Move the slider until the point of reference appears sharp and clear. Make small adjustments until you find the best setting for your vision.
- Experiment with different settings: Everyone’s eyes are unique, so it may take some trial and error to find the optimal IPD setting. If you’re not satisfied with the initial adjustment, try different IPD settings to determine what works best for you. Take your time and find the setting that provides the best clarity and comfort.
- Remember to adjust for each use: It’s important to adjust the IPD for each person using the Oculus Rift. If you share your VR headset with others, make sure to readjust the IPD slider to match their individual measurements before they use the system. This ensures that everyone can fully enjoy the visual quality of the virtual reality experience.
By properly adjusting the IPD on your Oculus Rift, you can tailor the visual experience to match your unique eye measurements. This allows for a more comfortable and immersive VR experience with clear, sharp visuals.
Setting Up the Guardian System
The Guardian system is a crucial component of the Oculus Rift setup, as it helps create a virtual boundary within your physical space to prevent you from accidentally bumping into objects or walls while immersed in VR. Follow these steps to set up the Guardian system:
- Enable Guardian during setup: When initially setting up the Oculus Rift, you will be prompted to set up the Guardian system. Ensure that you enable this feature by following the on-screen instructions.
- Outline your play area: After enabling the Guardian system, you will need to outline your play area. Put on the Oculus Rift headset and follow the instructions to trace the boundary by physically moving around the room. This creates a virtual boundary that defines the safe area for your VR experiences.
- Adjust the Guardian sensitivity: Depending on your preferences and the size of your play area, you can customize the sensitivity of the Guardian system. This allows you to adjust how close you can get to the virtual boundary before a warning is triggered. Experiment with the sensitivity settings to find the right balance between safety and freedom of movement.
- Ensure proper lighting: The Guardian system relies on visual sensors to detect the boundaries of your play area. It is important to have adequate lighting in the room to ensure the system can accurately detect the virtual boundary. Avoid overly dim or excessively bright lighting conditions that might affect the system’s performance.
- Regularly recalibrate the Guardian system: Over time, the position of furniture or objects in your room may change. It is advisable to recalibrate the Guardian system periodically to ensure its accuracy. This will help maintain the effectiveness of the system in keeping you safe during your VR experiences.
- Take note of the boundary warnings: Pay attention to the visual and audio warnings provided by the Guardian system when you are nearing the boundaries of your play area. This will help you stay aware of your position and prevent accidental collisions with nearby objects or walls.
By properly setting up and calibrating the Guardian system, you can enjoy your VR experiences with peace of mind, knowing that you have a virtual boundary to keep you safe. Take the time to outline your play area and customize the settings to match your specific needs and room conditions.
Setting Up Audio
Audio is an important aspect of the virtual reality experience, enhancing immersion and adding depth to the virtual worlds you explore with the Oculus Rift. Follow these steps to properly set up audio for your VR system:
- Choose the right audio setup: Decide on the audio setup that suits your preferences and gaming environment. You have several options, including headphones, earbuds, or external speakers. Consider factors such as sound quality, comfort, and privacy when making your decision.
- Connect your audio device: Depending on the audio setup you choose, connect your headphones, earbuds, or external speakers to the appropriate audio output on your PC or gaming console. Ensure that the audio device is properly connected and recognized by your system.
- Adjust volume levels: Test your audio setup and adjust the volume levels to a comfortable level. You want the audio to be immersive without being too loud or overwhelming. Take into consideration any specific volume settings recommended by the manufacturer of your audio device.
- Consider spatial audio: If your audio setup supports it, enable spatial audio technology, such as Windows Sonic or Dolby Atmos, to enhance the 3D audio experience in virtual reality. This technology creates a more immersive soundscape by accurately positioning the audio cues in relation to your movements within the virtual environment.
- Ensure audio sync: Check that the audio is synced correctly with the visual elements of your VR experiences. If you notice any noticeable delay or synchronization issues, adjust the audio settings or consult the documentation for your audio device to troubleshoot the problem.
- Be aware of your surroundings: When using headphones or earbuds, it’s important to be mindful of your surroundings. Make sure the volume is not too loud to prevent isolation from external sounds, especially if you are in a shared or potentially hazardous environment.
By properly setting up your audio, you can fully immerse yourself in the virtual worlds of the Oculus Rift. Take the time to choose the right audio setup, adjust the volume levels, and ensure proper synchronization to create a captivating and immersive auditory experience.