
Checking System Requirements
Before installing Trend Micro Internet Security, it is important to ensure that your system meets the minimum requirements for a smooth and successful installation. By checking the system requirements beforehand, you can avoid any compatibility issues and ensure that the software functions optimally on your device.
Here are the basic system requirements for installing Trend Micro Internet Security:
- Operating System: Trend Micro Internet Security is compatible with Windows 10, Windows 8.1, and Windows 7. Make sure you have the latest updates installed for your operating system to avoid any conflicts.
- Processor: Your device should have at least a 1GHz processor or higher for the software to run efficiently.
- Memory: A minimum of 1GB of RAM is required for Trend Micro Internet Security. However, it is recommended to have 2GB or more for better performance.
- Storage Space: Ensure that you have enough free disk space available on your device. The recommended minimum is 1.3GB, but it may vary depending on the specific version of Trend Micro Internet Security you are installing.
- Internet Connection: A stable internet connection is necessary for downloading the software and receiving updates.
It is also crucial to note that some features and functionalities of Trend Micro Internet Security may require additional system resources or specific hardware requirements. These can include but are not limited to features such as advanced threat protection, secure online banking, and secure password management.
Before proceeding with the installation, it is advisable to update your system software, including the operating system and any relevant drivers, to ensure compatibility and optimal performance. Additionally, make sure your device meets the minimum hardware requirements mentioned above.
By carefully checking and meeting the system requirements, you can ensure a smooth installation and enhance the overall performance of Trend Micro Internet Security on your device.
Downloading the Trend Micro Internet Security
To install Trend Micro Internet Security, you first need to download the software from the official Trend Micro website. Follow these steps to download the software onto your device:
- Open your preferred web browser and navigate to the Trend Micro website.
- On the homepage, locate the “Products” or “Downloads” section and click on it to access the product list.
- Search for “Trend Micro Internet Security” and click on the corresponding download link.
- Before downloading, you may be prompted to select the appropriate version based on your operating system. Choose the correct version and click on the download button.
- Once the download begins, wait for it to complete. The duration will depend on the speed of your internet connection.
- After the download finishes, navigate to the location where the file was saved on your computer.
- Double-click on the downloaded file to start the installation process.
It is important to note that downloading software from official sources ensures its authenticity and reduces the risk of downloading malicious or fake programs. Always be cautious of downloading security software from untrusted websites, as they may contain malware or compromise your system’s security.
During the download process, it is recommended to avoid any interruptions, such as turning off your device or disconnecting from the internet, as this may corrupt the downloaded file. If the download is interrupted due to unforeseen circumstances, you can resume it from where it left off once the issue is resolved.
By following these steps, you can successfully download the Trend Micro Internet Security software onto your device. Once the download is complete, you can proceed with the installation process to start protecting your computer against online threats.
Installing Trend Micro Internet Security
After downloading the Trend Micro Internet Security software, it’s time to install it on your device. Follow these step-by-step instructions to complete the installation process:
- Locate the downloaded installation file on your computer and double-click on it to begin the installation.
- A security warning may appear, asking for your permission to run the installer. Click “Yes” or “Run” to proceed.
- The Trend Micro Internet Security installer will launch. Read the End User License Agreement (EULA) and click on the “Agree and Install” button if you accept the terms.
- Wait for the installer to extract the necessary files and components.
- Once the extraction is complete, the installation wizard will appear on your screen. Follow the on-screen instructions to proceed.
- During the installation process, you may be prompted to choose the installation type. Select the “Typical” option for a standard installation with recommended settings, or choose “Custom” to customize the installation settings according to your preferences.
- If prompted, enter the serial number or activation code for your Trend Micro Internet Security. This information is usually provided with your purchase or subscription.
- Continue following the instructions provided by the installer. The installation may take a few minutes, depending on your device’s speed and performance.
- Once the installation is complete, you may be asked to restart your computer. It is recommended to do so to ensure that Trend Micro Internet Security is fully integrated into your system.
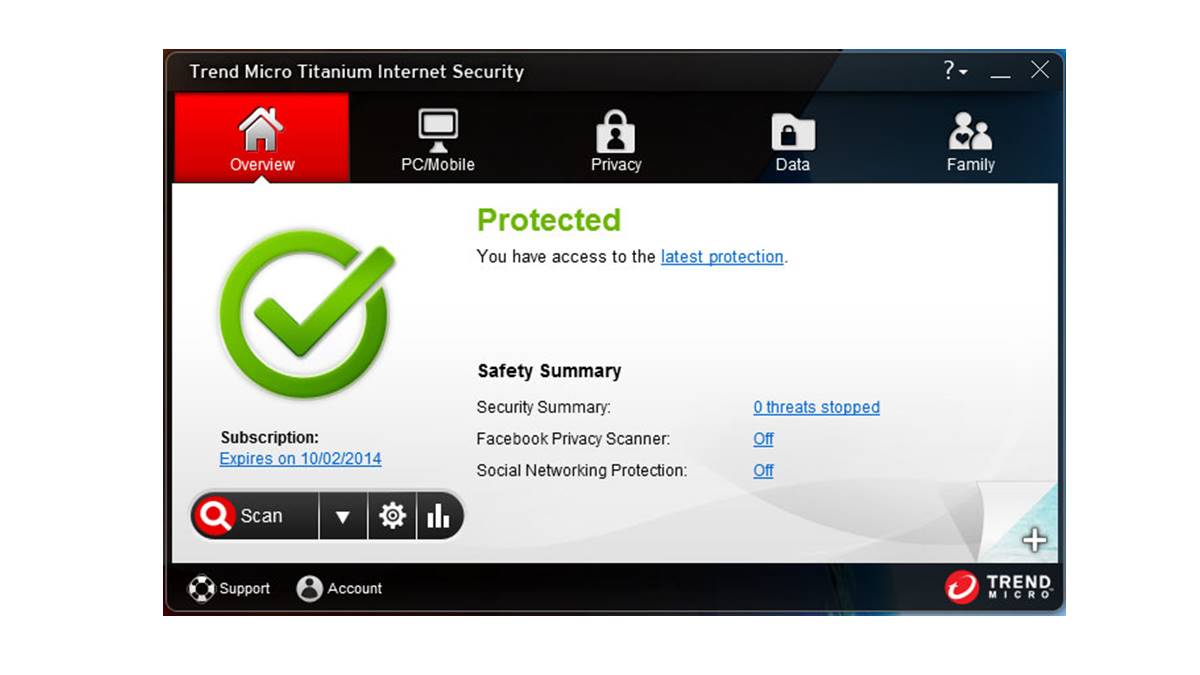
After restarting your computer, Trend Micro Internet Security will be installed and ready to protect your device from online threats. The software will run in the background, automatically updating and scanning your computer for any potential security risks.
It is important to note that during the installation process, your device should remain connected to the internet to download the latest updates and ensure the software’s effectiveness. A stable internet connection is essential for the successful installation and functioning of Trend Micro Internet Security.
By following these simple steps, you can easily install Trend Micro Internet Security and enjoy the peace of mind that comes with having comprehensive protection for your device and personal information.
Activating Trend Micro Internet Security
After the successful installation of Trend Micro Internet Security, it is important to activate the software to ensure continuous protection against online threats. Follow these steps to activate your Trend Micro Internet Security:
- Launch Trend Micro Internet Security by double-clicking on the program’s icon on your desktop or by accessing it from the Start menu.
- Once the program opens, you will be prompted to activate your copy of Trend Micro Internet Security. Click on the “Activate Now” or “Activate” option.
- Enter the serial number or activation code that was provided to you during the installation or included with your purchase or subscription.
- Click on the “Next” or “Activate” button to proceed.
- Follow the on-screen instructions to complete the activation process. This may include providing your email address or creating a Trend Micro account.
- Once the activation is successful, you will receive a confirmation message. Click “Finish” or “Done” to complete the process.
It is important to ensure that the activation code or serial number you enter is correct to activate Trend Micro Internet Security successfully. Double-check the information provided to avoid any errors during the activation process.
Activating Trend Micro Internet Security enables you to access all the features and functionalities of the software, including real-time protection, web filtering, and online security tools. It also ensures that you receive regular updates to keep your device protected against the latest threats.
If you encounter any issues during the activation process, such as an invalid or expired activation code, it is recommended to contact Trend Micro customer support for further assistance. They will be able to guide you through the necessary steps to resolve any activation-related problems.
Once Trend Micro Internet Security is successfully activated, you can enjoy a safe and secure online experience, knowing that your device is protected by industry-leading security software.
Customizing Trend Micro Internet Security Settings
Trend Micro Internet Security offers various customization options that allow you to tailor the software to your specific needs and preferences. By customizing the settings, you can optimize the protection provided by the software and enhance your overall security experience. Here are some key settings you can customize:
- Scan Settings: You can customize the scan schedule, scan types, and scan locations according to your requirements. This allows you to perform regular scans of specific files or folders, or schedule scans at convenient times when your device is not in use.
- Real-Time Protection: Customize the real-time protection settings to specify the level of security you want. You can adjust settings related to web and email protection, privacy protection, and threat detection methods.
- Firewall Settings: Trend Micro Internet Security includes a firewall to monitor and control incoming and outgoing network traffic. Customize the firewall settings to allow or block specific applications or network connections.
- Web Browsing Protection: Enable or disable web browsing protection features, such as website filtering and blocking malicious URLs. You can also customize the level of web threat detection and manage website exceptions.
- Privacy Scanner Settings: Customize the privacy scanner settings to scan for confidential information like credit card numbers, social security numbers, or other sensitive data stored on your device.
- Parental Control Settings: If you have children using the same device, you can customize the parental control settings to restrict access to inappropriate content, set time limits, and monitor online activities.
- Update Settings: Configure the update settings to automatically download and install the latest program updates and virus definitions. This ensures that your device is protected against the latest threats.
To customize these settings and more, follow these steps:
- Open Trend Micro Internet Security on your device.
- Navigate to the settings or preferences section within the program.
- Explore the various categories and options available to customize the settings according to your preference.
- Make the desired changes to the settings by selecting or deselecting checkboxes, adjusting sliders, or choosing from drop-down menus.
- Once you have customized the settings, save the changes and exit the settings menu.
It is important to strike a balance between customization and default settings to ensure adequate protection without compromising the integrity of your device’s security. Regularly review and update your settings as needed to adapt to evolving threats and changes in your online habits.
By customizing Trend Micro Internet Security settings, you can tailor the software to match your specific needs and provide optimal protection for your device and personal information.
Updating Trend Micro Internet Security
Regularly updating Trend Micro Internet Security is essential to ensure that your computer stays protected against the latest threats and vulnerabilities. The software relies on frequent updates to keep up with new malware signatures, security patches, and other important enhancements. Here are the steps to update Trend Micro Internet Security:
- Open Trend Micro Internet Security on your device.
- Look for the “Update” or “Update Now” option within the program’s interface.
- Click on the “Update” button to initiate the update process.
- The software will connect to the Trend Micro update servers to check for available updates.
- If there are any updates available, the software will begin downloading and installing them automatically.
- Wait for the update process to complete. The duration may vary depending on the size and number of updates.
- Once the updates are installed, you will receive a confirmation message.
It is important to keep your device connected to the internet throughout the update process to ensure the successful download and installation of the updates. A stable and reliable internet connection is recommended to avoid any interruptions or issues during the update process.
By regularly updating Trend Micro Internet Security, you ensure that your device has the latest definitions and patches to protect against new and emerging threats. These updates not only detect and remove recent malware but also address any security vulnerabilities that may exist in the software.
It is advisable to enable automatic updates within Trend Micro Internet Security to ensure that your device receives the latest updates without manual intervention. With automatic updates enabled, the software will regularly check for updates in the background and install them as soon as they become available.
Keep in mind that updates are crucial for maintaining the effectiveness of your security software. Failing to update Trend Micro Internet Security can leave your device vulnerable to new and evolving cyber threats, potentially compromising your security and privacy.
By following these simple steps and keeping your software up to date, you can ensure that Trend Micro Internet Security provides the highest level of protection for your computer.
Scanning Your Computer for Threats
Performing regular scans of your computer is crucial to identify and eliminate any potential threats or malware that may have infiltrated your system. Trend Micro Internet Security provides several scanning options to ensure comprehensive protection. Here’s how you can scan your computer:
- Open Trend Micro Internet Security on your device.
- Navigate to the scanning or security section within the program’s interface.
- Select the type of scan you want to perform:
- Quick Scan: This scan examines commonly infected areas of your system, such as running processes and critical system files. It is a fast scan that provides a general overview of your system’s security.
- Full Scan: A full scan checks every file and folder on your computer, leaving no stone unturned. It is a comprehensive scan that may take longer to complete but provides a thorough analysis of your system.
- Custom Scan: If you have specific files or folders you want to scan, you can create a custom scan and select the specific locations you wish to check.
- Once you have chosen the scan type, click on the “Scan” or “Start” button to initiate the scanning process.
- The software will start scanning your computer for any threats or suspicious files.
- During the scan, the software will display the progress and inform you of any detected threats.
- If any threats are found, you will be prompted to take appropriate actions, such as quarantining or removing the infected files.
- After the scanning process is complete, you will receive a report detailing the scan results and any actions taken by the software.
It is important to note that the duration of the scan depends on the size of your storage and the selected scan type. A full scan may take longer to complete, especially if you have a large number of files on your computer.
It is recommended to schedule regular scans to ensure continuous protection. You can set up automatic scans at specific times or intervals according to your preferences. This helps to maintain a proactive approach to security and detect any threats in a timely manner.
By performing regular scans with Trend Micro Internet Security, you can identify and remove any malicious files or potential threats, ensuring the ongoing security of your computer and protecting your privacy.
Managing Exclusions in Trend Micro Internet Security
Trend Micro Internet Security provides the option to manage exclusions, allowing you to specify files, folders, or websites that you want the software to exclude from scans or other security measures. This is particularly useful when dealing with false positives or allowing certain applications to run without interference. Here’s how you can manage exclusions:
- Open Trend Micro Internet Security on your device.
- Navigate to the settings or preferences section within the program’s interface.
- Look for the “Exclusions” or “Exceptions” category.
- Click on the “Manage Exclusions” or “Manage Exceptions” button.
- Choose the type of exclusion you want to set:
- File Exclusion: Exclude specific files or folders from being scanned or monitored by Trend Micro Internet Security.
- Folder Exclusion: Exclude entire folders from being scanned or monitored by the software.
- Website Exclusion: Exclude specific websites from being blocked or filtered by Trend Micro Internet Security’s web protection.
- Click on the “Add” or “Browse” button to select the file, folder, or website you want to exclude.
- Once selected, confirm the exclusion by clicking “OK” or “Add” (the terminology may vary).
- Repeat this process for each file, folder, or website you want to exclude.
- When you are finished adding exclusions, save the changes and exit the settings menu.
Managing exclusions allows you to tailor the scanning and protection capabilities of Trend Micro Internet Security to your specific needs. However, exercise caution when adding exclusions, as excluding certain files or websites may compromise the security of your system.
It is important to regularly review and update the exclusions to ensure they are still valid. Files or websites that were previously trusted may become compromised over time, so it is important to reevaluate their status periodically.
By effectively managing exclusions in Trend Micro Internet Security, you can strike a balance between comprehensive protection and allowing legitimate files or websites to function without interference. This customization ensures that the software works seamlessly with your system and minimizes false positives or unnecessary alerts.
Using the Firewall in Trend Micro Internet Security
The firewall feature in Trend Micro Internet Security adds an extra layer of protection by monitoring and controlling network traffic on your computer. It acts as a barrier between your device and potential external threats, allowing you to manage and customize firewall settings. Here’s how you can use the firewall in Trend Micro Internet Security:
- Open Trend Micro Internet Security on your device.
- Navigate to the settings or preferences section within the program’s interface.
- Look for the “Firewall” category or tab.
- Enable the firewall if it is not already turned on. Typically, the firewall is enabled by default.
- Explore the different firewall settings and options for customization:
- Intrusion Detection System (IDS): Configure the IDS settings to detect and block any suspicious or malicious network activities.
- Application Control: Set application-based rules to allow or deny incoming or outgoing network connections for specific programs.
- Port Forwarding: Customize the port forwarding settings to allow specific network services or applications to bypass the firewall.
- Proxy Settings: Manage proxy settings to control how your device accesses the internet through the firewall.
- Based on your requirements, adjust the firewall settings by selecting appropriate options or configuring specific rules.
- Save the changes and exit the settings menu.
It is important to strike a balance between a secure firewall configuration and allowing necessary network connections. Be cautious when modifying firewall settings, as excessive blocking may interfere with legitimate network activities or applications.
Regularly review your firewall settings to ensure they are up-to-date and aligned with your current security needs. This includes checking for any new program rules, updating intrusion detection signatures, and monitoring firewall logs for any suspicious activities.
By utilizing the firewall feature in Trend Micro Internet Security, you can safeguard your computer against unauthorized access, malicious network traffic, and potential threats. It provides an additional layer of protection to ensure the security and integrity of your network connections and data.
Using the Privacy Scanner in Trend Micro Internet Security
Trend Micro Internet Security offers a Privacy Scanner feature that helps protect your personal information by scanning your computer for sensitive data and potential privacy risks. By using the Privacy Scanner, you can identify and manage privacy-related concerns to ensure the security of your personal information. Here’s how you can use the Privacy Scanner in Trend Micro Internet Security:
- Open Trend Micro Internet Security on your device.
- Navigate to the privacy or data protection section within the program’s interface.
- Locate the Privacy Scanner option and initiate a scan.
- The Privacy Scanner will analyze your computer for potential privacy risks, such as stored passwords, credit card numbers, or other sensitive information.
- Once the scan is complete, the Privacy Scanner will provide a report detailing any identified privacy concerns.
- Review the report carefully to identify any sensitive information that may be at risk.
- You can take appropriate action based on the scan results, such as deleting or securing sensitive files or ensuring that passwords are encrypted.
- Consider enabling any additional privacy features offered by Trend Micro Internet Security, such as secure password management or secure browsing.
It is important to regularly scan your computer with the Privacy Scanner to stay vigilant about your privacy and protect your personal data. Be aware that the scan may take some time, especially if you have a large number of files or sensitive information stored on your computer.
In addition to using the Privacy Scanner, it is crucial to practice good privacy habits, such as using strong and unique passwords, avoiding suspicious websites, and being cautious while sharing personal information online.
By using the Privacy Scanner in Trend Micro Internet Security, you can proactively protect your personal information and identify any privacy risks that may exist on your computer.
Configuring Parental Controls in Trend Micro Internet Security
Trend Micro Internet Security offers robust Parental Control features that allow you to monitor and control your child’s online activities. By configuring Parental Controls, you can create a safer online environment for your children and protect them from inappropriate content. Here’s how you can configure Parental Controls in Trend Micro Internet Security:
- Open Trend Micro Internet Security on your device.
- Navigate to the settings or preferences section within the program’s interface.
- Look for the “Parental Controls” or “Child Protection” category.
- Click on the “Configure” or “Settings” button to access the Parental Control options.
- Create a profile for each child by providing their name and age.
- Specify the desired restrictions based on the child’s age and maturity level. These can include website filtering, time limits, and blocking specific types of content.
- Set up a schedule for internet usage, allowing specific times for online activities.
- Customize website exceptions if there are specific websites that you want to allow or block for your child.
- Enable safe search to filter search engine results for inappropriate content.
- Set up email notifications to receive reports and updates on your child’s online activities.
- Save the changes and exit the settings menu.
It is important to regularly review and update the Parental Control settings to ensure they align with your child’s changing needs and online habits. Stay engaged with your child’s online activities and have open conversations about internet safety and responsible online behavior.
Parental Controls provide an effective way to safeguard your child’s online experience and protect them from potentially harmful content. However, it is important to understand that no system is foolproof, and additional parental supervision is always recommended.
By configuring Parental Controls in Trend Micro Internet Security, you can have peace of mind knowing that your child is protected while exploring the digital world.
Troubleshooting Common Installation Issues
While installing Trend Micro Internet Security is usually a straightforward process, you may encounter some common issues that can hinder a successful installation. It’s important to be aware of these issues and know how to troubleshoot them. Here are some common installation issues and their possible solutions:
- Compatibility Issues: Ensure that your computer meets the minimum system requirements for installing Trend Micro Internet Security. Check the operating system version, processor speed, available memory, and disk space. If your computer falls short of these requirements, consider upgrading the necessary components or choosing a different version of the software that is compatible.
- Conflicting Software: If you have previously installed security software or antivirus programs, they may conflict with Trend Micro Internet Security during the installation process. Uninstall any existing security software from your computer before attempting to install Trend Micro. Use the appropriate software removal tools or the control panel’s “Add or Remove Programs” feature to remove the conflicting software.
- Corrupted Installation File: If the downloaded installation file for Trend Micro Internet Security is corrupted, you may encounter installation issues. Re-download the installation file from the official Trend Micro website to ensure it is intact. Make sure to complete the download without any interruptions and verify the file integrity using the provided checksum or hash value.
- No Internet Connection: Trend Micro Internet Security requires an active internet connection for the installation process. Make sure your device is connected to a stable network connection during the installation. If you experience any issues with your internet connection, resolve them before proceeding with the installation.
- User Account Control (UAC) Issues: User Account Control can sometimes interfere with the installation process. Disable UAC temporarily during the installation by adjusting the settings in the Control Panel. Remember to re-enable UAC after the installation is complete to maintain the security of your system.
- Installation Freeze or Hang: If the installation process freezes or hangs and does not progress, manually restart your computer and try reinstalling Trend Micro Internet Security. Ensure that your computer is free from any malware or viruses that can cause unexpected issues during installation.
If you encounter any other installation issues that are not covered here, it is recommended to visit the Trend Micro support website or contact their customer support for further assistance. They will have the resources and expertise to help you troubleshoot specific problems and provide tailored solutions.
By being aware of these common installation issues and their troubleshooting steps, you can overcome any hurdles and successfully install Trend Micro Internet Security to enjoy its comprehensive security features.
Uninstalling Trend Micro Internet Security
If you ever need to remove Trend Micro Internet Security from your computer, whether it’s to upgrade to a new version or switch to a different security solution, you can do so by following these steps to perform a clean and complete uninstallation:
- Save any unfinished work and close all open programs and windows.
- Open the Control Panel on your computer by clicking on the Start menu and selecting Control Panel.
- Navigate to the “Programs” or “Programs and Features” section within the Control Panel.
- Locate the entry for Trend Micro Internet Security in the list of installed programs.
- Click on the entry and choose the “Uninstall” or “Remove” option.
- Follow the on-screen prompts and confirm you want to uninstall Trend Micro Internet Security.
- A removal wizard will guide you through the uninstallation process. Select any additional options, such as retaining or removing your Trend Micro account information, as per your preference.
- Wait for the uninstallation process to complete. This may take a few minutes.
- Restart your computer when prompted or once the uninstallation is finished.
- After the computer restarts, check the Control Panel to verify that Trend Micro Internet Security is no longer listed among the installed programs.
It is also recommended to manually remove any residual files or folders associated with Trend Micro Internet Security, even after the uninstallation process is completed. To do this, navigate to the installation folder of Trend Micro Internet Security and delete any remaining files or folders.
By completely uninstalling Trend Micro Internet Security, you ensure that all components and settings related to the software are removed from your computer. This is important if you plan to install a different security software or upgrade to a newer version of Trend Micro Internet Security.
If you encounter any issues during the uninstallation process or have questions, it is advisable to consult the Trend Micro support website or contact their customer support for assistance. They can guide you through any specific concerns or provide additional instructions for a successful uninstallation.
Remember to always have an alternative security solution installed on your computer to ensure continuous protection after uninstalling Trend Micro Internet Security.