
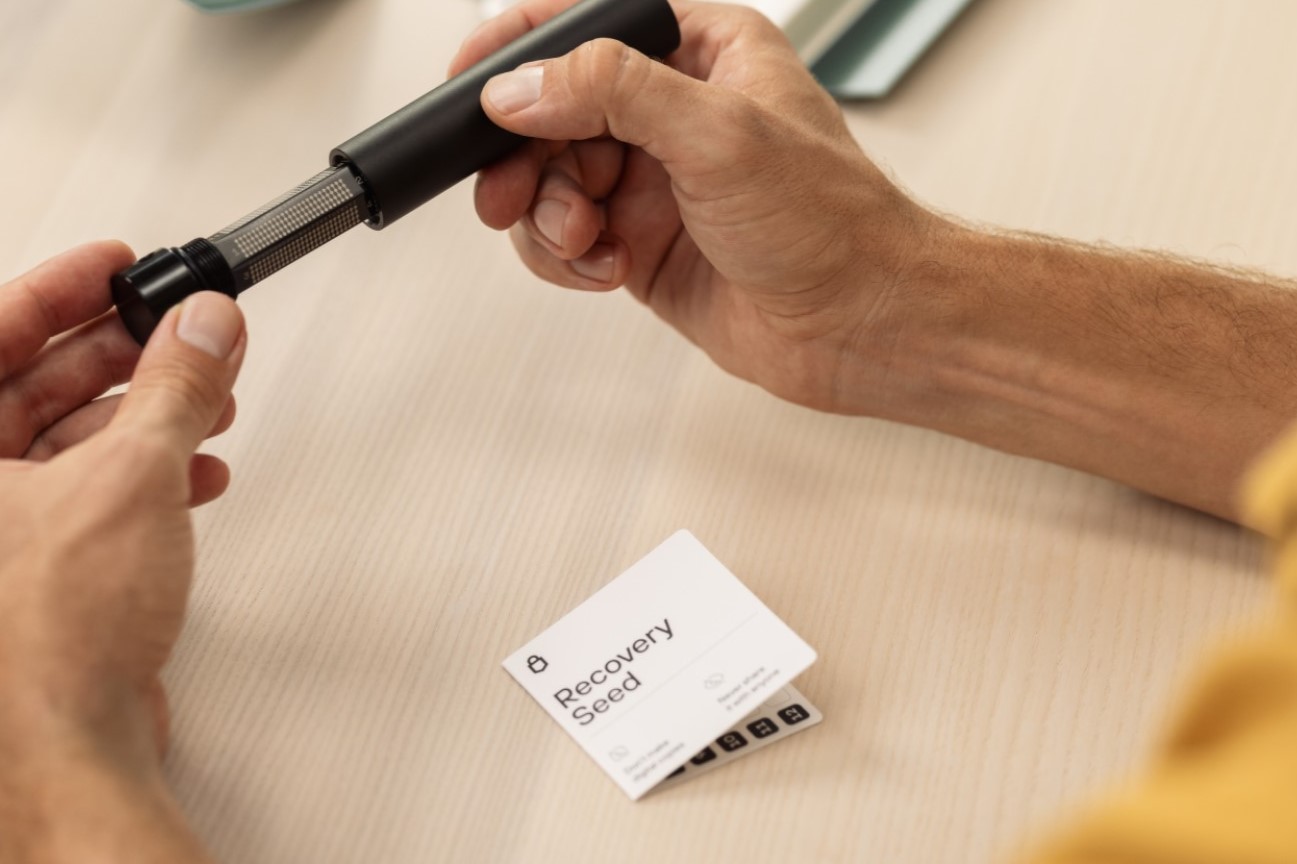
Why Change the Seed on Trezor?
When it comes to securing your cryptocurrencies, the seed on your Trezor device plays a critical role. The seed, also known as the recovery phrase or mnemonic phrase, is a combination of words that acts as the master key to your digital assets. It is used to generate all the public and private keys for your accounts.
Changing the seed on your Trezor device periodically is a recommended practice in the crypto community. This helps enhance the security of your funds by minimizing the risk of potential vulnerabilities. By generating a new seed, you decrease the likelihood of someone being able to guess or gather information about your previous seed, protecting you from any potential threats.
Furthermore, changing the seed allows you to start fresh, eliminating any concerns about potential compromises or security breaches. It gives you peace of mind knowing that you have a new, unique seed that has not been exposed to any potential risks.
Additionally, if you suspect that your current seed has been compromised or if you simply want to enhance the security measures surrounding your digital assets, changing the seed on your Trezor is a proactive step to safeguarding your funds.
It is important to note that changing the seed on your Trezor does not mean that you are deleting your accounts or losing access to your funds. Instead, it is a process of generating a new seed that will become the master key for accessing your cryptocurrencies.
Overall, changing the seed on your Trezor device is a crucial step in maintaining the utmost security for your investments. It allows you to start fresh, reducing the risks of potential vulnerabilities and threats. By taking proactive measures like changing your seed periodically, you can have greater confidence in the safety and protection of your digital assets.
What is a Seed on Trezor?
A seed, also known as a recovery phrase or mnemonic phrase, is a crucial component in securing your cryptocurrencies on a Trezor device. It is a unique combination of words that acts as the master key to your digital assets.
When you first set up your Trezor device, it generates a seed consisting of 12, 18, or 24 words. This seed is generated in a random and unpredictable manner, making it extremely difficult for anyone to guess or tamper with.
The seed is used to derive all the public and private keys of your cryptocurrency accounts. Each account on your Trezor device, whether it’s Bitcoin, Ethereum, or any other supported cryptocurrency, is associated with a unique set of keys derived from the seed.
It is essential to keep your seed secure and confidential because anyone who gains access to it can potentially access your funds. Trezor devices are built with robust security measures to protect your seed from physical or remote attacks. Additionally, the device itself never reveals the seed to the computer it’s connected to, ensuring an extra layer of security.
The seed allows you to recover your accounts and funds in case your Trezor device is lost, stolen, or damaged. It acts as a backup, enabling seamless restoration of your crypto holdings on a new Trezor device or other compatible wallets.
It is important to note that the seed should be kept offline and stored securely. Writing it down on paper and keeping it in a safe and accessible place, away from prying eyes, is a common practice. Some people also use metal backup plates or other physical forms to ensure the longevity and durability of the seed.
Overall, the seed on your Trezor device serves as the backbone of security for your cryptocurrencies. It generates the keys to access your funds and allows for seamless account recovery. By understanding the importance of the seed and taking necessary precautions, you can ensure the utmost security and protection for your digital assets.
How to Generate a New Seed on Trezor
Changing the seed on your Trezor device is a straightforward process that can be done within the Trezor Wallet interface. However, it is crucial to understand that generating a new seed will require you to transfer your funds to the new seed, so make sure you have a backup of your existing seed and a secure environment before proceeding.
Here is a step-by-step guide on how to generate a new seed on Trezor:
- Ensure that your Trezor device is connected to your computer and navigate to the Trezor Wallet interface in your web browser.
- Enter your PIN to unlock your Trezor device.
- In the trezor.io wallet interface, click on your device’s name and select “Device Settings” from the dropdown menu.
- In the Device Settings, locate the “Advanced” tab and click on it.
- Scroll down until you see the “Advanced Recovery” section and click on the “Generate new seed” button.
- Follow the prompts on your Trezor device’s screen to confirm the generation of a new seed.
- Once the new seed has been generated, carefully write it down on a piece of paper or enter it into a secure password manager. Ensure that it is kept in a safe and confidential place, away from prying eyes.
It is important to emphasize that generating a new seed will wipe all existing accounts and funds from your Trezor device. Therefore, it is crucial to transfer your funds to the new seed following the generated seed change. This ensures that you do not lose access to your cryptocurrencies.
Remember to update your records and any relevant software with the new seed to ensure a smooth transition. Once you have successfully generated and secured your new seed, you can proceed with transferring your funds and removing the old seed from your Trezor device.
By following these steps and taking necessary precautions, you can generate a new seed on your Trezor device, enhancing the security of your digital assets and protecting them from potential threats.
Precautions to Take Before Changing the Seed
Before proceeding to change the seed on your Trezor device, it is essential to take certain precautions to ensure the security and smooth transition of your funds. Here are some key precautions to consider:
1. Backup your current seed: Before generating a new seed, make sure you have a secure backup of your existing seed. Write down the recovery phrase on a piece of paper or use a reliable password manager to store it. This backup will allow you to restore your accounts and funds in case anything goes wrong during the seed change process.
2. Verify your backup: Take the time to verify that your backup seed is accurate and complete. Double-check each word and ensure that you have written it down correctly. This verification step is crucial as even a single incorrect word can lead to the loss of your funds.
3. Transfer your funds: Before changing the seed, it is essential to transfer your funds to a safe and secure location. Consider using a temporary wallet or an exchange that you trust to hold your funds during the seed change process. Once the new seed is generated, you can transfer your funds back to your Trezor device.
4. Ensure a secure environment: It is important to perform the seed change process in a secure and trusted environment. Make sure your computer is free from malware or any potential threats. Avoid using public Wi-Fi networks or unsecured connections that may expose your sensitive information. Taking these precautions will minimize the risk of someone intercepting or tampering with your seed during the process.
5. Follow official instructions: Stick to the official instructions provided by Trezor for changing your seed. Visit the official Trezor website and refer to their documentation or guides for the most accurate and up-to-date instructions. This will ensure that you are following the correct steps and minimizing the chances of making any errors during the seed change process.
By taking these precautions before changing the seed on your Trezor device, you can mitigate the risks and ensure a smooth transition of your funds. These steps help safeguard your digital assets and provide you with peace of mind during the seed change process.
Step-by-Step Guide to Changing the Seed on Trezor
Changing the seed on your Trezor device is a crucial step in safeguarding your cryptocurrencies. Follow this step-by-step guide to ensure a smooth and secure seed change process:
- Connect your Trezor device to your computer using the provided USB cable.
- Unlock your Trezor device by entering your PIN.
- Open your preferred web browser and navigate to the Trezor Wallet (trezor.io).
- In the web interface, select your Trezor device from the device list.
- Enter your PIN to confirm that you are the owner of the device.
- In the Trezor Wallet interface, click on your device’s name and select “Device Settings” from the dropdown menu.
- In the Device Settings, click on the “Advanced” tab.
- Scroll down to the “Advanced Recovery” section and click on the “Generate new seed” button.
- Follow the instructions displayed on your Trezor device’s screen to confirm the generation of a new seed.
- Once the new seed is generated, write down the recovery phrase on a piece of paper or enter it into a password manager. Ensure that the backup is accurate and stored securely.
- Double-check that you have securely backed up the new seed before proceeding further.
- Review the warning message on your Trezor device carefully. It serves as a final reminder to ensure that you have a secure backup of your new seed.
- Re-enter the recovery phrase to confirm that you have correctly recorded it.
- Once the confirmation is completed, your Trezor device will display a message indicating that the seed change was successful.
- Verify that your new seed is working correctly by going through the recovery process with your newly generated seed. This ensures that you can restore your accounts and funds using the new seed if necessary.
Remember to transfer your funds from the old seed to the new seed after completing the seed change process. Always double-check the destination address to ensure accuracy and prevent any accidental loss or misdirection of your funds.
By following these step-by-step instructions, you can successfully change the seed on your Trezor device and enhance the security of your cryptocurrency holdings. Take your time, follow the instructions carefully, and ensure that you have secure backups to protect your digital assets.
Transferring Funds to the New Seed
After generating a new seed on your Trezor device, one crucial step is to transfer your funds from the old seed to the new one. By doing so, you ensure that your cryptocurrencies are securely associated with the updated seed. Here’s a guide on how to transfer funds to the new seed:
- Access your Trezor Wallet by connecting your device to your computer and unlocking it with your PIN.
- In the web interface, select the cryptocurrency account you wish to transfer funds from.
- Click on the “Send” or “Transfer” button to initiate the transaction.
- Enter the destination wallet address for the new seed. Make sure to double-check the address to avoid any mistakes.
- Specify the amount of cryptocurrency you want to transfer to the new seed’s account. Take note of any network fees that may apply.
- Review the transaction details, including the amount, recipient address, and fees. Confirm that everything is accurate before proceeding.
- Verify the transaction on your Trezor device by carefully reviewing the details displayed.
- Authorize and confirm the transaction using the Trezor device’s buttons.
- Wait for the transaction to be confirmed on the blockchain network. This may take some time depending on network congestion and the chosen cryptocurrency.
- Once the transaction is confirmed, the funds will be transferred from the old seed’s account to the new seed’s account.
- Repeat this process for each cryptocurrency account you want to transfer funds from.
Remember to update your records and any relevant software with the new seed’s wallet address to ensure a seamless transition. Keep in mind that the old seed’s account balance will be depleted once you have successfully transferred all funds to the new seed’s account.
It is essential to exercise caution during the transfer process, double-checking all details to prevent any mistakes or loss of funds. Always use trusted sources and confirm the accuracy of recipient addresses before initiating any transaction.
By following this step-by-step guide, you can successfully transfer your funds from the old seed to the new seed, ensuring that your cryptocurrencies are securely associated with the updated seed on your Trezor device.
Removing the Old Seed from Trezor
Once you have successfully transferred your funds to the new seed on your Trezor device, it is important to remove the old seed from the device for security purposes. While the new seed is now associated with your cryptocurrency accounts, removing the old seed adds an extra layer of protection. Here are the steps to remove the old seed:
- Ensure your Trezor device is connected to your computer and unlocked with your PIN.
- In the Trezor Wallet interface, select your device and enter the PIN to access the settings.
- Click on the “Device Settings” tab or option.
- Locate the option to “Wipe device” or “Reset device” and click on it.
- Follow the prompts and confirm that you want to wipe the device.
- During this process, your device will display a series of random words.
- Verify that the displayed words match the ones from your new seed by comparing them.
- After confirming the accuracy of the words, the device will reset itself, erasing the old seed.
Once the device has been wiped, the old seed will no longer be associated with your Trezor device. It is important to note that by removing the old seed, you are preventing any access to funds or accounts associated with it. Therefore, it is crucial to double-check that you have securely transferred all your funds to the new seed before proceeding with the old seed removal.
After removing the old seed, it is a good practice to perform a recovery process with your newly generated seed to ensure that it works correctly. This will give you confidence that your funds can be restored if necessary using the new seed.
Remember to securely store the recovered seed in a safe location, away from any potential risks or unauthorized access. Consider using a fireproof and waterproof storage option or a secure digital password manager to protect your recovery seed.
By following these steps and removing the old seed from your Trezor device, you enhance the security of your cryptocurrency holdings, ensuring that only the new seed is associated with your accounts.
Backup and Restoration of the New Seed
After generating a new seed on your Trezor device, it is crucial to create a secure backup of the new seed. This backup ensures that you can restore your accounts and funds in case of device loss, damage, or any other unforeseen events. Here’s an overview of the backup and restoration process for the new seed:
Backup:
- Write down the recovery phrase of the new seed on a piece of paper. Make sure to use pen and paper rather than digital methods to minimize the risk of unauthorized access.
- Double-check each word of the recovery phrase to ensure accuracy. Even a slight mistake can lead to the loss of funds, so be meticulous during this process.
- Consider creating multiple copies of the recovery phrase and storing them in separate secure locations. This provides redundancy and protection against possible loss or damage to a single copy.
- Avoid taking any digital screenshots or storing the recovery phrase on any digital devices, as they can be susceptible to hacking or unauthorized access.
- Keep the backup of the new seed in a secure place, such as a locked drawer or a safe deposit box. Ensure the location is easily accessible only to you or trusted individuals.
Restoration:
- In case of a device loss or damage, acquire a new Trezor device or a compatible wallet that supports recovery using seed phrases.
- During the setup process of the new device or wallet, select the option to recover your accounts using a seed phrase or recovery phrase.
- Enter the recovery phrase of the new seed word-by-word as prompted by the setup process. Be cautious and accurate while entering the words to avoid any mistakes.
- Once the recovery process is complete, the new device or wallet should restore all the accounts and funds associated with the new seed.
- Double-check that all the accounts and funds have been successfully restored on the new device or wallet.
It is essential to emphasize the significance of securely storing the backup of the new seed. Treat it as securely as you would treat a valuable asset or important document.
Regularly review the backup to ensure its integrity and performing periodic checks by recovering your accounts using the backup seed can help you verify its accuracy and effectiveness.
By following these backup and restoration procedures, you can protect your digital assets and be prepared for any unforeseen circumstances that might require account recovery on a new device or wallet.
Storing the New Seed Securely
Storing the new seed securely is of utmost importance to ensure the safety and protection of your cryptocurrencies. The new seed acts as the master key to your digital assets, making it crucial to keep it away from unauthorized access, physical damage, and potential loss. Here are some essential tips for securely storing the new seed:
1. Physical Storage:
- Write down the new seed on a piece of paper, preferably using a pen instead of a printer or digital device.
- Consider creating multiple copies of the seed and storing them in separate and secure locations. This provides redundancy and protection against loss or damage to a single copy.
- Avoid storing the new seed in plain sight or easily accessible areas. Keep it in a locked drawer, safe deposit box, or other secure containers.
- Consider using a metal backup plate specifically designed for storing seed phrases. These plates protect against fire, water damage, and degradation over time.
2. Digital Storage:
- Avoid storing the new seed digitally, such as in a document or password manager on your computer or mobile device. Digital storage is susceptible to theft, hacking, and malware attacks.
- If you choose to store the seed digitally, make sure to use secure encryption methods and keep it offline as much as possible.
- Consider using dedicated hardware devices specifically designed for storing seed phrases. These devices offer added security measures and protect against digital threats and vulnerabilities.
3. Memorization:
- While it can be challenging, memorizing the seed can be one of the most secure methods. However, ensure that you have a backup in case of memory loss or other unforeseen issues.
- Use memory techniques or mnemonic devices to aid in memorization, such as creating associations or visualizations for each word.
- Avoid sharing the seed with anyone, including family members or friends. Keeping it confidential significantly reduces the risk of unauthorized access.
4. Regular Checks:
- Periodically review the condition of your seed backups to ensure they are still readable and in good shape.
- Consider testing the restoration process using a different device or wallet to verify that you can recover your accounts using the seed.
- Keep an up-to-date record of the locations where you have stored your seed, including any additional security measures or instructions for accessing it.
Protecting the new seed is essential for maintaining the security of your digital assets. By implementing these secure storage practices, you can mitigate the risk of unauthorized access, loss, or damage, ensuring that your cryptocurrencies remain safe and under your control.
Frequently Asked Questions about Changing the Seed on Trezor
Changing the seed on your Trezor device can be a crucial step in enhancing the security of your cryptocurrencies. Here are some frequently asked questions regarding the seed change process:
Q1: Why should I change the seed on my Trezor device?
A1: Changing the seed on your Trezor device periodically helps minimize the risk of potential vulnerabilities and compromises to your funds. It provides an opportunity to start fresh and ensures that your digital assets remain highly secure.
Q2: Will changing the seed delete my accounts and funds?
A2: Changing the seed does not delete your accounts or funds. It generates a new seed that becomes the master key for accessing your cryptocurrencies. However, it is crucial to transfer your funds from the old seed to the new one to avoid any loss of access.
Q3: How often should I change the seed on my Trezor device?
A3: The frequency of seed changes depends on personal preference and risk tolerance. Some individuals change their seed annually, while others do it every few years. It is recommended to consider changing the seed if you suspect compromise or if you want to enhance security measures.
Q4: Can I use the same recovery phrase for multiple devices or wallets?
A4: No, each device or wallet generates a unique recovery phrase or seed. It is required to have a separate and distinct recovery phrase for each device or wallet to maintain the security and isolation of your accounts.
Q5: What precautions should I take before changing the seed on my Trezor?
A5: Before changing the seed, ensure that you have a secure backup of the existing seed before proceeding. Verify the backup for accuracy and completeness. Transfer your funds to a safe location, update relevant software, and perform the seed change in a secure environment.
Q6: How do I restore my accounts using the new seed?
A6: When setting up a new Trezor device or compatible wallet, select the option to recover your accounts using the seed phrase. Enter the new seed word-by-word as prompted by the setup process and follow the instructions for account restoration.
Q7: Can I change the seed on my Trezor remotely?
A7: No, changing the seed on your Trezor requires physical access to the device itself. This additional security measure ensures that seed changes can only be performed by the authorized user of the device.
Q8: What if I forget my new seed?
A8: Forgetting the new seed can lead to permanent loss of access to your funds. It is essential to create multiple backups and store them securely in different locations. Memorization techniques or mnemonic devices can also be helpful in remembering the seed.
These frequently asked questions address some common concerns regarding changing the seed on your Trezor device. Always refer to official documentation and guidelines provided by Trezor for detailed instructions and best practices.