
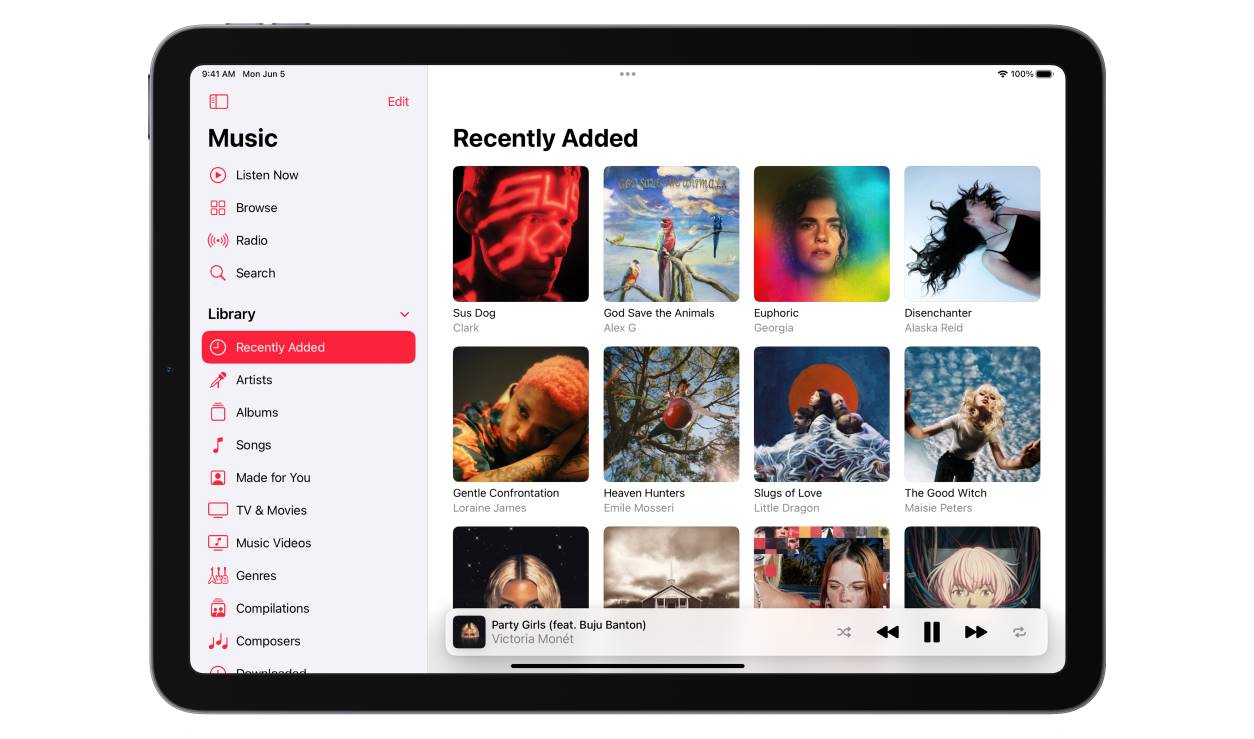
Using iTunes to Download Music
iTunes is a popular software developed by Apple that allows you to organize and play your music collection. It also serves as a platform to purchase and download music. Here’s how you can use iTunes to download music to your iPad:
- First, make sure you have the latest version of iTunes installed on your computer. If not, visit the Apple website and download the latest version.
- Connect your iPad to your computer using a USB cable. iTunes should automatically open when the connection is established.
- In iTunes, click on the device icon located at the top-left corner of the window to access your iPad’s content.
- Next, click on “Music” in the left sidebar to view your music library.
- You can either sync your entire music library or select specific songs or albums to transfer to your iPad. To sync your entire library, check the box next to “Sync Music” and click on “Apply” at the bottom-right corner of the screen. If you want to select specific songs, albums, or playlists, choose the desired options under the “Selected playlists, artists, albums, and genres” section.
- Once you have made your selections, click on “Sync” to begin transferring the music to your iPad.
- After the sync is complete, disconnect your iPad from the computer and navigate to the “Music” app on your iPad to access the downloaded music.
Using iTunes to download music to your iPad provides you with a seamless experience and allows you to easily organize your music library. Remember to regularly update your iTunes library with new music to keep your iPad filled with fresh tunes.
Using Apple Music to Download Music
Apple Music is a music streaming service offered by Apple that allows you to access a vast library of songs and download them for offline listening. Here’s how you can use Apple Music to download music to your iPad:
- Make sure you have the Apple Music app installed on your iPad. If not, you can download it from the App Store.
- Launch the Apple Music app and sign in with your Apple ID.
- Explore the wide range of music available in the Apple Music library. You can search for specific songs, albums, or artists using the search bar or browse through curated playlists and recommendations.
- When you find a song or album you want to download, simply tap on the “+” button next to it. This will add it to your library and make it available for offline listening.
- To view your downloaded music, go to your Library tab and select the “Downloaded Music” option. Here, you will find all the songs and albums you have downloaded for offline listening.
- You can also create playlists and add your favorite songs to them. These playlists can be downloaded for offline listening as well.
- If you have enabled the “Automatic Downloads” feature in the Apple Music settings, any music you add to your library on other devices linked to your Apple ID will automatically be downloaded to your iPad.
Using Apple Music provides you with a vast selection of music to discover and enjoy on your iPad. Whether you’re on the go or without an internet connection, you can always rely on Apple Music to keep your favorite tunes at your fingertips.
Using Spotify to Download Music
Spotify is a popular music streaming service that offers a vast collection of songs, playlists, and podcasts. It also allows you to download music for offline listening. Here’s how you can use Spotify to download music to your iPad:
- Download and install the Spotify app from the App Store if you don’t have it already.
- Launch the Spotify app and sign in with your Spotify account or create a new one if you’re a new user.
- Explore the vast library of music available on Spotify. You can search for specific songs, artists, or albums using the search bar.
- When you find a song or album you want to download, simply tap on the three dots next to the track or album, and select “Download”.
- The downloaded music will be available in the “Your Library” section of the app. To access it, tap on “Your Library” at the bottom of the screen, then select “Music” and “Downloads”.
- You can create playlists and add your favorite songs to them. These playlists will also be available for offline listening.
- To manage your downloads and free up storage space on your iPad, go to the Settings in the Spotify app and navigate to “Storage”. Here, you can delete downloaded music that you no longer need.
- It’s worth noting that in order to continue listening to downloaded music offline, you will need to go online with Spotify at least once every 30 days to verify your subscription.
Using Spotify to download music to your iPad gives you the flexibility to enjoy your favorite tracks even when you’re not connected to the internet. With a vast music library and easy-to-use interface, Spotify is a fantastic option for music lovers.
Using Amazon Music to Download Music
Amazon Music is a music streaming service offered by Amazon that allows you to access a wide range of songs, albums, and playlists. It also provides an option to download music for offline listening. Here’s how you can use Amazon Music to download music to your iPad:
- Download and install the Amazon Music app from the App Store if you haven’t done so already.
- Launch the Amazon Music app and sign in with your Amazon account. If you don’t have an Amazon account, create one.
- Explore the extensive music catalog available on Amazon Music. You can search for specific songs, artists, or albums using the search bar.
- When you find a song or album you want to download, tap on the three dots next to it and select “Download”.
- The downloaded music will be stored in the “Offline Music” section of the app. To access it, tap on “My Music” at the bottom of the screen and select “Offline Music”.
- You can also create personalized playlists and add your favorite songs to them. These playlists can be downloaded for offline listening as well.
- To manage your downloads and free up storage space on your iPad, go to the Settings in the Amazon Music app and select “Storage”, where you can delete downloaded music you no longer need.
- Keep in mind that to continue listening to downloaded music offline, you will need to periodically connect to the internet and sign in to your Amazon Music app to verify your subscription.
Using Amazon Music to download music to your iPad gives you the freedom to enjoy your favorite tracks even without an internet connection. With its vast music library and user-friendly interface, Amazon Music is a great choice for music enthusiasts.
Using Google Play Music to Download Music
Google Play Music is a music streaming service provided by Google that allows you to access millions of tracks and download them for offline listening. Here’s how you can use Google Play Music to download music to your iPad:
- Download and install the Google Play Music app from the App Store if you haven’t done so already.
- Launch the Google Play Music app and sign in with your Google account. If you don’t have a Google account, create one.
- Explore the vast music library available on Google Play Music. You can search for specific songs, albums, or artists using the search bar or browse through the recommended music sections.
- When you find a song or album you want to download, tap on the “More” button (three dots) next to it and select “Download”.
- The downloaded music will be stored in the “Downloaded” section of the app. To access it, tap on “Library” at the bottom of the screen and select “Downloaded”.
- You can also create playlists and add your favorite songs to them. These playlists can be downloaded for offline listening as well.
- To manage your downloads and free up storage space on your iPad, go to the Settings in the Google Play Music app and select “Storage location”, where you can clear downloaded music you no longer need.
- Remember to connect to the internet periodically and open the Google Play Music app to keep your downloaded music files updated and verify your subscription.
Using Google Play Music to download music to your iPad provides you with a vast range of songs to enjoy even when you’re offline. With its user-friendly interface and extensive music library, Google Play Music is a fantastic option for music lovers.
Using SoundCloud to Download Music
SoundCloud is a popular online music streaming platform that allows users to discover and share music from a wide range of genres. While SoundCloud primarily focuses on streaming music, there are still ways to download tracks for offline listening. Here’s how you can use SoundCloud to download music to your iPad:
- Download and install the SoundCloud app from the App Store if you haven’t done so already.
- Launch the SoundCloud app and create an account or sign in if you already have one.
- Search for the track or artist you want to download using the search bar at the top of the screen.
- Once you’ve found the track you want, tap on it to start playing it.
- Below the waveform display, you’ll see a “More” button (three dots). Tap on it to open additional options.
- If the track is available for download, you will see a “Download” option. Tap on it to start the download.
- The downloaded track will be available in the “Liked” section of your SoundCloud profile.
- To access your downloaded tracks, go to your profile by tapping on the profile icon at the bottom right of the screen, and then select the “Liked” section.
It’s important to note that not all tracks on SoundCloud are available for download, as this depends on the artist’s preferences. Additionally, downloading tracks may not be possible in certain regions due to licensing restrictions.
Using SoundCloud to download music to your iPad can be a great way to enjoy your favorite tracks even when you don’t have an internet connection. Make sure to explore the vast catalog of artists and genres available on SoundCloud for a unique and personalized music experience.
Using Tidal to Download Music
Tidal is a high-fidelity music streaming service that offers a premium listening experience with its extensive catalog of songs, albums, and exclusive content. If you have a Tidal subscription, you can also download music for offline listening. Here’s how you can use Tidal to download music to your iPad:
- Download and install the Tidal app from the App Store if you haven’t done so already.
- Launch the Tidal app and sign in using your Tidal account.
- Explore the vast collection of music available on Tidal. You can search for specific songs, albums, or artists using the search bar or browse through curated playlists and recommended tracks.
- When you find a song or album you want to download, tap on the three dots next to it, and select “Download” from the options.
- You can also create personalized playlists and add your favorite songs to them. These playlists can be downloaded for offline listening as well.
- To access your downloaded music, tap on the “My Collection” tab at the bottom of the screen, and then select “Downloads”.
- You can manage your downloaded music by tapping on the three dots next to a track or playlist and selecting “Remove Download” if you want to free up storage space on your iPad.
- It’s important to note that downloaded music on Tidal is encrypted and can only be played within the Tidal app. You cannot transfer the downloaded files to other devices or platforms.
Using Tidal to download music to your iPad ensures that you have access to your favorite tracks even when you’re not connected to the internet. With Tidal’s high-quality audio and exclusive content, you can enjoy a premium music streaming experience on your iPad.
Using YouTube Music to Download Music
YouTube Music is a music streaming service offered by YouTube that allows you to access a vast library of songs and music videos. With a subscription to YouTube Music Premium, you can also download music for offline listening. Here’s how you can use YouTube Music to download music to your iPad:
- Download and install the YouTube Music app from the App Store if you don’t have it already.
- Launch the YouTube Music app and sign in with your Google account.
- Explore the extensive music collection on YouTube Music. You can search for specific songs, artists, or albums using the search bar, or browse through the recommended playlists and charts.
- When you find a song or album you want to download, tap on the three dots next to it and select “Download” from the options.
- The downloaded music will be available in the “Library” section of the app. To access it, tap on the “Library” tab at the bottom of the screen, and select “Downloads”.
- You can also create playlists and add your favorite songs to them. These playlists can be downloaded for offline listening as well.
- To manage your downloaded music and free up storage space on your iPad, go to the Settings in the YouTube Music app and select “Downloads”. Here, you can delete downloaded songs or adjust the audio quality settings for future downloads.
- Keep in mind that downloaded music on YouTube Music is only accessible within the app and cannot be transferred to other devices or platforms.
Using YouTube Music to download music to your iPad gives you the flexibility to enjoy your favorite tracks offline. With its vast music collection and integration with the YouTube platform, YouTube Music offers a unique listening experience for music enthusiasts.
Using Pandora to Download Music
Pandora is a popular music streaming platform that uses a personalized recommendation algorithm to curate playlists based on your music preferences. While Pandora primarily focuses on streaming music, there are ways to download music for offline listening. Here’s how you can use Pandora to download music to your iPad:
- Download and install the Pandora app from the App Store if you haven’t done so already.
- Launch the Pandora app and sign in using your Pandora account. If you don’t have an account, you can create one for free.
- Explore Pandora’s extensive music collection and discover new artists and songs. You can search for specific songs, artists, or genres using the search bar, or let Pandora generate personalized playlists for you.
- To download a song or playlist for offline listening, you need to have a Pandora Plus or Pandora Premium subscription. These subscription options offer the ability to download music.
- When you play a song or playlist, you’ll see a download icon (usually a downwards arrow) next to it. Tap on the download icon to start the download process.
- The downloaded music will be stored within the Pandora app for offline listening. To access your downloaded music, go to the ‘My Collection’ section of the app and select ‘Offline’ or ‘Downloads’.
- You can manage your downloaded music by going to the ‘Settings’ within the Pandora app. From there, you can delete downloaded songs or adjust the audio quality settings for future downloads.
- It’s important to note that downloaded music on Pandora is only accessible within the app and cannot be transferred to other devices or platforms.
Using Pandora to download music to your iPad allows you to enjoy your favorite songs, albums, and playlists offline. Whether you’re on a road trip or in a place with limited internet connectivity, Pandora provides a convenient way to enjoy music wherever you go.
Using Deezer to Download Music
Deezer is a popular music streaming service that offers a vast library of songs, albums, and playlists. With a Deezer Premium subscription, you can also download music for offline listening. Here’s how you can use Deezer to download music to your iPad:
- Download and install the Deezer app from the App Store if you haven’t done so already.
- Launch the Deezer app and sign in using your Deezer account. If you don’t have an account, you can create one or sign in with Facebook or Google.
- Explore the extensive music catalog available on Deezer. You can search for specific songs, artists, or albums using the search bar, or discover new music through personalized playlists and recommendations.
- When you find a song or album you want to download, tap on the three dots next to it and select “Download” from the options.
- The downloaded music will be available in the “My Library” section of the app. To access it, tap on the “My Music” tab at the bottom of the screen and select “Downloads”.
- You can also create playlists and add your favorite songs to them. These playlists can be downloaded for offline listening as well.
- To manage your downloaded music and free up storage space on your iPad, go to the Settings in the Deezer app and select “Manage downloads”, where you can delete downloaded songs or adjust the audio quality settings for future downloads.
- It’s important to note that downloaded music on Deezer can only be accessed within the Deezer app and cannot be transferred to other devices or platforms.
Using Deezer to download music to your iPad allows you to enjoy your favorite tracks even without an internet connection. With its vast music library and user-friendly interface, Deezer provides a convenient way to discover, stream, and download music.
Using Napster to Download Music
Napster, originally known for pioneering peer-to-peer file sharing, is now a legal music streaming service that offers a vast collection of songs and allows you to download music for offline listening. If you have a Napster subscription, here’s how you can use it to download music to your iPad:
- Download and install the Napster app from the App Store if you haven’t done so already.
- Launch the Napster app and sign in using your Napster account. If you’re new to Napster, you can sign up for a subscription.
- Explore the extensive music library available on Napster. You can search for specific songs, artists, or genres using the search bar, or discover new music through Napster’s curated playlists and recommendations.
- To download a song or album for offline listening, simply tap on the three dots next to it and select “Download” from the options.
- The downloaded music will be available in the “My Music” section of the app. To access it, tap on the “My Music” tab at the bottom of the screen and select “Downloads”.
- You can also create playlists and add your favorite songs to them. These playlists can be downloaded for offline listening as well.
- To manage your downloaded music and free up storage space on your iPad, go to the Settings in the Napster app and select “Storage & Sync”, where you can delete downloaded songs or adjust the audio quality settings for future downloads.
- It’s important to note that downloaded music on Napster is encrypted and can only be played within the Napster app. You cannot transfer the downloaded files to other devices or platforms.
Using Napster to download music to your iPad provides you with a convenient way to enjoy your favorite songs even without an internet connection. With its extensive music catalog and personalized recommendations, Napster offers a comprehensive music streaming and downloading experience for music enthusiasts.
Using iHeartRadio to Download Music
iHeartRadio is a popular music streaming platform that allows you to access a wide variety of music, radio stations, and podcasts. While iHeartRadio primarily focuses on streaming music, there are ways to download music for offline listening. Here’s how you can use iHeartRadio to download music to your iPad:
- Download and install the iHeartRadio app from the App Store if you haven’t done so already.
- Launch the iHeartRadio app and sign in using your iHeartRadio account. If you don’t have an account, you can create one for free.
- Explore the vast collection of music, radio stations, and podcasts available on iHeartRadio. You can search for specific songs, artists, or genres using the search bar or browse through recommended stations and playlists.
- To download a song or station for offline listening, tap on the “+” icon next to it. This will add it to your “My Favorites”.
- Once you have added songs or stations to your “My Favorites”, go to the “My Library” section of the app to access your downloaded content.
- In the “My Library” section, you will find your “My Favorites” where you can listen to downloaded songs and stations offline.
- It’s important to note that downloaded music on iHeartRadio can only be accessed within the iHeartRadio app and cannot be transferred to other devices or platforms.
- To manage your downloaded content and free up storage space on your iPad, you can remove songs or stations from your “My Favorites” section in the app.
Using iHeartRadio to download music to your iPad allows you to enjoy your favorite songs and radio stations even when you’re offline. With its vast music collection and diverse range of content, iHeartRadio offers a comprehensive and personalized music streaming and downloading experience.
Using Shazam to Download Music
Shazam is a popular music recognition app that allows you to identify songs, discover new music, and access various features related to the identified tracks. While Shazam itself does not have a built-in option to download music, it provides integration with other music streaming platforms where you can listen to and download the identified songs. Here’s how you can use Shazam to download music to your iPad:
- Download and install the Shazam app from the App Store if you haven’t done so already.
- Launch the Shazam app and grant it permission to access the microphone. This will enable Shazam to listen and identify the songs.
- Tap on the Shazam button in the app to start the song recognition process. Shazam will listen to the audio and try to identify the track.
- Once Shazam has successfully identified the song, you will see detailed information about it, including the song title, artist, and album cover.
- Look for the “Listen on” or “Open in” options within the Shazam app. These options will provide you with links to various music streaming platforms where the identified song is available.
- Tap on the relevant option, such as Spotify, Apple Music, or Deezer, and it will launch the respective app with the song ready to be played.
- In the music streaming app, you may find an option to download the song for offline listening. The exact steps for downloading music may vary depending on the streaming platform you choose.
- Follow the instructions within the streaming app to download the identified song for offline listening.
By using Shazam to identify songs and leveraging the integration with popular music streaming platforms, you can easily discover and download music to your iPad. Shazam acts as a gateway to connect you with the streaming services that offer the songs you want to download, providing a seamless music discovery and downloading experience.
Using Musi to Download Music
Musi is a popular music streaming app that allows you to create playlists, discover new songs, and listen to your favorite tracks. In addition to streaming, Musi provides a convenient feature that lets you download music for offline listening. Here’s how you can use Musi to download music to your iPad:
- Download and install the Musi app from the App Store if you haven’t done so already.
- Launch the Musi app and sign in using your Musi account, or sign in with your existing Google, Facebook, or Apple account.
- Explore the vast music library available on Musi. You can search for specific songs, artists, or albums using the search bar, or browse through curated playlists and genres.
- When you find a song or playlist you want to download, tap on the three dots next to it and select the “Download” option.
- The downloaded music will be stored in the “Library” section of the app. To access it, tap on the “Library” tab at the bottom of the screen and select “Downloads”.
- You can also create playlists and add your favorite songs to them. These playlists can be downloaded for offline listening as well.
- To manage your downloaded music and free up storage space on your iPad, go to the settings within the Musi app and select “Storage”. Here, you can delete downloaded songs or adjust the audio quality settings for future downloads.
- Keep in mind that downloaded music on Musi can only be accessed within the Musi app and cannot be transferred to other devices or platforms.
Using Musi to download music to your iPad provides a convenient way to enjoy your favorite tracks even without an internet connection. With its user-friendly interface and extensive music library, Musi offers a seamless music streaming and downloading experience for music enthusiasts on the go.
Using Documents by Readdle to Download Music
Documents by Readdle is a versatile file management app that offers a wide range of features, including the ability to download and manage music on your iPad. With the help of Documents by Readdle, you can easily download music files from various sources and enjoy them offline. Here’s how you can use Documents by Readdle to download music:
- Download and install the Documents by Readdle app from the App Store if you haven’t done so already.
- Launch the Documents app on your iPad after installation.
- To download music, tap on the browser icon located at the bottom-right corner of the screen. This will open the built-in browser within the app.
- Using the browser, navigate to a website or platform where you can download music files. Some popular sources include SoundCloud, Bandcamp, and Mixcloud.
- Find the music file you want to download and tap on the download link or button associated with it. Documents will start downloading the file.
- Once the download is complete, the music file will be saved within the Documents app.
- To access your downloaded music, tap on the “Files” icon at the bottom-left corner of the screen within the Documents app. You’ll find your downloaded music files here.
- You can organize your downloaded music by creating folders within the Documents app. To do this, tap on the “+” button in the “Files” section and select “New folder”. Give it a name and move your downloaded music files into the respective folder.
- Documents by Readdle also supports audio file playback within the app, so you can enjoy your downloaded music files directly within the app’s interface.
- If you want to transfer the downloaded music files to another app or platform, tap on the “…” button next to the music file and select “Share”. From here, you can choose the sharing option that suits your needs, such as uploading to cloud storage or sending the file to another app on your iPad.
Using Documents by Readdle provides a convenient way to download and manage music files on your iPad. With its robust file management capabilities and built-in browser, you can easily collect and enjoy your favorite music offline, all within a single app.
Using Free Music Downloader to Download Music
Free Music Downloader is an app that allows you to easily download music files directly to your iPad. With this app, you can search for and download your favorite songs, albums, and playlists for offline listening. Here’s how you can use Free Music Downloader to download music:
- Download and install the Free Music Downloader app from the App Store if you haven’t done so already.
- Launch the Free Music Downloader app on your iPad after installation.
- Using the built-in search function, enter the name of the song, album, or artist you want to download and tap on the search button.
- A list of search results will appear. Tap on the desired item to preview the song or album.
- To download the music, tap on the download button next to the song or album. The download process will begin, and you can monitor the progress in the “Downloads” section of the app.
- Once the download is complete, you can access your downloaded music in the “Library” or “Downloads” section of the app.
- You can create playlists within the Free Music Downloader app by selecting the songs from your downloaded library and adding them to a playlist.
- To manage your downloaded music, you can use the options available within the Free Music Downloader app. These options may include organizing your downloads, deleting unwanted files, or adjusting settings related to downloads.
- Free Music Downloader also supports audio file playback within the app, allowing you to listen to your downloaded music directly within the app’s interface.
- If you want to transfer the downloaded music to another app or platform, you can use the sharing options provided by Free Music Downloader. These options may include sending the file via email, messaging apps, or saving it to cloud storage.
Using Free Music Downloader provides a convenient way to download and manage music files on your iPad. With its user-friendly interface and straightforward download process, you can easily build your offline music library and enjoy your favorite tunes wherever you go.
Using YouTube to MP3 Converters to Download Music
YouTube provides a vast collection of music videos, making it a popular platform for discovering and listening to music. While downloading music directly from YouTube is not supported due to copyright restrictions, there are third-party tools called YouTube to MP3 converters that allow you to extract audio from YouTube videos and convert them into downloadable MP3 files. Here’s how you can use YouTube to MP3 converters to download music:
- Find a reliable YouTube to MP3 converter website or software that you trust. There are various options available online, but be cautious of potential risks or copyright infringements associated with certain converters.
- Open the YouTube video containing the music you want to download in a separate browser tab or window.
- Copy the URL of the YouTube video from the address bar at the top of the browser.
- Go to the YouTube to MP3 converter website or launch the software you have chosen.
- Paste the YouTube video URL into the converter’s search bar or designated field.
- Select the desired audio format, usually MP3, for the conversion.
- Click on the “Convert” or “Download” button to start the conversion process.
- Wait for the conversion to complete. The length of time will depend on the duration of the video and the speed of the converter.
- Once the conversion is finished, the website or software will present a download link or button for the MP3 file.
- Click on the download link or button to save the MP3 file to your iPad’s storage.
- Locate the downloaded MP3 file in your iPad’s file manager or music player app.
- For better organization, consider creating a dedicated folder on your iPad to store downloaded music from YouTube.
When using YouTube to MP3 converters, it’s essential to respect copyright laws and only download music for personal use or if authorized by the copyright owner. Additionally, it’s important to exercise caution when using converters from third-party websites, as some may contain malware or violate YouTube’s terms of service. Always research and choose reputable converters to ensure a safe and legal downloading experience.
Using Safari Web Browser to Download Music
Safari is the default web browser available on iOS devices, including the iPad. While Safari primarily serves as a browser for accessing websites, it also provides the capability to download music files. Here’s how you can use Safari to download music on your iPad:
- Open the Safari app on your iPad by tapping on its icon on the home screen.
- Using the Safari browser, navigate to a website or platform where you can find and download music files. Some popular sources include Soundcloud, Bandcamp, or websites of independent artists.
- Search for the specific song or album you want to download within the website or platform.
- Once you find the music file you want to download, tap on the download link or button associated with it. Safari will start downloading the file.
- Depending on the website or platform, you may be prompted to select the location to save the file. Choose a folder or the default Downloads folder for convenience.
- To access your downloaded music files, tap on the “Downloads” icon located at the top-right corner of the Safari browser.
- In the Downloads section, you will find a list of all the files you have downloaded. Tap on the music file you want to open and listen to.
- To manage your downloaded music, you can delete unwanted files by tapping on the “Edit” button in the Downloads section and selecting the files you want to remove.
- If you want to transfer the downloaded music files to another app or platform, tap on the “Share” button next to the file. From here, you can choose the sharing option that suits your needs, such as uploading to cloud storage or sending the file to another app on your iPad.
Using Safari as a web browser to download music files on your iPad provides a convenient and straightforward method to acquire and enjoy your desired songs. Remember to respect copyright laws when downloading music and ensure that you only obtain files from authorized sources or with the explicit permission of the copyright holder.
Using the Files App to Download Music
The Files app on iOS devices, including the iPad, serves as a centralized file management system. With the Files app, you can download and manage music files obtained from various sources. Here’s how you can use the Files app to download music on your iPad:
- Open the Files app on your iPad by tapping on its icon on the home screen.
- Navigate to the location where you want to save the downloaded music file. This can be the iCloud Drive, On My iPad, or any other cloud storage services you have linked to the Files app.
- If you want to download music from a website or platform, open the Safari browser and follow the instructions outlined in the section for that specific website or platform.
- Once the music file is ready to be downloaded, tap and hold on the download link or button. A menu will appear with various options.
- From the menu, select “Download Linked File” or a similar option. This action will initiate the download process, and the music file will be saved to the designated location within the Files app.
- Alternatively, if you have received a music file through email or messaging apps, you can tap on the attachment or file within the Files app, and it will be automatically saved to the designated storage location.
- To access and manage your downloaded music files, open the Files app and navigate to the location where the files were saved.
- Tap on the music file you want to open and listen to. The file can be played directly within the Files app using the built-in media player.
- If you want to transfer the downloaded music file to another app or platform, tap and hold on the file, and then select “Share” from the menu. You can choose the sharing option that suits your needs, such as uploading to cloud storage or sending the file to another app on your iPad.
- Within the Files app, you can also create folders to organize your downloaded music files. This helps keep your music collection neatly categorized.
- You can manage your downloaded music files by deleting unwanted files or transferring them to cloud storage for backup or easier access across multiple devices.
The Files app provides a convenient way to download, organize, and access your music files on your iPad. With its file management capabilities, you can have full control over your downloaded music collection and enjoy your favorite songs whenever you want.
Using Dropbox to Download Music
Dropbox is a cloud storage and file synchronization service that allows you to store and access your files from various devices. In addition to its storage capabilities, Dropbox also provides a convenient way to download and manage music files. Here’s how you can use Dropbox to download music on your iPad:
- Download and install the Dropbox app from the App Store if you don’t have it already.
- Launch the Dropbox app and sign in with your Dropbox account. If you don’t have an account, you can create one for free.
- On your computer, connect to the Dropbox website (www.dropbox.com) and sign in to your account.
- Upload your music files to Dropbox by dragging and dropping them into the Dropbox website interface or using the file upload feature.
- On your iPad, open the Dropbox app and navigate to the folder where you uploaded your music files.
- To download a music file, tap on it to open a preview of the file.
- In the preview screen, tap on the three dots (…) located in the top-right corner of the screen.
- From the options that appear, select “Export” or “Save to Device”.
- Choose the location on your iPad where you want to save the music file, such as iCloud Drive or On My iPad.
- Tap “Save” to start the download process. The music file will be saved to the designated location on your iPad.
- To access and listen to your downloaded music files, open the Files app or the app associated with the downloaded file type (e.g., a music player app).
- Alternatively, you can transfer the downloaded music file to another app or platform by selecting “Share” from the options and choosing the desired sharing option.
- In Dropbox, you can create folders to organize your music files and easily manage your music collection.
- Remember to keep your Dropbox app updated to benefit from the latest features and enhancements.
Using Dropbox to download music on your iPad provides a secure and convenient way to access your music collection from anywhere. With its cloud storage capabilities, you can easily manage and enjoy your favorite music files on your iPad without taking up local storage space.
Using Google Drive to Download Music
Google Drive is a cloud storage and file synchronization service provided by Google. In addition to storing and organizing files, Google Drive can be used to download and manage music files on your iPad. Here’s how you can use Google Drive to download music:
- Download and install the Google Drive app from the App Store if you don’t have it already.
- Launch the Google Drive app and sign in with your Google account. If you don’t have a Google account, create one for free.
- On your computer, visit the Google Drive website (drive.google.com) and sign in to your account.
- Upload your music files to Google Drive by dragging and dropping them into the Google Drive website interface or using the file upload feature.
- On your iPad, open the Google Drive app and navigate to the folder where you uploaded your music files.
- Tap on the music file you want to download to open a preview of the file.
- In the preview screen, tap on the three vertical dots (⋮) located in the top-right corner of the screen.
- From the options that appear, select “Open In” or “Share & Export”.
- Choose the app where you want to open the music file. This can be a music player app or any other compatible app on your iPad.
- The chosen app will open the music file, and you can listen to it or download it within that app.
- Alternatively, you can tap on the three vertical dots (⋮) again and select “Make Available Offline” to save the music file directly to your iPad’s local storage, ensuring you can access it even without an internet connection.
- To manage your downloaded music files, you can use the app where you downloaded the music file. Some apps may provide options to organize your music files into playlists or folders.
- Remember to keep your Google Drive app updated to benefit from the latest features and improvements.
Using Google Drive to download music on your iPad offers a flexible and accessible solution for managing and enjoying your music collection. With the ability to sync files across devices and the convenience of cloud storage, Google Drive provides a seamless way to store, access, and download your favorite music files on your iPad.
Using a VPN to Download Music
A Virtual Private Network (VPN) is a powerful tool that provides a secure and private connection to the internet. While VPNs are commonly used for protecting online privacy and security, they can also be beneficial for downloading music files. Here’s how using a VPN can facilitate music downloads:
- Choose and subscribe to a reputable VPN service that supports your iPad’s operating system.
- Download and install the VPN app from the App Store on your iPad.
- Launch the VPN app and sign in using your VPN account credentials.
- Select a VPN server location from the available options. Ideally, choose a server located in a country that allows music downloads or gives you access to specific music content.
- Connect to the selected VPN server. Once connected, your internet traffic will be securely routed through the chosen server.
- Open your preferred music streaming app or website, or navigate to a platform where you can legally download music files.
- Search for the desired music file or album and follow the provided instructions to download it.
- Since your internet connection is now encrypted and routed through the VPN server, your online activities, including music downloads, are more secure and less likely to be monitored or restricted.
- The VPN also provides an extra layer of privacy by hiding your IP address, helping you maintain anonymity while downloading music files.
- If you encounter any download restrictions based on your geographical location, using a VPN can help you bypass these limitations by connecting to a server in a different location that allows you to access the desired content.
- Once you’ve finished downloading the music files, you can disconnect from the VPN server to resume your regular internet browsing and streaming activities.
- Remember to choose a reliable VPN service provider that prioritizes user privacy and offers fast and stable connections.
- Keep your VPN app up to date to benefit from the latest security features and enhancements.
Using a VPN to download music on your iPad not only provides a secure and private connection but also allows you to access music content and bypass geographical restrictions. However, it’s crucial to ensure you comply with copyright laws and only download music files from legitimate and authorized sources.
Using a Music Downloading App to Download Music
A music downloading app can serve as a dedicated tool for finding, downloading, and managing music files on your iPad. These apps often provide a vast library of songs and offer various features to enhance your music downloading experience. Here’s how you can use a music downloading app to download music:
- Download and install a reputable music downloading app from the App Store that suits your preferences and needs.
- Launch the music downloading app on your iPad after installation.
- Explore the app’s catalog of music and search for specific songs, albums, or artists using the search function.
- Select the desired music file and tap on the download button or a similar option provided by the app.
- Choose the location on your iPad where you want to save the downloaded music file, such as a specific folder within the app or your device’s local storage.
- Monitor the download progress of the music file within the app, and once finished, the downloaded file will be available for offline listening.
- If the app allows you to create playlists, organize your downloaded music files accordingly, making it easy to access your favorite tracks.
- Explore additional features offered by the app, such as personalized recommendations, curated playlists, or the ability to discover new music based on your preferences.
- Some music downloading apps may offer cloud storage integration, allowing you to store and access your downloaded music files across devices.
- Ensure you comply with copyright laws and only download music files from authorized sources to support artists and respect their work.
- Keep your music downloading app updated to access the latest features, improvements, and security enhancements.
Using a dedicated music downloading app on your iPad provides a convenient and straightforward method to acquire, organize, and enjoy your favorite music files. With features tailored for music enthusiasts, these apps enhance your music listening experience by offering an extensive music library and additional features to enhance music discovery and enjoyment.
Using a Torrent Client to Download Music
A torrent client is a software application that enables the peer-to-peer file sharing protocol called BitTorrent. While torrenting is commonly associated with sharing large files, it can also be used to download music. Here’s how you can use a torrent client to download music:
- Download and install a reliable torrent client on your iPad. Some popular options include uTorrent and BitTorrent.
- Search for music torrents on dedicated torrent websites or torrent search engines. These websites often have a vast collection of music files shared by users.
- Choose a music file or album that you want to download. Look for torrents with a good number of seeders (users who have already downloaded the file and are actively sharing it) for faster download speeds.
- Download the .torrent file associated with the music file or album. This file contains information about the file’s location and other metadata.
- Open your torrent client and use the “Add Torrent” or “Open Torrent” option to load the .torrent file into the client.
- Choose the location on your iPad where you want to save the downloaded music file.
- Wait for the torrent client to establish connections with seeders and peers. The client will then begin downloading the music file or album in small chunks.
- Monitor the download progress within the torrent client. You can prioritize certain files within the torrent if it contains multiple files.
- Once the download is complete, you can find the music file or album in the location you specified earlier.
- Use a media player app or any compatible app on your iPad to play the downloaded music files.
- Remember to comply with copyright laws and only download and share music files that are authorized for free distribution or fall under the Creative Commons license.
- Take caution when downloading music files from unknown or untrusted sources as they may contain malware or violate copyright laws.
- Regularly scan your iPad with updated antivirus software to ensure the downloaded files are safe.
Using a torrent client to download music can provide access to a wide range of music files shared by the user community. However, it’s important to exercise caution, respect copyright laws, and download content from trusted sources to maintain a safe and legal downloading experience.