
Signs that Your iPad Battery Needs Replacing
If you have been using your iPad for a while, you may have noticed a decline in battery performance. Here are some signs that indicate it might be time to replace your iPad battery:
- Rapid Battery Drain: If your iPad’s battery seems to be draining much faster than it used to, even after minimal usage, it could be a sign of a deteriorating battery.
- Difficulty in Holding a Charge: Does your iPad struggle to hold a charge? If it discharges quickly after being fully charged, it’s a clear indication that the battery is no longer functioning optimally.
- Overheating: An overheating iPad, especially during regular tasks, can be a sign of a failing battery. If you notice excessive heat emanating from your device, it’s time to consider a battery replacement.
- Delayed Response: Is your iPad responding sluggishly, even when it’s fully charged? This could be a result of an aging battery that is no longer able to power the device efficiently.
- Random Shutdowns: If your iPad shuts down unexpectedly, even when the battery indicator shows a reasonable charge, it’s a strong indication that the battery is failing.
- Swollen Battery: A visibly swollen or bulging battery is a clear sign of a malfunctioning battery. It’s crucial to address this issue promptly to avoid any safety hazards.
Recognizing these signs can help you take proactive steps to replace your iPad battery, ensuring that your device continues to function optimally.
Tools and Materials Needed for Replacing Your iPad Battery
Before embarking on the journey of replacing your iPad battery, it’s essential to gather the necessary tools and materials. Here’s what you’ll need:
- iPad Battery Replacement Kit: Ensure you have a high-quality replacement battery specifically designed for your iPad model. These kits typically include the necessary tools and adhesive for the replacement process.
- Precision Screwdriver Set: A set of precision screwdrivers is crucial for removing the tiny screws that secure the iPad’s casing and battery.
- Plastic Spudger or Opening Tool: This tool is essential for prying open the iPad’s casing without causing damage to the delicate components.
- Adhesive Strips: You may need adhesive strips to secure the new battery in place within the iPad’s housing.
- Heat Gun or Hair Dryer: In some cases, gentle heat application may be required to soften the adhesive securing the battery to the iPad.
- Clean Workspace: Prepare a clean, well-lit workspace with ample room to lay out the iPad and its components during the battery replacement process.
- Protective Gear: It’s advisable to wear anti-static wrist straps and safety glasses to prevent accidental damage to the iPad and ensure personal safety during the procedure.
Having these tools and materials at your disposal will streamline the battery replacement process and minimize the risk of damaging your iPad or its components.
Step-by-Step Guide to Replacing Your iPad Battery
Replacing the battery in your iPad can breathe new life into your device. Here’s a comprehensive guide to help you through the process:
- Prepare Your Workspace: Find a clean, well-lit area to work in and gather all the necessary tools and materials.
- Back Up Your Data: Before starting, ensure that all your important data is backed up to prevent any potential loss during the battery replacement.
- Power Off Your iPad: Completely power off your iPad and disconnect any charging cables or accessories.
- Remove the Screen: Use a heat gun or hair dryer to gently warm the edges of the iPad’s screen. Once the adhesive softens, carefully use a plastic spudger to separate the screen from the body of the iPad.
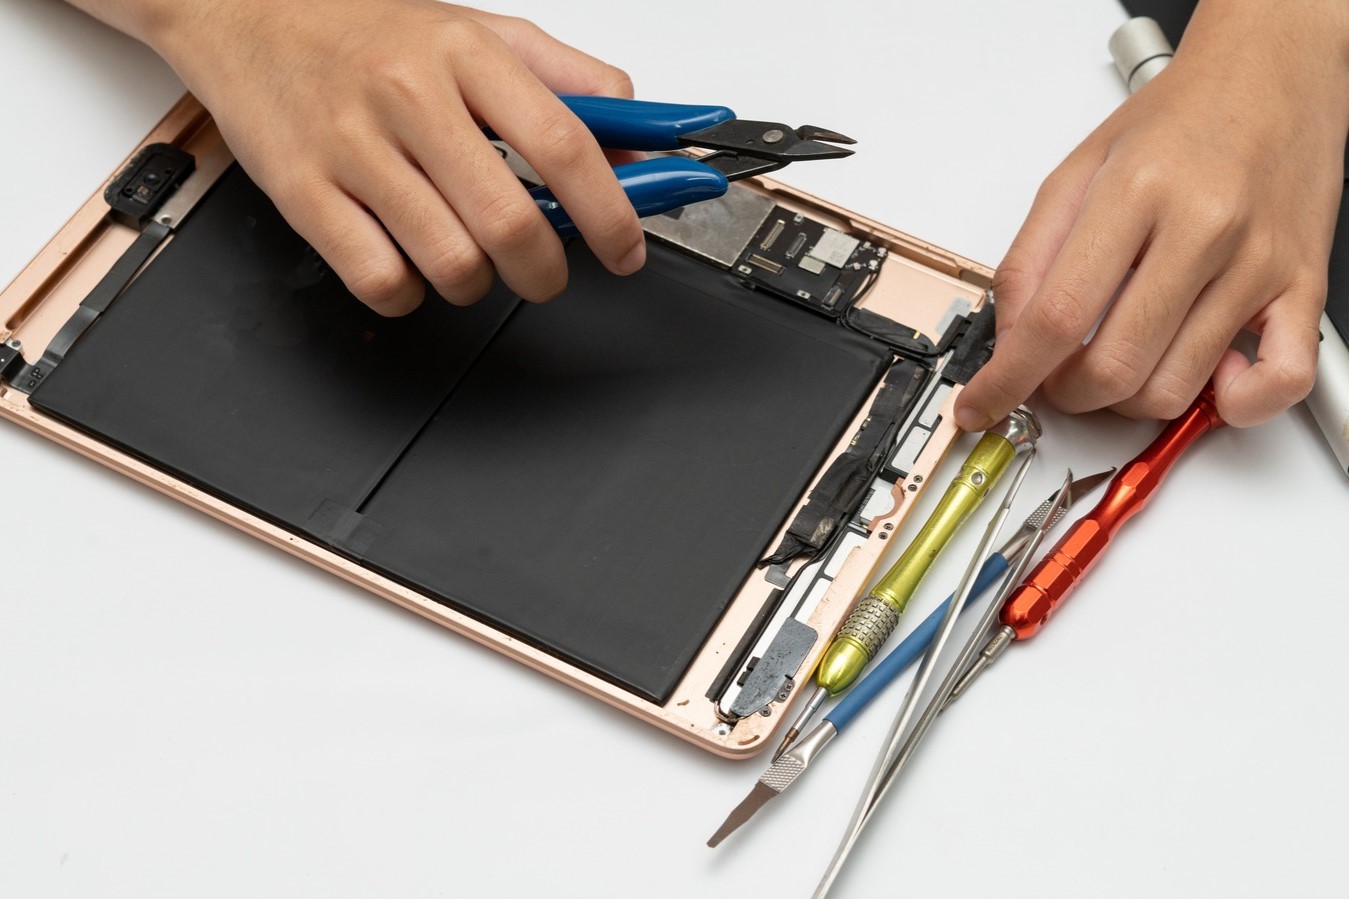
- Disconnect the Battery: After gaining access to the interior, locate and disconnect the battery connector from the iPad’s logic board using a spudger or plastic opening tool.
- Remove the Old Battery: Use the appropriate tools to carefully remove the old battery from its housing, ensuring not to puncture or damage it during the process.
- Install the New Battery: Place the new battery into the designated space within the iPad and reconnect the battery connector to the logic board.
- Reattach the Screen: Carefully reattach the iPad’s screen, ensuring that it is properly aligned and secured in place.
- Power On and Test: Power on your iPad and verify that the new battery is functioning correctly. Check for proper charging and overall performance.
- Final Checks: Once the iPad is operational, perform a final inspection to ensure all components are securely in place and that the device is functioning as expected.
Following these steps meticulously will enable you to successfully replace the battery in your iPad, extending its lifespan and restoring its functionality.
Tips for Extending the Life of Your New iPad Battery
After replacing your iPad’s battery, it’s essential to adopt practices that will prolong the longevity of the new battery. Here are some valuable tips to help you maximize its lifespan:
- Optimize Screen Brightness: Lowering the screen brightness can significantly reduce the strain on your battery, preserving its charge for longer periods.
- Manage Background App Refresh: Limiting the number of apps that refresh content in the background can conserve battery power and improve overall efficiency.
- Enable Low Power Mode: When your iPad’s battery is running low, activating Low Power Mode can extend its longevity by reducing power consumption.
- Update Software Regularly: Keeping your iPad’s operating system up to date can optimize battery performance by addressing software-related issues and enhancing power management.
- Avoid Extreme Temperatures: Exposing your iPad to extreme heat or cold can degrade the battery over time. It’s best to operate and store your device within the recommended temperature range.
- Use Genuine Chargers: Utilize authentic chargers and cables that are specifically designed for your iPad model to ensure safe and efficient charging, which can positively impact battery longevity.
- Avoid Complete Discharges: While it’s advisable to perform a full discharge and recharge occasionally, frequent complete discharges can strain the battery and diminish its lifespan.
- Implement Regular Charging Cycles: Periodically charging your iPad in shorter bursts rather than allowing it to fully deplete can contribute to maintaining the battery’s health.
- Store Your iPad Carefully: When storing your iPad for an extended period, ensure that it is powered off and stored in a cool, dry place to prevent unnecessary battery drain.
- Monitor Battery Health: Keep an eye on your battery’s performance through the iPad’s settings to identify any irregularities and take timely action if needed.
By incorporating these practices into your daily iPad usage, you can effectively prolong the life of your new battery, ensuring sustained performance and reliability.
Common Mistakes to Avoid When Replacing Your iPad Battery
While replacing your iPad battery can be a rewarding endeavor, it’s crucial to steer clear of common pitfalls that could compromise the process and your device’s functionality. Here are some mistakes to avoid:
- Rushing the Process: Impatience can lead to hasty actions, potentially causing damage to delicate components. Take your time and proceed with caution.
- Skipping Backup: Failing to back up your iPad’s data before initiating the battery replacement can result in irreversible data loss if something goes awry during the process.
- Using Incorrect Tools: Utilizing inappropriate tools or applying excessive force can lead to scratches, dents, or irreparable damage to the iPad’s exterior and internal components.
- Disregarding Static Precautions: Neglecting to discharge static electricity or wearing anti-static wrist straps can pose a risk to the sensitive electronic parts of your iPad.
- Forgetting Cable Connections: Failing to reconnect cables securely after the battery replacement can lead to malfunctioning components or a non-responsive iPad.
- Overlooking Adhesive Application: Inadequate or improper application of adhesive strips when securing the new battery can result in instability and potential damage to the device.
- Ignoring Battery Compatibility: Installing a battery that is not compatible with your iPad model can lead to performance issues and may even pose safety hazards.
- Excessive Heat Application: Applying excessive heat when detaching the iPad’s screen or working near the battery can cause damage to the device’s internal components.
- Disregarding Proper Disposal: Incorrectly disposing of the old battery can harm the environment and may violate local regulations. Always adhere to proper disposal guidelines.
- Failure to Test the New Battery: Neglecting to verify the functionality of the new battery before reassembling the iPad can lead to additional troubleshooting and rework.
By steering clear of these common mistakes and approaching the battery replacement process with care and attention to detail, you can ensure a successful and seamless transition to a new iPad battery without encountering unnecessary setbacks.