
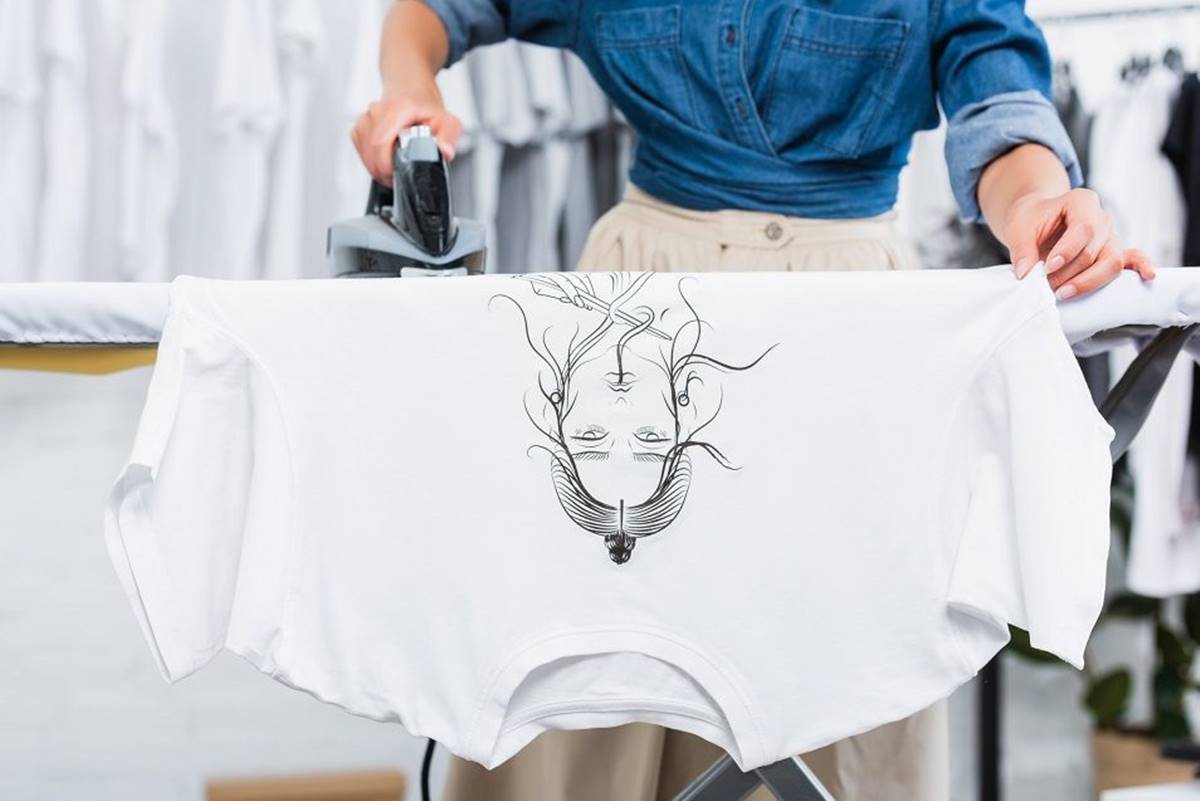
Choosing the Right Design for Your Iron-On Transfer
Designing an iron-on transfer starts with selecting the perfect design that will make a statement. Whether you’re creating custom t-shirts, tote bags, or other fabric items, choosing the right design is crucial. Here are some tips to help you make the best choice for your iron-on transfer.
- Consider the purpose: Think about the purpose of your iron-on transfer. Are you designing it for a special event, a sports team, or just for personal use? Understanding the purpose will help you narrow down the options.
- Keep it simple: Remember that simplicity is key when it comes to iron-on transfers. Intricate designs with tiny details might not come out as crisp and clear once transferred onto fabric. Opt for bold, straightforward designs that will have a greater impact.
- Consider the color of the fabric: The color of the fabric you’ll be applying the iron-on transfer to is an important factor to consider. Choose a design color that will contrast well with the fabric color, ensuring that the design stands out.
- Size matters: Determine the appropriate size for your design. It should be large enough to be easily visible and readable but not too big that it overwhelms the fabric. Take into account the size of the fabric item as well.
- Quality matters: Whether you’re creating your own design or purchasing one, ensure that the design is of high quality. This will ensure that the transferred image is clear and durable, ensuring longevity of the design.
- Reflect your personal style: Your iron-on transfer is a reflection of your personal style, so choose a design that speaks to your interests, hobbies, or personality. This will make the fabric item feel more unique and personal.
By considering these factors, you can select the perfect design for your iron-on transfer that will make a lasting impression. Remember, a well-chosen design is the first step towards creating a visually appealing and personalized fabric item.
Preparing and Cleaning the Fabric for Iron-On Transfers
Before applying an iron-on transfer to fabric, it’s essential to properly prepare and clean the fabric for optimal results. This ensures that the transfer adheres well and lasts longer. Here are some steps to follow for fabric preparation:
- Wash the fabric: Start by washing the fabric item you’ll be applying the transfer to. Use a mild detergent and avoid using fabric softener, as it can create a barrier between the transfer and the fabric.
- Choose the right fabric: Not all fabrics are suitable for iron-on transfers. Choose a fabric that is made of natural fibers, such as cotton or linen, as they tend to work best. Synthetic fibers may not hold the transfer as well and can melt under high heat.
- Preheat the fabric: Before applying the transfer, preheat the fabric by running a dry iron over it for a few seconds. This helps remove any moisture and wrinkles, creating a smooth surface for the transfer to adhere to.
- Position the fabric: It’s important to have a flat, stable surface to work on. Lay the fabric item on an ironing board or a heat-resistant mat, ensuring that it’s wrinkle-free and evenly stretched out.
- Protect the fabric: To prevent any damage or discoloration to the fabric, place a thin cloth or parchment paper over the area where you’ll be applying the transfer. This acts as a barrier between the iron and the fabric.
By properly preparing and cleaning the fabric, you create an ideal surface for your iron-on transfer. This ensures that the transfer adheres smoothly and securely, resulting in a professional-looking and long-lasting design. Remember to follow the manufacturer’s instructions for ironing temperature and duration to achieve the best results.
Using Design Software for Iron-On Transfers
Design software provides endless possibilities for creating unique and eye-catching designs for iron-on transfers. Whether you’re a beginner or an experienced designer, using design software can greatly enhance your creativity. Here are some tips for using design software effectively:
- Choose the right software: There are various design software options available, ranging from free online tools to professional graphic design programs. Choose one that suits your skill level and budget. Some popular choices include Adobe Illustrator, CorelDRAW, and Canva.
- Understand the features: Familiarize yourself with the features and tools offered by the design software. Learn how to manipulate shapes, add text, import images, and apply effects. The more you explore, the more you’ll be able to unleash your creativity.
- Use high-quality graphics: When designing iron-on transfers, it’s important to use high-quality graphics to ensure a crisp and clear transfer. Utilize vector graphics or high-resolution images to prevent any pixelation or blurriness.
- Experiment with colors and fonts: Design software allows you to play with a wide range of colors and fonts. Experiment with different combinations to find the perfect match for your design. Ensure that the chosen colors and fonts are legible and complement each other well.
- Consider layering and effects: Design software enables you to create layered designs and add special effects like shadows, gradients, and textures. These elements can add depth and visual interest to your iron-on transfer.
- Save and export in the correct format: Once your design is finalized, save it in the appropriate file format for iron-on transfers, such as PNG or SVG. These formats preserve the quality of the design and allow for easy transfer to the fabric.
Using design software opens up a world of possibilities for creating stunning iron-on transfer designs. Whether you’re designing for personal use or for a business, mastering the software’s features and exploring different techniques will help you bring your creative visions to life.
Tips for Designing Text for Iron-On Transfers
Text can be a powerful element in iron-on transfer designs, conveying messages, slogans, or personalization. When designing text for iron-on transfers, it’s important to consider legibility, font selection, and placement. Here are some tips to help you create visually appealing and readable text designs:
- Choose a legible font: Select a font that is easy to read, even from a distance. Avoid intricate or overly decorative fonts that may sacrifice legibility. Sans-serif fonts like Arial or Helvetica are a popular choice for readability.
- Consider font size and spacing: Ensure that the font size and spacing between characters are appropriate for the size of the iron-on transfer and the fabric item. Text that is too small or crowded together may become difficult to read once transferred.
- Experiment with text effects: Design software allows you to apply effects like bold, italic, underline, or different colors to your text. However, use these effects sparingly to maintain readability. Avoid using multiple effects together, as it can make the text appear cluttered.
- Position the text strategically: Consider the placement of the text within the design. Position it in a way that complements the overall composition and does not interfere with other design elements. You may want to align the text horizontally or vertically for a balanced look.
- Consider the fabric color: The color of the fabric plays a crucial role in the readability of the text. Choose a text color that contrasts well with the fabric color. For light-colored fabrics, opt for dark-colored text, and vice versa.
- Proofread and double-check spelling: Before finalizing your design, ensure that all text is properly spelled and free of errors. Double-check the grammar and punctuation to avoid any embarrassing mistakes once the transfer is applied.
By following these tips, you can create text designs for iron-on transfers that are not only visually appealing but also easy to read. Remember to experiment and iterate on your designs until you achieve the desired result.
Utilizing Graphics and Images for Iron-On Transfers
Graphics and images can elevate the visual impact of iron-on transfers, bringing life to your designs. Whether you’re using pre-made graphics or creating your own, here are some tips for effectively utilizing graphics and images in your iron-on transfers:
- Choose high-quality images: When using images for iron-on transfers, it’s important to use high-resolution and sharp images. This ensures that the transferred image remains clear and detailed. Avoid pixelated or low-quality images that may result in a blurry and unattractive transfer.
- Consider image size and placement: Adjust the size of the image according to the fabric item and the overall design. Ensure that the image is large enough to be visible, but not too large that it dominates the entire design. Experiment with different placements to find the most visually appealing arrangement.
- Blend images and backgrounds: If you’re combining images with backgrounds or other design elements, strive for a seamless blend. Use editing tools to remove unwanted backgrounds or adjust the transparency to integrate the image smoothly into the design.
- Use vector graphics: Vector graphics are scalable and retain their quality when resized. Consider using vector graphics for iron-on transfers for flexibility and versatility in design. They can be manipulated, resized, and edited without losing their sharpness.
- Add personal touch: Customizing graphics and images adds a personal touch to your iron-on transfers. Consider adding text overlays, borders, or filters that reflect your style and personality. This will make your transfers unique and distinct.
- Test print before transferring: Before applying the iron-on transfer to the fabric, perform a test print on regular paper. This allows you to check the colors, details, and overall appearance of the image. Make any necessary adjustments before proceeding with the actual transfer.
By effectively utilizing graphics and images, you can create visually captivating iron-on transfers that express your creativity and style. With careful selection, editing, and customization, your transfers will stand out and make a lasting impression.
Customizing Iron-On Transfers with Multiple Layers
Adding multiple layers to your iron-on transfers can take your designs to the next level, creating depth, dimension, and visual interest. Here are some tips for customizing your iron-on transfers with multiple layers:
- Plan your design: Before starting the layering process, sketch out your design and plan which elements will be on separate layers. This will help you visualize the final result and ensure a cohesive design.
- Use different materials: Experiment with using different materials for each layer, such as glitter, metallic, or holographic vinyl. This will create a dynamic and eye-catching effect when transferred onto fabric.
- Layer from bottom to top: Start with the bottom layer and work your way up. Apply one layer at a time, making sure to properly align and position each layer before moving on to the next.
- Consider transparency: If using materials with transparency, take advantage of this feature to create interesting overlays and blending effects. This can enhance the overall aesthetics of your design.
- Utilize transfer tape: Transfer tape is a helpful tool for layering iron-on transfers. It allows you to transfer each layer onto the fabric accurately and smoothly. Use it to position and hold the layers in place during the transfer process.
- Add dimension with foam or fabric: To add texture and depth to your design, consider incorporating foam or fabric elements as separate layers. These can be cut to shape and applied to the transfer, giving it a 3D effect.
- Take care with layer placement: Pay attention to the positioning of each layer to avoid any overlapping or accidental alignment issues. Prioritize clarity and avoid overcrowding the design.
- Ensure proper heat application: When applying multiple layers, it’s essential to determine the correct heat application for each layer. Follow the manufacturer’s instructions for temperature and duration to ensure that all layers adhere properly to the fabric.
By customizing your iron-on transfers with multiple layers, you can create visually stunning and unique designs. With careful planning, layering techniques, and proper heat application, your transfers will have depth, dimension, and an added touch of creativity.
Properly Aligning and Positioning Iron-On Transfers
Achieving precise alignment and positioning of your iron-on transfers is crucial for a professional and polished result. Here are some tips to help you ensure accurate placement of your transfers:
- Measure and mark: Use a ruler or measuring tape to measure and mark the desired placement of your transfer. This will provide you with reference points to align the transfer properly.
- Center alignment: For designs that need to be centered, fold the fabric in half vertically or horizontally, depending on the placement, and create a crease as a guide. Line up the center of the transfer with the crease to achieve a perfectly centered design.
- Use a T-square or alignment tools: If you require precise alignment for text or specific elements, use a T-square or alignment tools to ensure straight lines and accurate positioning. These tools can be helpful for maintaining symmetry and uniformity in your design.
- Test placement before transferring: Before applying the transfer to the fabric, place it on the desired location and step back to evaluate its positioning. This will allow you to make any necessary adjustments before applying heat.
- Utilize transfer tape or masking tape: If your design includes multiple elements or layers, it can be helpful to use transfer tape or masking tape to hold the individual pieces in place before ironing. This will prevent them from shifting and ensure proper alignment during the transfer process.
- Apply heat evenly: When ironing the transfer onto the fabric, apply heat evenly across the entire design. This helps the transfer adhere uniformly and prevents any parts from peeling off or not adhering properly.
- Press firmly: Use firm and even pressure when applying the iron to the transfer. This ensures proper contact with the fabric and allows the transfer to bond securely.
- Follow manufacturer’s instructions: Each iron-on transfer may have specific instructions for alignment and positioning. Be sure to carefully read and follow the manufacturer’s guidelines for the best results.
By following these tips and techniques, you can ensure that your iron-on transfers are properly aligned and positioned, resulting in a professional-looking and visually stunning finished product.
Understanding Heat Press Settings for Iron-On Transfers
The heat press settings play a crucial role in the success of your iron-on transfers. Knowing and understanding these settings is key to achieving a long-lasting and vibrant design. Here are the important factors to consider when setting up your heat press:
- Temperature: The temperature of the heat press is essential for activating the adhesive on the transfer. Different types of transfers and fabrics require different temperature settings. Consult the instructions provided by the transfer manufacturer to determine the appropriate temperature for your specific transfer.
- Time: The duration for which the heat press is applied to the transfer is equally important. Too little time may result in a weak bond, while too much time can cause damage to the transfer or fabric. Again, refer to the manufacturer’s instructions for the recommended duration.
- Pressure: The pressure applied by the heat press determines the level of adherence between the transfer and the fabric. The pressure should be enough to ensure the transfer fully bonds with the fabric but not too much to damage the design or fabric. Adjust the pressure dial according to the thickness of the fabric.
- Preheat: Preheating the heat press before applying the transfer is essential. This removes any moisture, wrinkles, or impurities from the fabric, creating a smooth surface for the transfer. Preheating also ensures more effective heat distribution during the pressing process.
- Even heat distribution: Ensure that the heat press distributes heat evenly across the entire surface. Uneven heat can result in inconsistent transfer quality, with some areas showing poor adhesion or color vibrancy. Regularly check the heat press for any areas with inadequate heat distribution.
- Cool down: After the transfer is pressed, give it sufficient time to cool down before removing the backing. Premature removal of the backing while the transfer is still hot can cause it to distort or detach from the fabric.
Understanding and properly adjusting the heat press settings is essential for achieving professional and long-lasting iron-on transfers. It’s important to follow the manufacturer’s guidelines and experiment with different settings to find the optimal combination for your specific transfer materials and fabric types.
Troubleshooting Common Issues with Iron-On Transfers
Iron-on transfers are generally straightforward to apply, but occasionally, issues may arise that can affect the quality and durability of the design. Here are some common issues you may encounter with iron-on transfers and tips on how to troubleshoot them:
- Peeling or lifting: If your transfer starts to peel or lift from the fabric after application, it could be due to insufficient heat or pressure during the pressing process. Ensure that you are using the correct temperature, applying enough pressure, and following the recommended time duration.
- Fading or discoloration: Fading or discoloration can occur if the transfer is exposed to excessive heat or if the fabric is not suitable for iron-on transfers. Use the correct temperature and consult the manufacturer’s instructions for the recommended type of fabric for your transfer. Additionally, avoid washing the fabric in hot water or using harsh detergents that may fade the colors.
- Burn marks or scorching: Burn marks and scorching may occur if the heat applied during pressing is too high or if the transfer is pressed for too long. Adjust the temperature and time settings on your heat press to prevent burning. Additionally, place a thin cloth or parchment paper between the iron and the transfer to act as a barrier.
- Crumbling or cracking design: A design that crumbles or cracks after washing or wearing indicates a problem with the transfer itself. Ensure that you are using a high-quality transfer from a reputable manufacturer. Follow the washing and care instructions provided by the manufacturer for long-lasting results.
- Misalignment or shifting: If your design appears misaligned or shifted after application, it may be due to improper positioning or movement during pressing. Take extra care to align and position the transfer accurately before pressing. Use transfer tape or masking tape to hold the design in place during the transfer process.
- Incomplete transfer: If your design does not fully transfer onto the fabric, it could be due to insufficient heat, pressure, or time. Ensure that you are using the recommended heat press settings provided by the transfer manufacturer. If necessary, repeat the pressing process and apply additional pressure to ensure complete transfer.
By troubleshooting common issues with iron-on transfers, you can overcome challenges and achieve high-quality and long-lasting results. Remember to carefully follow the manufacturer’s instructions, adjust heat press settings as needed, and use high-quality transfers and fabrics for the best outcome.