
Why do you need a Google Account?
A Google Account is an essential tool that provides access to a wide range of Google services, including Gmail, Google Drive, and YouTube. By creating a Google Account, you can take advantage of the numerous features and benefits that these platforms offer. Here are some compelling reasons why you need a Google Account:
- Email Communication: With a Google Account, you get access to Gmail, a powerful email service that offers a user-friendly interface and ample storage space. Whether you want to communicate with friends, family, or colleagues, Gmail allows you to send and receive emails easily.
- Cloud Storage: Google Drive is a cloud-based storage solution that comes with your Google Account. It enables you to store and access files, documents, photos, and videos from anywhere. With a generous amount of free storage space, Google Drive ensures that your important files are securely backed up and readily available whenever you need them.
- Video Sharing: YouTube, the world’s largest video-sharing platform, requires a Google Account to create, upload, and manage videos. Whether you want to showcase your talents, share educational content, or simply explore the vast library of videos, having a Google Account allows you to participate in the vibrant YouTube community.
- Seamless Integration: A Google Account provides seamless integration across various devices and platforms. Whether you are using a computer, smartphone, or tablet, you can easily access and synchronize your emails, files, and other Google services. This integration enhances productivity and convenience, allowing you to stay connected on the go.
- Premium Features: Some Google services offer additional premium features exclusively to account holders. For instance, with a Google Account, you can enjoy ad-free viewing on YouTube and access advanced features on Gmail, such as email forwarding and auto-responses. These perks enhance your overall user experience.
By creating a Google Account, you tap into a vast ecosystem of services and features that Google provides. Whether you want to communicate, store files, share videos, or enjoy premium benefits, having a Google Account unlocks a world of possibilities. So, don’t miss out on the numerous advantages – create your Google Account today and start benefiting from all that Google has to offer.
How to create a Google Account
Creating a Google Account is a simple and straightforward process. Follow these steps to get started:
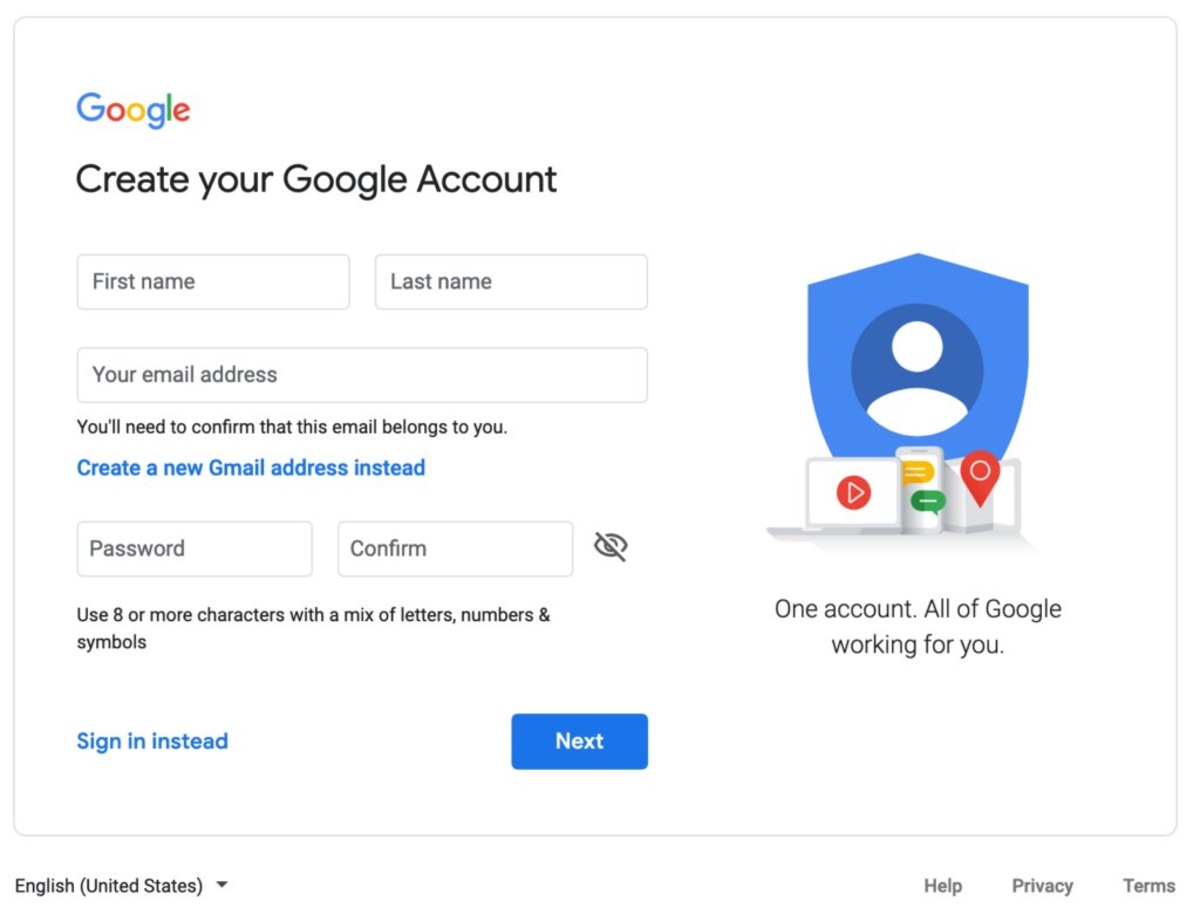
- Go to the Google Account creation page: Open your web browser and navigate to the Google Account creation page. You can either search for “Google Account creation” or directly go to accounts.google.com/signup.
- Provide your personal information: On the account creation page, you will be prompted to provide your personal information. This includes your first and last name. You will also need to choose a unique username, which will be your email address. You can either create a new email address or use an existing one from another provider.
- Create a strong password: It’s essential to create a strong and secure password to protect your Google Account. Make sure your password is a combination of uppercase and lowercase letters, numbers, and special characters. Avoid using common passwords, such as your name or birthdate, to enhance the security of your account.
- Verify your account: Google will ask you to verify your account by providing a valid phone number. This step is necessary to ensure the security of your account and to facilitate account recovery if needed. Follow the prompts to enter your phone number and verify it through a code sent to your mobile device.
- Agree to the terms and conditions: Take the time to read the terms and conditions of creating a Google Account. Once you have understood and agreed to the terms, click on the checkbox to indicate your consent.
- Set up your account recovery: It’s crucial to set up account recovery options to secure your Google Account. You may choose to provide an alternate email address or set up a recovery phone number. These options will help you regain access to your account if you ever forget your password or get locked out.
- Complete the process: After providing the necessary information and setting up account recovery, click on the “Next” button to complete the process. You may be asked to add a profile picture and customize your account settings, but these steps are optional and can be done later.
Once you have completed the steps above, congratulations, you have successfully created your Google Account! You can now access Gmail, Google Drive, YouTube, and other Google services using your new account credentials. Keep your login information secure and enjoy the convenience and benefits of having a Google Account.
Setting up your Gmail account
Gmail is a popular email service offered by Google that provides a user-friendly interface, powerful features, and ample storage space. After creating your Google Account, follow these steps to set up your Gmail account:
- Access Gmail: Open your web browser and navigate to www.gmail.com. Enter your Google Account email address and password to log in to your Gmail account.
- Explore the inbox: Once you log in, you will be directed to your Gmail inbox. Take a moment to familiarize yourself with the layout. You will see your most recent emails displayed in chronological order, with the most recent ones at the top.
- Composing and sending emails: To compose a new email, click on the “Compose” button located in the top-left corner of the screen. A new window will appear where you can enter the recipient’s email address, subject, and content of the email. Once you have written your email, click the “Send” button to send it.
- Organizing your inbox: Gmail offers various features to help you organize your emails. You can create labels to categorize your emails, such as “Work,” “Personal,” or “Important.” To create a label, go to the left sidebar, click on the three horizontal lines, and then select “Create new label.” You can also use the “Archive” button to remove emails from your main inbox and keep them in the “All Mail” section.
- Customizing your Gmail settings: Gmail provides a range of settings that allow you to personalize your email experience. To access these settings, click on the gear icon in the top-right corner and select “Settings.” Here, you can customize your signature, set up automatic replies, create filters to organize incoming emails, and adjust other preferences to suit your needs.
- Adding contacts: To start building your contact list, click on the “Contacts” link on the left sidebar. Here, you can manually add contacts or import them from other email providers. Having a contact list makes it easy to find and send emails to specific individuals without having to remember their email addresses.
- Using additional Gmail features: Gmail offers a plethora of additional features to enhance your email experience. These include chat integration with Google Hangouts, the ability to create and manage multiple email aliases, and advanced search options to quickly find specific emails. Take the time to explore these features to make the most out of your Gmail account.
By following these steps and exploring the features of Gmail, you can efficiently manage your emails and take advantage of the numerous tools and options provided by Google. Stay organized, respond promptly to messages, and make the most out of your Gmail account’s capabilities.
Exploring Gmail Features
Gmail offers a wide range of features that can enhance your email experience and make managing your inbox more efficient. Let’s explore some of the key features available in Gmail:
- Tabs and categories: Gmail automatically categorizes your emails into different tabs, such as Primary, Social, Promotions, and Updates. This helps you quickly navigate through your inbox and prioritize important emails.
- Smart reply: Gmail uses artificial intelligence to suggest quick and relevant replies to your emails. With a simple click, you can save time by selecting a prewritten response that suits the context of the email.
- Conversation view: Gmail groups related emails together in a conversation view, making it easy to follow the thread of a discussion. This feature eliminates clutter and helps you quickly access previous messages within a conversation.
- Advanced search: Gmail provides powerful search capabilities, allowing you to find specific emails quickly. You can search by keywords, sender, recipient, date, attachment, and more. These advanced search options help you locate important emails with precision.
- Filters and labels: Gmail allows you to create filters and labels to automatically organize your incoming emails. Filters can be set up based on criteria such as sender, subject, or keywords, while labels help you categorize and prioritize your emails.
- Undo send: Have you ever regretted sending an email too quickly? Gmail’s undo send feature allows you to recall a sent email within a short time window after clicking the send button.
- Priority inbox: With priority inbox, Gmail intelligently categorizes your emails based on their importance. It identifies key emails and separates them from less important ones, making it easier to focus on the messages that matter most.
- Offline access: Gmail offers offline access so you can continue working on your emails even when you’re without an internet connection. This is especially useful for frequent travelers or those in areas with limited connectivity.
- Integrations: Gmail seamlessly integrates with other Google services. You can access Google Calendar to schedule events, Google Tasks to keep track of your to-do list, and Google Meet for video conferences, all from within your Gmail account.
- Security features: Gmail prioritizes your account’s security by providing features such as two-factor authentication, spam filtering, and phishing detection. This helps protect your inbox from unauthorized access and potential threats.
Take the time to explore and utilize these features in Gmail to maximize your email productivity and efficiency. With its advanced functionalities and intelligent design, Gmail continues to evolve and offer a seamless email experience.
Managing your Gmail Account Settings
Gmail provides a range of customizable settings that allow you to personalize your email experience and tailor it to your preferences. Here are some key settings you can manage in your Gmail account:
- General settings: Access the General settings by clicking on the gear icon in the top-right corner of the Gmail screen, then selecting “Settings.” Here, you can modify settings such as language preferences, inbox layout, and email display density.
- Labels: Labels in Gmail are like folders that help you organize your emails into categories. You can create, edit, or delete labels to suit your needs. To manage your labels, go to the Settings page and click on the “Labels” tab.
- Filters: Filters allow you to automatically sort incoming emails into specific labels or apply actions to them. You can create filters based on various criteria, such as sender, subject, or keywords. This helps you keep your inbox organized and ensures important emails are prioritized. Access the Filters settings under the Settings page, then click on the “Filters and Blocked Addresses” tab.
- Signature: Customize your email signature to add a personal touch to your messages. You can include your name, job title, contact information, or any other relevant details. To set up your signature, go to the General settings and scroll down to the “Signature” section. Here, you can create a new signature and choose when to display it in your emails.
- Automatic replies: If you’re going on vacation or will be away from your email for an extended period, you can set up automatic replies to let people know you’re unavailable. Navigate to the General settings and scroll down to the “Vacation responder” section. Here, you can customize your message and set the start and end dates for the automatic replies.
- Chat and Meet: Gmail offers integration with Google Chat and Google Meet for real-time messaging and video calls. In the Chat and Meet settings, you can control your availability status, notification preferences, and other related options. Access these settings by clicking on the gear icon, then selecting “See all settings” and navigating to the Chat and Meet tab.
- Security and privacy: Gmail takes security seriously and provides various settings to protect your account. You can enable two-factor authentication to add an extra layer of security, manage app permissions to control access to your account, and review your account’s security and privacy settings in the respective sections under the Settings page.
- Offline access: If you frequently work without an internet connection, you can enable offline access to your emails. This feature allows you to read, write, and search for emails even when you’re not connected to the internet. To enable offline access, go to the General settings and scroll down to the “Offline” section.
- Import and forwarding: If you have another email account, you can import your emails to Gmail or set up email forwarding to receive all your emails in one inbox. Explore the “Accounts and Import” tab in the Settings page to manage import and forwarding settings.
- Theme and appearance: Personalize the look and feel of your inbox by choosing a theme. Gmail offers several pre-designed themes or allows you to create a custom theme using your own background images. Go to the Appearance settings to explore these options and select your preferred theme.
By managing these settings according to your preferences, you can customize your Gmail account to align with your workflow and communication style. Explore each setting and make adjustments as needed to optimize your Gmail experience.
Using Google Drive
Google Drive is a cloud-based storage platform that allows you to store, access, and manage your files from anywhere. Here’s how you can make the most out of Google Drive:
- Accessing Google Drive: You can access Google Drive by visiting drive.google.com or by clicking on the grid icon in the top-right corner of any Google page and selecting “Drive.” Sign in using your Google Account credentials.
- Uploading files: To upload files to Google Drive, simply drag and drop them into the Drive interface or click on the “New” button and select “File upload.” You can upload various types of files, including documents, images, videos, and more.
- Organizing files: Google Drive allows you to organize your files into folders, making it easy to find and manage your content. Create new folders by clicking on the “New” button and selecting “Folder.” You can also move files and folders by selecting them and using the “Move” option.
- Collaborating on files: One of the standout features of Google Drive is its collaboration capabilities. You can easily share files and folders with others, allowing them to view, comment, or edit the content. To share a file, right-click on it, select “Share,” and enter the email addresses of the people you want to collaborate with.
- File versions and revisions: Google Drive automatically saves multiple versions of your files, enabling you to access previous versions and track changes. You can view the revision history by right-clicking on a file and selecting “Version history.” This feature is particularly useful when collaborating on documents and tracking changes made by different users.
- Offline access: With Google Drive’s offline access feature, you can access and work on your files even when you don’t have an internet connection. You can enable this feature by going to the Google Drive settings and checking the box for “Offline.”
- Sharing and security settings: Google Drive provides granular sharing and security settings to control who can access and edit your files. You can set permissions for specific users or allow public access. Additionally, you can protect sensitive files with encryption and two-factor authentication.
- Searching and filtering: Google Drive offers powerful search and filtering capabilities to help you quickly find files. You can search by file name, type, owner, or keywords. Use the search bar at the top of the Drive interface to find the content you’re looking for.
- Third-party integrations: Google Drive integrates with various third-party apps and services, expanding its functionality. You can connect apps like DocuSign, Pixlr, and Trello to enhance your file management and editing capabilities.
- Automatic backups and synchronization: Google Drive provides automatic backups and synchronization across multiple devices. Any changes you make to a file on one device will be instantly reflected on all other connected devices, ensuring you always have the most up-to-date version of your files.
By utilizing the features and functionalities of Google Drive, you can create a seamless workflow for storing, accessing, and collaborating on your files. Whether for personal or professional use, Google Drive simplifies file management and offers a convenient and secure cloud storage solution.
Uploading and Organizing Files in Google Drive
Google Drive provides a simple and efficient way to upload and organize your files in the cloud. Here’s a guide on how to upload and organize your files in Google Drive:
- Uploading Files: To upload files to Google Drive, click on the “New” button in the top-left corner of the Drive interface and select “File upload.” You can then choose a file from your computer to upload. Alternatively, you can drag and drop files directly into the Drive interface.
- Creating Folders: Folders help you organize your files and keep them structured. To create a new folder in Google Drive, click on the “New” button and select “Folder.” Enter a name for the folder and click “Create.” You can then drag and drop files into the folder or move files from one folder to another.
- Organizing Files into Folders: To keep your files organized, simply drag and drop them into the desired folder in Google Drive. You can also select one or multiple files, right-click, and choose the “Move to” option to place them into a specific folder. This allows you to easily categorize and find your files.
- Using Color-coded Labels: Google Drive allows you to add color-coded labels to your files and folders to enhance organization. Right-click on a file or folder, select “Change Color,” and choose a color from the available options. This visual indicator makes it easier to identify and categorize your files at a glance.
- Searching for Files: With Google Drive’s powerful search functionality, you can quickly find specific files or folders. Use the search bar at the top of the Drive interface to enter keywords, file names, or any relevant information. Drive will display results based on your search terms, allowing you to locate files efficiently.
- Sorting and Filtering: You can sort your files and folders in Google Drive to arrange them in a specific order. Click on the “Sort” button in the top-right corner of the Drive interface to choose sorting options such as “Last Modified,” “Name,” or “File Size.” Additionally, you can use the “Filter” button to further refine the displayed files based on specific criteria.
- Collaborating on Files: Google Drive allows multiple users to collaborate on the same file simultaneously. To collaborate, select the file you want to share, click on the “Share” button, and enter the email addresses of the people you want to collaborate with. You can then assign permissions for each user, such as view, comment, or edit access.
- Version History: Google Drive automatically saves multiple versions of your files, enabling you to access previous revisions. Right-click on a file, select “Version history,” and choose the specific version you want to view or restore. This feature is especially useful when working on documents with multiple collaborators.
- Using Starred Files: You can mark files as “Starred” in Google Drive to designate them as important or frequently accessed. Simply click on the star icon next to a file or folder to mark it. Starred files can be easily accessed from the “Starred” section in the left sidebar, making them readily available.
- Deleting Files: If you no longer need a file, you can delete it from Google Drive. Select the file, right-click, and choose “Remove” or press the “Trash” icon. Deleted files will be moved to the Trash folder, where they can be permanently deleted or restored if needed.
By following these steps and utilizing the features available in Google Drive, you can efficiently upload and organize your files, making them easily accessible and organized according to your specific needs.
Collaborating and Sharing Files in Google Drive
Google Drive offers powerful collaboration features that allow you to easily share and work together on files with others. Here’s how you can collaborate and share files in Google Drive:
- Sharing Files: To share a file in Google Drive, right-click on the file and select “Share.” You can then enter the email addresses of the people you want to share the file with. You can choose whether they have view-only, comment, or edit access to the file.
- Setting Access Permissions: When sharing files, you can control access permissions for each person. You can choose whether they can only view the file, leave comments, or have the ability to edit the file. You can also specify whether others can share the file with additional users or whether the file requires a password to access.
- Collaborating in Real-time: Google Drive enables real-time collaboration on documents, spreadsheets, and presentations. When multiple users open a file, they can simultaneously make changes and additions. You can see the changes happening in real-time and communicate through comments or the chat feature.
- Sending File Links: Instead of directly sharing files, you can also send shareable links to others. These links allow recipients to access the files without requiring a Google Account. You can choose whether the link gives view-only access or grants permission to edit the file.
- Commenting on Files: Collaborators can leave comments on files in Google Drive, making it easy to provide feedback or discuss specific areas of the document. To leave a comment, select the section of the file you want to comment on and click on the “Comment” icon. You can also tag specific users using the @ symbol to notify them.
- Version Control: With Google Drive’s version control, you can access the revision history of shared files. This allows you to review previous versions of the file and restore earlier versions if needed. To access the version history, right-click on the file, select “Version history,” and choose the specific version you want to preview or revert to.
- Notification Settings: You can control the notifications you receive when collaborating on files in Google Drive. Click on the bell icon in the top-right corner to access notification settings. You can customize when and how you receive notifications for file updates, comments, or requests for access.
- Shared Drives: Google Drive offers the option to create Shared Drives, which are shared spaces where teams can easily store, search, and access files. Shared Drives allow for collaborative file management and ownership, making it ideal for organizations and teams working together on projects.
- Revoking Access: If you want to remove someone’s access to a file, you can easily revoke their permissions. Right-click on the file, select “Share,” and navigate to the “People” tab. Click on the specific user’s name and select the “Remove” option. This ensures that only authorized individuals have access to your files.
- External Collaborators: Google Drive also allows you to collaborate with people who don’t have a Google Account. By changing the sharing settings to “Anyone with the link,” non-Google users can access and collaborate on files through shareable links.
By utilizing these collaboration and sharing features in Google Drive, you can seamlessly work together with colleagues, clients, or team members on files, fostering productivity and efficiency in your projects.
Customizing Google Drive Settings
Google Drive offers a range of customizable settings that allow you to personalize your experience and optimize your workflow. Here are some key settings you can customize in Google Drive:
- Language and Region Settings: You can customize the language and region settings in Google Drive. This allows you to use the platform in your preferred language and adjust other regional preferences. To access these settings, click on the gear icon in the top-right corner and select “Settings” from the dropdown menu.
- Notifications: Google Drive provides notification settings that allow you to control how and when you receive notifications. You can choose whether to receive email notifications for shared files, comments, or requests for access. Customize these settings by clicking on the bell icon in the top-right corner and selecting “Notification settings.”
- Offline Access: Google Drive allows you to access your files offline, even without an internet connection. To enable this feature, go to the settings menu, click on “Offline” and turn on the option for offline access. This allows you to view, edit, and create files in Google Drive while offline, and any changes made will be synced once you reconnect to the internet.
- Storage Space: Google Drive offers a certain amount of free storage space, but you can also purchase additional storage if needed. To manage your storage space, go to the storage settings in Google Drive. Here, you can view how much storage you’ve used and purchase additional storage plans if required.
- Application Settings: Drive is connected to various Google applications, such as Google Docs, Sheets, and Slides. Customize the application settings to set default formats, convert uploaded files to Google Docs format, and other application-specific preferences. Access these settings by clicking on the gear icon and selecting “Settings,” then navigate to the “Applications” tab.
- Keyboard Shortcuts: Google Drive offers a range of keyboard shortcuts that make navigating and working with files faster and more efficient. You can customize or learn these shortcuts by accessing the keyboard shortcuts settings. Simply click on the gear icon, select “Settings,” and navigate to the “Keyboard shortcuts” tab.
- Third-Party App Integration: Google Drive integrates with a variety of third-party applications that can enhance your file management and productivity. Customize your integration settings to connect Google Drive to apps such as DocuSign, Pixlr, or Trello. Explore integrations by accessing the settings menu and selecting “Get Add-ons” or “Manage apps.”
- Visibility Options: You can control the visibility of your files in Google Drive by adjusting sharing settings. You can choose to keep files private, share them with specific individuals or groups, or make them accessible to anyone with the link. Modify these settings by right-clicking on a file, selecting “Share,” and adjusting the sharing options.
- Device & Backup Settings: Google Drive offers options for managing device backups and settings. You can synchronize files between your computer and Google Drive, enable device backups for Android devices, and adjust upload and download speeds. Access these settings by clicking on the gear icon and selecting “Settings,” then navigate to the “Backup and Sync” tab.
- Google Photos Integration: If you use Google Photos to store and manage your images and videos, you can customize the integration settings between Google Drive and Google Photos. Decide whether to show Google Photos in your Drive interface and adjust upload quality settings by accessing the settings menu and selecting “Settings,” then navigate to the “Google Photos” tab.
By customizing these settings in Google Drive, you can tailor the platform to your individual preferences, streamline your workflow, and optimize your file management experience.
Getting Started with YouTube
YouTube is a popular platform for watching and sharing videos, as well as creating your own content. Whether you want to explore various video genres, start a channel, or engage with the YouTube community, here’s a guide to help you get started:
- Create a YouTube Account: To access all of YouTube’s features, you’ll need to create a YouTube account. If you already have a Google Account, you can use it to sign in to YouTube. If not, you can create a new account specifically for YouTube by visiting youtube.com and clicking on the “Sign In” button.
- Explore Trending and Recommended Videos: Once you’re signed in, you can start exploring YouTube’s vast library of videos. Check out the “Trending” tab to discover popular videos. YouTube’s algorithm also suggests personalized content based on your viewing habits, which you can find in the “Recommended” section.
- Create a YouTube Channel: If you want to upload your own videos, you’ll need to create a YouTube channel. This gives you a dedicated space to showcase your content and interact with your subscribers. Click on your profile picture and select “Create a channel” to get started. You can choose to create a personal channel or a brand channel.
- Customize Your Channel: Personalize your YouTube channel by adding a channel banner, creating a channel trailer, and filling out the channel description. This helps give your channel a unique look and feel. You can customize your channel’s appearance by navigating to the “Customization” section in your channel settings.
- Uploading Videos: To upload a video to YouTube, click on the camera icon with the “+” sign, then select “Upload Video.” Choose the video file from your computer, add a title, description, tags, and select the appropriate privacy settings. You can also choose to set a custom thumbnail that represents your video visually.
- Engage with the YouTube Community: YouTube is a social platform, and engaging with the community can help you grow your channel and connect with like-minded creators and viewers. Interact with your audience by responding to comments on your videos, collaborating with other YouTubers, and participating in discussions on popular channels.
- Promote Your Channel: To gain more visibility and subscribers, promote your channel through various methods. Share your videos on social media platforms, embed them on your website or blog, collaborate with other YouTubers, and optimize your video titles, descriptions, and tags to increase search visibility.
- Explore YouTube Features: YouTube offers a range of features to enhance your channel and video content. Utilize features such as end screens and cards to promote other videos or external links. You can also enable live streaming, create playlists, and schedule video releases to keep your content organized and engaging.
- Analyze Your Channel Performance: YouTube’s analytics provide valuable insights into your channel’s performance. Monitor metrics such as views, watch time, audience demographics, and engagement to understand what content resonates with your audience. Use this information to refine your content strategy and improve your channel’s growth.
- Stay Consistent and Engage Regularly: Building a successful YouTube channel takes time and effort. Stay consistent with your content uploads and engage regularly with your audience. Listen to their feedback, adapt to their preferences, and keep experimenting to find your unique style and niche.
By following these steps and utilizing the features and opportunities available on YouTube, you can start your journey as a creator or simply enjoy the diverse range of videos the platform has to offer.
Creating a YouTube Channel
Creating a YouTube channel is the first step towards showcasing your videos and building an audience on the platform. Here’s a step-by-step guide on how to create your own YouTube channel:
- Sign in to YouTube: Visit youtube.com and sign in to your Google Account. If you don’t have a Google Account, you can create one by clicking on the “Sign In” button and selecting “Create account.”
- Access YouTube Studio: Once you’re signed in, click on your profile picture in the top-right corner of the YouTube homepage. From the dropdown menu, select “YouTube Studio.”
- Create a Channel: In YouTube Studio, click on the “Create a channel” button. You’ll be prompted to choose between creating a personal channel or a brand channel. A personal channel is associated with your Google Account, while a brand channel allows you to create a channel specifically for your brand or business.
- Customize Your Channel Name: After selecting the type of channel, enter a name for your channel. Choose a name that accurately represents your content or brand. Keep in mind that the channel name is how viewers will identify you on YouTube.
- Add a Channel Icon and Art: Personalize your channel by adding a channel icon and art. The channel icon is a square image that represents your channel and is displayed alongside your videos and comments. The channel art is a larger banner image that appears at the top of your channel page. Ensure your images are clear, visually appealing, and represent your brand or content effectively.
- Add Channel Description and Links: In the “Customization” tab of your channel settings, you’ll find options to write a channel description and add links to your website, social media, or other platforms. Use the channel description to provide a brief overview of your content, and include relevant keywords to help potential viewers find your channel.
- Verify Your Channel: To unlock additional features and benefits, verify your channel. In YouTube Studio, go to the “Channel Status and Features” tab and click on “Verify” next to your channel name. Follow the instructions provided by YouTube to complete the verification process.
- Set Channel Defaults: In the YouTube Studio settings, go to the “Upload Defaults” tab. Here, you can set default options for your uploaded videos, such as privacy settings, tags, captions, and more. These settings will be applied to every video you upload, saving you time and ensuring consistency.
- Enable Monetization (if eligible): If you meet the requirements for the YouTube Partner Program, you can enable monetization for your channel. This allows you to earn money from ads shown on your videos. In YouTube Studio, go to the “Monetization” tab to review the eligibility requirements and enable monetization if eligible.
- Create Playlists: Playlists help organize your videos and make it easier for viewers to navigate your content. In YouTube Studio, go to the “Playlists” tab and click on “New Playlist” to create playlists based on themes, series, or genres. Add videos to your playlists to provide a seamless viewing experience for your audience.
- Promote Your Channel: Once your YouTube channel is set up, it’s crucial to promote it to reach a wider audience. Share your videos on your social media platforms, embed them on your website or blog, collaborate with other YouTubers, and interact with your audience. Engage with the YouTube community by leaving comments, responding to comments, and participating in discussions on other channels.
By following these steps and customizing your YouTube channel, you can establish a strong presence on the platform and start sharing your content with the world.
Uploading and Managing Videos on YouTube
Uploading and managing videos on YouTube is an essential part of creating and growing your YouTube channel. Here’s a step-by-step guide on how to upload and effectively manage your videos on YouTube:
- Sign in to YouTube: Visit youtube.com and sign in to your YouTube account. Click on your channel icon in the top-right corner and select “YouTube Studio” from the dropdown menu.
- Upload a Video: In YouTube Studio, click on the “Content” tab on the left sidebar, then select the “Videos” tab. Click on the “Import” button or simply drag and drop your video file into the designated area. Add a title, description, tags, and select an appropriate thumbnail for your video.
- Privacy and Visibility: Choose the privacy settings for your video. You can set your video to be public, unlisted (accessible only to those with the link), or private (viewable only by you). Determine the visibility based on your content and channel strategy.
- Optimize Video Details: Optimize your video details to improve its discoverability. Add relevant tags, write a compelling video description using target keywords, and include timestamps for longer videos to improve user navigation. Enriching your video details helps your content rank higher in search results.
- Add Cards and End Screens: Enhance viewer engagement and promote your content by adding interactive elements such as cards and end screens. Cards can link to related videos, playlists, or external websites, while end screens allow you to promote other videos, playlists, or subscribe buttons to keep viewers engaged.
- Manage Video Thumbnails: Thumbnails are a crucial visual representation of your video. YouTube automatically generates three thumbnail options, but you can upload a custom thumbnail to make it more appealing and relevant to your video content. Engaging thumbnails can attract more viewers and improve click-through rates.
- Organize Videos into Playlists: Group related videos into playlists to make it easier for viewers to navigate and find content. Create playlists based on themes, series, or genres. In the “Playlists” section of YouTube Studio, click on “New Playlist” and add videos to the respective playlists to provide a cohesive viewing experience.
- Manage Video Comments: Engage with your audience by responding to comments on your videos. Encourage constructive discussions and address questions or feedback. Regularly monitor and moderate comments to maintain a positive and interactive community on your channel.
- Track Video Performance: Utilize YouTube Analytics to gain insights into your video performance. In YouTube Studio, navigate to the “Analytics” tab to review metrics such as views, watch time, audience retention, and engagement. Analyzing these metrics helps you understand what content resonates with your audience and make informed decisions for future videos.
- Manage Uploading Defaults: Set uploading defaults to save time when uploading new videos. In YouTube Studio, go to the “Settings” section, select “Channel” from the left sidebar, and click on “Upload defaults.” Customize settings such as privacy, category, tags, and video elements that apply to all your uploads.
- Promote and Share Videos: Promote your videos to increase visibility and reach a wider audience. Share your videos on social media platforms, embed them on your blog or website, interact with other YouTubers, participate in relevant communities, and collaborate with creators in your niche.
By following these steps and effectively managing your videos on YouTube, you can optimize your channel’s growth, engage with your audience, and create a compelling video library.
Interacting with the YouTube Community
Interacting with the YouTube community is a valuable way to grow your channel, establish connections, and engage with your audience. Here are some effective ways to interact with the YouTube community:
- Respond to Comments: Engaging with your viewers by responding to comments on your videos shows that you value their feedback and opinions. Take the time to answer questions, acknowledge positive feedback, and address concerns. Encourage conversation and create a welcoming environment on your channel.
- Participate in YouTube Discussions: Engage in discussions on popular YouTube channels in your niche. Leave thoughtful comments that contribute to the conversation and showcase your knowledge or unique perspective. This allows you to build relationships with other creators and attract attention to your channel.
- Collaborate with Other YouTubers: Collaborations are a fantastic way to tap into each other’s audiences, reach new viewers, and expand your reach. Identify creators in your niche with a similar audience and propose collaboration ideas. Collaborative videos, shoutouts, or joint projects can introduce your channel to a wider audience and provide valuable cross-promotion.
- Participate in YouTube Challenges or Trends: Get involved in popular challenges or trends within the YouTube community. Create content that aligns with the current trends, adding your unique twist and staying true to your channel’s style. Participating in challenges not only increases visibility but also helps you connect with other creators who are taking part.
- Join YouTube Community Groups or Forums: Look for online communities or forums dedicated to YouTube creators. These platforms provide opportunities to connect with like-minded individuals, learn from each other’s experiences, and share helpful tips. Engaging in discussions can lead to valuable insights, collaborations, and potential collaborations with creators in your community.
- Engage on Social Media Platforms: In addition to YouTube, establish a presence on social media platforms such as Twitter, Instagram, or Facebook. Interact with your audience, share behind-the-scenes content, announce new videos, and respond to messages or comments. Leveraging social media increases your accessibility and allows for real-time interactions.
- Attend YouTube Events or Meetups: Keep an eye out for YouTube-related events or local meetups in your area. These gatherings provide opportunities to network, meet fellow creators, and learn from industry experts. Networking face-to-face can foster meaningful connections and open doors for future collaborations or partnerships.
- Support Other YouTubers: Show support for other creators by subscribing to their channels, liking their videos, and leaving genuine comments. By supporting others, you contribute to building a positive and supportive community. Others are likely to reciprocate, and you may gain new subscribers who discovered you through your interactions.
- Create a Community Tab: Utilize YouTube’s Community tab if your channel is eligible. Share polls, updates, behind-the-scenes content, or exclusive previews of upcoming videos. This feature allows you to directly engage with your subscribers and create a sense of community around your channel.
- Be Authentic and Respectful: Above all, be yourself and show respect towards others. Authenticity builds trust and attracts loyal viewers. Treat the YouTube community with respect, be supportive of fellow creators, and foster a positive environment through your interactions.
By actively engaging with the YouTube community, you can establish meaningful connections, increase your channel’s visibility, and create a supportive network of creators and viewers.
Adjusting YouTube Account Settings
Adjusting your YouTube account settings allows you to personalize your experience on the platform and tailor it to your preferences. Here are some important settings that you can adjust:
- Privacy Settings: Manage your privacy settings to control who can view and interact with your content. You can choose to make your videos/public, unlisted (only accessible through a direct link), or private (only visible to you). Adjust these settings based on your content strategy and the audience you want to reach.
- Notification Preferences: Customize your notification preferences to control the frequency and type of notifications you receive from YouTube. You can choose to be notified about new video uploads, comments, subscriber activity, and more. Navigate to your account settings, select “Notifications,” and customize the settings according to your preferences.
- Playback and Quality Settings: Adjust the playback and quality settings to enhance your viewing experience. Choose the default video quality that suits your internet connection, enable autoplay for a continuous watching experience, and manage other playback-related options. Access these settings by clicking on the gear icon in the playback bar while watching a YouTube video.
- Channel Layout and Design: Customize the layout and design of your YouTube channel to reflect your brand or personal style. Add a channel banner, create a channel trailer, and choose a color scheme that matches your branding. Navigate to your channel settings and explore the customization options available to create a visually appealing channel.
- Subscriptions and Recommendations: Manage your subscriptions and recommendations to curate the content you see on your YouTube homepage and in your subscription feed. You can add or remove channels you’re subscribed to, adjust the notification settings for specific channels, and update your subscription feed preferences to display content from specific channels or topics.
- Comment Moderation: Configure the comment moderation settings to filter and manage comments on your videos. You can choose to automatically hold potentially inappropriate comments for review, block certain words or phrases, and set up a list of approved users whose comments are automatically visible. These settings help maintain a positive and constructive comment section.
- Connected Apps and Permissions: Review the apps and websites connected to your YouTube account to ensure secure access and permissions. Remove any apps or websites you no longer use or trust. Regularly check and manage the permissions granted to these apps to protect your account’s security and privacy.
- Playback Restrictions: If needed, you can set playback restrictions to control what types of videos can be viewed on your YouTube account. You can enable restricted mode to filter out potentially mature or inappropriate content. This is particularly useful if your YouTube account is used by young viewers or in educational settings.
- Advanced Settings: Explore the advanced settings to fine-tune your YouTube experience. These settings include options such as controlling your YouTube search and watch history, managing your playlist privacy, adjusting the appearance of closed captions, and more. Access the advanced settings through your account settings menu.
- Deletion and Account Recovery: Familiarize yourself with the deletion and account recovery options in case you ever need to delete your YouTube account or recover a lost or compromised one. Review the account recovery options, such as mobile number and email address, and understand the steps to recover your account in case of any unexpected situations.
By adjusting your YouTube account settings, you can personalize your experience, maintain control over your content and privacy, and optimize the platform to suit your preferences and needs.