
Materials Needed
Creating your own stylus is a fun and practical DIY project that requires just a few basic materials. Before you begin, gather the following items:
- A ballpoint pen: Choose a pen with a sturdy and comfortable grip. The pen’s size should be suitable for your hand, allowing for easy maneuvering.
- Conductive foam or fabric: This material will serve as the conductive tip of the stylus, enabling it to interact with touchscreens. Conductive foam or fabric can be found at electronics or craft stores.
- Scissors: A pair of sharp scissors will be necessary for cutting and shaping the conductive material.
- Electrical tape: This will be used to secure the conductive tip to the pen.
- A ruler: A ruler will help ensure precision when measuring and cutting the conductive material.
- A hot glue gun (optional): If you prefer a more permanent attachment for the stylus tip, a hot glue gun can be used to secure it to the pen.
Once you have gathered these materials, you are ready to embark on the process of crafting your own stylus. With just a few simple steps, you can transform these everyday items into a functional and personalized tool for interacting with touchscreens.
Step 1: Gather Your Materials
Before diving into the process of creating your DIY stylus, it’s essential to gather all the necessary materials. This step sets the foundation for a smooth and enjoyable crafting experience. Here’s a detailed guide on gathering your materials:
Start by selecting a ballpoint pen that feels comfortable in your hand. The pen’s grip should be sturdy and ergonomic, allowing for easy maneuvering and precise control. Consider the size of the pen and ensure it fits your hand comfortably, as this will impact the usability of the stylus.
Next, acquire conductive foam or fabric, which will serve as the essential component for the stylus tip. Conductive materials enable the stylus to interact with touchscreens effectively. These materials are readily available at electronics or craft stores. When choosing the conductive material, opt for a type that offers a good balance of conductivity and durability.
Ensure you have a pair of sharp scissors on hand for cutting and shaping the conductive material. Precision is crucial in this step to create a stylus tip that is responsive and accurate when used on touchscreens. A ruler will also be necessary to measure and cut the conductive material with accuracy.
Lastly, if you prefer a more secure attachment for the stylus tip, consider using a hot glue gun. While this is optional, it can provide a more permanent and robust connection between the conductive tip and the pen.
By carefully gathering these materials, you are setting the stage for a successful DIY stylus creation. Once you have all the necessary items at your disposal, you can proceed to the next step with confidence, knowing that you are well-prepared for the crafting process.
Step 2: Prepare the Pen
With the materials gathered, the next crucial step in crafting your DIY stylus is to prepare the pen for the assembly process. This step involves readying the pen to accommodate the conductive tip, ensuring that it functions seamlessly as a stylus for touchscreens. Here’s a detailed guide on preparing the pen:
Begin by disassembling the pen, separating the ink cartridge from the pen body. Carefully remove the ink cartridge and set it aside. This step will allow you to focus on the pen’s body as the primary component of the stylus.
Next, examine the pen’s body to determine the best placement for the conductive tip. Consider the pen’s size and grip, and envision where the stylus tip would be most comfortable and effective for touchscreen interaction. This assessment will guide the positioning of the conductive material to ensure optimal usability.
If the pen has a grip or any protrusions that may interfere with the placement of the stylus tip, consider removing or modifying them to create a smooth and ergonomic surface for the conductive material. This step is crucial for enhancing the comfort and functionality of the DIY stylus.
Once the pen’s body is prepared and any necessary modifications have been made, you are ready to proceed to the next step of assembling the stylus tip. By carefully preparing the pen, you are laying the groundwork for a stylus that not only functions effectively but also feels comfortable and intuitive to use on touchscreens.
Step 3: Assemble the Stylus Tip
Assembling the stylus tip is a pivotal stage in the DIY stylus creation process, as it involves integrating the conductive material with the pen to form the functional tip for touchscreen interaction. This step requires precision and attention to detail to ensure the stylus operates effectively. Here’s a comprehensive guide on assembling the stylus tip:
Begin by cutting the conductive foam or fabric to the desired size and shape for the stylus tip. Use sharp scissors to achieve clean and precise cuts, as the accuracy of the tip’s dimensions will directly impact its responsiveness on touchscreens. Aim for a size and shape that aligns with the pen’s design and your personal preference for stylus use.
Once the conductive material is cut to the appropriate dimensions, carefully position it on the pen’s body in the predetermined location. Take into account the ergonomics and usability of the stylus tip, ensuring that it aligns with the pen’s grip and feels natural when held for touchscreen interaction.
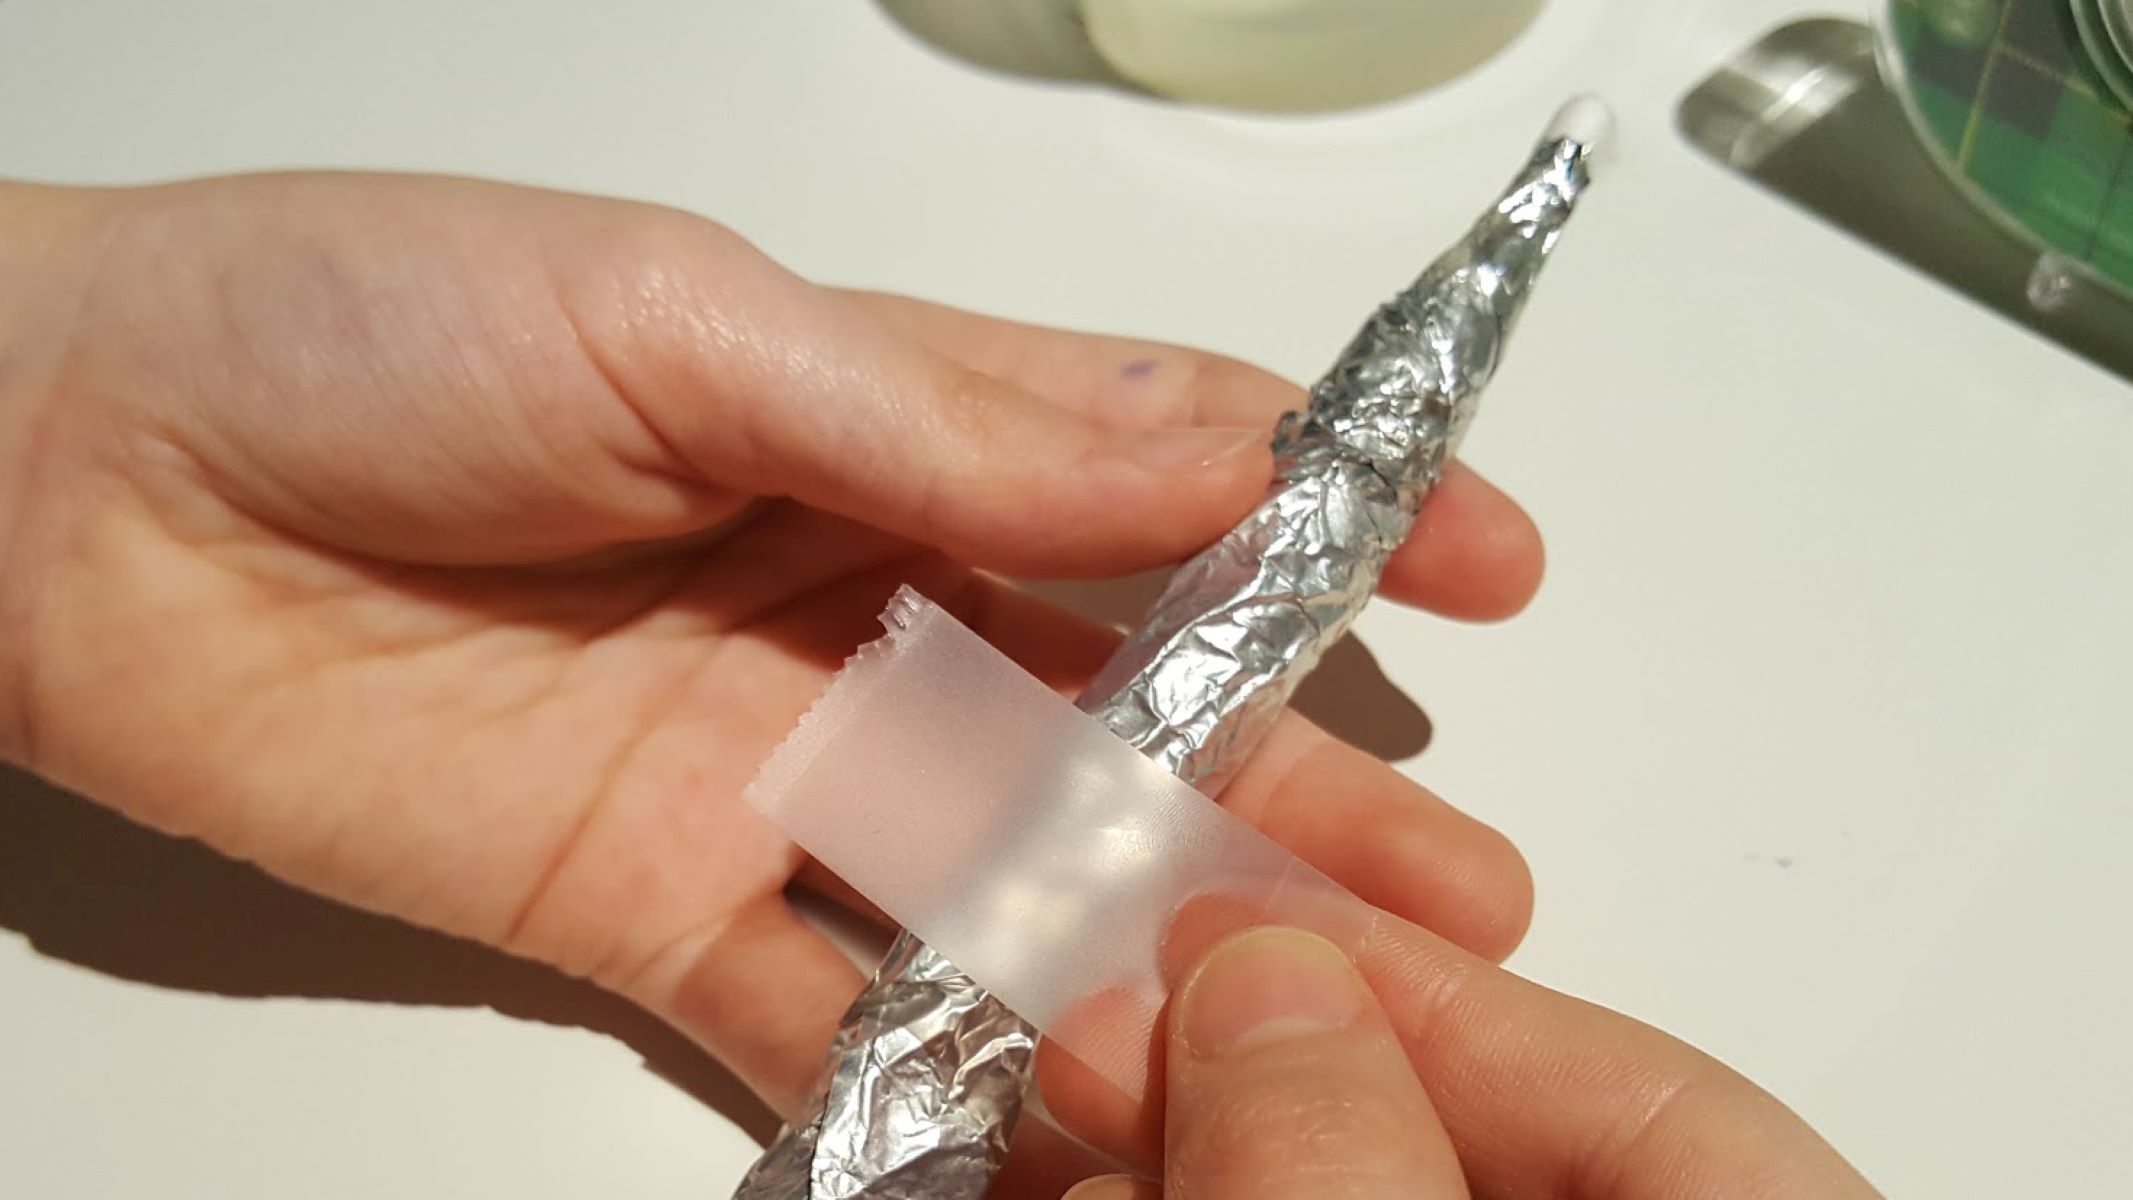
If necessary, use electrical tape to secure the conductive tip to the pen’s body. Wrap the tape around the base of the tip, ensuring a snug and secure fit that prevents any movement or detachment during use. This step is crucial for maintaining the integrity of the stylus tip and ensuring its longevity.
For those seeking a more permanent attachment, a hot glue gun can be used to affix the conductive tip to the pen. Apply a small amount of hot glue to the base of the tip and carefully press it onto the pen, creating a durable and lasting connection. Exercise caution when using the hot glue gun to avoid any mishaps during this process.
By meticulously assembling the stylus tip, you are transforming the pen into a versatile tool for interacting with touchscreens. The precision and care invested in this step will result in a DIY stylus that offers seamless and responsive performance, tailored to your specific preferences and needs.
Step 4: Attach the Stylus Tip to the Pen
Attaching the stylus tip to the pen is a critical phase in the DIY stylus creation process, as it finalizes the integration of the conductive material with the pen, culminating in a functional and personalized stylus. This step requires careful attention to detail to ensure a secure and reliable connection. Here’s a comprehensive guide on attaching the stylus tip to the pen:
Begin by positioning the assembled stylus tip onto the pen’s body, aligning it precisely with the predetermined location that offers optimal usability and comfort for touchscreen interaction. Take a moment to assess the placement, ensuring that the tip complements the pen’s grip and feels natural when held.
If you opted to use electrical tape for securing the stylus tip, carefully wrap the tape around the base of the tip, ensuring a snug and stable fit. The tape should be applied firmly to prevent any movement or detachment during use, guaranteeing the longevity and reliability of the stylus tip.
For those who chose to utilize a hot glue gun for a more permanent attachment, proceed with caution. Apply a small amount of hot glue to the base of the stylus tip and gently press it onto the pen, creating a durable and enduring connection. Exercise care to avoid any excess glue that may interfere with the stylus’s functionality or aesthetics.
Once the stylus tip is securely attached to the pen, take a moment to inspect the connection and ensure that it is stable and well-positioned. A properly attached stylus tip is essential for the effective and consistent performance of the DIY stylus on touchscreens.
By successfully attaching the stylus tip to the pen, you are finalizing the transformation of an everyday writing instrument into a versatile tool for interacting with touchscreens. The attention to detail and precision invested in this step will result in a personalized and functional stylus that reflects your creativity and craftsmanship.
Step 5: Test Your DIY Stylus
Testing your DIY stylus is an exciting and essential step that allows you to evaluate its functionality and performance on touchscreen devices. This phase ensures that the stylus operates as intended, providing a seamless and responsive experience. Here’s a detailed guide on testing your DIY stylus:
Begin by selecting a touchscreen device, such as a smartphone or tablet, to assess the stylus’s performance. Power on the device and navigate to an application that allows for stylus input, such as a drawing or note-taking app. This will provide a practical environment for testing the stylus’s responsiveness and accuracy.
With the stylus in hand, begin interacting with the touchscreen, noting the precision and sensitivity of the stylus tip. Test various gestures, such as tapping, dragging, and drawing, to evaluate the stylus’s performance across different types of interactions. Pay attention to the smoothness of the stylus’s movements and its ability to register input accurately.
Observe how the stylus tip glides across the touchscreen surface, ensuring that it provides a consistent and reliable touch response. Take note of any areas where the stylus may require adjustments or refinements to optimize its performance for specific tasks or applications.
If the stylus exhibits any issues during testing, such as inconsistent responsiveness or imprecise input, consider making adjustments to the stylus tip or its attachment to the pen. This may involve refining the shape or size of the stylus tip or ensuring a more secure and stable connection with the pen.
By thoroughly testing your DIY stylus, you are refining its performance and functionality, ensuring that it meets your expectations for touchscreen interaction. This step allows you to identify any areas for improvement and fine-tune the stylus to deliver a satisfying and reliable user experience on touchscreens.
Tips for Using Your DIY Stylus
Once you have crafted your DIY stylus, it’s important to maximize its effectiveness and longevity through thoughtful usage and maintenance. Here are some valuable tips for optimizing the performance and lifespan of your DIY stylus:
- Keep the Stylus Tip Clean: Regularly clean the stylus tip to remove any debris or residue that may accumulate from touchscreen use. A clean tip ensures smooth and accurate interactions with touchscreens.
- Store the Stylus Properly: When not in use, store the stylus in a protective case or holder to prevent damage to the tip and ensure that it remains in optimal condition for future use.
- Adjust the Stylus Tip if Needed: If you encounter any issues with the stylus’s responsiveness or accuracy, consider adjusting the shape or size of the stylus tip to better suit your touchscreen interactions.
- Be Mindful of Pressure: When using the stylus, apply gentle and consistent pressure to the touchscreen to avoid exerting excessive force on the stylus tip, which can lead to premature wear.
- Explore Different Apps and Tasks: Experiment with various applications and tasks that benefit from stylus input, such as drawing, note-taking, and precision navigation, to fully leverage the capabilities of your DIY stylus.
- Inspect and Maintain the Stylus Regularly: Periodically inspect the stylus for any signs of wear or damage, and perform maintenance as needed to ensure its continued performance and durability.
- Share Your Creation: Share your DIY stylus creation with friends and family, and consider customizing styluses for different tasks or gifting them as personalized accessories.
By incorporating these tips into your usage and maintenance routine, you can enhance the functionality and longevity of your DIY stylus, ensuring that it remains a reliable and enjoyable tool for interacting with touchscreens.