
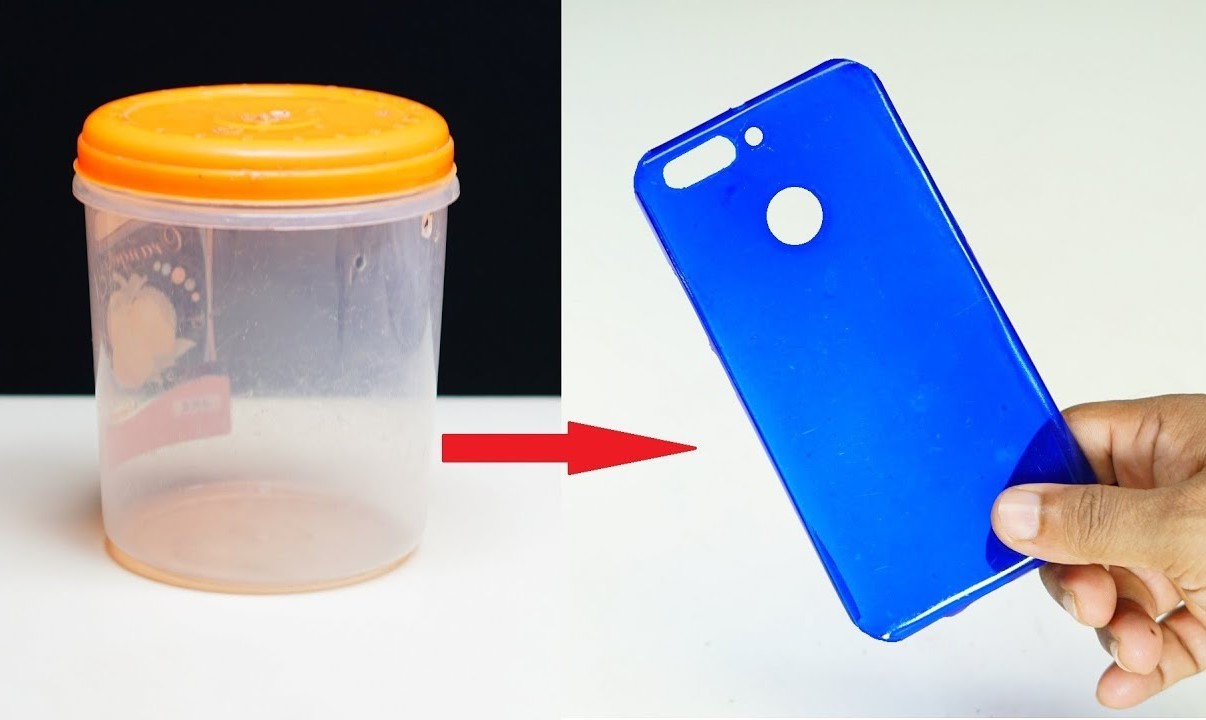
Choosing the Right Plastic Material
When crafting a phone case from plastic, the first step is to select the right material. The choice of plastic will determine the durability, appearance, and overall quality of the finished product. Here are some key factors to consider when choosing the appropriate plastic material for your DIY phone case:
- Impact Resistance: Opt for a plastic material with high impact resistance to ensure that your phone case provides adequate protection against accidental drops and bumps. Polycarbonate and ABS (Acrylonitrile Butadiene Styrene) are popular choices due to their robust nature.
- Flexibility: Consider the flexibility of the plastic, as it should be rigid enough to offer structural support to the phone while also providing some degree of flexibility to withstand bending and twisting without breaking. TPU (Thermoplastic Polyurethane) is known for its flexibility and elasticity, making it an excellent option for impact-resistant cases.
- Heat Resistance: If you anticipate exposure to high temperatures, such as leaving your phone in a hot car, opt for a plastic material with high heat resistance to prevent warping or deformation. Polypropylene and PC/ABS blends are known for their heat-resistant properties.
- Aesthetic Appeal: The visual appeal of the plastic material is also crucial. Consider the transparency, color options, and surface finish to ensure that the final phone case aligns with your desired aesthetic. Clear polycarbonate or colored ABS can offer diverse visual possibilities.
- Eco-Friendly Options: For environmentally conscious crafters, there are eco-friendly plastic materials available, such as biodegradable PLA (Polylactic Acid) or recycled PET (Polyethylene Terephthalate), which can be used to create sustainable phone cases.
By carefully considering these factors, you can select the most suitable plastic material for your DIY phone case, ensuring that it meets your functional, aesthetic, and environmental requirements.
Designing Your Phone Case
Once you have chosen the appropriate plastic material for your DIY phone case, the next step is to embark on the exciting process of designing the case. This phase allows for ample creativity and personalization, enabling you to tailor the appearance and functionality of the phone case to your preferences. Here are essential steps to consider when designing your phone case:
- Measurements and Prototyping: Begin by measuring the dimensions of your phone to ensure an accurate fit. Create a prototype using cardboard or a 3D modeling software to test the design and make necessary adjustments before proceeding to the plastic fabrication phase.
- Aesthetic Elements: Consider the visual elements you want to incorporate, such as intricate patterns, embossed textures, or transparent sections to showcase the phone’s original design. Sketch out the design on paper or utilize digital design software to visualize the final look of the phone case.
- Functional Features: Think about the practical aspects of the phone case, including button covers, port access, and camera protection. Ensure that the design allows for unhindered functionality while providing optimal safeguarding for your phone.
- Customization Options: Explore opportunities for personalization, such as incorporating your initials, favorite quotes, or decorative elements that resonate with your style. This stage allows for the infusion of unique touches that reflect your personality.
- Ergonomic Considerations: Pay attention to the ergonomics of the design to ensure a comfortable grip and convenient handling of the phone. Smooth edges, textured surfaces, and strategic contouring can enhance the user experience.
By meticulously planning and designing your phone case, you can create a bespoke accessory that not only safeguards your device but also reflects your individuality and creativity. This phase sets the stage for the actual fabrication of the case, where your envisioned design will come to life in the form of a personalized and functional phone accessory.
Cutting and Shaping the Plastic
With the design of your DIY phone case finalized, it’s time to bring your vision to fruition by cutting and shaping the chosen plastic material. This phase requires precision and attention to detail to ensure that the fabricated components align with your design specifications. Here’s a comprehensive guide to cutting and shaping the plastic for your custom phone case:
- Preparation: Gather the necessary tools for cutting and shaping the plastic, including a sharp utility knife, scissors, a heat gun or hairdryer, sandpaper, and protective gloves to ensure safe handling.
- Transferring the Design: Transfer the finalized design onto the plastic material using a washable marker or a scribing tool. Ensure that the measurements and markings are accurate to maintain the integrity of the design.
- Cutting Technique: Employ precise cutting techniques to achieve clean edges and accurate shapes. Depending on the chosen plastic material, utilize appropriate cutting tools and methods, such as scoring and snapping for acrylic or laser cutting for intricate designs in polycarbonate.
- Shaping and Forming: If the design involves curved or contoured elements, utilize a heat gun or hairdryer to gently heat the plastic, making it pliable for shaping. Employ molds or formers to achieve the desired curvature and form, ensuring that the plastic retains its structural integrity.
- Refinement: Use sandpaper or a fine file to refine the cut edges and smooth any rough surfaces. This step is crucial for achieving a professional finish and ensuring that the phone case components fit together seamlessly during assembly.
By meticulously executing the cutting and shaping process, you can transform the chosen plastic material into the precise components required for your custom phone case. Attention to detail and a methodical approach are essential in this phase to ensure that the fabricated pieces align with your design and functional requirements, setting the stage for the subsequent assembly process.
Adding Personal Touches
As you progress in crafting your DIY phone case, the opportunity to infuse it with personal touches and unique embellishments arises. This phase allows for creative expression and customization, enabling you to elevate the aesthetic appeal and individuality of the phone case. Here are key considerations for adding personal touches to your custom phone case:
- Decals and Stickers: Explore the use of decals, stickers, or vinyl cutouts to adorn the phone case with designs, patterns, or images that resonate with your interests and style. These elements can be applied to the surface of the case to add visual interest and personal flair.
- Paint and Embellishments: Utilize acrylic paints, markers, or decorative embellishments to hand-paint intricate designs, motifs, or personalized artwork onto the phone case. This hands-on approach allows for artistic expression and the incorporation of meaningful symbols or imagery.
- Resin Embedding: Consider incorporating resin embedding to encapsulate small mementos, glitter, or decorative elements within the phone case. This technique adds depth and dimension to the case while encapsulating sentimental items within a transparent resin layer.
- Custom Engraving: If working with a plastic material amenable to engraving, such as acrylic or polycarbonate, explore the option of custom engraving to inscribe meaningful quotes, dates, or personal messages onto the surface of the phone case.
- Photographic Inserts: Personalize the phone case by inserting printed photographs, artwork, or meaningful images between transparent layers of the case, creating a unique and sentimental accessory that showcases cherished memories.
By incorporating these personal touches, you can transform your DIY phone case into a meaningful and visually captivating accessory that reflects your individuality and creativity. This phase serves as an opportunity to infuse the case with personal narratives, artistic expressions, and sentimental value, elevating it from a functional item to a personalized work of art.
Assembling the Phone Case
As you near the completion of your DIY phone case project, the crucial phase of assembling the fabricated components comes into focus. This stage requires meticulous attention to detail and precision to ensure that the individual elements seamlessly come together to form a functional and visually appealing phone case. Here’s a comprehensive guide to assembling your custom phone case:
- Dry Fitting: Begin by dry fitting the fabricated components together to verify the alignment and fit. This step allows you to identify any discrepancies or adjustments needed before proceeding to the final assembly.
- Adhesive Application: Utilize a suitable adhesive, such as cyanoacrylate (super glue) or specialized plastic adhesives, to securely bond the case components together. Apply the adhesive sparingly and precisely to avoid excess seepage and ensure a clean assembly.
- Clamping or Securing: Employ clamps or secure the assembled components in place using non-permanent fastening methods to allow the adhesive to set and cure effectively. This step is crucial for maintaining the desired form and alignment during the bonding process.
- Curing Time: Allow sufficient time for the adhesive to cure as per the manufacturer’s recommendations. Patience during this phase is essential to ensure that the assembled components achieve maximum bond strength and structural integrity.
- Functional Testing: After the adhesive has fully cured, conduct functional testing to ensure that the phone case accommodates the device securely, allows unimpeded access to buttons and ports, and provides the intended level of protection.
By methodically following these steps, you can expertly assemble the fabricated components into a cohesive and functional phone case that aligns with your design and functional requirements. Attention to detail, precision in adhesive application, and careful monitoring of the curing process are paramount in achieving a professional-quality assembly, bringing you one step closer to the completion of your personalized phone case.
Final Touches and Quality Check
As you approach the culmination of your DIY phone case crafting journey, the final touches and quality check phase play a pivotal role in ensuring the overall integrity and visual appeal of the completed project. This stage involves meticulous inspection, refinement, and attention to detail to elevate the phone case to a professional standard. Here’s a detailed overview of the final touches and quality check process:
- Surface Polishing: Utilize a gentle plastic polish or a microfiber cloth to buff the surfaces of the phone case, removing any smudges, fingerprints, or minor imperfections. This step enhances the clarity and luster of transparent or glossy plastic materials.
- Edge Smoothing: Inspect the edges of the phone case for any roughness or sharp protrusions. Use fine-grit sandpaper or a deburring tool to smooth and round the edges, ensuring a comfortable and refined feel during handling.
- Visual Inspection: Conduct a thorough visual inspection of the entire phone case, scrutinizing the seams, adhesive joints, and overall finish for any blemishes, irregularities, or imperfections that may detract from the final presentation.
- Functionality Testing: Verify the functionality of the phone case by inserting the device, testing button responsiveness, and assessing the ease of access to ports and camera lenses. This step ensures that the case not only looks exceptional but also performs its protective role effectively.
- Personalized Elements: Confirm that any personalized touches, such as decals, engravings, or embedded elements, are securely in place and enhance the overall aesthetic without compromising the functionality of the phone case.
By meticulously attending to these final touches and conducting a comprehensive quality check, you can elevate the phone case to a professional standard, ensuring that it not only meets your design expectations but also functions optimally as a protective accessory for your device. This phase marks the culmination of your craftsmanship, signifying the transformation of raw materials into a personalized and functional work of art.