
Choosing the Right Adapter
When it comes to connecting your phone to a projector via USB, selecting the right adapter is crucial for a seamless and successful setup. With a myriad of adapter options available, it's essential to choose one that is compatible with both your phone and the projector. Here's a guide to help you make an informed decision:
Compatibility
First and foremost, ensure that the adapter you choose is compatible with your specific phone model. Whether you have an Android, iPhone, or another type of smartphone, it's important to select an adapter that is designed to work with your device. For Android phones, USB-C to HDMI or Micro USB to HDMI adapters are commonly used, while iPhones typically require a Lightning to HDMI adapter. Be sure to check the compatibility of the adapter with your phone before making a purchase.
Projector Input
Consider the input options available on your projector. Most projectors feature HDMI inputs, making HDMI adapters the go-to choice for connecting to projectors. However, some projectors may have VGA or USB inputs, so it's essential to choose an adapter that aligns with the available input ports on your projector. This ensures that the adapter will seamlessly integrate with the projector, enabling a smooth connection for projection.
Additional Features
While basic adapters serve the primary function of connecting your phone to a projector, consider any additional features that may enhance your overall experience. Some adapters offer extra ports, such as USB or SD card slots, which can be beneficial for accessing additional content or charging your device while projecting. Additionally, certain adapters may support audio output, allowing you to connect external speakers for enhanced sound quality during presentations or movie screenings.
Quality and Reliability
Opt for a reputable and reliable adapter from a trusted manufacturer. Quality adapters are less likely to encounter connectivity issues and are designed to provide stable and consistent performance. Reading user reviews and seeking recommendations can help you identify adapters known for their durability and compatibility with a wide range of devices.
Budget Considerations
While it's important to prioritize quality and compatibility, consider your budget when choosing an adapter. There are various options available at different price points, so explore the features and specifications offered by different adapters to find one that meets your requirements without exceeding your budget.
By considering compatibility, projector input options, additional features, quality, reliability, and budget considerations, you can confidently select the right adapter to facilitate a seamless connection between your phone and the projector. This foundational step sets the stage for a successful USB setup, ensuring that you can effortlessly share content from your phone on the big screen.
Connecting the Adapter to Your Phone
Once you have chosen the appropriate adapter for connecting your phone to a projector, the next step is to establish a secure connection between the adapter and your phone. Follow these steps to ensure a seamless and reliable connection:
1. Identify the Phone Port
Begin by identifying the port on your phone that the adapter will connect to. Depending on your phone model, this may be a USB-C, Micro USB, or Lightning port. Carefully locate the port to prepare for the adapter connection.
2. Insert the Adapter
Gently plug the adapter into the corresponding port on your phone. Ensure that the connection is secure to avoid any potential interruptions during projection. Proper insertion of the adapter is essential for establishing a stable link between your phone and the projector.
3. Secure the Connection
Once the adapter is plugged into your phone, take a moment to ensure that the connection is secure. Any loose connections may lead to signal loss or intermittent projection issues. Double-check that the adapter is firmly attached to your phone to guarantee a reliable connection.
4. Power Up the Adapter (if applicable)
If the adapter requires power, such as through a built-in USB port or external power source, ensure that it is adequately powered. Some adapters may need additional power to function correctly, especially when transmitting high-definition content to the projector. Refer to the adapter’s instructions to determine if external power is necessary.
5. Phone Recognition
Upon connecting the adapter to your phone, your device may automatically recognize the adapter and initiate the necessary settings for projection. In some cases, you may need to manually configure the phone’s display settings to enable projection through the adapter. Refer to your phone’s user manual for specific instructions on configuring external display settings.
By following these steps, you can successfully connect the adapter to your phone, laying the groundwork for projecting content onto the larger screen. A secure and properly established connection is essential for a seamless projection experience, ensuring that your phone’s content is accurately and consistently displayed on the projector.
Connecting the Adapter to the Projector
After securing the connection between the adapter and your phone, the next vital step is to link the adapter to the projector. This crucial connection ensures that the content from your phone is seamlessly displayed on the projector screen. Here’s a detailed guide to connecting the adapter to the projector:
1. Identify the Projector Input
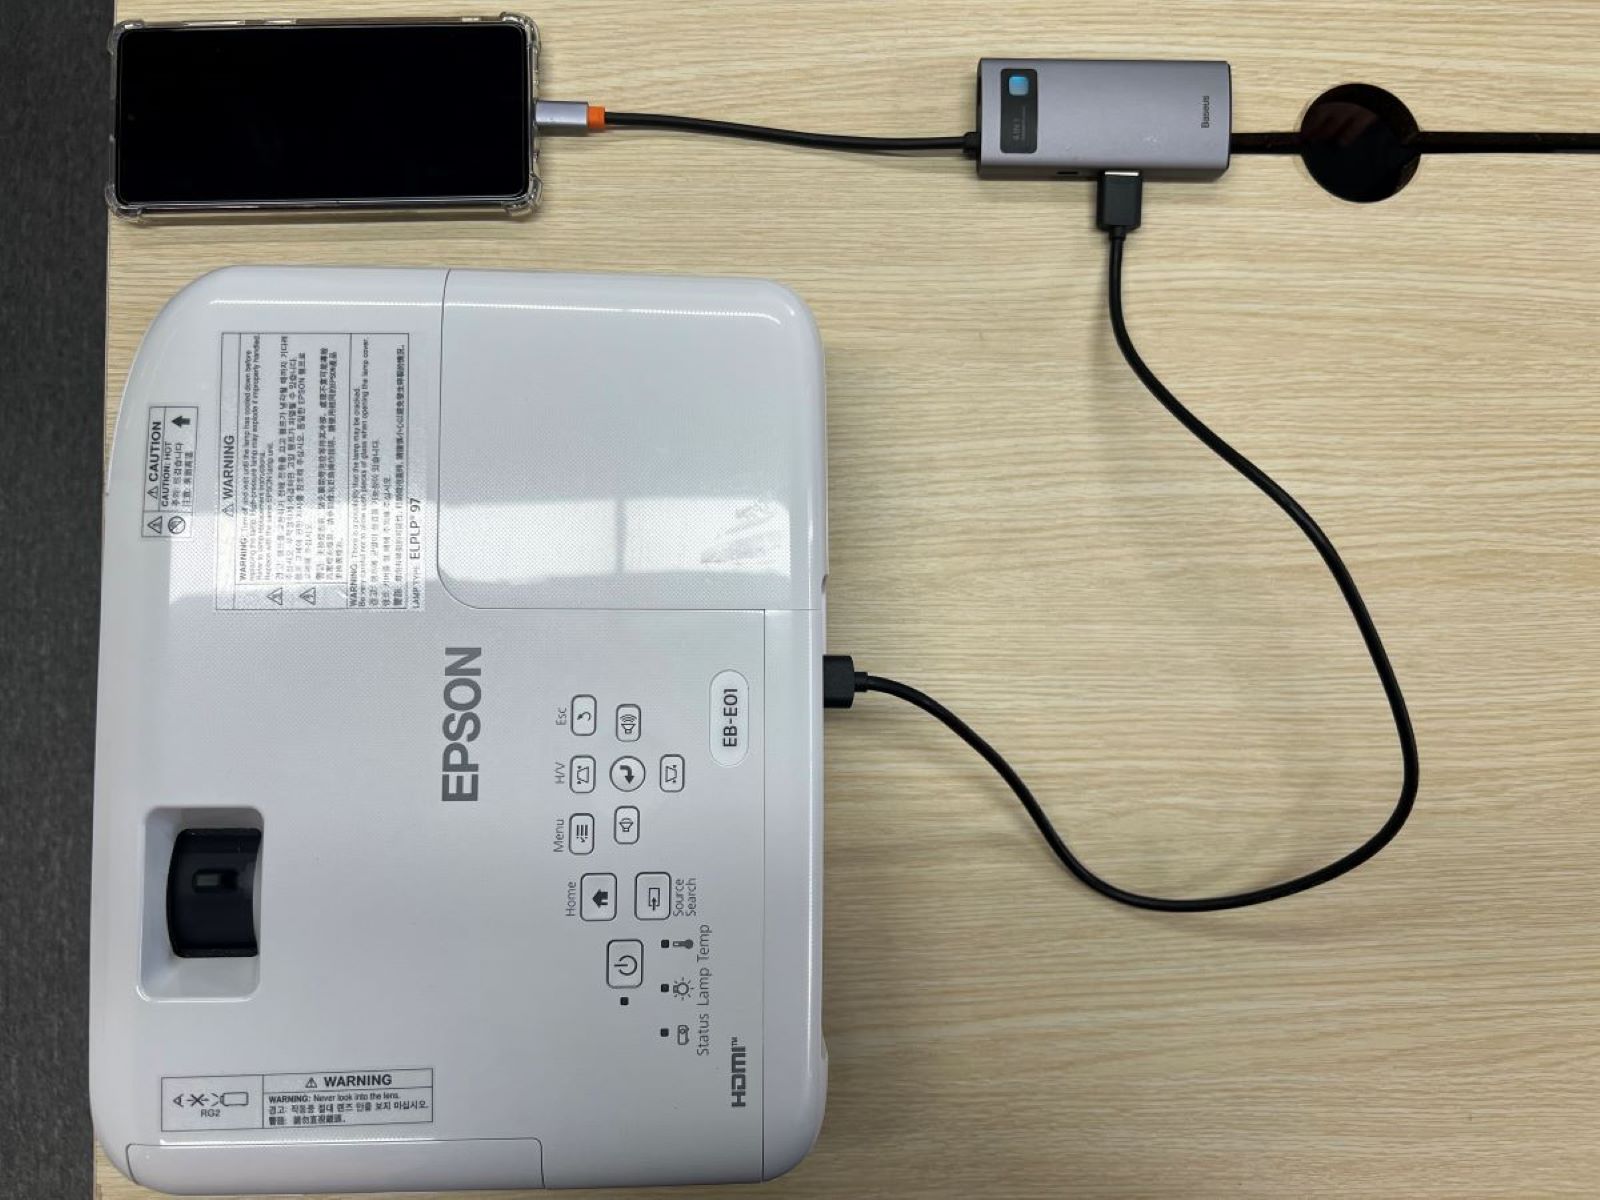
Begin by identifying the input ports on the projector. Most projectors feature HDMI inputs, which align with HDMI adapters commonly used for phone-to-projector connections. If your projector has multiple input options, such as VGA or USB, select the port that corresponds to the adapter you are using.
2. Plug in the Adapter
Insert the adapter into the designated input port on the projector. Ensure that the connection is secure to prevent any signal loss or disruptions during projection. A stable connection between the adapter and the projector is essential for transmitting the content from your phone accurately.
3. Power Up the Projector
If the projector is not already powered on, activate it using the appropriate power button or switch. Allow the projector to initialize and prepare for input from the connected adapter. Depending on the projector model, it may automatically detect the input source, or you may need to select the corresponding input using the projector’s control panel or remote.
4. Signal Recognition
Once the adapter is connected to the projector and the projector is powered on, the projector should recognize the input signal from the adapter. This recognition establishes the link between your phone and the projector, enabling the projection of your phone’s content onto the projector screen.
5. Adjust Projection Settings (if necessary)
Depending on the projector’s settings, you may need to make adjustments to the projection mode, aspect ratio, or other display settings to optimize the projected content. Refer to the projector’s user manual for guidance on adjusting the settings to achieve the desired display quality.
By following these steps, you can effectively connect the adapter to the projector, paving the way for a seamless projection experience. A secure and properly established connection between the adapter and the projector ensures that the content from your phone is accurately and vividly displayed on the larger projection screen.
Setting Up Your Phone for Projection
Once the adapter is connected to both your phone and the projector, it’s essential to configure your phone’s settings to enable seamless projection. By optimizing the display and audio settings, you can ensure that the projected content appears as intended and that any accompanying audio is accurately transmitted. Here’s a comprehensive guide to setting up your phone for projection:
1. Display Settings
Access your phone’s display settings to configure the external display mode. Depending on your phone’s operating system, you may need to navigate to the “Display” or “Screen Mirroring” settings. Enable the option to mirror or extend the display to the connected adapter, allowing the content to be projected onto the larger screen.
2. Aspect Ratio and Resolution
Adjust the aspect ratio and resolution settings to match the optimal settings for the projector. Ensuring that the aspect ratio and resolution are compatible with the projector’s capabilities can enhance the visual quality of the projected content, minimizing any distortion or display issues.
3. Audio Output Configuration
If your phone includes audio output settings, confirm that the audio is set to transmit through the connected adapter. This step ensures that any accompanying audio from videos, presentations, or other content on your phone is projected through the projector’s audio output, providing a complete multimedia experience.
4. Screen Orientation
Check the screen orientation settings to ensure that the projected content appears correctly on the projector screen. Some projectors may require specific screen orientations, such as landscape or portrait mode, to display content accurately. Adjust the screen orientation on your phone as needed to align with the projector’s display requirements.
5. Screen Timeout and Notifications
Temporarily adjust the screen timeout settings on your phone to prevent the screen from dimming or turning off during projection. Additionally, consider disabling notifications or enabling a “Do Not Disturb” mode to minimize interruptions and maintain a focused projection environment.
6. Test the Projection
Before commencing your presentation or content sharing, conduct a quick test to ensure that the projected content appears as expected and that any audio is transmitted clearly. This test allows you to address any potential issues and make further adjustments to the settings if necessary.
By carefully configuring your phone’s display and audio settings, you can effectively set up your device for projection, ensuring that the projected content is accurately displayed and any accompanying audio is seamlessly transmitted. This meticulous preparation sets the stage for a successful projection experience, allowing you to share your phone’s content with clarity and precision.
Troubleshooting Common Issues
While connecting your phone to a projector via USB can offer a seamless projection experience, occasional issues may arise that require troubleshooting to ensure a successful connection and projection. By addressing common issues proactively, you can overcome potential obstacles and optimize the projection setup. Here are some common issues and troubleshooting tips:
1. No Display on the Projector
If the projector does not display the content from your phone, verify that the adapter is securely connected to both your phone and the projector. Additionally, confirm that the projector is set to the correct input source corresponding to the adapter. Adjust the input source on the projector as needed to establish the connection.
2. Inconsistent Signal or Flickering Display
If the projected content exhibits an inconsistent signal or flickering display, inspect the adapter and its connections for any signs of damage or loose connections. Try using a different HDMI or USB port on the projector to rule out potential port-related issues. Additionally, test the adapter with another compatible device to determine if the issue is specific to the phone or the adapter.
3. Audio Not Transmitting to the Projector
If the audio from your phone is not transmitting to the projector, ensure that the audio output settings on your phone are configured to transmit audio through the connected adapter. Check the projector’s audio input settings and volume levels to confirm that the audio is being received and projected. Using external speakers connected to the projector can also address audio transmission issues.
4. Resolution or Aspect Ratio Mismatch
If the projected content appears distorted or does not fit the projector screen correctly, review the aspect ratio and resolution settings on both your phone and the projector. Adjust the settings to ensure compatibility and alignment between the phone’s output and the projector’s display capabilities, minimizing any visual discrepancies.
5. Adapter Compatibility and Power Issues
If you encounter persistent issues, consider the compatibility of the adapter with your phone and the projector. Ensure that the adapter is designed for use with your specific phone model and is compatible with the projector’s input requirements. Additionally, if the adapter requires external power, verify that it is adequately powered to support the transmission of content to the projector.
6. Software and Firmware Updates
Check for any available software updates for your phone, projector, and adapter. Updating the firmware or software of these devices can address compatibility issues and enhance the overall performance of the projection setup. Ensure that all devices involved in the projection are running the latest available software versions.
By addressing these common issues and implementing the corresponding troubleshooting tips, you can effectively overcome potential obstacles and ensure a smooth and successful projection experience. Proactive troubleshooting enhances the reliability and performance of the phone-to-projector connection, allowing you to share content with confidence and clarity.