
Check if Your iPhone is Unlocked
Before you begin the process of changing your SIM card, it’s crucial to determine whether your iPhone is unlocked. An unlocked iPhone allows you to use a SIM card from any carrier, giving you the flexibility to switch between different service providers. If your iPhone is locked to a specific carrier, you will need to contact the carrier to request an unlock. Here’s how to check if your iPhone is unlocked:
- Step 1: Open the Settings app on your iPhone.
- Step 2: Tap on “Cellular” or “Mobile Data,” depending on your iOS version.
- Step 3: Look for “Cellular Data Network” or “Mobile Data Network” options. If you see these options, your iPhone is likely unlocked.
If you don’t see the “Cellular Data Network” or “Mobile Data Network” options, it’s possible that your iPhone is locked to a specific carrier. In this case, you can also check your iPhone’s unlock status by using a SIM card from a different carrier. If the iPhone accepts the new SIM card and connects to the network, it’s unlocked. However, if you receive an error message or are unable to connect to the new network, your iPhone is likely locked.
Ensuring that your iPhone is unlocked is essential before proceeding with the SIM card replacement process. If your iPhone is locked, you’ll need to contact your carrier to initiate the unlock request, which may involve meeting specific eligibility criteria, such as completing the terms of your contract or fully paying off your device.
Power Off Your iPhone
Before you begin the process of changing your SIM card, it’s important to power off your iPhone to prevent any potential damage to the device or the SIM card itself. Here’s how to power off your iPhone:
- Step 1: Locate the power button on your iPhone. On most models, it is located on the right side of the device.
- Step 2: Press and hold the power button until the “slide to power off” slider appears on the screen.
- Step 3: Slide the on-screen slider from left to right to power off your iPhone.
Once your iPhone is powered off, you can proceed with the next steps to change the SIM card. It’s important to ensure that the device is completely powered down before attempting to access the SIM card tray to avoid any potential damage to the SIM card or the iPhone’s internal components.
Powering off your iPhone also ensures that the device is in a safe state for the SIM card replacement process. This simple precaution can help prevent any potential issues and ensure a smooth transition to the new SIM card.
Locate the SIM Card Tray
Once your iPhone is powered off, the next step in the process of changing your SIM card is to locate the SIM card tray. The SIM card tray is a small, specially designed compartment that houses the SIM card and allows for easy removal and replacement. The location of the SIM card tray varies depending on the iPhone model, but the following general steps will guide you in finding it:
- Step 1: Examine the sides of your iPhone. The location of the SIM card tray may differ based on the specific iPhone model.
- Step 2: For most iPhone models, the SIM card tray is typically located on the right side of the device, near the top edge. It may have a small pinhole or a small rectangular slot.
- Step 3: If you don’t find the SIM card tray on the right side, check the left side of the iPhone, especially for older models.
It’s essential to handle the iPhone carefully while locating the SIM card tray to avoid causing any damage to the device. Take your time to visually inspect the sides of the iPhone, and if necessary, refer to the user manual or online resources for your specific iPhone model to pinpoint the exact location of the SIM card tray.
Once you’ve successfully located the SIM card tray, you’re ready to proceed with the next steps to remove the old SIM card and insert the new one. Taking the time to find the SIM card tray ensures that you can smoothly transition to the next phase of the SIM card replacement process without any delays or complications.
Eject the SIM Card Tray
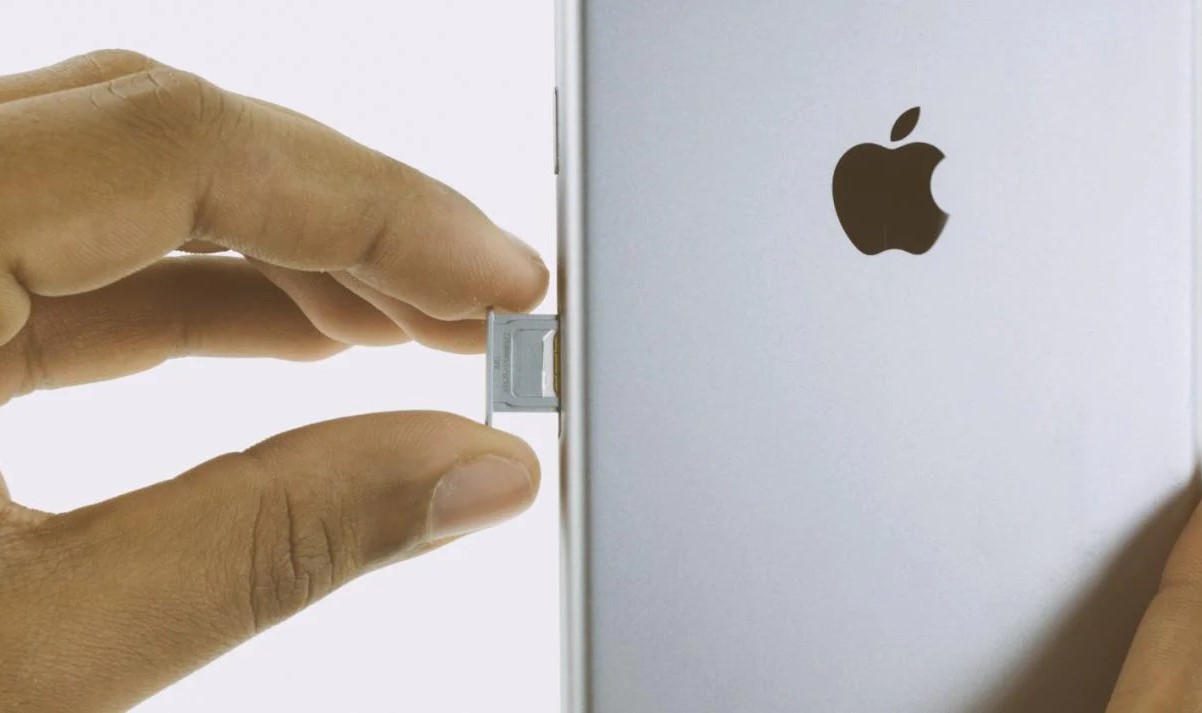
With the SIM card tray located, the next step in the process of changing your SIM card is to eject the tray from your iPhone. Ejecting the SIM card tray allows you to safely remove the old SIM card and prepare for the insertion of the new one. Here’s how to eject the SIM card tray:
- Step 1: Ensure that your iPhone is still powered off to prevent any potential damage during the tray ejection process.
- Step 2: Locate the small pinhole or slot on the SIM card tray. This is where you’ll insert the SIM card ejection tool or a straightened paperclip.
- Step 3: Insert the SIM card ejection tool or paperclip into the pinhole or slot with gentle pressure until the SIM card tray begins to protrude.
- Step 4: Gently pull the SIM card tray out of the iPhone using the protruding edge, taking care not to force it or apply excessive pressure.
It’s important to handle the ejection process with care and precision to avoid any damage to the SIM card tray or the iPhone itself. If you encounter resistance while attempting to eject the tray, refrain from using excessive force, as this could cause damage to the device.
Once the SIM card tray is successfully ejected, carefully set it aside in a secure location to prevent misplacement. With the tray removed, you’re now ready to proceed with the next steps to remove the old SIM card and insert the new one, ensuring a smooth transition to the updated SIM card without any complications.
Remove the Old SIM Card
With the SIM card tray ejected, the next step in the process of changing your SIM card is to remove the old SIM card from the tray. Removing the old SIM card prepares the tray for the insertion of the new SIM card, allowing for a seamless transition to the updated card. Here’s how to remove the old SIM card:
- Step 1: Gently remove the old SIM card from the SIM card tray by sliding it out or carefully popping it out, depending on the design of the tray.
- Step 2: Inspect the old SIM card for any visible damage, such as scratches or cracks. If the old SIM card shows signs of damage, dispose of it properly and securely to protect your personal information.
- Step 3: Place the old SIM card in a safe and designated location, especially if you plan to keep it as a backup or for any other purpose in the future.
It’s important to handle the old SIM card with care during the removal process to prevent any damage to the card or the SIM card tray. Avoid bending or forcefully manipulating the old SIM card, as this could lead to potential issues when inserting the new SIM card.
By safely removing the old SIM card from the tray, you’re now ready to proceed with the next steps to insert the new SIM card. Taking the time to handle the removal process with care ensures that you can smoothly transition to the new SIM card without encountering any complications or potential damage to the SIM card tray or the iPhone itself.
Insert the New SIM Card
With the old SIM card removed, the next step in the process of changing your SIM card is to insert the new SIM card into the SIM card tray. Inserting the new SIM card allows you to update your device with the latest carrier information and ensures seamless connectivity. Here’s how to insert the new SIM card:
- Step 1: Carefully align the new SIM card with the SIM card tray, ensuring that the notched corner of the SIM card matches the notched corner of the tray. Most SIM cards are designed to fit into the tray in only one orientation.
- Step 2: Gently place the new SIM card into the designated area within the SIM card tray, taking care not to force it or apply excessive pressure. The SIM card should fit snugly into the tray without any gaps or misalignment.
- Step 3: Once the new SIM card is securely placed in the tray, gently slide the tray back into the SIM card slot of your iPhone until it is fully seated.
It’s important to handle the new SIM card with care during the insertion process to prevent any damage to the card or the SIM card tray. Avoid touching the metal contacts on the SIM card, as these contacts facilitate the connection between the card and your device’s internal components.
By successfully inserting the new SIM card into the tray, you’re now ready to proceed with the next steps to reinsert the SIM card tray into your iPhone and power on the device. Taking the time to handle the insertion process with care ensures that you can seamlessly transition to the new SIM card without encountering any complications or potential damage to the SIM card or the iPhone itself.
Reinsert the SIM Card Tray
After successfully inserting the new SIM card into the SIM card tray, the next step in the process of changing your SIM card is to reinsert the tray into your iPhone. Properly reinserting the SIM card tray ensures that the new SIM card is securely in place and ready for activation. Here’s how to reinsert the SIM card tray:
- Step 1: Align the SIM card tray with the SIM card slot on your iPhone, ensuring that it is positioned correctly for insertion.
- Step 2: Gently slide the SIM card tray back into the SIM card slot, applying light pressure to ensure that it glides smoothly into place without resistance.
- Step 3: Once the SIM card tray is fully inserted, give it a gentle push to ensure that it is securely seated within the iPhone.
It’s important to handle the SIM card tray with care during the reinsertion process to prevent any potential damage to the tray or the iPhone’s SIM card slot. Take your time to align the tray properly and avoid using excessive force, as this could lead to complications or damage to the device.
By successfully reinserting the SIM card tray into your iPhone, you’ve completed the physical installation of the new SIM card. The next steps involve powering on your iPhone and activating the new SIM card to establish connectivity with your chosen carrier. Ensuring that the SIM card tray is securely in place sets the stage for a smooth transition to the new SIM card without encountering any issues or disruptions.
Power On Your iPhone
With the new SIM card securely inserted and the SIM card tray reinserted into your iPhone, the next step in the process of changing your SIM card is to power on your device. Powering on your iPhone allows the device to recognize the new SIM card and initiate the activation process, enabling you to establish connectivity with your chosen carrier. Here’s how to power on your iPhone:
- Step 1: Press and hold the power button on your iPhone until the Apple logo appears on the screen.
- Step 2: Release the power button and wait for your iPhone to boot up. This process may take a few moments as the device initializes the new SIM card and prepares for activation.
- Step 3: Once your iPhone has powered on, you’ll see the home screen or the unlock screen, indicating that the device is ready for use.
It’s important to allow your iPhone to complete the startup process without interruption to ensure that the new SIM card is recognized and activated seamlessly. During this time, the device establishes communication with the carrier network, allowing you to make calls, send messages, and access mobile data with the new SIM card.
By successfully powering on your iPhone, you’ve initiated the activation process for the new SIM card. The next steps involve activating the new SIM card with your carrier to establish full connectivity and access to network services. Ensuring that your iPhone powers on smoothly sets the stage for a seamless transition to the new SIM card without encountering any issues or disruptions.
Activate the New SIM Card
After powering on your iPhone and ensuring that the new SIM card is recognized, the final step in the process of changing your SIM card is to activate the new SIM card with your chosen carrier. Activating the new SIM card allows you to establish full connectivity, enabling you to make calls, send messages, and access mobile data with your updated carrier information. Here’s how to activate the new SIM card:
- Step 1: Contact your carrier’s customer service or visit their website to initiate the activation process for your new SIM card. You may need to provide the SIM card’s unique identification number, which is typically printed on the SIM card or included in the activation materials.
- Step 2: Follow the carrier’s instructions to complete the activation process, which may involve entering specific activation codes or confirming your identity to link the new SIM card to your account.
- Step 3: Once the activation process is complete, restart your iPhone to ensure that the new carrier information is fully integrated, allowing you to access network services seamlessly.
Activating the new SIM card with your carrier ensures that your iPhone is fully connected to the carrier’s network, enabling you to enjoy uninterrupted service and access to essential mobile features. It’s important to follow the carrier’s activation instructions carefully to ensure a successful activation process.
By successfully activating the new SIM card, you’ve completed the transition to the updated carrier information, allowing you to enjoy seamless connectivity and network services with your iPhone. Ensuring that the new SIM card is fully activated sets the stage for a smooth and uninterrupted mobile experience with your chosen carrier.