
Understanding the Different Methods for Taking Screenshots
Capturing screenshots on your Motorola Razr allows you to preserve and share memorable moments from your device's screen. Whether you want to save a funny conversation, capture a stunning image, or document important information, knowing the various methods for taking screenshots can greatly enhance your user experience.
There are several ways to take screenshots on the Motorola Razr, each offering its own unique advantages. Understanding these methods will empower you to choose the most convenient option for your specific needs. Let's explore the different techniques for capturing screenshots on your device:
-
Using the Physical Buttons: The traditional method of capturing a screenshot involves using the physical buttons on your device. By pressing the power button and volume down button simultaneously, you can quickly capture the contents of your screen. This method is straightforward and reliable, making it a popular choice for many users.
-
Using the Three-Finger Screenshot Gesture: The Motorola Razr offers a convenient gesture that allows you to capture screenshots with a simple swipe of your fingers. By enabling this feature in the settings menu, you can effortlessly take screenshots by swiping three fingers across the screen. This intuitive gesture provides a seamless way to capture moments without the need to press physical buttons.
-
Utilizing the Google Assistant: Another method for taking screenshots involves using the Google Assistant, a powerful virtual assistant integrated into the Motorola Razr. By activating the Google Assistant and issuing a voice command or tapping the on-screen button, you can instruct the assistant to capture a screenshot for you. This hands-free approach can be particularly useful in situations where using physical buttons or gestures may be inconvenient.
By familiarizing yourself with these different methods for taking screenshots on the Motorola Razr, you can choose the approach that best suits your preferences and the specific context in which you want to capture a screenshot. Whether you prefer the tactile feedback of physical buttons, the convenience of intuitive gestures, or the hands-free functionality of the Google Assistant, the diverse range of options ensures that you can capture screenshots with ease and efficiency.
In the subsequent sections, we will delve deeper into each method, providing step-by-step instructions and additional tips to help you make the most of these screenshot-capturing techniques. With this comprehensive understanding, you will be well-equipped to seamlessly integrate screenshot capture into your daily interactions with your Motorola Razr.
Using the Physical Buttons to Capture Screenshots
Capturing screenshots using the physical buttons on your Motorola Razr is a straightforward and reliable method that allows you to preserve moments from your device's screen with ease. Whether you want to capture a memorable conversation, save important information, or document a visually captivating scene, mastering this technique empowers you to effortlessly capture and share content.
To take a screenshot using the physical buttons, simply locate the power button and the volume down button on your device. Once you have identified these buttons, follow these simple steps:
-
Identify the Content: Before capturing the screenshot, ensure that the content you want to preserve is displayed on your screen. Whether it's a hilarious meme, a crucial piece of information, or a stunning image, having the desired content ready will streamline the screenshot process.
-
Press the Buttons: With the desired content on your screen, press the power button and the volume down button simultaneously. It's important to press both buttons at the same time to trigger the screenshot capture. Upon pressing the buttons, you will notice a brief animation or hear a shutter sound, indicating that the screenshot has been successfully taken.
-
View and Share: Once the screenshot has been captured, you can access it in your device's gallery or through the notification panel. From there, you can view, edit, and share the screenshot as desired. Whether you want to send it to a friend, save it for future reference, or post it on social media, the captured screenshot is readily available for your use.
The physical buttons method for capturing screenshots on the Motorola Razr offers a tactile and reliable approach to preserving content from your device's screen. Whether you're a seasoned user or new to the world of smartphone screenshots, mastering this technique will equip you with a fundamental skill that enhances your overall user experience.
By seamlessly integrating the physical buttons method into your daily interactions with your Motorola Razr, you can effortlessly capture and share moments that matter to you. Whether it's a hilarious meme, an important message, or a visually stunning image, the ability to capture screenshots using the physical buttons empowers you to preserve and share content with unparalleled convenience.
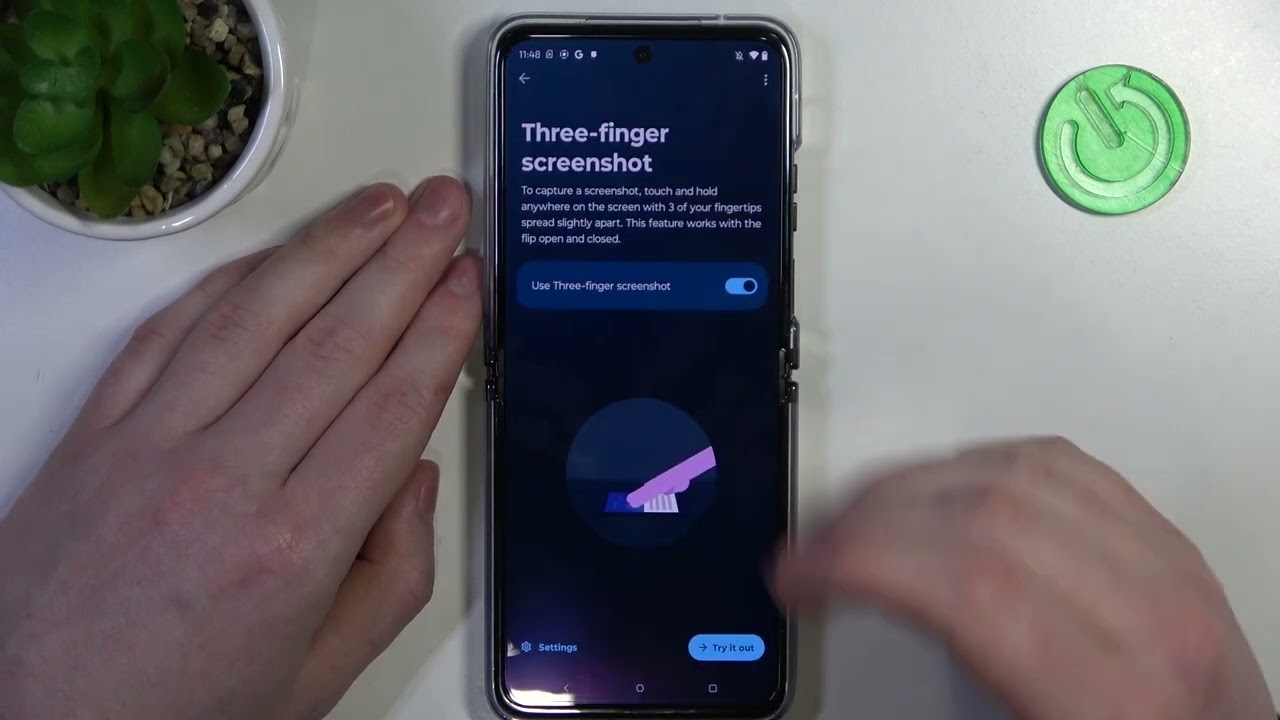
Using the Three-Finger Screenshot Gesture
The Motorola Razr offers a convenient and intuitive method for capturing screenshots through the use of a three-finger gesture. This innovative feature provides a seamless way to preserve moments from your device's screen without the need to rely on physical buttons or complex commands. By enabling the three-finger screenshot gesture, you can effortlessly capture and share content with a simple swipe of your fingers.
To utilize the three-finger screenshot gesture on your Motorola Razr, follow these steps to enable and execute this intuitive feature:
-
Enable the Gesture: Begin by accessing the settings menu on your device and navigating to the "Moto Actions" or "Gestures" section. Within this menu, you will find the option to enable the three-finger screenshot gesture. Once activated, your device will be primed to capture screenshots with a swift and natural gesture.
-
Prepare the Content: Before executing the three-finger gesture, ensure that the desired content is displayed on your device's screen. Whether it's a hilarious meme, an important message, or a visually captivating image, having the content ready will streamline the screenshot process.
-
Execute the Gesture: With the desired content on your screen, lightly place three fingers on the display and swipe downwards. This fluid motion triggers the screenshot capture, allowing you to effortlessly preserve the content with a natural and intuitive gesture. Upon successfully executing the gesture, you will receive visual or haptic feedback, indicating that the screenshot has been captured.
-
Access and Share: Once the screenshot has been taken, you can access it in your device's gallery or through the notification panel. From there, you can view, edit, and share the screenshot as desired. Whether you want to send it to a friend, save it for future reference, or post it on social media, the captured screenshot is readily available for your use.
The three-finger screenshot gesture on the Motorola Razr offers a seamless and intuitive way to capture and share content from your device's screen. By incorporating this gesture into your daily interactions with your device, you can effortlessly preserve moments that matter to you. Whether it's a humorous conversation, an important piece of information, or a visually striking image, the three-finger gesture empowers you to capture and share content with unparalleled ease and efficiency.
Utilizing the Google Assistant to Take Screenshots
The Motorola Razr integrates the powerful Google Assistant, offering users a hands-free and efficient method for capturing screenshots. By leveraging the capabilities of the Google Assistant, you can seamlessly instruct your device to capture and preserve content from the screen without the need to press physical buttons or execute complex gestures.
To utilize the Google Assistant for taking screenshots on your Motorola Razr, follow these simple steps:
-
Activate the Google Assistant: Begin by activating the Google Assistant on your device. This can be done by either saying "Hey Google" or by pressing and holding the home button. Once the Assistant is activated, it awaits your command to assist you with various tasks, including capturing screenshots.
-
Issue the Command: With the Google Assistant ready to receive your command, instruct it to take a screenshot by saying "Hey Google, take a screenshot" or a similar voice command. Alternatively, you can tap the on-screen button to activate the Assistant and issue the same command.
-
Confirmation and Access: Upon receiving your command, the Google Assistant will swiftly capture the screenshot and provide visual or auditory confirmation of the action. The captured screenshot can then be accessed through the device's gallery or the notification panel, allowing you to view, edit, and share it as needed.
Utilizing the Google Assistant to take screenshots on the Motorola Razr offers a convenient and hands-free approach to preserving content from your device's screen. Whether you're in a situation where using physical buttons or executing gestures may be impractical, the Google Assistant provides a seamless solution that enhances your overall user experience.
By integrating the capabilities of the Google Assistant into your screenshot-capturing routine, you can effortlessly preserve and share moments that matter to you. Whether it's a crucial piece of information, a hilarious conversation, or a visually captivating image, the hands-free functionality of the Google Assistant empowers you to capture and share content with unparalleled convenience.
Incorporating the Google Assistant into your screenshot-capturing repertoire expands the versatility of your Motorola Razr, providing you with a diverse range of options for preserving and sharing content from your device's screen. Whether you prefer the tactile feedback of physical buttons, the intuitive nature of gestures, or the hands-free functionality of the Google Assistant, the diverse methods for capturing screenshots ensure that you can seamlessly integrate this feature into your daily interactions with your device.
Managing and Editing Screenshots in the Gallery
Once you have successfully captured screenshots on your Motorola Razr using the various methods available, it's essential to know how to manage and edit these screenshots effectively within the device's gallery. The gallery serves as a centralized hub where you can access, organize, and enhance your captured screenshots, ensuring that they are readily available for viewing, sharing, or further customization.
Upon capturing a screenshot, it is conveniently saved in the gallery, allowing you to access it at your convenience. From the gallery, you can perform a range of actions to manage and edit your screenshots, including organizing them into albums, sharing them with others, or applying enhancements to make them more visually appealing.
Organizing Screenshots
The gallery provides the functionality to organize your screenshots into albums or folders, allowing you to categorize and group them based on specific criteria. Whether you want to create separate albums for different types of content or organize screenshots based on events or themes, the gallery's organizational features empower you to maintain a structured and easily navigable collection of screenshots.
Sharing Screenshots
Once your screenshots are captured and organized, the gallery enables seamless sharing options, allowing you to effortlessly send your screenshots to friends, family, or colleagues. Whether you prefer to share screenshots through messaging apps, social media platforms, or email, the gallery streamlines the sharing process, ensuring that your captured moments can be easily distributed to others.
Editing Screenshots
The gallery also offers basic editing tools that allow you to enhance your screenshots directly within the device. From cropping and rotating to applying filters and adjustments, these editing features enable you to refine and customize your screenshots to better suit your preferences. Whether you want to highlight specific details, improve the composition, or add a creative touch, the editing capabilities within the gallery provide a convenient platform for enhancing your captured screenshots.
By effectively managing and editing your screenshots within the gallery, you can ensure that your captured moments are organized, visually appealing, and easily shareable. Whether you're preserving important information, documenting memorable conversations, or capturing visually striking images, the gallery serves as a versatile tool for curating and enhancing your collection of screenshots on the Motorola Razr.