
Checking the Battery Status
Before embarking on the battery replacement process for your Motorola Razr M, it's crucial to assess the current state of the battery. This step is essential as it helps determine whether the battery is the root cause of any performance issues experienced with the device. Here's how to check the battery status:
-
Battery Usage: Begin by navigating to the "Settings" menu on your Motorola Razr M. Look for the "Battery" option, which provides valuable insights into the battery usage patterns. This section displays the apps and features consuming the most power, enabling you to identify any power-hungry applications that may be draining the battery excessively.
-
Battery Health: Modern smartphones, including the Motorola Razr M, are equipped with built-in features to monitor battery health. Access the "Battery" settings and check for options such as "Battery Health" or "Battery Usage History." These features offer a comprehensive overview of the battery's performance over time, including its capacity and charging patterns.
-
Battery Performance: Assess the overall performance of your device in relation to battery usage. If you notice a significant decrease in battery life or frequent unexpected shutdowns, it could indicate a deteriorating battery that requires replacement.
-
External Indicators: Inspect the physical condition of the battery for any signs of damage, such as bulging or leakage. Additionally, if the battery feels excessively hot during usage or charging, it may indicate a malfunctioning battery.
By thoroughly evaluating the battery status using the aforementioned methods, you can gain valuable insights into the overall health and performance of the battery in your Motorola Razr M. This assessment serves as a crucial foundation for determining whether a battery replacement is necessary to restore the optimal functionality of your device.
Tools Required for Battery Replacement
When it comes to replacing the battery in your Motorola Razr M, having the right tools at your disposal is essential for a smooth and successful process. Here's a comprehensive list of the tools you'll need to effectively carry out the battery replacement:
-
Replacement Battery: The most crucial tool for this task is, of course, the replacement battery itself. Ensure that you acquire a compatible battery specifically designed for the Motorola Razr M. It's advisable to purchase a high-quality, OEM (Original Equipment Manufacturer) or certified third-party battery to guarantee optimal performance and compatibility with your device.
-
Small Phillips Screwdriver: A small Phillips screwdriver is indispensable for removing the screws securing the back cover and the battery compartment. This tool allows for precise and controlled handling, enabling you to access the internal components of the device with ease.
-
Plastic Opening Tool or Spudger: To safely pry open the back cover and maneuver within the device, a plastic opening tool or spudger is highly recommended. These non-conductive tools prevent accidental damage to the internal circuitry and components while providing the necessary leverage to detach the back cover without causing any harm.
-
Tweezers: Utilizing a pair of tweezers can greatly facilitate the handling of small components and connectors within the device. This tool is particularly useful for disconnecting delicate ribbon cables and connectors without applying excessive force, minimizing the risk of damage during the disassembly process.
-
Adhesive Strips or Double-Sided Tape: Depending on the design of the battery compartment, adhesive strips or double-sided tape may be required to secure the new battery in place. These adhesive materials ensure a secure and stable fit for the replacement battery, preventing any movement or displacement within the device.
-
Anti-Static Wrist Strap (Optional): While not mandatory, an anti-static wrist strap can be beneficial for dissipating any static electricity from your body, minimizing the risk of electrostatic discharge (ESD) that could potentially damage sensitive electronic components during the battery replacement process.
By assembling these essential tools, you can effectively prepare for the battery replacement procedure, ensuring that you have everything necessary to execute the task with precision and care. With the right tools at your disposal, you'll be well-equipped to navigate the intricacies of the battery replacement process for your Motorola Razr M, ultimately restoring the device to its optimal functionality.
Removing the Back Cover
Removing the back cover of your Motorola Razr M is the initial step towards accessing the internal components, including the battery, for replacement or maintenance. This process requires careful handling to avoid damaging the cover or the device itself. Here's a detailed guide on how to effectively remove the back cover:
-
Power Off the Device: Before proceeding with the back cover removal, ensure that your Motorola Razr M is powered off. This precautionary measure prevents any potential damage to the device and ensures a safe disassembly process.
-
Locate the Notch: Examine the edges of the device to locate the small notch or indentation designed for prying open the back cover. This notch is usually situated along the seam where the back cover meets the main body of the device.
-
Utilize a Plastic Opening Tool: Gently insert a plastic opening tool or spudger into the identified notch. Carefully apply pressure to create a slight separation between the back cover and the device's main body. It's essential to exercise caution and avoid using excessive force to prevent any damage to the cover or the internal components.
-
Work Along the Edges: Once the initial separation is achieved, gradually slide the plastic opening tool along the edges of the device, releasing the plastic clips securing the back cover in place. Take your time and proceed methodically to ensure a uniform detachment of the cover without causing any undue stress on the components.
-
Lift Off the Back Cover: As the plastic clips are disengaged, gently lift the back cover away from the device. Exercise patience and ensure that no cables or connectors are still attached to the cover before completely removing it. If any resistance is encountered, retrace your steps and verify that all clips have been released.
-
Inspect for Damage: With the back cover removed, take a moment to inspect it for any signs of damage or wear. Additionally, examine the interior of the device for dust or debris accumulation that may require cleaning before proceeding with the battery replacement.
By following these steps meticulously, you can successfully remove the back cover of your Motorola Razr M, granting access to the internal components for further maintenance or battery replacement. It's crucial to maintain a steady and gentle approach throughout the process, ensuring that the cover and the device remain unharmed.
Removing the Old Battery
Once the back cover of your Motorola Razr M has been successfully removed, the next critical step in the battery replacement process is the careful removal of the old battery. This phase demands precision and attentiveness to ensure the safe extraction of the old battery without causing any damage to the device's internal components. Here's a comprehensive guide on how to effectively remove the old battery from your Motorola Razr M:
-
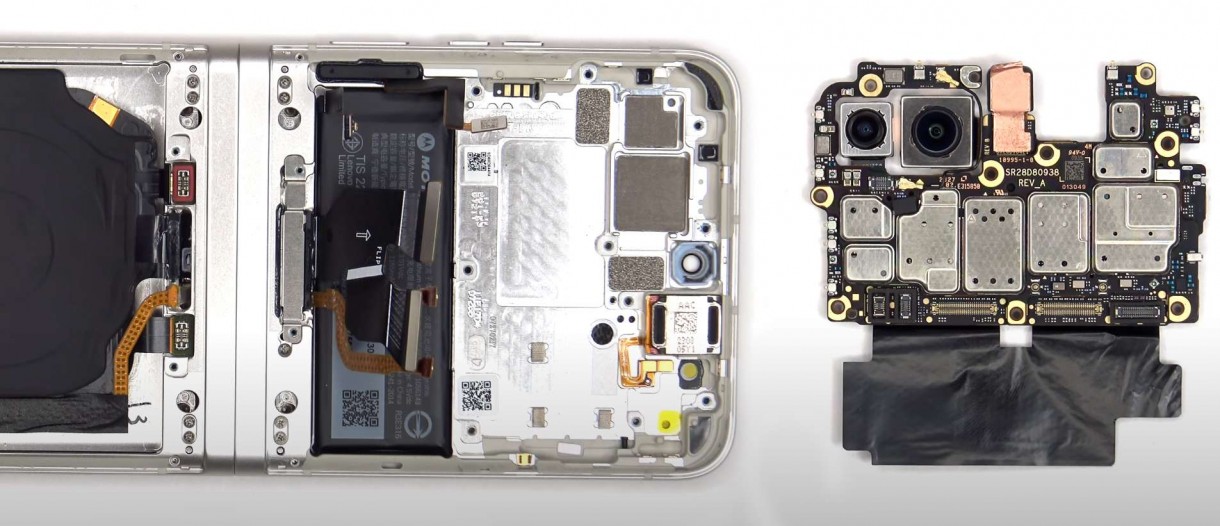
Identify the Battery: Upon gaining access to the internal compartment of the device, locate the battery, which is typically situated near the center of the device's rear panel. The battery is secured in place by connectors and possibly adhesive strips, depending on the specific design of the device.
-
Disconnect the Battery Connector: Using a pair of tweezers or your fingers, carefully disconnect the battery connector from the device's motherboard. Exercise caution and ensure a gentle, yet firm, grip to avoid damaging the connector or the surrounding components. It's essential to exert even pressure on both sides of the connector to facilitate a smooth disconnection.
-
Release Adhesive Strips or Tape: If the old battery is secured in place with adhesive strips or double-sided tape, carefully peel back or release the adhesive to free the battery from its mounting position. Take your time and apply consistent, gentle force to avoid any sudden movements that could potentially damage the battery or the internal components.
-
Lift Out the Battery: Once the battery connector and any adhesive securing the battery have been addressed, gently lift the old battery out of its compartment. Exercise caution to ensure that no cables or connectors are inadvertently pulled or strained during the extraction process. Maintain a steady grip on the battery to prevent any accidental drops or mishandling.
-
Inspect the Battery Compartment: With the old battery removed, take a moment to inspect the battery compartment for any residual adhesive or debris that may require cleaning. Ensure that the compartment is free from any obstructions or foreign particles before proceeding with the installation of the new battery.
By meticulously following these steps, you can effectively remove the old battery from your Motorola Razr M, paving the way for the seamless installation of the new battery. It's crucial to approach this process with patience and precision, prioritizing the safety of the internal components and the successful extraction of the old battery.
Installing the New Battery
With the old battery successfully removed from your Motorola Razr M, the installation of the new battery marks a pivotal phase in the battery replacement process. This step demands meticulous attention to detail and a methodical approach to ensure the seamless integration of the new battery into the device. Here's a comprehensive guide on how to effectively install the new battery in your Motorola Razr M:
-
Verify Compatibility: Before proceeding with the installation, carefully inspect the new battery to confirm its compatibility with the Motorola Razr M. Ensure that the specifications and form factor of the replacement battery align with the requirements of the device, guaranteeing a proper fit and optimal performance.
-
Position the New Battery: Gently position the new battery into the designated compartment within the device, aligning it with the corresponding connectors and mounting points. Exercise caution to avoid applying excessive force or misaligning the battery during the placement process.
-
Secure the Battery Connector: Carefully reconnect the battery connector to the device's motherboard, ensuring a snug and secure fit. Verify that the connector is aligned correctly and gently press it into place to establish a reliable electrical connection without causing any damage to the delicate components.
-
Address Adhesive Strips or Tape: If the new battery requires adhesive strips or double-sided tape for secure mounting, carefully apply the adhesive to the designated areas within the battery compartment. Ensure that the adhesive is positioned to provide stable support for the battery without obstructing any connectors or components.
-
Seat the Battery Firmly: Once the battery connector and adhesive are in place, gently press the new battery down to secure it within the compartment. Apply even pressure to ensure that the battery sits flush and stable, minimizing any potential movement or displacement during device usage.
-
Inspect the Installation: After installing the new battery, take a moment to inspect the battery compartment and surrounding areas for any signs of misalignment or irregularities. Verify that the battery is securely seated and that all connectors and adhesive are properly positioned to support the battery effectively.
By meticulously following these steps, you can effectively install the new battery in your Motorola Razr M, setting the stage for the restoration of optimal functionality and extended battery life. It's imperative to approach this process with precision and care, prioritizing the seamless integration of the new battery to ensure the continued performance and reliability of your device.
Replacing the Back Cover
Once the battery replacement or maintenance tasks have been completed on your Motorola Razr M, the final step involves replacing the back cover to restore the device to its original state. This phase is crucial for ensuring the integrity and protection of the internal components while providing a seamless and aesthetically pleasing exterior for the device. Here's a detailed guide on how to effectively replace the back cover of your Motorola Razr M:
-
Align the Back Cover: Begin by aligning the back cover with the main body of the device, ensuring that the edges and corners are positioned correctly. Take care to match the alignment of the cover with the corresponding grooves and openings on the device to facilitate a smooth and secure fit.
-
Apply Gentle Pressure: Once the back cover is aligned, apply gentle and even pressure along the edges to initiate the reattachment process. Start from one edge and gradually work your way around the perimeter of the device, ensuring that the cover sits flush and uniform without any gaps or misalignments.
-
Secure the Clips: As you apply pressure, listen for audible clicks or subtle indications that the plastic clips on the back cover are securely engaging with the device's main body. These clips are designed to hold the cover in place and provide a secure attachment, contributing to the overall structural integrity of the device.
-
Verify the Fit: After securing the back cover, take a moment to verify that it sits uniformly and securely on the device. Check for any protrusions or uneven gaps that may indicate a misaligned or improperly attached cover. A snug and uniform fit is essential for maintaining the device's resistance to dust, moisture, and physical impacts.
-
Inspect the Seams: Once the back cover is in place, inspect the seams and edges to ensure that the cover is seamlessly integrated with the device. Run your fingers along the edges to verify that the cover sits flush and uniform, providing a cohesive and visually appealing exterior for your Motorola Razr M.
By following these steps diligently, you can effectively replace the back cover of your Motorola Razr M, completing the battery replacement or maintenance process with precision and care. It's essential to prioritize the proper alignment and secure attachment of the back cover to safeguard the internal components and maintain the device's overall functionality and aesthetics.