
Precautions before Battery Removal
Before embarking on the process of removing the battery from your Motorola Razr, it's crucial to take certain precautions to ensure the safety of both yourself and the device. The following steps will help you prepare for a smooth and risk-free battery removal process:
-
Power Off the Device: Always power off your Motorola Razr before attempting to remove the battery. This simple yet essential step prevents the risk of electrical shock and minimizes the chances of damaging the device during the removal process.
-
Work in a Well-Lit Area: Ensure that you are working in a well-lit environment. Proper lighting is essential for identifying the components and connectors inside the device, reducing the likelihood of errors during the battery removal process.
-
Use ESD-Safe Tools: Electrostatic discharge (ESD) can cause irreparable damage to the sensitive electronic components of your device. To prevent ESD-related issues, use ESD-safe tools and equipment when handling the device and its internal components.
-
Disconnect External Power Sources: If your Motorola Razr is connected to a charger or any other external power source, disconnect it before proceeding with the battery removal. This step eliminates the risk of electrical interference and ensures a safe working environment.
-
Handle the Battery with Care: Lithium-ion batteries, commonly used in modern smartphones, require careful handling. Avoid puncturing, crushing, or exposing the battery to extreme temperatures, as these actions can lead to safety hazards such as leakage, overheating, or even fire.
By adhering to these precautions, you can significantly reduce the likelihood of accidents and damage during the battery removal process. Taking the time to prepare and follow these safety measures demonstrates a responsible approach to device maintenance and contributes to a successful and risk-free battery removal experience.
Tools Required for Battery Removal
When it comes to removing the battery from your Motorola Razr, having the right tools at your disposal is essential for a smooth and efficient process. While the specific tools needed may vary depending on the device model and the intricacies of its design, there are several commonly used tools that can facilitate the battery removal process.
-
Screwdriver Set: A precision screwdriver set is a fundamental tool for accessing the internal components of the Motorola Razr. The device's casing is typically secured with small screws, and a precision screwdriver set with various interchangeable heads allows for the careful removal of these screws without causing damage to the surrounding components.
-
Plastic Opening Tools: To safely pry open the device's casing and access the battery, plastic opening tools are indispensable. These tools are designed to prevent scratches, dents, or other forms of damage to the device's exterior during the opening process. They provide the necessary leverage to separate the components without causing harm to the delicate internal circuitry.
-
ESD-Safe Tweezers: Electrostatic discharge (ESD) can pose a significant risk to the sensitive electronic components within the device. ESD-safe tweezers are designed to minimize the potential for static electricity buildup, reducing the likelihood of damaging the internal circuitry or the battery during the removal process.
-
Spudger Tool: A spudger tool, often made of nylon or plastic, is useful for disconnecting delicate ribbon cables and connectors inside the device. Its non-conductive properties make it a safe and effective tool for manipulating internal components without the risk of causing short circuits or other electrical damage.
-
Adhesive Strips or Heat Gun: In some cases, the battery in a Motorola Razr may be secured in place with adhesive strips. To safely detach the battery from the device's housing, adhesive strips or a heat gun can be used to soften the adhesive and facilitate the removal process without causing damage to the battery or the surrounding components.
By ensuring that these essential tools are readily available before initiating the battery removal process, you can approach the task with confidence and precision. Proper tools not only make the removal process more manageable but also help safeguard the integrity of the device and its components, ensuring a successful battery removal experience.
Steps for Battery Removal
-
Prepare the Work Surface: Find a clean, well-lit workspace and gather all the necessary tools for the battery removal process. Ensure that the Motorola Razr is powered off to prevent electrical mishaps.
-
Remove the Back Cover: Using a plastic opening tool, carefully pry open the back cover of the device. Apply gentle and even pressure to avoid damaging the cover or the internal components.
-
Identify the Battery: Once the back cover is removed, locate the battery within the device. In most cases, the battery is easily identifiable and is connected to the device's motherboard.
-
Disconnect the Battery Connector: Using ESD-safe tweezers or a spudger tool, gently disconnect the battery connector from the motherboard. Take care to apply even pressure and avoid bending or damaging the connector during this step.
-
Release Adhesive (if applicable): If the battery is secured in place with adhesive strips, carefully loosen the adhesive using a heat gun or adhesive removal tool. Exercise caution to prevent damage to the battery or other internal components.
-
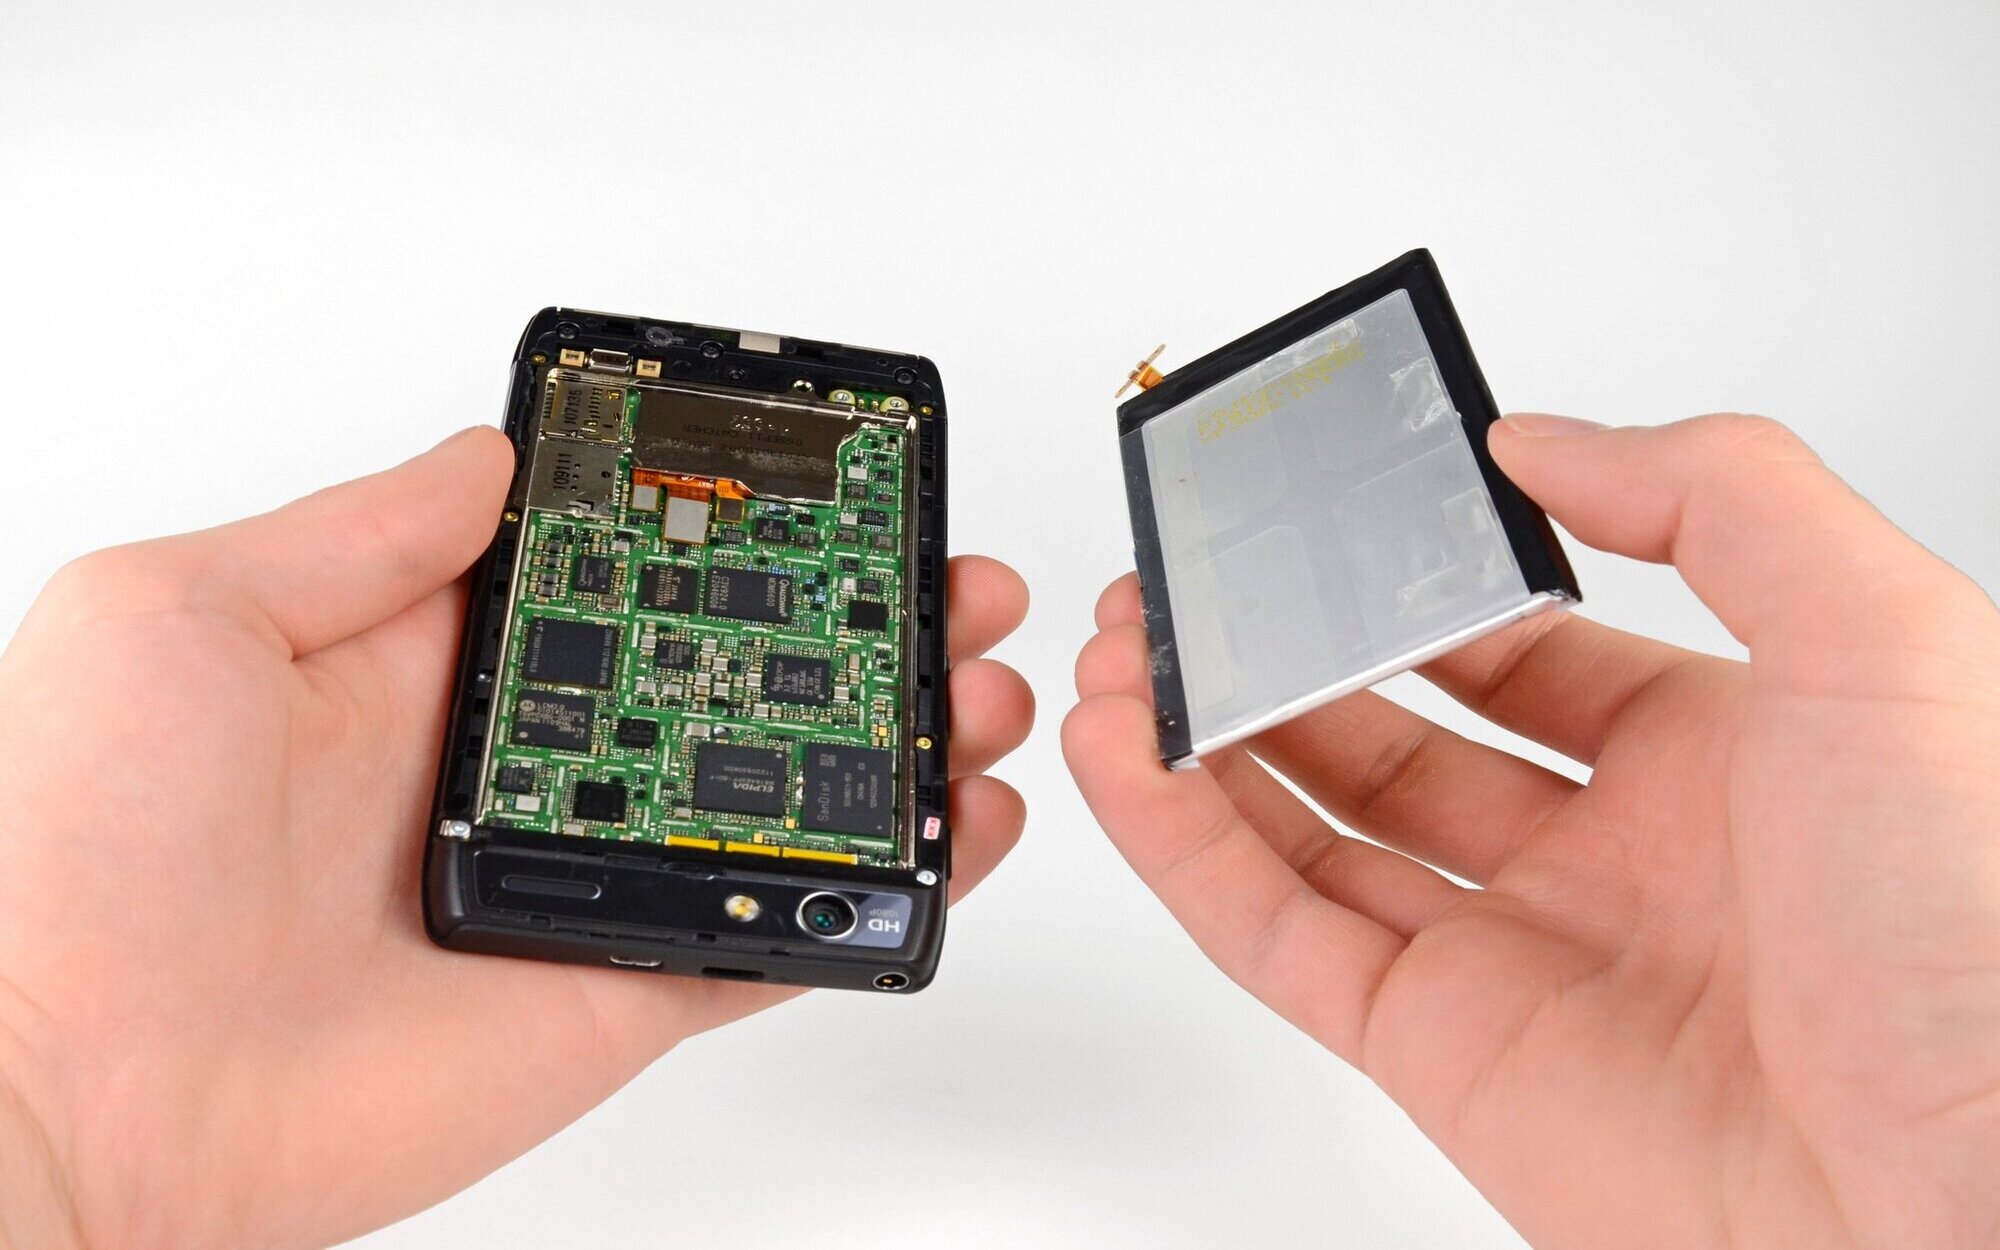
Lift and Remove the Battery: Once the battery connector and any adhesive securing the battery are detached, carefully lift the battery from its housing. Handle the battery with care, ensuring that it does not come into contact with any metal components or sharp objects.
-
Inspect for Damage: Before proceeding with the battery replacement, inspect the battery and the surrounding components for any signs of damage or wear. This step is crucial for identifying any potential issues that may need to be addressed before installing the new battery.
-
Clean the Work Area: After the battery is removed, take a moment to clean the work area and remove any debris or dust that may have accumulated during the removal process. A clean work surface is essential for the subsequent battery replacement steps.
Following these steps meticulously and with the appropriate tools will ensure a successful battery removal process for your Motorola Razr. By exercising patience and precision, you can safely remove the battery without causing damage to the device or its internal components.
Replacing the Battery
After successfully removing the old battery from your Motorola Razr, the next crucial step is to proceed with the battery replacement. This process involves installing a new battery that is compatible with your device and ensuring that it is securely connected to the motherboard. The following detailed steps will guide you through the battery replacement process, allowing you to restore power to your Motorola Razr effectively.
-
Select the Correct Replacement Battery: Before initiating the replacement process, ensure that you have obtained a compatible replacement battery for your specific Motorola Razr model. It is essential to use a genuine or high-quality replacement battery to maintain the device's performance and safety standards.
-
Prepare the New Battery: If the new battery is not precharged, it is advisable to charge it to an optimal level before installation. This ensures that the device will have sufficient power once the new battery is installed, minimizing any potential downtime.
-
Position the New Battery: Carefully place the new battery into the designated slot within the device, ensuring that it aligns correctly with the battery connectors on the motherboard. Take note of any alignment markers or indicators to ensure proper positioning.
-
Connect the Battery: Gently reconnect the battery connector to the motherboard using ESD-safe tweezers or a spudger tool. Apply even pressure to ensure a secure connection without bending or damaging the connector.
-
Secure the Battery (if applicable): If the new battery requires adhesive strips for secure placement, carefully apply the adhesive to the designated areas on the battery and the device's housing. Ensure that the adhesive is positioned correctly to prevent any obstruction during reassembly.
-
Replace the Back Cover: Once the new battery is securely in place, reattach the back cover of the device by aligning it with the edges and applying gentle pressure to snap it back into position. Ensure that the cover is firmly secured to prevent any movement or gaps.
-
Power On and Test: After replacing the battery and reassembling the device, power it on to verify that the new battery is functioning correctly. Check for any error messages or irregularities in the device's performance, ensuring that the replacement battery is fully operational.
By following these comprehensive steps, you can successfully replace the battery in your Motorola Razr, restoring its power capacity and ensuring continued functionality. It is essential to approach the battery replacement process with care and attention to detail, ultimately contributing to the optimal performance and longevity of your device.