
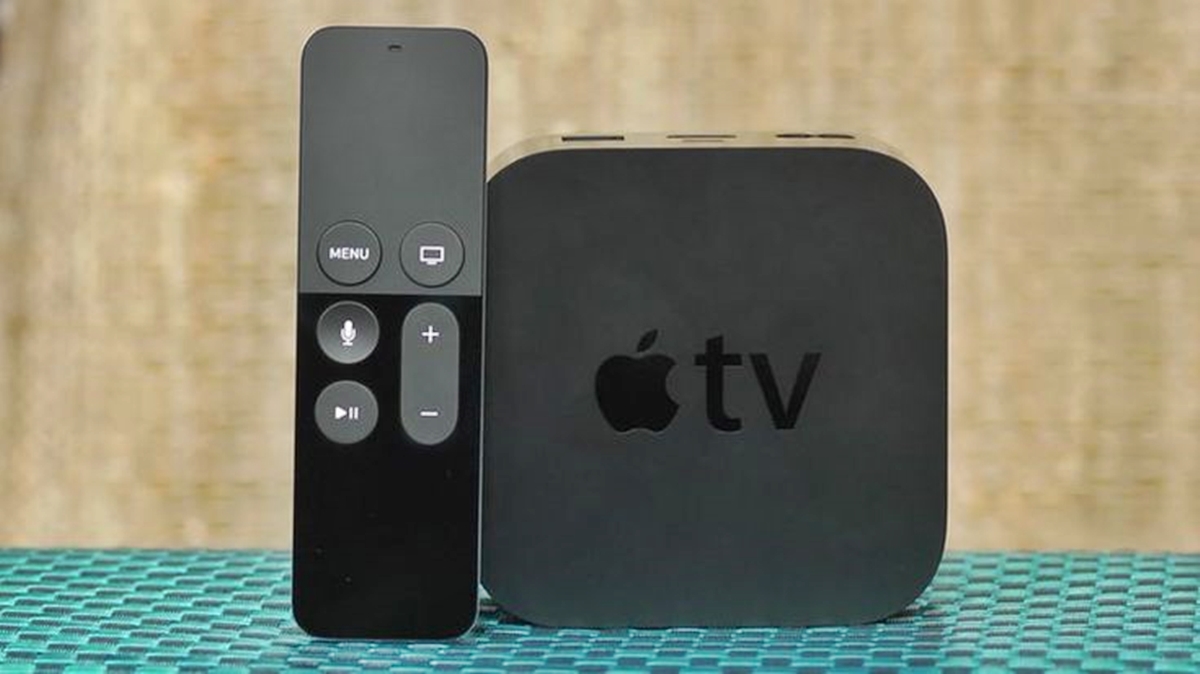
Apple TV not turning on
One of the most frustrating issues Apple TV users encounter is when their device refuses to turn on. If you’re facing this problem, here are some potential solutions to try:
- Check the power source: Ensure that your Apple TV is properly connected to a power source. Check the power cable and the wall outlet to confirm that there are no issues.
- Restart your Apple TV: Press and hold the “Menu” and “Home” buttons on the Apple TV remote simultaneously until the light on the front of the device starts flashing. This will force a restart of the Apple TV and may resolve any software glitches causing the issue.
- Verify the HDMI connection: Make sure that the HDMI cable connecting the Apple TV to your TV or receiver is securely plugged in. If necessary, try connecting the HDMI cable to a different port or using a different cable altogether.
- Try a different power cable: If you have access to another Apple TV power cable, test it out to see if the problem lies with a faulty cable. Sometimes, power cables can become damaged or defective, preventing the Apple TV from powering on.
- Reset the Apple TV: If none of the above solutions work, you may need to perform a factory reset on your Apple TV. Keep in mind that this will erase all settings and data on the device, so it should be used as a last resort. To reset your Apple TV, go to Settings > System > Reset and select “Reset and Update”.
By following these troubleshooting steps, you should be able to resolve the issue of your Apple TV not turning on. If the problem persists, it may be necessary to contact Apple Support for further assistance.
Remote control not working
The Apple TV remote control is a crucial component for navigating through the device’s interface and accessing various features. If you’re experiencing issues with your Apple TV remote control not working, here are a few potential solutions:
- Check the battery: Ensure that the remote control has fresh batteries. Replace the batteries if they are running low or not providing sufficient power.
- Restart the remote: Press the Menu and Volume Up buttons simultaneously for a few seconds. This will restart the remote and may resolve any temporary glitches.
- Pair the remote: Sometimes, the remote control may lose its connection with the Apple TV. To reestablish the connection, hold the remote close to the Apple TV and press and hold the Menu and Volume Up buttons simultaneously until the remote pairs with the Apple TV.
- Reset the Apple TV: If the remote control issues persist, you can try resetting the Apple TV. Go to Settings > System > Reset and select “Reset and Update”. However, keep in mind that this will erase all settings and data on the device, so it’s advisable to use this as a last resort.
- Use the Apple TV Remote app: If you have configured the Apple TV Remote app on your iPhone or iPad, you can use it as an alternative to control your Apple TV. Ensure that your device is connected to the same Wi-Fi network as the Apple TV and launch the app to control your device.
By following these troubleshooting steps, you should be able to resolve the issues with your Apple TV remote control. If the problem persists, you may need to contact Apple Support for further assistance.
Apple TV freezing or buffering
It can be incredibly frustrating when your Apple TV freezes or experiences buffering issues while you’re trying to enjoy your favorite content. Fortunately, there are several steps you can take to address this problem:
- Check your internet connection: Ensure that your Apple TV is connected to a stable internet connection. You can do this by going to Settings > Network and checking the network status. If the signal strength is weak, try moving closer to your router or consider upgrading your internet plan.
- Restart your Apple TV and router: Sometimes, a simple restart can resolve temporary glitches causing freezing or buffering issues. Start by restarting your Apple TV by going to Settings > System > Restart. Additionally, power cycle your router by unplugging it from the power source, waiting for a few seconds, and plugging it back in.
- Close unused apps: If you have multiple apps running in the background, they can consume system resources and lead to performance issues. Double-press the TV/Home button on the remote control to view the app switcher, swipe left or right to navigate through the open apps, and swipe up to close any unnecessary apps.
- Update your apps and software: Outdated apps or software can sometimes cause compatibility issues or performance problems. Make sure that your Apple TV is running the latest version of tvOS by going to Settings > System > Software Updates. Similarly, check for updates for the apps experiencing freezing or buffering problems.
- Adjust video settings: If you’re experiencing buffering issues with streaming services, you may need to adjust the video settings. Go to Settings > Video and Audio > Resolution and select a lower resolution option. This will reduce the demand on your internet connection and may help prevent buffering.
By following these troubleshooting steps, you should be able to resolve the issue of your Apple TV freezing or buffering. If the problem persists, it may be necessary to contact Apple Support or reach out to the specific app/service provider for further assistance.
Apple TV not connecting to Wi-Fi network
When your Apple TV is unable to connect to your Wi-Fi network, it can prevent you from accessing online content and services. Here are some troubleshooting steps to help you resolve this issue:
- Check your Wi-Fi settings: Begin by ensuring that your Wi-Fi network is operational and other devices can connect to it without any problems. Check the Wi-Fi settings on your Apple TV by going to Settings > Network and selecting your network. Verify that the password is correct and try reconnecting.
- Restart your Apple TV and router: Sometimes, a simple restart can fix connectivity issues. Start by restarting your Apple TV by going to Settings > System > Restart. Additionally, power cycle your router by unplugging it from the power source, waiting for a few seconds, and plugging it back in.
- Move closer to the Wi-Fi router: If the Apple TV is too far away from the Wi-Fi router, it may have trouble establishing a strong connection. Try moving the Apple TV closer to the router to see if that helps with connectivity.
- Reset network settings: If the previous steps haven’t resolved the issue, you can try resetting the network settings on your Apple TV. Go to Settings > System > Reset and select “Reset Network Settings”. Keep in mind that this will remove all saved Wi-Fi networks, so you’ll need to reconnect to your network afterwards.
- Check for firmware updates: Ensure that your Apple TV is running the latest version of tvOS by going to Settings > System > Software Updates. Updating to the latest firmware can sometimes fix Wi-Fi connectivity issues.
- Use an Ethernet connection: If you’re still experiencing problems, you can try connecting your Apple TV directly to the router using an Ethernet cable. This can provide a more stable and reliable connection, especially if your Wi-Fi signal is weak.
By following these steps, you should be able to resolve the issue of your Apple TV not connecting to the Wi-Fi network. If the problem persists, you may need to contact Apple Support or your internet service provider for further assistance.
Apple TV not recognizing HDMI connection
If your Apple TV is not recognizing the HDMI connection to your TV or receiver, it can prevent you from enjoying your favorite content. Here are a few steps you can take to troubleshoot this issue:
- Check the HDMI cable: Begin by inspecting the HDMI cable that connects your Apple TV to your TV or receiver. Ensure that it is securely plugged in on both ends and that there are no visible signs of damage or fraying. If possible, try using a different HDMI cable to see if the issue lies with a faulty cable.
- Try a different HDMI port: If you have multiple HDMI ports available on your TV or receiver, try connecting the Apple TV to a different port. It’s possible that the current HDMI port is not functioning properly.
- Reset the Apple TV: If the issue persists, you can try resetting the Apple TV to its factory settings. Go to Settings > System > Reset and select “Reset and Update”. Keep in mind that this will erase all settings and data on the device, so make sure to back up any important data beforehand.
- Update the software: Ensure that your Apple TV is running the latest version of tvOS by going to Settings > System > Software Updates. Updating to the latest software can sometimes resolve HDMI connectivity issues.
- Check TV firmware: Some TVs require firmware updates to maintain compatibility with HDMI connections. Check your TV manufacturer’s website or contact their support to ensure that your TV’s firmware is up to date.
- Try a different TV or receiver: If possible, try connecting your Apple TV to a different TV or receiver to see if the HDMI connection is recognized. This will help determine if the issue lies with the Apple TV or the original TV or receiver.
By following these troubleshooting steps, you should be able to resolve the issue of your Apple TV not recognizing the HDMI connection. If the problem persists, you may need to contact Apple Support or consult the technical support of your TV or receiver manufacturer for further assistance.
Apple TV not playing sound
Having no sound while using your Apple TV can be frustrating, especially when you’re trying to enjoy your favorite movies or TV shows. Here are some steps you can take to troubleshoot and fix this issue:
- Check the volume: Ensure that the volume on your television or audio receiver is turned up and not muted. It’s possible that the sound issue is not related to the Apple TV itself, but rather the settings on your TV.
- Check the audio settings: Go to Settings > Video and Audio > Audio Format on your Apple TV and ensure that the correct audio format is selected. If you’re unsure of the optimal audio format, you can choose “Best Quality Available” to let the Apple TV automatically detect and use the best audio format based on your setup.
- Restart your Apple TV and audio devices: Restart your Apple TV by going to Settings > System > Restart. Additionally, if you have an audio receiver or soundbar connected to your Apple TV, power cycle those devices by unplugging them from the power source, waiting for a few seconds, and plugging them back in. This may help refresh their settings and resolve any temporary glitches.
- Check the audio connections: Make sure that the audio cables connecting your Apple TV to your television or audio receiver are securely plugged in. If you’re using HDMI for both video and audio, try disconnecting and reconnecting the HDMI cable. If you’re using an optical audio cable, ensure that it is properly connected and functioning.
- Try a different audio output: If you have multiple audio output options, such as HDMI and optical audio, try switching to a different output and see if that resolves the sound issue. This can help determine if the problem is specific to a particular audio output method.
- Reset audio settings: If the previous steps haven’t resolved the issue, you can try resetting the audio settings on your Apple TV. Go to Settings > System > Reset and select “Reset Audio Settings”. Keep in mind that this will restore the audio settings to their default values, so you may need to configure them again.
By following these troubleshooting steps, you should be able to fix the issue of your Apple TV not playing sound. If the problem persists, it may be necessary to contact Apple Support or consult the technical support of your television or audio receiver manufacturer for further assistance.
Apple TV showing black screen
Encountering a black screen on your Apple TV can be concerning, as it prevents you from accessing and enjoying your content. Here are some troubleshooting steps to help resolve this issue:
- Check the HDMI connection: Ensure that the HDMI cable connecting your Apple TV to your TV or receiver is securely plugged in on both ends. Try unplugging and re-plugging the cable to ensure a proper connection.
- Check the TV input/source: Verify that your TV is set to the correct input/source for the Apple TV. Use the TV remote control to cycle through the available inputs/sources until you find the one to which the Apple TV is connected.
- Restart your Apple TV: Press and hold the Menu and Home buttons on the Apple TV remote simultaneously until the light on the front of the device starts flashing. This will force a restart of the Apple TV and may resolve any software glitches causing the black screen.
- Reset the display settings: If the black screen persists, you can try resetting the display settings on your Apple TV. Go to Settings > Video and Audio > Resolution and select a different resolution option. This forces the Apple TV to renegotiate the video signal with your TV or receiver.
- Try a different HDMI port or cable: If you have multiple HDMI ports on your TV, try connecting the Apple TV to a different port. Alternatively, you can try using a different HDMI cable to rule out any potential issues with the current cable.
- Update the software: Ensure that your Apple TV is running the latest version of tvOS by going to Settings > System > Software Updates. Updating to the latest software can fix bugs and compatibility issues that may be causing the black screen.
- Contact Apple Support: If none of the above steps resolve the issue, it may indicate a hardware problem with your Apple TV. Contact Apple Support or visit an Apple Store for further assistance and potential repair options.
By following these troubleshooting steps, you should be able to resolve the issue of your Apple TV showing a black screen. If the problem persists, it is recommended to reach out to Apple Support or seek professional assistance.
Apple TV not updating software
Keeping your Apple TV software up to date is crucial for accessing new features and ensuring optimal performance. If your Apple TV is not updating the software, here are a few steps you can take to troubleshoot the issue:
- Check your internet connection: Ensure that your Apple TV is connected to a stable internet connection. Go to Settings > Network and verify that the Wi-Fi or Ethernet connection is active and functioning properly.
- Restart your Apple TV: Sometimes, a simple restart can fix issues preventing software updates. Go to Settings > System > Restart to initiate a restart of your Apple TV.
- Check available storage: Insufficient storage on your Apple TV can prevent software updates from being installed. Go to Settings > General > Manage Storage to see how much available storage is remaining. If you’re running low on storage, consider deleting unnecessary apps or content to free up space.
- Enable automatic updates: Ensure that automatic software updates are enabled on your Apple TV. Go to Settings > System > Software Updates and toggle on “Automatically Update”. This will allow your Apple TV to download and install updates in the background without manual intervention.
- Manually check for updates: If automatic updates are enabled but not working, you can manually check for updates. Go to Settings > System > Software Updates and select “Update Software”. If an update is available, follow the on-screen instructions to download and install it.
- Reset network settings: If the issue persists, you can try resetting the network settings on your Apple TV. Go to Settings > System > Reset and select “Reset Network Settings”. Keep in mind that this will remove all saved Wi-Fi networks, so you’ll need to reconnect to your network afterwards.
- Update via iTunes on a computer: If you’re unable to update the software directly on the Apple TV, you can also try updating it using iTunes on a computer. Connect your Apple TV to your computer using a USB-C cable and open iTunes. Select your Apple TV in iTunes and click on “Update” to initiate the software update process.
By following these troubleshooting steps, you should be able to resolve the issue of your Apple TV not updating the software. If the problem persists, you may need to contact Apple Support or visit an Apple Store for further assistance.
Apple TV apps not working properly
When the apps on your Apple TV are not functioning properly, it can hinder your ability to access and enjoy your favorite content. Here are some steps you can take to troubleshoot and resolve this issue:
- Update the app: Ensure that you are using the latest version of the app by checking for updates in the App Store. Go to the App Store on your Apple TV, select “Updates” and update any apps that have available updates.
- Restart the Apple TV: Sometimes, restarting the Apple TV can help resolve app-related issues. Go to Settings > System > Restart to initiate a restart of your Apple TV.
- Force quit the app: If a specific app is not working properly, you can force quit the app and relaunch it. Double press the TV/Home button on the remote control to access the app switcher, then swipe left or right to locate the app and swipe up to close it. Afterward, relaunch the app to see if the problem is resolved.
- Check for app-specific settings: Some apps may have specific settings that could be affecting their functionality. Check the settings within the problematic app to ensure that everything is configured correctly, including login credentials, video quality settings, or audio output settings.
- Clear app cache: Some apps may accumulate temporary cache data, which can sometimes cause performance issues. Unfortunately, Apple TV does not provide a built-in way to clear app cache. However, deleting and reinstalling the app can achieve a similar effect by removing cache data. To do this, navigate to the app on the home screen, press and hold the touch surface or the Play/Pause button on the remote until the app begins to jiggle, and then select the “Delete” option. Afterward, go to the App Store to reinstall the app.
- Reset the Apple TV: If the issue persists, you can try resetting your Apple TV. Go to Settings > System > Reset and select “Reset and Update”. Keep in mind that this will erase all settings and data on the device, so use this as a last resort.
- Contact the app developer: If you have tried all the above steps and the app is still not working properly, you may need to reach out to the app developer for further assistance. They may be able to provide additional troubleshooting steps or offer insights into any known issues or updates related to the app.
By following these troubleshooting steps, you should be able to address the issue of your Apple TV apps not working properly. If the problem persists, you may need to contact Apple Support or the specific app developer for further assistance.
Apple TV not displaying correct resolution
If your Apple TV is not displaying the correct resolution on your TV or monitor, it can result in a compromised viewing experience. Here are some troubleshooting steps to help resolve this issue:
- Check TV or monitor settings: Verify that your TV or monitor is set to the correct resolution. Use the remote control or the on-screen menu of your display device to access the settings and ensure that the desired resolution is selected.
- Restart your Apple TV: Sometimes, a simple restart of the Apple TV can resolve resolution-related issues. Go to Settings > System>Restart to initiate a restart of your Apple TV.
- Adjust the Apple TV resolution settings: On your Apple TV, go to Settings > Video and Audio > Resolution. Select the appropriate resolution for your TV or monitor. If you’re unsure of the optimal resolution, you can choose “Best Available” to let the Apple TV automatically detect and display the suitable resolution.
- Check your HDMI cable: Ensure that the HDMI cable connecting your Apple TV to your TV or monitor supports the desired resolution. Some older HDMI cables may not be capable of carrying higher resolution signals. If necessary, replace the HDMI cable with a newer, high-speed HDMI cable.
- Try a different HDMI port: If your TV or monitor has multiple HDMI ports, try connecting your Apple TV to a different port. It’s possible that the current HDMI port is not functioning properly or does not support the desired resolution.
- Update the Apple TV software: Make sure your Apple TV is running the latest version of tvOS. Go to Settings > System > Software Updates and select “Update Software” if an update is available. Sometimes, software updates can include fixes for resolution-related issues.
- Reset video settings: If the above steps have not resolved the issue, you can try resetting the video settings on your Apple TV. Go to Settings > Video and Audio > Reset Video Settings. Keep in mind that this will restore the video settings to their default values.
By following these troubleshooting steps, you should be able to resolve the issue of your Apple TV not displaying the correct resolution. If the problem persists, you may need to contact Apple Support or consult the technical support of your TV or monitor manufacturer for further assistance.
